Product:
Planning Analytics 2.0.8
Planning Analytics Workspace 45
Microsoft Windows 2016 server

https://www.ibm.com/support/pages/ibm-planning-analytics-pa-workspace-and-pa-microsoft-excel-fix-list

Problem:
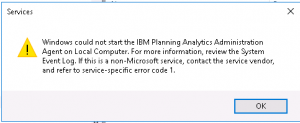
After a reboot of the server, the docker service does not start. If you login to server and click on start in the service manager it will start. Ensure that you wait 5 min before testing with “start”.

Suggested Solution:
Check the format of the c:\programdata\docker\config\daemon.json file.
If it contain illegal characters, the docker service will not start.

If you enter docker ps or docker version to see running containers you get this message:

If you check the C:\ProgramData\docker\panic.log you may see this:

Failed to fire hook: The interface is unknown lock: = it did not get the response it needed in time, but windows service will try again in a few minutes,  so wait an see if it starts.

If you check the windows event log, you may see this:

Open the file c:\programdata\docker\config\daemon.json in NOTEPAD++
ensure it looks correct, and do not have any errors.


Debug parameter will write more information in the Windows Event log for Docker. When you have issues with Docker, check the Windows Event log for any errors.

You can copy the text in the json file to this site, to validate https://jsonformatter.curiousconcept.com/

There can be other causes, for this problem, that the docker service does not start.

Ensure that one network cards is prioritize, and that your DNS is working from this server.

You need also at least 4 cpu and 32 GB ram on the PAW server.

More information:
https://blogs.msdn.microsoft.com/jikuma/2018/03/19/error-pipedocker_engine-access-is-denied-in-the-default-daemon-configuration-on-windows/
https://docs.microsoft.com/en-us/virtualization/windowscontainers/manage-docker/configure-docker-daemon#set-docker-security-group
https://www.reddit.com/r/docker/comments/82myaw/invalid_character_in_string_escape_code/
https://docs.docker.com/v17.09/engine/admin/#start-the-daemon-manually

https://success.docker.com/article/error-streaming-logs-invalid-character-after-object-key-value-pair

Product:
Planning Analytics 2.0.8
Planning Analytics Workspace 45
Microsoft Windows 2012 server

Problem:
When you surf to your PAW, and go to Administrator page, tab – Databases. It says the Agent is not available.

Solution:
Even do you are on the same server. You need to open the Windows Firewall inbound port 9012 to make the PAW have access to the PA Agent.

Go to Control Panel
Go to Administrative tools
Go to Windows Firewall
Click Inbound Rules
Click New Rule
Select Port
Enter 9012 (and the other TM1 ports) at Specific Local ports
Click next for Allow the connection
Click next to keep that the rule apply to all domains
Enter a name like “Cognos TM1”
Click Finish

Now it should work.

When you check a previous made firewall rule it can look like this;

More Information:

https://www.ibm.com/support/knowledgecenter/en/SSD29G_2.0.0/com.ibm.swg.ba.cognos.tm1_prism_gs.2.0.0.doc/c_paw_administer_servers.html
https://www.ibm.com/support/knowledgecenter/en/SSD29G_2.0.0/com.ibm.swg.ba.cognos.tm1_inst.2.0.0.doc/c_tm1_inst_defaultvaluesfortm1installation.html

Product:
Planning Analytics 2.0.6 Workspace
Microsoft Windows 2016 Server

Problem:
How to use OPENSSL to convert certificates from company CA pfx file to the pem format needed by PAW?

Solution:
Download OPENSSL from http://slproweb.com/products/Win32OpenSSL.html
or from https://github.com/git-for-windows/git/releases/tag/v2.23.0.windows.1 – get the file Git-2.23.0-64-bit.exe Run the installation with all default values.
When installing GIT you will get a local openssl tool, that you can access from the command line:
“c:\program files\git\mingw64\bin\openssl.exe”

If you get a certificatechainfile.pfx file that you should use, you can convert it with the following command in CMD:
openssl  pkcs12  -in  c:\temp\your.pfx  -out  c:\temp\good.pem  -nodes

Then you need to open good.pem in Notepad++ and remove the lines not needed, and save it as pa-workspace.pem. It should have this certs in the file;
—–BEGIN RSA PRIVATE KEY—–
(Your Private Key: your_domain_name.key)
—–END RSA PRIVATE KEY—–
—–BEGIN CERTIFICATE—–
(Your Server certificate: your_domain_name.crt)
—–END CERTIFICATE—–
—–BEGIN CERTIFICATE—–
(Your Intermediate certificate: IntermediateCA.crt)
—–END CERTIFICATE—–
—–BEGIN CERTIFICATE—–
(Your Root certificate: TrustedRoot.crt)
—–END CERTIFICATE—–

How setup TLS (SSL) for PAW:

(Do the steps in your TEST environment first, to ensure they work for you.)

Export the root and intermediate certificates first.
Start Internet Explorer and surf to company internal site.
Click on the PAD lock icon.
Click view certificates.
Click Certificate Path tab.

Mark root cert and click view certificate.
Click Details tab.
Click “copy to file” button.
Click Next.

Select Base-64 encoded X.509 (.CER) and click Next.
Browse to your c:\temp folder and enter a name.

Click next and finish.
Repeat above steps for the intermediate cert.

Copy this two cer files to the d:\ibm\paw\config\certs folder.
Rename the cer files to pem.
Start Powershell as administrator.
Go to folder d:\ibm\paw\scripts.
Run .\process_certs.ps1 to include the root cert in the cacerts file.

Stop the paw with command d:\ibm\paw\scripts\paw.ps1 stop.
Go to the d:\ibm\paw\config\ssl folder.
Rename pa-workspace.pem to pa-workspace.pem.org.

If you got a .pfx file from the company that include the privatekey, servercert and  intermediate and root certs. You convert it with this command:
openssl pkcs12 -in your.pfx -out good.pem -nodes

Open good.pem in notepad, and remove lines above the —-BEGIN CERTIFICATE—- but after the —- END line.
Save the file. Now only with the cryptic binary text.

Copy the good.pem file to folder d:\ibm\paw\config\ssl and rename it to pa-workspace.pem

Open d:\ibm\paw\config\paw.ps1 file in notepad++.
Change all HTTP to HTTPS.

Add last in the file, this two lines:
$env:EnableSSL=”true”

$env:ServerName=”yourPAWservername”

Save the file.
Go to the d:\ibm\paw\ folder.
Run ./Start.ps1 to start the PAW administration.
Click on Validate button. Ensure all URL are correct, does they point to correct CA11 or TM1 servers?
Click on the Update button.
Restart PAW, can also be done from powershell with commando  d:\ibm\paw\scripts\paw.ps1

You must add ibmtm1.arm cert to your CA11 servers:
https://www.ibm.com/support/pages/configure-datasource-ibm-planning-analytics-20x-ibm-cognos-analytics-1106

You must add SSL (TLS) cert to your TM1WEB servers:

https://www.ibm.com/support/knowledgecenter/en/SSD29G_2.0.0/com.ibm.swg.ba.cognos.tm1_inst.2.0.0.doc/t_pa_use_ibmkeymgmt.html

https://www.ibm.com/support/pages/how-obtain-planning-analytics-tm1-server-certificate

More Information:

https://knowledge.digicert.com/solution/SO26449.html
https://www.feistyduck.com/
https://www.ibm.com/support/pages/how-transform-pem-and-pfx-keystore-public-key-cryptography-standard-12-pkcs12-keystore
https://www.freecodecamp.org/news/openssl-command-cheatsheet-b441be1e8c4a/
https://www.ibm.com/support/knowledgecenter/en/SSD29G_2.0.0/com.ibm.swg.ba.cognos.tm1_inst.2.0.0.doc/t_paw_enable_ssl.html
https://www.sslshopper.com/article-most-common-openssl-commands.html

Common OPENSSL commands (from SSL Shopper):

These commands allow you to generate CSRs, Certificates, Private Keys and do other miscellaneous tasks.

  • Generate a new private key and Certificate Signing Request
    openssl req -out CSR.csr -new -newkey rsa:2048 -nodes -keyout privateKey.key
  • Generate a self-signed certificate (see How to Create and Install an Apache Self Signed Certificate for more info)
    openssl req -x509 -sha256 -nodes -days 365 -newkey rsa:2048 -keyout privateKey.key -out certificate.crt
  • Generate a certificate signing request (CSR) for an existing private key
    openssl req -out CSR.csr -key privateKey.key -new
  • Generate a certificate signing request based on an existing certificate
    openssl x509 -x509toreq -in certificate.crt -out CSR.csr -signkey privateKey.key
  • Remove a passphrase from a private key
    openssl rsa -in privateKey.pem -out newPrivateKey.pem

Checking Using OpenSSL

If you need to check the information within a Certificate, CSR or Private Key, use these commands. You can also check CSRs and check certificates using SSL Shopper online tools.

  • Check a Certificate Signing Request (CSR)
    openssl req -text -noout -verify -in CSR.csr
  • Check a private key
    openssl rsa -in privateKey.key -check
  • Check a certificate
    openssl x509 -in certificate.crt -text -noout
  • Check a PKCS#12 file (.pfx or .p12)
    openssl pkcs12 -info -in keyStore.p12

Debugging Using OpenSSL

If you are receiving an error that the private doesn’t match the certificate or that a certificate that you installed to a site is not trusted, try one of these commands. If you are trying to verify that an SSL certificate is installed correctly, be sure to check out the SSL Shopper SSL Checker.

  • Check an MD5 hash of the public key to ensure that it matches with what is in a CSR or private key
    openssl x509 -noout -modulus -in certificate.crt | openssl md5
    openssl rsa -noout -modulus -in privateKey.key | openssl md5
    openssl req -noout -modulus -in CSR.csr | openssl md5
  • Check an SSL connection. All the certificates (including Intermediates) should be displayed
    openssl s_client -connect www.paypal.com:443

Converting Using OpenSSL

These commands allow you to convert certificates and keys to different formats to make them compatible with specific types of servers or software. For example, you can convert a normal PEM file that would work with Apache to a PFX (PKCS#12) file and use it with Tomcat or IIS. Use SSL Shopper SSL Converter to convert certificates without messing with OpenSSL.

  • Convert a DER file (.crt .cer .der) to PEM
    openssl x509 -inform der -in certificate.cer -out certificate.pem
  • Convert a PEM file to DER
    openssl x509 -outform der -in certificate.pem -out certificate.der
  • Convert a PKCS#12 file (.pfx .p12) containing a private key and certificates to PEM
    openssl pkcs12 -in keyStore.pfx -out keyStore.pem -nodes

    You can add -nocerts to only output the private key or add -nokeys to only output the certificates.

  • Convert a PEM certificate file and a private key to PKCS#12 (.pfx .p12)
    openssl pkcs12 -export -out certificate.pfx -inkey privateKey.key -in certificate.crt -certfile CAC
    
    https://www.sslshopper.com/ssl-faq.html

Product:
Planning Analytics 2.0.6
Microsoft Windows 2016 Terminal Server

Problem:
On new install of TM1 Architect on a Terminal Server, the list of TM1 instances is not showing up. They show up if you run TM1 architect direct on the TM1 server.

Solution:
Check Windows Firewall one both the Terminal Server and on your TM1 (PAL) server.
Go to Run from the start menu, enter wf.msc and press OK
Add a inbound rule that opens port 5495, 5498.
Save it as Cognos TM1 rule and check if it works again.

If you get a list of TM1 instances, but can not connect to them, then you miss the higher ports you have defined in TM1S.CFG
go back into Windows firewall, and add a port range like 12345-12360 to your cognos firewall rule.
Save and try again.

You need ports 5495, 5498 for TM1 Architect. 5895, 5898 is the Admin Server REST interface port (like HTTPPort for Tm1 servers). 5898 is when using TLS1.2
Then you need the ports you specify in TM1 applications – best to set a range like 12345-12360 then update in every TM1S.CFG file to unique values;
PortNumber=12345
HTTPportnumber=12346
ClientMessagePortNumber=12347

More Information:
https://www.ibm.com/support/knowledgecenter/en/SSD29G_2.0.0/com.ibm.swg.ba.cognos.tm1_inst.2.0.0.doc/c_tm1_inst_defaultvaluesfortm1installation.html
https://www.ibm.com/support/knowledgecenter/en/SSEP7J_11.1.0/com.ibm.swg.ba.cognos.inst_cr_winux.doc/c_reviewthedefaultsettings.html
https://www.ibm.com/support/knowledgecenter/en/SSD29G_2.0.0/com.ibm.swg.ba.cognos.tm1_inst.2.0.0.doc/c_paw_install_free_ports.html
http://cogknowhow.tm1.dk/archives/2055

Port 9300 is for Cognos Analytics (BI dispatcher).
Port 9510 is for TM1WEB and PMPSVC.
Port 5495,5498,5895,5898 is for TM1 Admin service.
Port 9012 is for the TM1 Agent.
Port 80 and 443 is for PAW or CA11 web-gateway ibmcognos.
There are other ports, but they are for communications between servers.

Product:
Planning Analytics Workspace 36
Microsoft Windows 2016 Server

Problem:
When open PAW and create a new book. There are no TM1 servers/applications listed under databases.

If you only miss access to the TM1 instances, then you can see a error like unable to fetch data for content tree. Session can not be established for server: Planning Sample 500 (internal server error) “code”,”Explorer”,”refID”,”message”,”Failed to get children for Server Cubes”,”Cause”…. ConnectTimeoutException….

When you validate the IBM Planning Analytics Workspace Administration Tool, and get time out on the TM1 Admin Server URI – it can be because the Windows Firewall is blocking port 5898.

Solution:
The Microsoft Windows firewall is blocking the traffic to the TM1 Admin service, and the rest api port to the TM1 instances.
Go to Run from the start menu, enter wf.msc and press OK.
This will start the Windows Firewall.
Expand Inbound Rules
Click New Rule
Select Port and click next
Enter the needed ports, can be depending on TM1 instance, below for the standard samples;
9300, 9510, 5898, 9012, 8888, 12354, 8014, 5010, 44312, 8011, 5011, 8010
Click Next
Mark Allow the connection click Next
Click Next to apply rule everywhere
Enter name to Cognos and click Finish

Try again.

If you still get 401 errors, you may need to restart the Windows server to make the Firewall changes kick in.

Port 9300 is for Cognos Analytics (BI dispatcher)
Port 9510 is for TM1WEB
Port 5898 is for TM1 Admin service
Port 9012 is for the TM1 Agent

More information:
https://www.ibm.com/support/knowledgecenter/en/SSD29G_2.0.0/com.ibm.swg.ba.cognos.tm1_inst.2.0.0.doc/c_paw_install_free_ports.html

Product:
Planning Analytics 2.0.6
Planning Analytics Workspace version 36
Microsoft Windows 2016 server

Problem:
How add many users to the PAW?

Solution:
Ensure that SSO and CAM security is working in TM1 (planning analytics).
Check the domain name in Cognos Configuration, this need to be enter in the file.
If the cognos namespace ID is Pacman, then it must be part of the file. It is case sensitive.
Open notepad (or excel) and enter the names like this:
Pacman/Donald Duck,Donald,Duck,administrator,donald.duck@pacman.com,active
Pacman/Daisy Duck,Daisy,Duck,analyst,daisy.duck@pacman.com,active

Save the file as a comma separated list.
Surf to your PAW installation.
Click on Administration
Click on Users
Click on upload users

Click on the icon of the file to browse for the file.
Select and Open the file
Now the users should be added to your PAW, so they can start working.
Please use this to add new administrators, direct after your first setup of PAW.

One user per line, and you must separate columns with comma. Should contain Login ID, First Name, Last Name, Role, Email, Status. Only the 3 first are required.

More information:
https://www.ibm.com/support/knowledgecenter/en/SSD29G_2.0.0/com.ibm.swg.ba.cognos.tm1_prism_gs.2.0.0.doc/t_paw_add_users_locally.html

Product:
Cognos Command Center 10.2.4 (ICCCStarterEdition.10.2.40100.20.exe)
Microsoft Windows 2012 R2

Problem:
How install Cognos Command Center? This program should be installed on a central server from everything is controlled. You then install Cognos Command Center Agent on your TM1 servers you want to control.

Preparation:
Download the Command Center software from https://www-01.ibm.com/support/docview.wss?uid=ibm10715631
Download NET Framework 4.7.1 from https://www.microsoft.com/en-us/download/details.aspx?id=56116
Install NET framework 4.7.1 on all your servers.
Setup a Microsoft SQL database to hold the information the system uses. https://www.microsoft.com/en-us/download/details.aspx?id=30438
Create a empty database (CCC_LOCAL), and a SQL user e.g. ccc and a password. That have full access to the database (db_owner).
IIS need to be installed and running, on your central command center server, before start of the installation.

Installation on central server:
The Starter Edition is free to use together with Planning Analytics license, check with you software partner.
Login to the server as a administrator and start the installation from the exe file.
Click next and accept any license information dialogs.
Select all components, on the central server, and click next.
Click next on the destination folder.
Select the database type and enter the information needed to access the database.
Keep the default values for communication to the central server.

You must enter a password to the admin user for the commando server.

You must enter a password to the admin for the agent on the server.

You must enter a password to the web user for the web server.

Note down all user and passwords on paper.
Press on to install.

When installation is done, you should have a lot of tables in the database.


Installation of agent (client) on TM1 server:
Before you install an IBM Cognos Command Center agent on a Microsoft Windows operating system, create a dedicated local Windows account. Name the account cccAgent and run the IBM Cognos Command Center Agent service under this account.


Click Next to start the installation.

Accept the license and click next.


Select Agent and click next.

Click Next, and use default folder for Command Center.

Enter password and click next.

Click next.

Click Install, to start installation of the agent.
When done, you add the agent to your central command center.

Start Cognos Command Center Client, and login with Default user.

Then add a new agent, by right click on Agents and select new.

Fill in the server name, and the user and password.
Click on Test the Agent.

Now you have connection with your first agent. Install and add agents on all your Tm1 servers.

Ecosystem:
Next step are to create a ecosystem, right click ecosystem and select new. Enter a name, could be your company name.

Enter name for your Environments, you maybe have a DEV, TEST and PROD setup with similar servers.

Enter global variables, you will use in your scripts, here – like a folder where your scripts will run e.g. c:\temp\ccc

On Computing resources, you add the servers as HOST – select the agent that represent your server. When you run a script on PROD, it will be run by TM1Agent42 and when you select DEV it will run on your local host. Setup more hosts, and name them different like TM1WEB, 2016_Server and so one. Home directory is where you have run your Command Center scripts.

To send a mail notification if a Command Center process have succeeded or not, you first need to setup SMTP information in Command Center System Configuration.  From inside the Command Center Client program go to menu Tools – System Configuration.

Enter mail server and port, and your credentials to access the mail server.

Create a new process, name it something, like “check log files”, now you can add the different task to it. Click on blue ADD TASK icon in left top corner.

Each process consist of many task, the last one is the Email Notification. Here you mark if a mail should go out if the process fail.

The email notification is a simple way to send status of the Command Center process to the Administrator.


After all software is installed, you should update to latest service pack to get the security fixes for java.
https://www-01.ibm.com/support/docview.wss?uid=ibm10886239
More information:
https://www-01.ibm.com/support/docview.wss?uid=swg21983018
https://www.ibm.com/support/knowledgecenter/SSPLNP_10.2.4/com.ibm.swg.ba.cognos.ag_ccc.10.2.4.doc/c_ig_ccc_proc_ovrvw.html

https://www-01.ibm.com/support/docview.wss?uid=swg27049429
https://www.youtube.com/watch?v=fMC6GwX05eE

More about TM1 logging:
https://www.element61.be/en/resource/advanced-logging-ibm-planning-analytics-tm1

Product:
Planning Analytics 2.0.6
Cognos Controller 10.4 FAP
Microsoft Windows 2016 server

Problem:
How export FAP cube data to csv file in the FTD format?

https://www.ibm.com/support/knowledgecenter/SS9S6B_10.4.1/com.ibm.swg.ba.cognos.ctrl_ug.doc/c_wp0041.html

Suggested Solution:
The Cognos Controller standard export of data to file, from inside the cognos controller client, menu transfer – export data, create files of the cognos controller data. It will export the data you select, commonly limit by period and group/company.
https://www.ibm.com/support/knowledgecenter/en/SS9S6B_10.4.0/com.ibm.swg.ba.cognos.ctrl_ug.10.4.0.doc/c_e1k15_2_exportingdata.html#E1K15_2_ExportingData

You can get the output in unencrypted ASCII format, to import the data to other systems (e.g. SAP).
The output file format is similar to the columns of the XDB tables in the Cognos Controller database.

There is one XDB table for each year (xdb00-xdb99). These tables contain the period values. The amount is stored in xdb.belopp. The transaction amount is stored in xdb.trbelopp. These amounts are accumulated year to date value. The field vtyp is used to tell how data has been entered into the system.

XDBxx
Perakt Period + Actuality
Bol Company
Vkod Currency Code
Konto Account
Dim1 Extended Dimension 1
Dim2 Extended Dimension 2
Dim3 Extended Dimension 3
Dim4 Extended Dimension 4
Btyp Journal type
Etyp Automatic Journal type
Ktypkonc Consolidation Type + Group
Vernr Journal Number
Motbol Counter Company
Ursbol Original Company
Travkd Transaction Currency Code
Motdim Counter Dimension
Belopp Amount
Trbelopp Amount in Transaction Currency
vtyp Currency Type (G=Group Currency, C=Converted Currency, K=Consolidated)
ino Unique record identifier
HID “Happening id” = Functional area that created the record.
Null indicates unknown.
PDF “Prepared for delete” = Other value than 0 only while Controller is processing data.


The FAP service, will copy data from the Cognos Controller database to a cube in your TM1 (Planning Analytics) installation. Here doing some adjustment to the structure to make it work in TM1. You must have the FAP service working before you can export any data.

Start TM1 Architect, and check the cubes that your Cognos Controller FAP solution have created.

Create a TM1 TI process to export data from a view of the cube FAPMonthlyCompanyDetails (this cube is mostly used to export period values). Use a view that take all dimensions, and then edit the TI process to select only the dimensions element you need in your export ( for example only for a specific company ). Change the variable names to more understandable names, as shown in below picture.

Set all to be “string” and Contents to be “other” in the variables tab of the TI process.
Create parameters to make it possible for the user who run the TI process to select period and actuality to limit the output.


In our example we will hard-code the company that is exported.

In PROLOG tab enter code similar to this (you need to updated the script for your data):

#****Begin: Generated Statements***
#****End: Generated Statements****

#————————————————————————————————
# one single process to create view and export data to csv file
# for export from controller fap cube FAPMonthlyCompanyDetails
# updated date: 2019-08-12
# ———————————————————————————————–

# specify the location of the file – .. moves up one step from starting folder for tm1 data
sFilepath = ‘..\temp\’;

# specifiy the file name
sFileName= ‘scriptview.txt’;

# check that it is correct length
vcheck = LONG ( numbertostring ( pPeriodMonthly ) ) ;
if ( vcheck <> 6 ) ;
textoutput (‘..\temp\debug1.txt’, ‘prolog break – wrong date’);
ProcessBreak;
endif;
sPeriod = SUBST ( numbertostring (pPeriodMonthly) , 3,4);

# add the period to the file name
# check if a period is in the filename, if not add FTD at end of filename
nFileName = SCAN ( ‘.’ , pFileName );
if (LONG(pFileName) < 20);
if (nFileName <> 0 );
sFileName = sPeriod | pFileName ;
else;
sFileName = sPeriod | pFileName | ‘.FTD’;
Endif;
Endif;

# create the full file name including path
sFileName = sFilePath | sFileName;

# ————- create a view with script —————————————
# pCube: Specify cube name
# ——————————————————-
pCube =’FAPMonthlyCompanyDetails’;

#pDim1: Specifiy first dimension name – region = country code
pDim1=’Region’;
#pElement1: Specifiy element name for pDim1
pElement1=’@Aggr_@TOT’;

#pDim2: Specifiy second dimension name
pDim2=’Counter Dimension’;
#pElement2: Specifiy element name for pDim2
pElement2=’@Aggr_@TOT’;

#pDim3: Specifiy second dimension name
pDim3=’Activity’;
#pElement3: Specifiy element name for pDim3
pElement3=’@Aggr_@TOT’;

pDim4=’Currency’;
pElement4=’EUR’;

pDim5=’Transaction Currency’;
pElement5=’@none’;
pDim6=’Consolidation Perspective’;
pElement6=’@none’;
pDim7=’Closing Version’;
pElement7=’CL’;
pDim8=’Contribution Version’;
pElement8=’BASE’;

pDim9=’Account’;
pElement9=’1100′;

pDim10=’ActualityMonthly’;
# check that it is correct length
vcheck = LONG ( ( pActualityMonthly ) ) ;
if ( vcheck <> 2 ) ;
textoutput (‘..\temp\debug2.txt’, ‘prolog break – wrong ActualityMonthly’);
ProcessBreak;
endif;
pElement10= pActualityMonthly ;

#  — we list all variables here – but use them not in the code – so you can remove some of the rows
pDim11=’Origin Company’;
pElement11=’AllOrigComp’;
pDim12=’Counter Company’;
pElement12=’AllCounterComp’;

pDim13=’Company’;
pElement13=’4526′;

pDim14=’Journal Number’;
pElement14=’AllJournals’;

pDim15=’PeriodMonthly’;
# format should be this
# pElement15=’201907′;
#
# add it to the period from parameter
pElement15= numbertostring( pPeriodMonthly ) ;

pDim16=’Measures’;
pElement16=’Monthly’;

#————————————————————————————————-
# set the name of the subset and view
# are time stamped to prevent collision when several users run process at same time
#————————————————————————————————–
sView = ‘FAP_Export_’ | TIMST(NOW(), ‘\Y\m\d_\h\i’, 1) ;
sSubset = sView;

#—————————————————————————
# not all dimensions need to be specified in a subset view
# remark ViewSubsetAssign line to show all elements for that dimension
#—————————————————————————

# Step 1: create View
If( ViewExists( pCube, sView ) = 1 );
ViewDestroy( pCube, sView );
EndIf;
ViewCreate( pCube, sView );

# Step 2: create first subset
If( SubsetExists( pDim1, sSubset ) = 1 );
SubsetDeleteAllElements( pDim1, sSubset );
Else;
SubsetCreate( pDim1, sSubset );
EndIf;
# Step 3: add the first element to dimension subset
SubsetElementInsert( pDim1, sSubset, pElement1, 1 );

# ————— do not include region subset (first variable) by remark out ViewSubsetAssign ——————–
# Step 4: Assigned the subset to view
## ViewSubsetAssign( pCube, sView, pDim1, sSubset );

# Step 5: create second subset and assigned it to view if needed
If( SubsetExists( pDim2, sSubset ) = 1 );
SubsetDeleteAllElements( pDim2, sSubset );
Else;
SubsetCreate( pDim2, sSubset );
EndIf;
SubsetElementInsert( pDim2, sSubset, pElement2, 1 );

# Step 6: Assigned the subset to view
## ViewSubsetAssign( pCube, sView, pDim2, sSubset );

If( SubsetExists( pDim10, sSubset ) = 1 );
SubsetDeleteAllElements( pDim10, sSubset );
Else;
SubsetCreate( pDim10, sSubset );
EndIf;
SubsetElementInsert( pDim10, sSubset, pElement10, 1 );
# for ActualityMonthly – this is already selected in FAP export program
# for the export vi only run one at a time

ViewSubsetAssign( pCube, sView, pDim10, sSubset );

#————————————————————————————————-
# defined a limit number of company — we try with a MDX
#————————————————————————————————-
If( SubsetExists( pDim13, sSubset ) = 1 );
SubsetDeleteAllElements( pDim13, sSubset );
SubsetDestroy ( pDim13, sSubset );

Else;
## should not be created as the subsetcreatebymdx demands that the subset does not exists
## SubsetCreate( pDim13, sSubset );
EndIf;
## SubsetElementInsert( pDim13, sSubset, pElement13, 1 );

# —  improve code in future by use variables for repeated values.
pAlias = ‘Company Code’;

# —————————————————————————————————–
# we want to export only companies that have STO, ST1, ST2… ST7 in there name.
# mdx filter to include some groups by search for letters in name
# use this format { FILTER( {TM1FILTERBYLEVEL( {TM1SUBSETALL( [MyDim] )}, 0)}, INSTR([MyDim].[MyAlias], “SubString” ) > 0 ) }

# —————————————————————————————————–

StringMDX = ‘{ FILTER( {TM1FILTERBYLEVEL( {TM1SUBSETALL( [ ‘ | pDim13 | ‘ ] )}, 0)}, ( INSTR([ ‘ | pDim13 | ‘ ].[ Company Code ], “STO” ) > 0 ) OR ( INSTR([ ‘ | pDim13 | ‘ ].[ Company Code ], “ST1” ) > 0 ) OR ( INSTR([ ‘ | pDim13 | ‘ ].[ Company Code ], “ST2” ) > 0 ) OR ( INSTR([ ‘ | pDim13 | ‘ ].[ Company Code ], “ST3” ) > 0 ) OR ( INSTR([ ‘ | pDim13 | ‘ ].[ Company Code ], “ST4” ) > 0 ) OR ( INSTR([ ‘ | pDim13 | ‘ ].[ Company Code ], “ST5” ) > 0 ) OR ( INSTR([ ‘ | pDim13 | ‘ ].[ Company Code ], “ST6” ) > 0 ) OR ( INSTR([ ‘ | pDim13 | ‘ ].[ Company Code ], “ST7″ ) > 0 ) ) } ‘;

# next step – you need to modify this for your company structure in your cognos controller data

# ——————————————————————————

# apply the MDX to the dimension
SubsetCreatebyMDX( sSubset ,StringMDX);

# add subset to view
ViewSubsetAssign( pCube, sView, pDim13, sSubset );

If( SubsetExists( pDim15, sSubset ) = 1 );
SubsetDeleteAllElements( pDim15, sSubset );
Else;
SubsetCreate( pDim15, sSubset );
EndIf;
SubsetElementInsert( pDim15, sSubset, pElement15, 1 );
# this is PeriodMonthly that should be selected
ViewSubsetAssign( pCube, sView, pDim15, sSubset );

If( SubsetExists( pDim16, sSubset ) = 1 );
SubsetDeleteAllElements( pDim16, sSubset );
Else;
SubsetCreate( pDim16, sSubset );
EndIf;
SubsetElementInsert( pDim16, sSubset, pElement16, 1 );
# this is the Measures that should be same month
ViewSubsetAssign( pCube, sView, pDim16, sSubset );

# IMPORTANT: set view parameters
# Specify 1 to exclude consolidated values from the view extract. Specify 0 to include consolidated values.
ViewExtractSkipCalcsSet( pCube, sView, 1 );
ViewExtractSkipZeroesSet( pCube, sView, 1 );

# change the subset view to be used by the TI process to be the one you have defined above
DATASOURCECUBEVIEW = sView;


In METADATA tab enter code similar to this (you need to updated it for your data):

#****Begin: Generated Statements***
#****End: Generated Statements****

# add below to remove ” from output file
DatasourceASCIIQuoteCharacter = ”;
DatasourceASCIIDelimiter=’;’;

# print the first column as a value of two columns
sFirst = subst ( vPeriodMonthly ,3,4) | ( vActualityMonthly );

# debug print out to show all values in original order
#  we hard code the last columns in the FTD file to 000000 and L.
textoutput (‘..\temp\debug3.txt’, vPeriodMonthly , vActualityMonthly , vCompany , vCurrency , vAccount , vRegion , vActivity , vCounterDimension , vTransactionCurrency ,
vConsolidationPerspective , vClosingVersion , vContributionVersion , vOriginCompany ,
vCounterCompany , vJournalNumber , vMeasures , vValue , ‘0,000000’ , ‘L’ );

# format to fixed decimals
nResult1 = SCAN ( ‘,’ , vValue ) ;
if (nResult1 = 0) ;
sResult1 = vValue | ‘,000000’ ;
else;
# values with more than 6 decimal values is rounded up — this can affect the result.
vValue = numbertostring( ROUNDP( stringtonumber(vValue) , 6) ) ;
nResult1a = 6 – ( LONG (vValue) – nResult1) ;
## textoutput (‘..\temp\scriptview3debug2.txt’, numbertostring (nResult2), vValue);
sResult1 = FILL (‘0’, nResult1a) ;
## textoutput (‘..\temp\scriptview3debug2.txt’, sResult1 );
sResult1 = vValue | sResult1 ;
endif;

# add spaces to name so we have a fixed with column
sResult2 = FILL(‘ ‘, 6 – LONG (vOriginCompany));
sResult2 = vOriginCompany | sResult2 ;

# set to blank if specific values e.g. values that start with @
# the FTD file often contain blank values for middle columns
if ( vCounterDimension @= ‘@TOT’);
vCounterDimension = ”;
endif;

if ( vTransactionCurrency @= ‘@None’);
vTransactionCurrency = ”;
endif;

if ( vConsolidationPerspective @= ‘@None’);
vConsolidationPerspective = ”;
endif;

if ( vClosingVersion @= ‘REPOBT’);
vClosingVersion = ”;
endif;

if ( vContributionVersion @= ‘BASEET’);
vContributionVersion = ”;
endif;

if ( vJournalNumber @= ‘0_’);
vJournalNumber = ‘0’;
endif;

if ( vCounterCompany @= ‘@None’);
vCounterCompany = ”;
endif;

if ( vMeasures @= ‘Monthly’);
vMeasures = ”;
endif;

# set to space if it is blank in cell
if ( vTransactionCurrency @= ”);
vTransactionCurrency = ‘ ‘;
endif;

#———————————————————————————
# change the formatting to match that of a FTD file
# ———————————————————————————
slongline = char(34) | sFirst | char(34) | char(59) | char(34) | vCompany | char(34) | char(59) | char(34) |
vCurrency | char(34) | char(59) | char(34) |
vAccount | char(34) | char(59) | char(34) | vRegion | char(34) | char(59) | char(34) | vActivity | char(34) | char(59) | char(34) |
” | char(34) | char(59) | char(34) | ” | char(34) | char(59) | char(34) | vClosingVersion | char(34) | char(59) | char(34) |
vContributionVersion | char(34) | char(59) | char(34) |
vMeasures | char(34) | char(59) |
vJournalNumber | char(59) | char(34) | vCounterCompany | char(34) | char(59) | char(34) |
sResult2 | char(34) | char(59) | char(34) | vTransactionCurrency | char(34) | char(59) | char(34) | vCounterDimension | char(34) | char(59) | sResult1
| char(59) | ‘0,000000’ | char(59) | char(34) | ‘L’ | char(34) ;

textoutput ( sFileName , slongline);

In EPILOG tab enter code similar to this:

#****Begin: Generated Statements***
#****End: Generated Statements****

if (pView @= ‘Y’) ;

# remove the view
ViewDestroy( pCube, sView );

# destroy all subsets
i = 1;
# loop through all dimensions of the cube
while (tabdim(pCube,i) @<> ”);
SubsetDestroy(tabdim(pCube,i), sSubset);
i = i + 1;
end;
endif;

# ======= end of code =========

There is better and nicer ways of doing the export of data from a TM1 cube, but this is only to show an example of it. Keep in mind that the FAP cube is rebuild at every IP (Initial publish) from the FAP service. So you must recreate the views for the export, therefor use a TI script to do it.  You need to change above code examples to work in your setup of Cognos Controller FAP. This is only a starting point.

The output file should have a format like this, to be like FTD:

“1908F6″;”STOZYX”;”EUR”;”5600″;”AT”;”AO”;””;””;””;””;””;0;””;”STOZYX”;” “;””;123,560000;0,000000;”L”
“1908F6″;”STOZYX”;”EUR”;”5900″;”AT”;”AO”;””;””;””;””;””;0;””;”STOZYX”;” “;””;789,000000;0,000000;”L”
…..

Use this tool to make your work in TM1 Architect easier: https://code.cubewise.com/ti-helper

More information on MDX

http://www.wimgielis.com/tm1_neatmdxtricks_EN.htm

TM1 MDX FILTER BY SUBSTRING

http://www.wimgielis.com/tm1_mdxstatements_EN.htm

More information on FAP

https://www.ibm.com/support/knowledgecenter/en/SS9S6B_10.3.1/com.ibm.swg.ba.cognos.ctrl_fap_ug.10.3.1.doc/c_appendixa.html

https://www.ibm.com/support/knowledgecenter/en/SS9S6B_10.3.1/com.ibm.swg.ba.cognos.ctrl_fap_ug.10.3.1.doc/c_fapcubes.html

https://ibm-data-and-ai.ideas.aha.io/ideas/BACC-I-147

https://www-01.ibm.com/support/docview.wss?uid=swg21661294

Product:
Planning Analytics 2.0.6
Microsoft Windows 2016 server

Problem:
The vValue need to have 6 decimals in the output and the string vOrigincompany need to have fixed width of 6 characters.

Solution:
In TM1 write TI code like this:

# format to fixed length of 6 decimals
nResult1 = SCAN ( ‘,’ , vValue ) ;
if (nResult1 = 0) ;
sResult1 = vValue | ‘,000000’ ;
else;
# values with more than 6 decimal values is rounded up
vValue = numbertostring( ROUNDP( stringtonumber(vValue) , 6) ) ;
nResult1a = 6 – ( LONG (vValue) – nResult1) ;
sResult1 = FILL (‘0’, nResult1a) ;
sResult1 = vValue | sResult1 ;
endif;

# add spaces to name so we have a fixed width column
sResult2 = FILL(‘ ‘, 6 – LONG (vOriginCompany));
sResult2 = vOriginCompany | sResult2 ;

# There exist other ways to solve this, but this is a suggestion.

textoutput ( ‘c:\temp\filename.txt’ , sResult1 , sResult2 );

More information:
https://exploringtm1.com/fixed-width-file-format-from-tm1/

Product:
Planning Analytics 2.0.6
Microsoft Windows 2016 server

Problem:
How to remove temporary views in TI code?

Solution:

Use a parameter in the TI process, to ask if the views should be removed. pView will have the value Y if they should be removed.

Create the views in Prolog

# pCube: Specify cube name
pCube =’FAPMonthlyCompanyDetails’;

# set the name of the subset and view
# with a time stamped
sView = ‘FAP_Export_’ | TIMST(NOW(), ‘\Y\m\d_\h\i’, 1) ;
sSubset = sView;

Use the views in your code

# Step 1: create View
If( ViewExists( pCube, sView ) = 1 );
ViewDestroy( pCube, sView );
EndIf;
ViewCreate( pCube, sView );

# Step 2: create first subset
If( SubsetExists( pDim1, sSubset ) = 1 );
SubsetDeleteAllElements( pDim1, sSubset );
Else;
SubsetCreate( pDim1, sSubset );
EndIf;

SubsetElementInsert( pDim1, sSubset, pElement1, 1 );

remove the views in Epilog

if (pView @= ‘Y’) ;

# remove the view
ViewDestroy( pCube, sView );

# destroy all subsets
i = 1;
# loop through all dimensions of the cube
while (tabdim(pCube,i) @<> ”);
SubsetDestroy(tabdim(pCube,i), sSubset);
i = i + 1;
end;

endif;

More information:
https://www.bihints.com/creating_temporary_views

http://cognosknowhow.blogspot.com/2014/07/how-to-create-tm1-view-using-ti-script.html