Product:
Planning Analytics 2.0 Local (TM1)
Microsoft Windows 2012 R2 Server
Microsoft SQL 2014 database server
Problem:
How setup PA 2.0 Local?
Background:
This will describe the steps to setup PA 2.0 local with Security mode 5 connected to Cognos Analytics 11 (CA) and install of Toolbox docker and PAW. This doc will not cover SSO or how-to setup a reverse proxy for CA 11.
https://www.ibm.com/support/knowledgecenter/SSD29G_2.0.0/com.ibm.swg.ba.cognos.tm1_inst.2.0.0.doc/c_tm1_inst_singlecomputerinstallations.html
Newer versions of Planning Analytics use a different setup, please check the official documentation.
Solution:
Ensure that you have a big virtual Microsoft Windows 2012 R2 server, with at least 4 CPU cores, 16 Gb ram and 200 Gb hard disk space. Recommended is to have more RAM – like 64 GB ram.
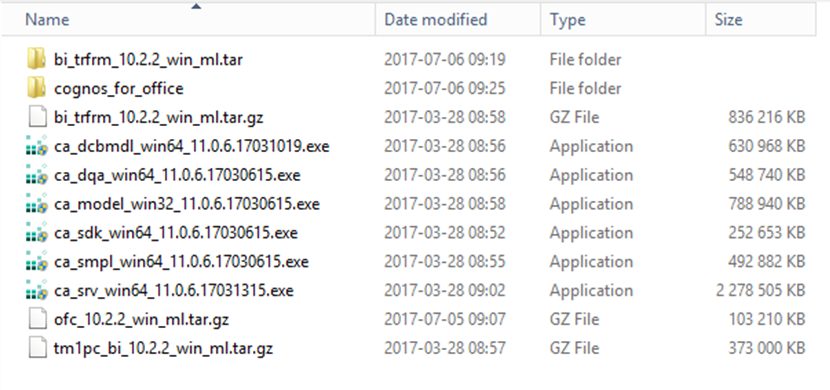
Download software from IBM web site (easiest is to search for the PART NUMBER)
| IBM TM1 2.0 Microsoft Windows Multilingual (download also the latest version from the links below) |
CNG5RML |
| IBM Planning Analytics Workspace 2.0 Multilingual |
CNG5UML |
| IBM Planning Analytics for Microsoft Excel 64-bit 2.0 Microsoft Windows Multilingual |
CNG5WML |
| IBM TM1 Client 64-bit 2.0 Microsoft Windows Multilingual (TM1 Perspective) |
CNG5TML |
| IBM Cognos Analytics Server 11.0.5 Microsoft Windows Multilingual (for cam security)
You should download the latest version – at least version 11.0.6 from link below. |
CNG1XML |
| IBM Cognos Framework Manager 11.0.5 Microsoft Windows Multilingual |
CNG25ML |
| IBM TM1 Client 32-bit 2.0 Microsoft Windows Multilingual (if you have 32 bit Excel) |
CNG5SML |
| IBM Planning Analytics for Microsoft Excel 32-bit 2.0 Microsoft Windows Multilingual (if you have 32 bit Excel 2010) |
CNG5VML |
RTM versions are listed here http://www-01.ibm.com/support/docview.wss?uid=swg24042732
Download IBM Cognos Analytics 11.0.6.0 from here (ca_srv_win64_11.0.6.17031315.exe) http://www-01.ibm.com/support/docview.wss?uid=swg24043412
IBM Planning Analytics Local 2.0.2 is now available on Fix Central (tm1_winx64h_2.0.2.138_ml.tar.gz)
http://www-01.ibm.com/support/docview.wss?uid=swg24043689
IBM Planning Analytics Workspace 2.0.20 (ipa_workspace_local_2.0.20.770.4.zip)
https://www-945.ibm.com/support/fixcentral/swg/downloadFixes?parent=ibm%7EInformation%20Management&product=ibm/Information+Management/IBM+Planning+Analytics+Local&release=All&platform=All&function=fixId&fixids=BA-PAWL-2.0.20&includeRequisites=1&includeSupersedes=0&downloadMethod=http&login=true
IBM Planning Analytics for Microsoft Excel 2.0.20 (cor_win32_2.0.20.17_ml.tar.gz)
https://www-945.ibm.com/support/fixcentral/swg/downloadFixes?parent=ibm%7EInformation%20Management&product=ibm/Information+Management/IBM+Planning+Analytics+Local&release=All&platform=All&function=fixId&fixids=BA-PAXL-2.0.20&includeRequisites=1&includeSupersedes=0&downloadMethod=http
Fix pack information can be found here
http://www-01.ibm.com/support/docview.wss?uid=swg27049229
http://www-01.ibm.com/support/docview.wss?uid=swg27049597
To get the fix list info in mail
https://www.ibm.com/communities/analytics/planning-analytics-blog/subscribe-to-fix-list-updates-for-planning-analytics-workspace-and-planning-analytics-for-microsoft-excel/
This is only a suggestion for the setup of PA 2.0 Local – you should follow the instructions that come from IBM in the first hand.
If you install to Microsoft Windows 2016 – you should use version 2.0.21
https://www-01.ibm.com/support/docview.wss?uid=swg24043782
Download Docker Toolbox https://www.docker.com/products/docker-toolbox if PAW is going to be installed on Windows 2012 server.
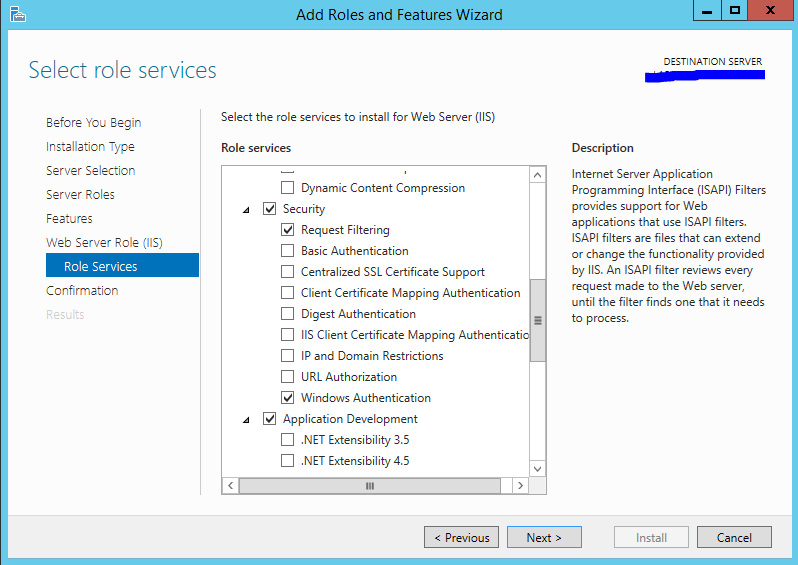
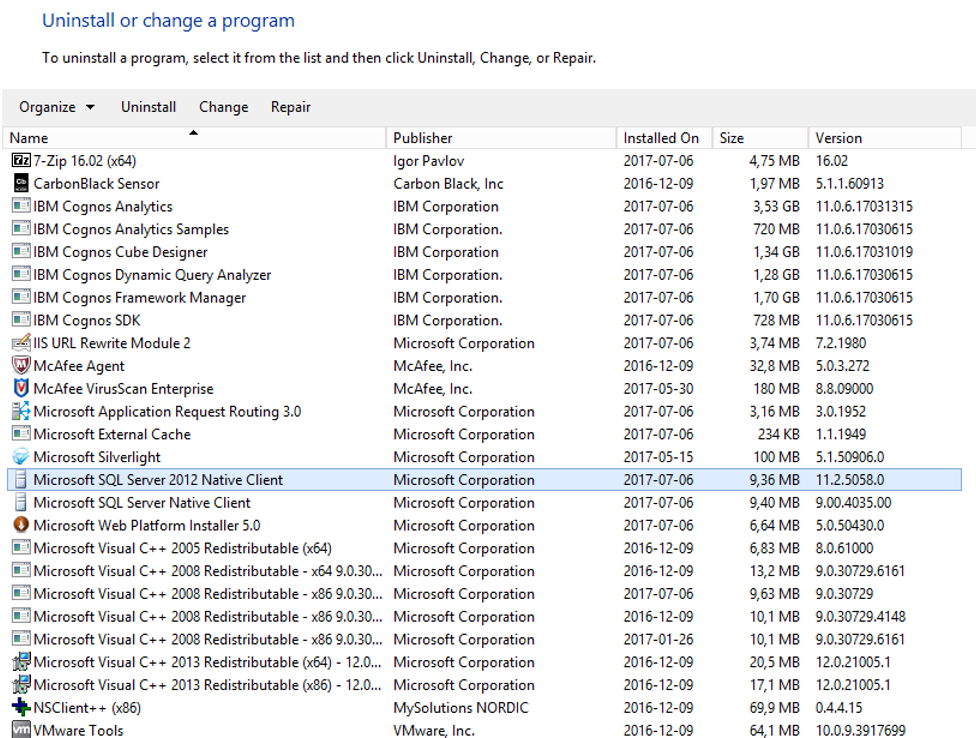
Check that on the Windows 2012 R2 server, you have installed:
- NET Framework 4.6.1
- C++ 2010 x64 redistributable (vcredist_x64.exe)
- 7zip (to unpack the media files) http://www.7-zip.org/download.html
- Telnet client (for testing of access to ports)
- SQL drivers (sqlncli_x64.msi and sqljdbc4.jar files)
Turn off DEP
- Log on to the server.
- Open Windows Explorer.
- Right-click Computer > Properties.
- In the System Properties window, click Advanced System Settings.
- On the Advanced tab, under the Performance heading, click Settings.
- In the Performance Options window, click the Data Execution Prevention tab, and then select Turn on DEP for essential Windows programs and services only.
- Click OK and then restart your system to enable the change.
DEP – Data Execution Prevention, can also be changed like this;
To do this from the Start menu select All Programs, then go to Accessories and then finally right-click on Command Prompt and click Run as Administrator.
Once the command prompt is open, you can now disable the DEP by entering the following command line.
bcdedit.exe /set nx AlwaysOff
Now restart the server
To reverse the action, simply type this command line to enable DEP back on again.
bcdedit.exe /set nx AlwaysOn
Turn off IE enhanced security
To disable IE enhanced security in windows server 2012 R2, launch the Server Manager, on the left hand side click on Local Server. On the right hand side click on the On link next to IE Enhanced Security Configuration.
You will now see the Internet Explorer Enhanced Security Configuration box. Click on Off to turn off the IE ESC for both users and administrators.
Switch to the High Performance power profile
To configure this using a GUI, go to the Start Menu, search for “Choose a Power Plan” under Settings, then select the “High Performance” option. To configure this from a command line, use “POWERCFG.EXE /S SCHEME_MIN”.
By default, hidden files and folders are not visible, change this to make the work easier.
- Start Control panel.
- Click Folder options.
- Click Folder and search options.
- Click the View tab.
- Check show hidden files, folders and drives.
- Scroll down until you notice Hide extensions for known file types, un-check this line by clicking the check box.
Note; To hide file name extensions, check this line.
- Click OK
If you are going to install CA11 and PA 2.0 Local on the same Windows server you must install CA11 first. If they are not on the same server (it is recommended to have them on separate servers) you can install PA 2.0 Local first and set it up with “localhost” in Cognos Configuration Environment tab.
Copy all media files to a folder on the Windows server, like D:\install
Unzip all gz media files to different folders, and remove the .tar files to save space.
SETUP CA 11
Create an empty database on your SQL server, name the database to “contentstore”.
Create a SQL login named cognos with the password Cognos202.
Ensure the SQL login cognos is DB_OWNER on the database “contentstore”.
Turn off On-Access-Scan in the server’s Anti-virus software before installing.
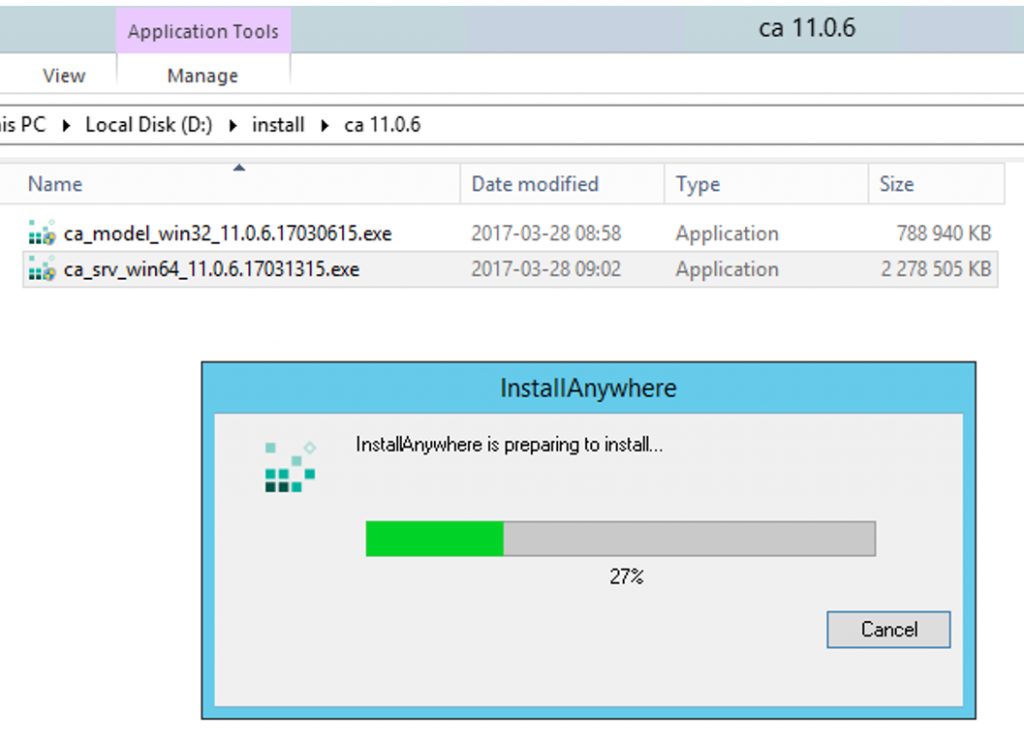
Right click on ca_srv_win64_11.0.6.17031315.exe file and select “run as administrator”.
Click next to run the installation in English.
Select IBM Cognos Analytics, and click Next.
Select to Accept the license agreement, and click Next.
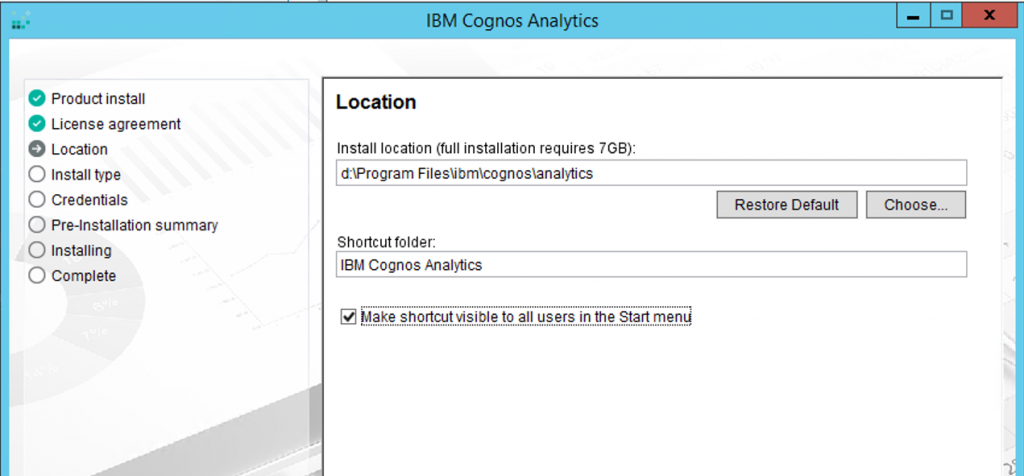
Enter the installation directory to d:\program files\ibm\cognos\analytics and click Next.
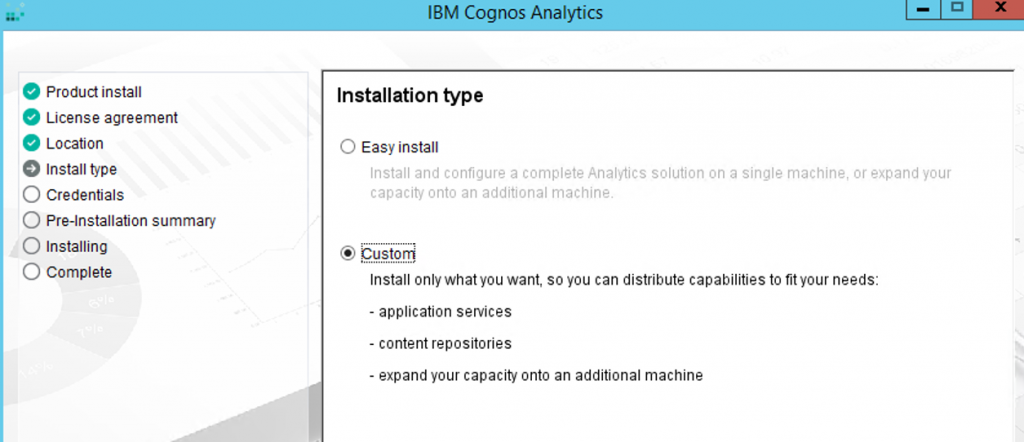
Select the Custom installation type, and click Next.
Select the First Install option and click Next.
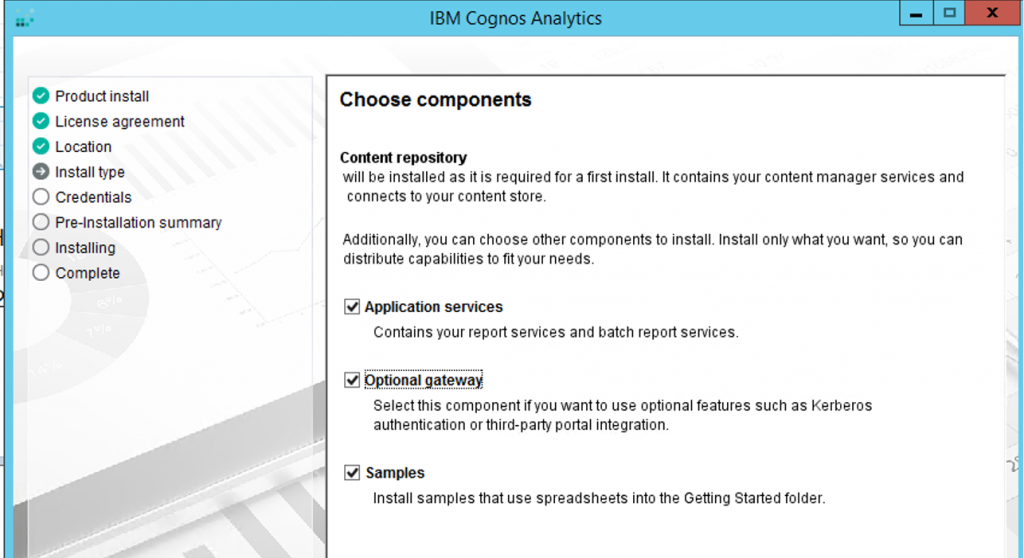
Select all components and click Next.
Click on Install.
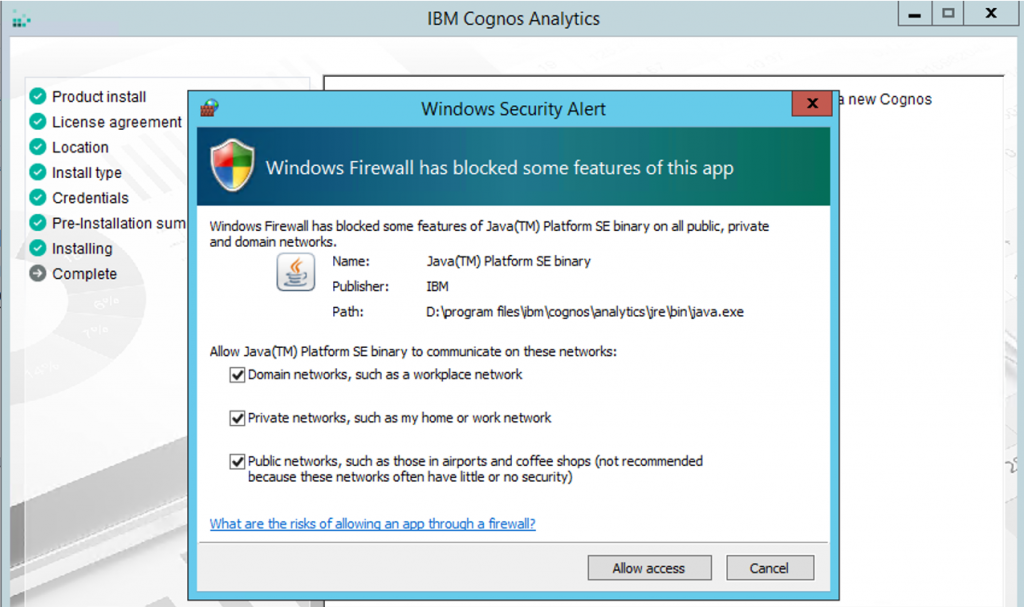
If you get a warning from the Windows firewall, check all and click on Allow access to continue the program installation.
When finish, click on Done.
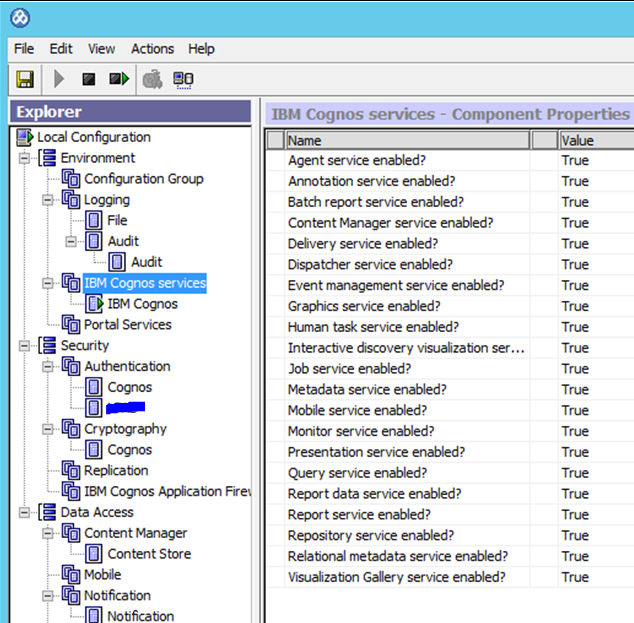
Start up Cognos Configuration by right click and select “run as administrator”.
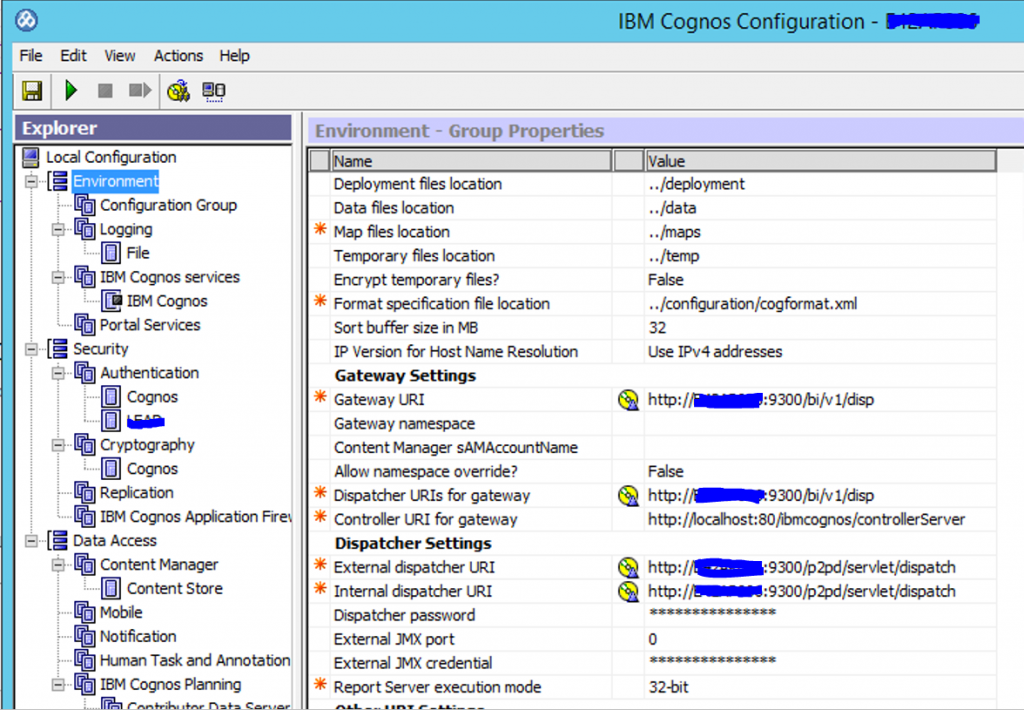
Check to ensure the Windows server name is under Environment instead of localhost for the important URLs. Should be same server name everywhere instead of localhost.
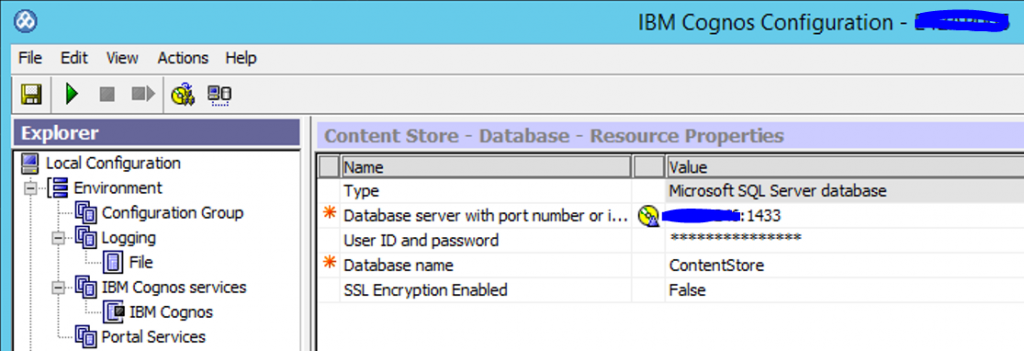
The Content store need to be change from IBM DB2 to a SQL Server database. Under Data Access – Content manager, right click ‘Content Store’. Select ‘Delete’.
Right-click New Resources -Database. Name the database ‘Content Store’ and select the type ‘Microsoft SQL Server database’.
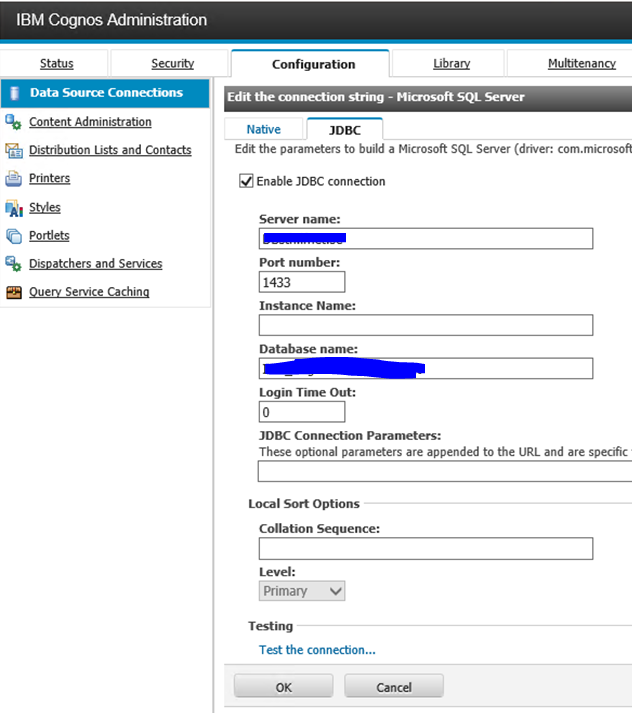
In the right-hand pane at ‘Resource Properties’, fill in;
Database server name with port number (the sql servernamn:1433)
User ID and password (in our example cognos and Cognos202)
Database name (in our example contentstore)
Click on save icon and wait.
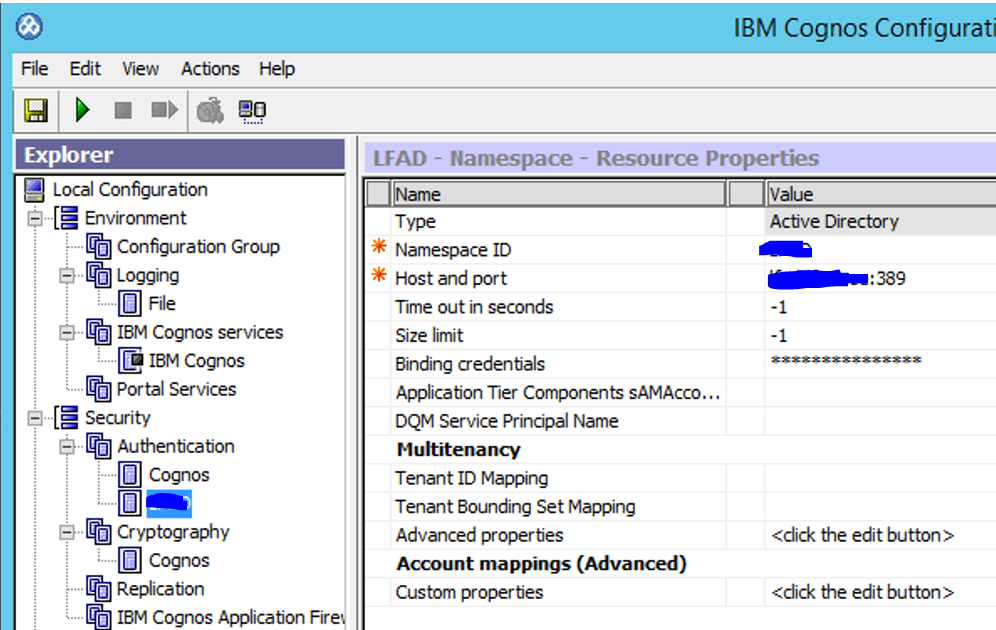
To enable login to Active Directory, you need under Security – Authentication,
Right-click New Resource – Namespace. Provide a name of the domain ‘AD’ and select ‘Active Directory’. Click OK.
Enter the Namespace ID to be the same as the Authentication name like ‘AD’.
Enter the host and port to the domain: domain.com:389
Click the save icon. You must change domain.com and the server-name to meet your environments need.
Right click and test to see that the AD connection works, you must provide an AD users name and password for the test.
Click save and click on start (triangle) to start the CA 11 service.
Surf to ‘http://servername:9300/bi/v1/disp’ to test the program.
You should get to the page without the need to login.
To test the network speed to the AD server, open a DOS prompt, and enter
PING DOMAIN.COM -T
This should give you how far it is to the DC server, if Time value is above 50ms you need to talk to IT department.

Change allow anonymous access to ‘False’ under the cognos namespace in Cognos Configuration.
Save the change and restart the Cognos services from the restart icon.
Test to surf again to http://servername:9300/bi, this time you should get a login dialog up.
Login to ensure the connection to Active Directory (AD) is working.
SETUP PA 2.0 Local
Turn off the anti-virus program on the server before installing.
Go to the folder where you have unzipped the PA media files.
Right click on file D:\install\pa 2.0.1\pa_2.0.1_win_ml.tar\winx64h\iisetup.exe and select ‘run as administrator’.
Click Next to get English as installation language.
Click I agree to the IBM License Agreement, and click Next.
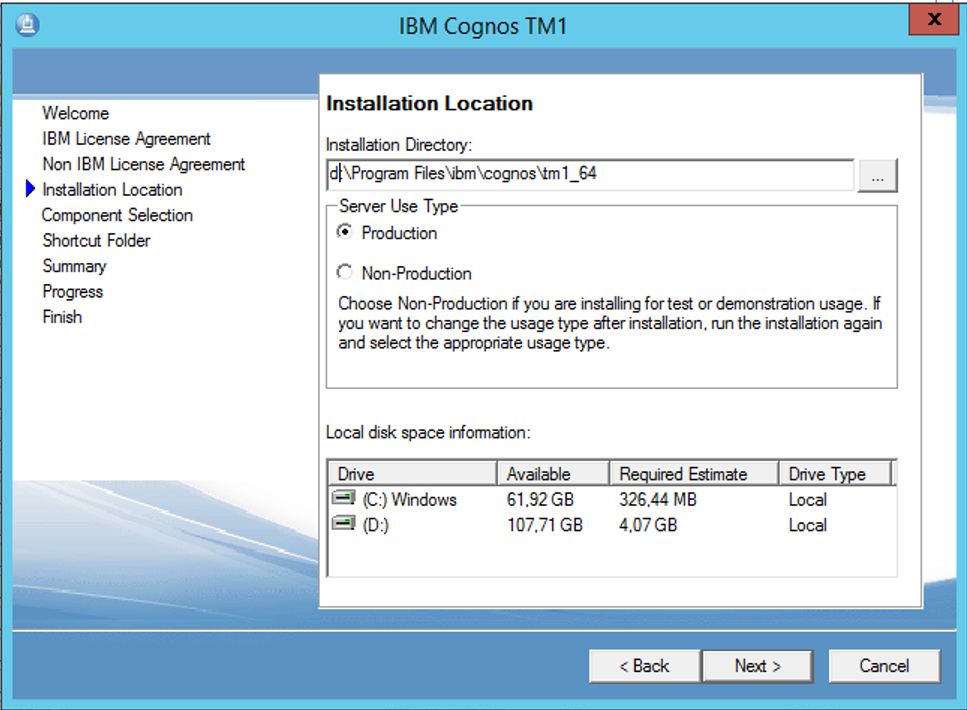
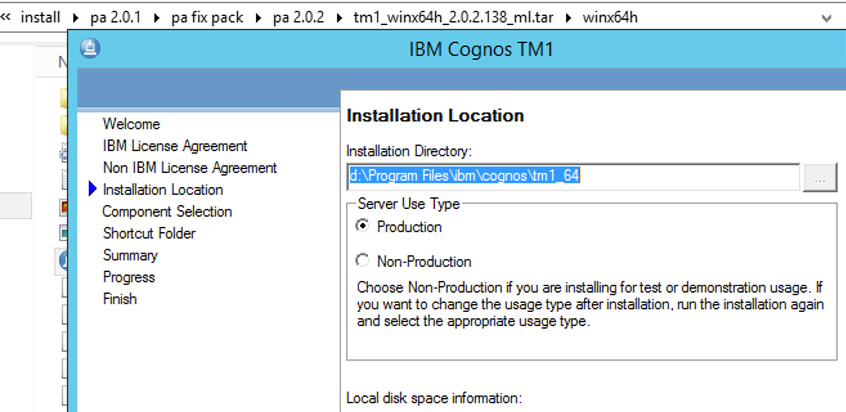
Enter the path to the installations folder and set the server use type to Production (if this is the production server) and click Next. Server use type can be used by ILMT software to list the server as production or not.
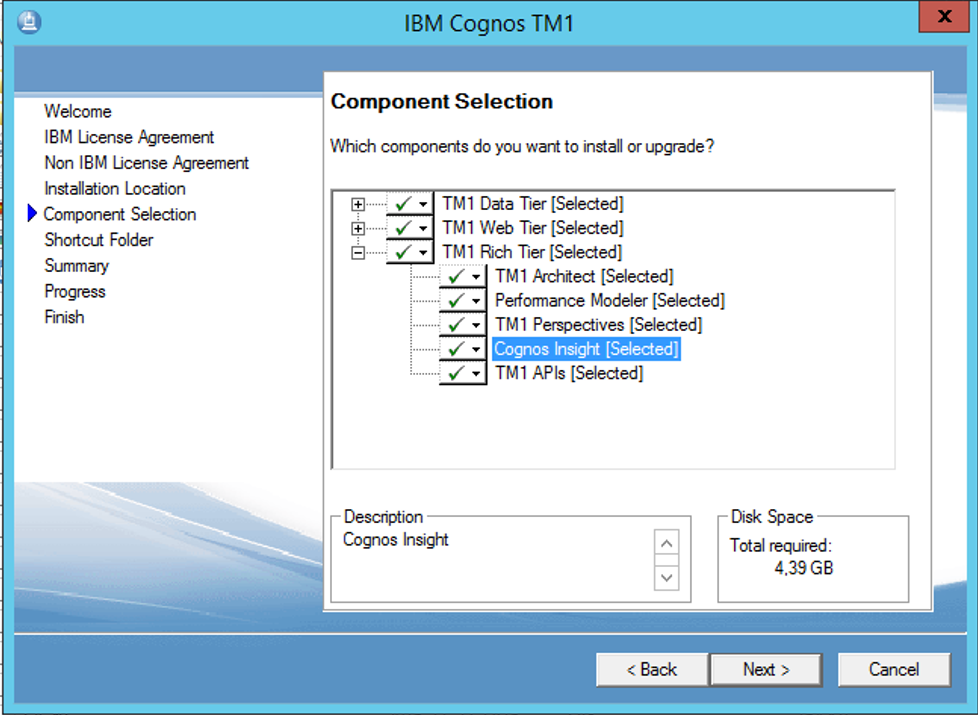
Select all components and click Next.
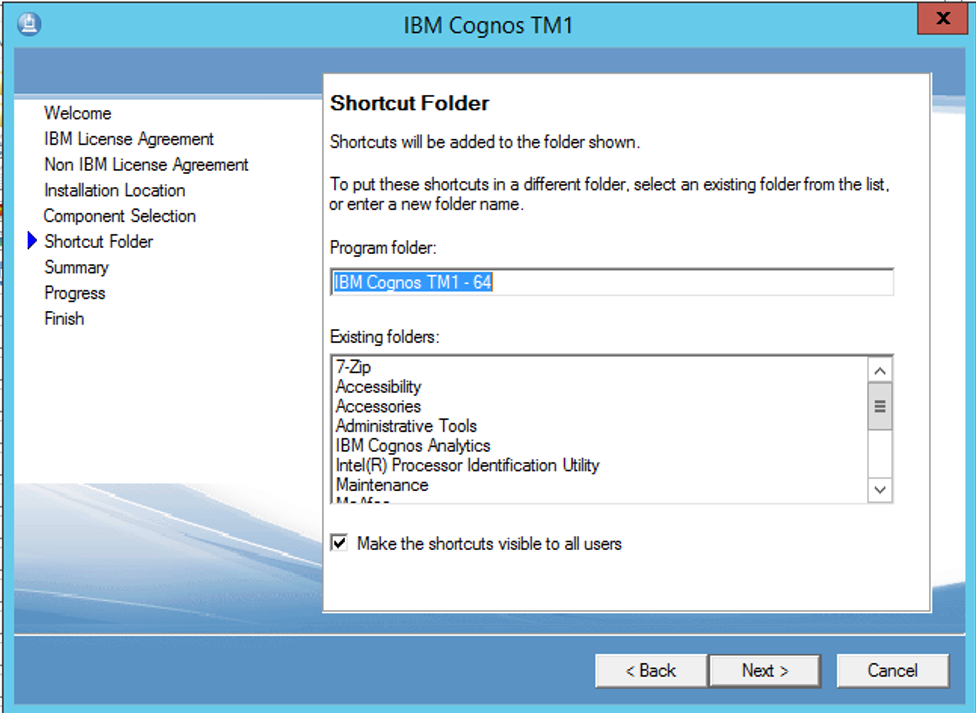
Mark ‘Make the shortcuts visible to all users’ and click Next.
Click next to start the installation.
It should finish without any errors.
Go to the folder for the latest version of the PA 2.0 Local media and run the setup again in same folder. Ensure you install to the same folder as before. (maybe it is possible to run the setup direct with this refresh media file tm1_winx64h_2.0.2.138_ml.tar.gz)
Right-click IBM Cognos Configuration for IBM Cognos TM1 – 64. and select Run as Administrator.
Go to Environment and enter the server name of the BI (CA11) server (if BI is not on same server as PA, then some fields should point to PA) instead of localhost.
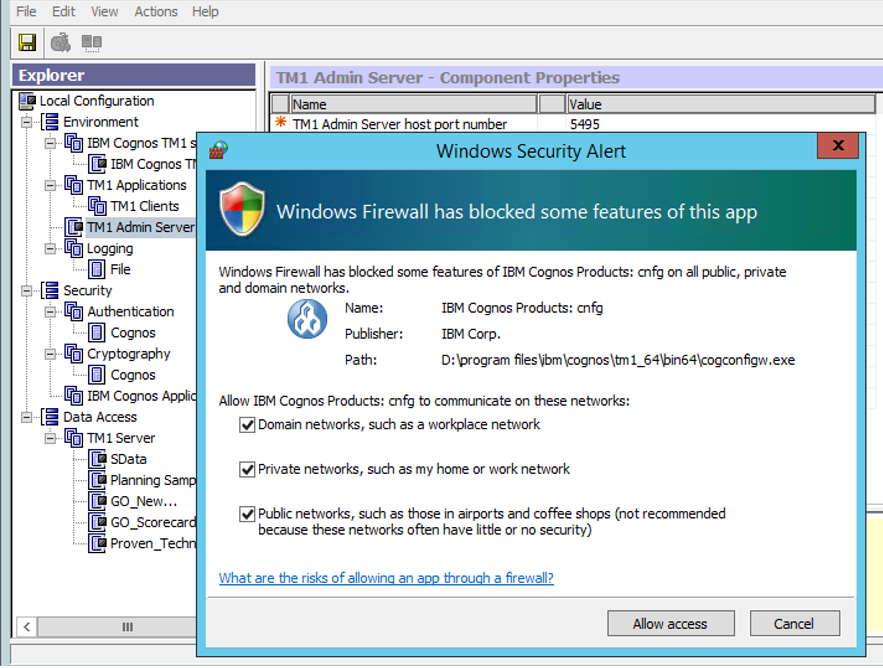
Click on save icon. If you get message from Windows Firewall , click on Allow access.
Right click on TM1 Admin server and select start.
Go to TM1 applications and enter the server name of the TM1 server you are configure instead of localhost. Click on the save icon.
Right click on IBM Cognos TM1 under IBM Cognos TM1 services and select start.
Go down to TM1 servers, and start the SData and Proven_Techniques sample TM1 data models.
SData is default used by Opsconsole as the holder of user’s login.
We use Proven_Techniques to test the CAM security later.
Close Cognos Configuration.
Start TM1 Architect and test that you can login to Sdata.
User name is Admin and password is apple.
FIREWALL
To access the PA 2.0 Local from other computers, you need to open some ports on the Microsoft Windows firewall on the 2012 server.
On the Start menu, click Run, type WF.msc, and then click OK.
In the Windows Firewall with Advanced Security, in the left pane, right-click Inbound Rules, and then click New Rule in the action pane (upper right corner).

Select Port and click next.
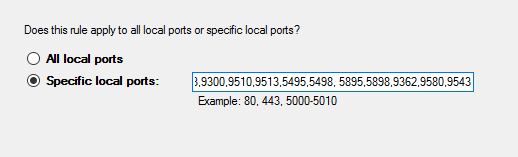
Specify the local ports to: 80,443,9300,9510,9513,5495,5498, 5895,5898,9362,9580,9543
(ports 80,443,9510 are for End Users, the rest is for TM1 developers)
Click Next.
Ensure ‘allow the connection’ is select and click next.
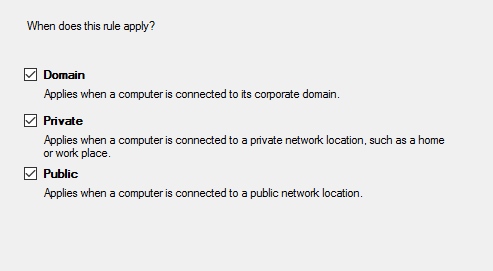
Mark all options for the rule to apply and click next.
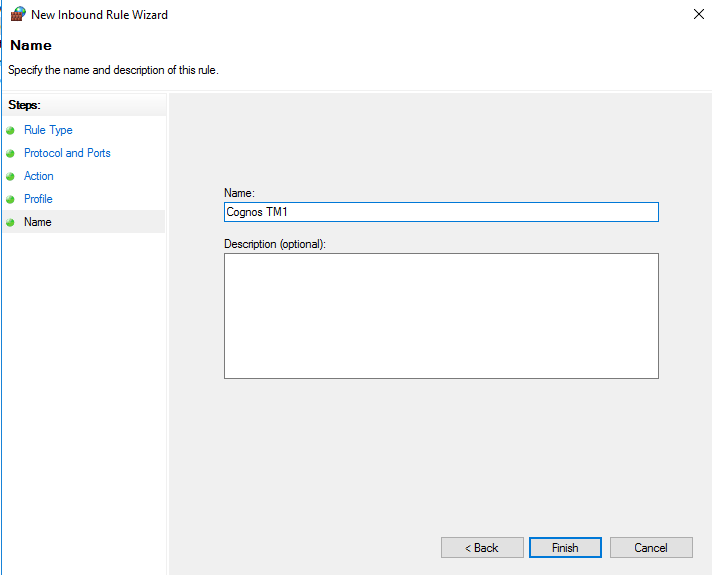
Enter a name, like “Cognos Tm1” and click on Finish.
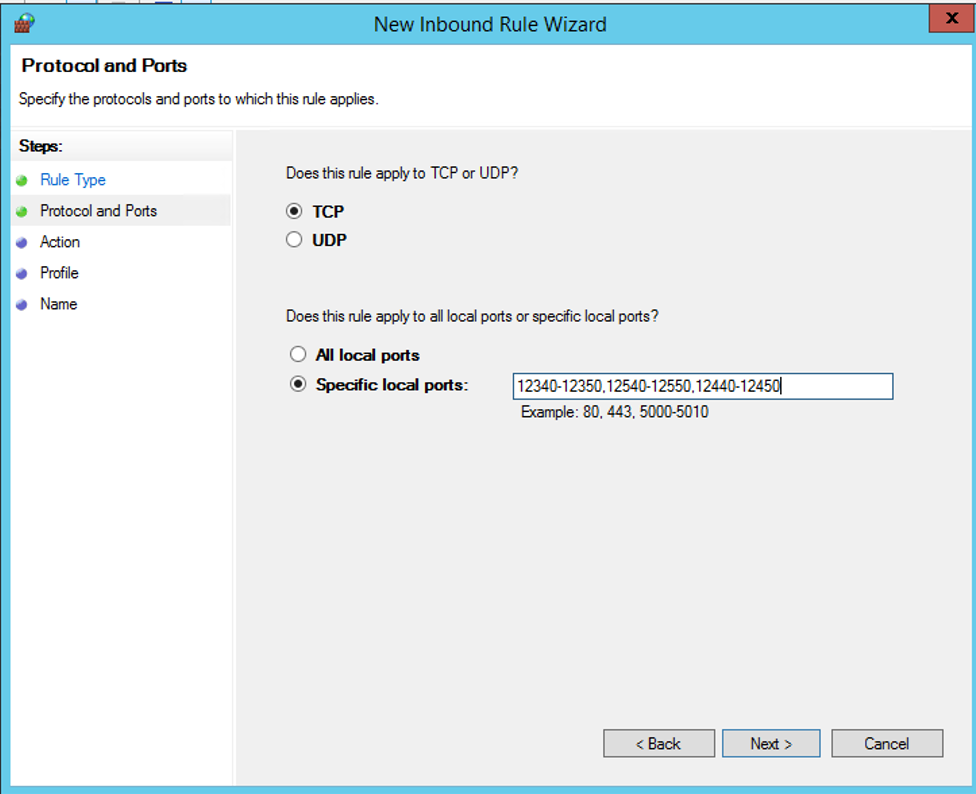
Repeat the above for a new rule for the TM1 applications ports.
Here is best to open a series of ports – can be this suggested range;
| PortNumber |
Range 12340 -12350 |
| HTTPPortNumber |
Range 12540 -12550 |
| ClientMessagePortNumber |
Range 12440 -12450 |
We may have missed some needed ports, like 1433, that you also need to open in the Windows firewall on the server.
If there exist router firewalls between the servers, then you also need to open the ports in there.
TEST TM1WEB
Ensure the PA 2.0 LOCAL server is in the Trusted Zone in your Internet Options for your IE browser. Add both the server name and the *.domain.com
Surf to http://PAservername:9510/tm1web to test tm1web.
for IBM Cognos Performance Management Hub use:
http://PAservername:9510/pmhub/pm/admin
for TM1 Operations Console use:
http://PAservername:9510/pmhub/pm/opsconsole
TM1 applications should you not setup yet, if you are going to use CAM security.
http://PAservername:9510/pmpsvc
SETUP CAM SECURITY
Start Cognos Configuration for CA 11, and change to not allow anonymous login.
Save and restart the CA 11 windows service (IBM Cognos).
Open Cognos Configuration for PA 2.0 and in Environment section copy the URL for gateway and internal dispatcher to notepad. This should be used in your TM1S.CFG file.
Close TM1 architect, if it is open.
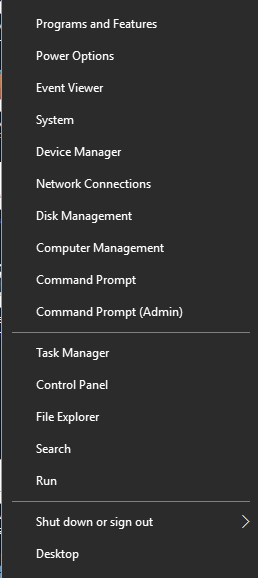
Click start and select Command Prompt (admin).
From the cmd dialog enter notepad and press enter.
This will start a notepad in admin mode that can write to \program files\ folder.
From inside Notepad select open and find tm1s.cfg in folder d:\Program Files\ibm\cognos\tm1_64\samples\tm1\Proven_Techniques\.
You need to change notepad to show all files and not only .txt.
Add this values to the tm1s.cfg file
IntegratedSecurityMode=2
ClientCAMURI=http://biservername:9300/bi/v1/disp
ServerCAMURI=http://biservername:9300/p2pd/servlet/dispatch
ClientPingCAMPassport=900
Update the values for ports to this
PortNumber=12345
HTTPPortNumber=12545
ClientMessagePortNumber=12445
Add these values
IPaddress=T
AllowSeparateNandCRules=T
DistributedPlanningOutputDir=.\tunit
ForceReevaluationOfFeedersForFedCellsOnDataChange=T
EnableNewHierarchyCreation=T
ParallelInteraction=T
MTQ=2
See here for more values to tm1s.cfg
https://www.ibm.com/support/knowledgecenter/en/SS9RXT_10.2.2/com.ibm.swg.ba.cognos.tm1_inst.10.2.2.3.doc/c_parametersinthetm1s.cfgfile_n1503fe.html
Save the tm1s.cfg file for Proven_Techniques
From inside Notepad (in administrator mode) open the tm1p.ini file for your user.
You will find it in folder C:\Users\%username%\AppData\Roaming\Applix\TM1
Change AllowImportCAMClients = F to AllowImportCAMClients = T.
Add CognosGatewayURI = http://biservername:9300/bi/v1/disp
Save the file and close notepad.
Check that Cognos BI service ‘IBM Cognos’ is running.
Restart your TM1 services, like IBM Cognos TM1 Server – proven_techniques.
Start TM1 Architect and login to proven_techniques.
Use the native login of Admin and password apple.
When inside, select the application and right click and select security – clients/groups.
From menu clients, select add new member.
At the login prompt enter the AD username and password you have.
You should get to Cognos Connections add users dialog where you can select Cognos and your AD namespace.
Go to you AD namespace, and search for the Windows users you want to be able to work in your application. In this test, only add one user (you).
You can also click on TYPE in upper right corner and enter the username like this;
AD/roos
Where first is your AD namespace name and after the slash is the NT user name.
Click on the arrow to add the user, and it should resolve to display name.
Click OK to add the user to your TM1 application.
Mark ADMIN for that user before you exist TM1 architect.
Close TM1 Architect.
Start NOTEPAD from Admin command prompt.
Open the tm1s.cfg file from d:\Program Files\ibm\cognos\tm1_64\samples\tm1\Proven_Techniques folder.
Change to IntegratedSecurityMode=5
Save the tm1s.cfg file and exit notepad.
Restart the TM1 windows service proven_techniques.
Wait a long time to allow the services to start.
Start TM1 Architect and login to proven_techniques, you should be prompted with the CA 11 login page, and come in as the user you have just added.
You need to repeat above step of adding users for your TM1 applications, so you get the first CAM user to be Admin inside the TM1 application.
To get TM1WEB and PMPSVC to work with CAM security you need to update some file in your Cognos BI (CA 11) server.

On your PA 2.0 Local (TM1) server unzip the file d:\program files\ibm\cognos\tm1_64\bi_interop\bi_interop.zip to a new folder.
Stop the Cognos Analytices service (IBM Cognos)
Copy the webcontent to the folder d:\program files\ibm\cognos\analytics\webcontent to merge the content.
Copy the templates to the folder d:\program files\ibm\cognos\analytics\templates to merge the content.
Start Notepad from a admin command prompt, to be able to save the files later.
From inside notepad open the file d:\program files\ibm\cognos\analytics\webcontent\planning.html
Change
// Update the following to point to the location of the planning service(s)
var planningServices = [“http://machine.company.com:9510”];
to point to the new PA (TM1) server
// Update the following to point to the location of the planning service(s)
var planningServices = [“http://PAservername.domain.com:9510”];
Save the file.
From inside notepad open the file d:\program files\ibm\cognos\analytics\webcontent\pmhub.html
Change
// Update the following to point to the location of the pmhub service(s)
var pmhubURLs = [“http://mypmhubserver1:9510″,”http://mypmhubserver1.domain.com:9510”];
to point to the new PA (TM1) server and to the PAW server, like this
// Update the following to point to the location of the pmhub service(s)
var pmhubURLs = [“http://PAservername.domain.com:9510″,”http://PAWservername.domain.com:9580”];
Save the file.
From inside notepad open the file d:\program files\ibm\cognos\analytics\webcontent\tm1\web\tm1web.html
Change
// Update the following to point to the location of the TM1Web service(s)
var tm1webServices = [“http://localhost:8080”, “http://localhost:9510”];
to point to the new PA (TM1) server
// Update the following to point to the location of the TM1Web service(s)
var tm1webServices = [“http://PAservername.domain.com:9510”];
Save the file.
Start the CA 11 ( IBM Cognos) service. Wait until it is started.
Startup PMPSVC for the first time, now when you have cam security in your application and support for it setup in the cognos bi (CA 11) server.
Surf to http://PAservername.domain.com:9510/pmpsvc/
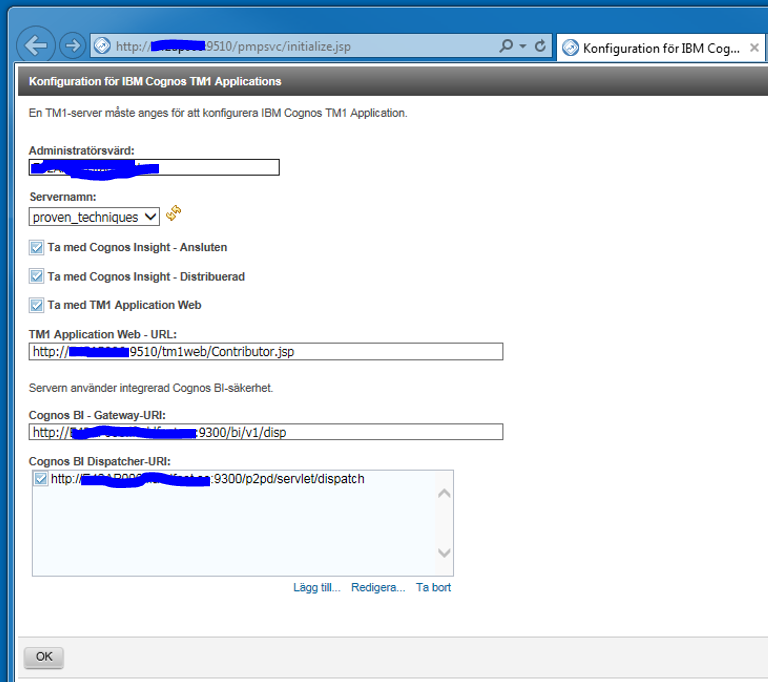
Ensure you can select your TM1 application in the dropdown list
(if the list is missing – please try a different web browser)
All url should be correct populated.
If you are missing information – check the TM1 Cognos Configuration section. You may have a localhost line there.
Mark the Cognos BI dispatcher and click OK to save the settings (they are save to the file d:\Program Files\ibm\cognos\tm1_64\webapps\pmpsvc\WEB-INF\configuration\ fpmsvc_config.xml).
Now only applications with the same security (IntegratedSecurityMode=5) will work in TM1 application portal (pmpsvc).
User who need to access the admin functions in pmpsvc, can need to be part of the first TM1 application you added to the list of PMPSVC TM1 applications (instances).
The new Planning Analytics Workspace (PAW) in IntegratedSecurityMode=1 point to ONE TM1 instance, that must contain the admin users who can change the PAW settings.
PAW only work with IntegratedSecurityMode=1 applications or IntegratedSecurityMode=5 applications, you cannot mix IntegratedSecurityMode for applications that interact with the PAW.
Simplest is to use IntegratedSecurityMode=1 in your application, but then the TM1 super user need to handle the name and password administration.
With IntegratedSecurityMode=5 you can use the Active Directory (or LDAP) functions, and user and password administration can be handled by your IT department.
Before installing docker;
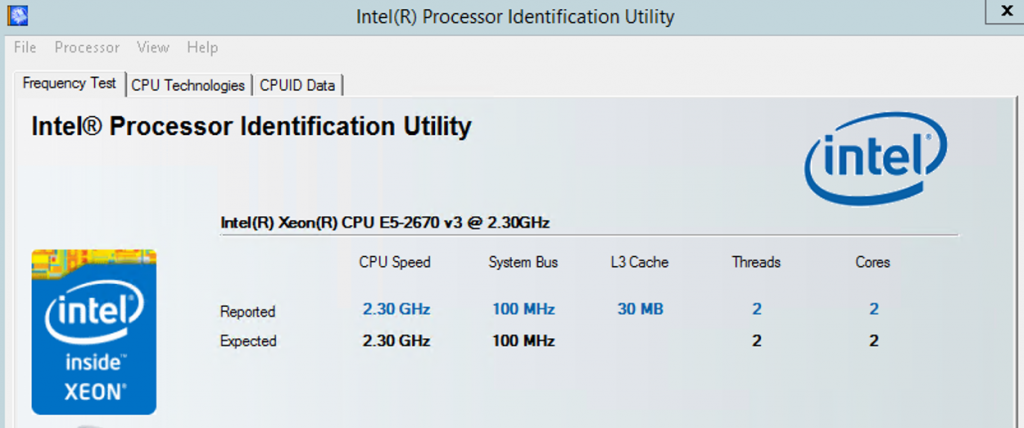
Check that VTX are enable on the Microsoft Windows 2012 server, by download and install the Intel processor identifier. Download it from here:
https://downloadcenter.intel.com/download/7838/Intel-Processor-Identification-Utility-Windows-Version
Run the utility, and go to the cpu technologies tab. The Intel VT-x with EPT must read a value of Yes. If No, you must active VTx in your system before we start installing PA 2.0 Local PAW.
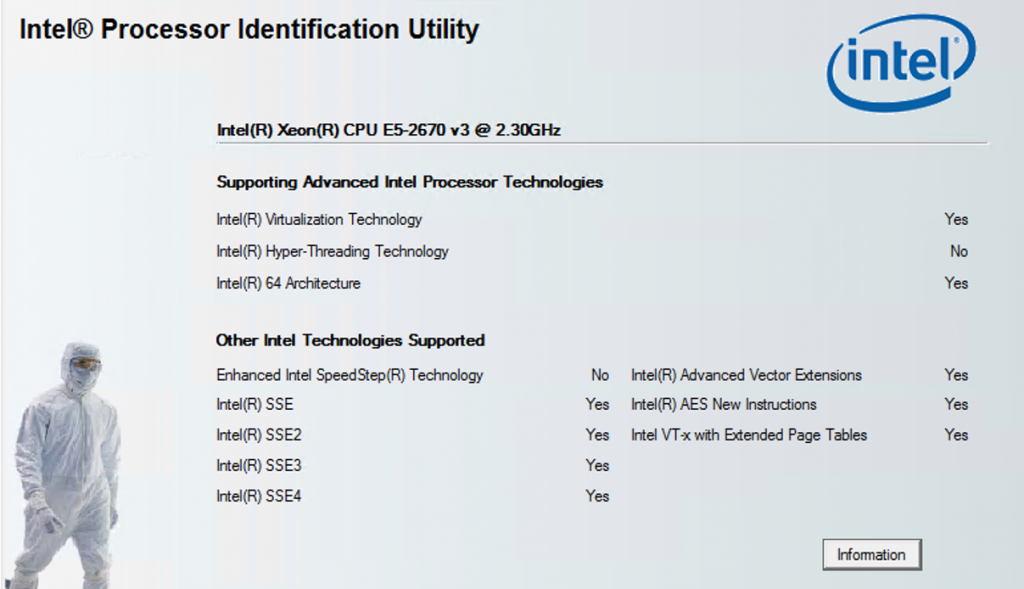
This mean your VMWARE guru need to change in HOST BIOS, enable VT-X support in the HOST VMware console, and for change VT-x support for the image you plan to run PAW in.
Note; that some versions of Hyper-V or VMWARE does not support VT-x, here can you not install PAW.
Best is to create a folder, d:\vbox, for the virtual machines on your server.
Go to Control Panel \System and Security\System.
Click on Change Settings.
Go to “Advance” tab.
Click on Environment Variables.
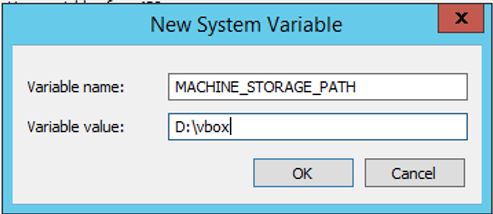
Set the “MACHINE_STORAGE_PATH” system variable to point to folder d:\vbox
Go to CMD prompt and enter SET to see a list of all variables in use.
Check that the MACHINE_STORAGE_PATH is listed correct.
SETUP DOCKER
For Microsoft Windows 2012 you must download the “docker toolbox” installation program.
Right click on DockerToolbox.exe and select “run as administrator”.
Untick ‘help Docker improve Toolbox’ and click Next.
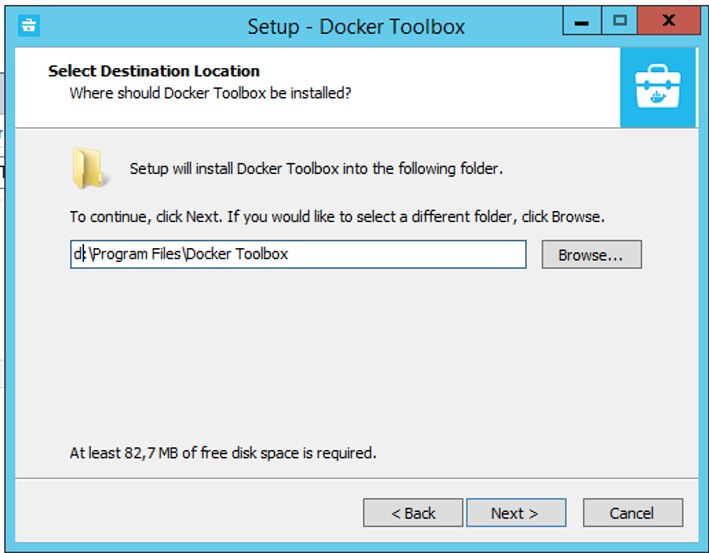
Enter the path for the program (d:\program files\docker toolbox) and click Next.
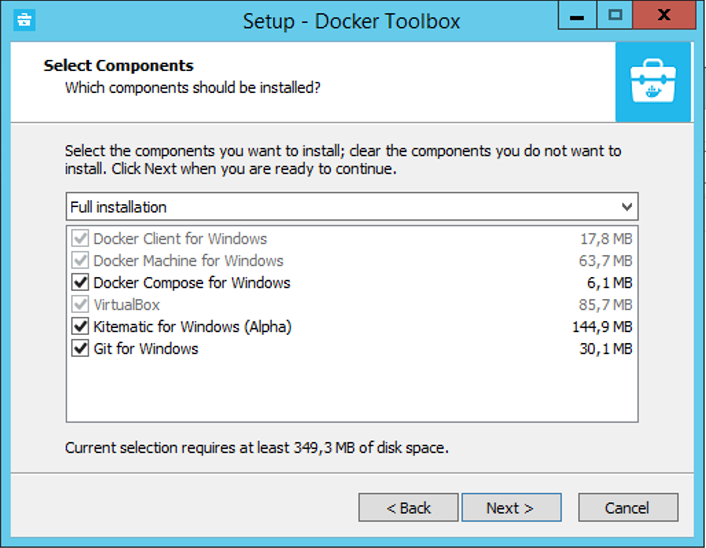
Choose Full Installation and click Next.
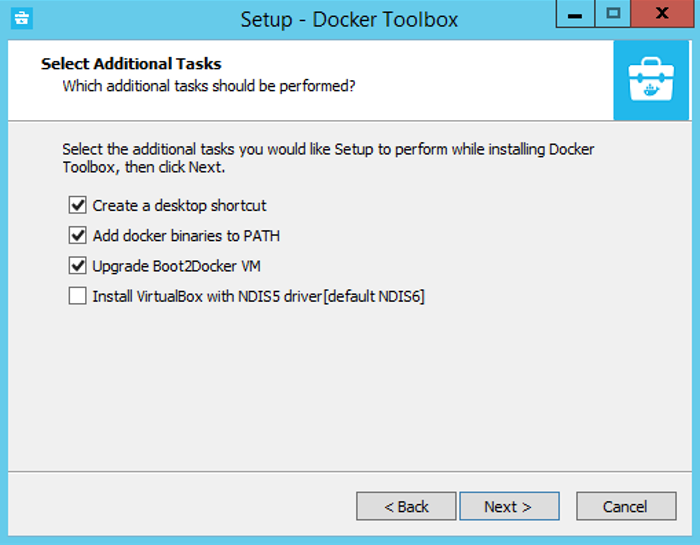
Uncheck ‘Install VirtualBox with NDISS driver’ and click Next, at additional tasks.
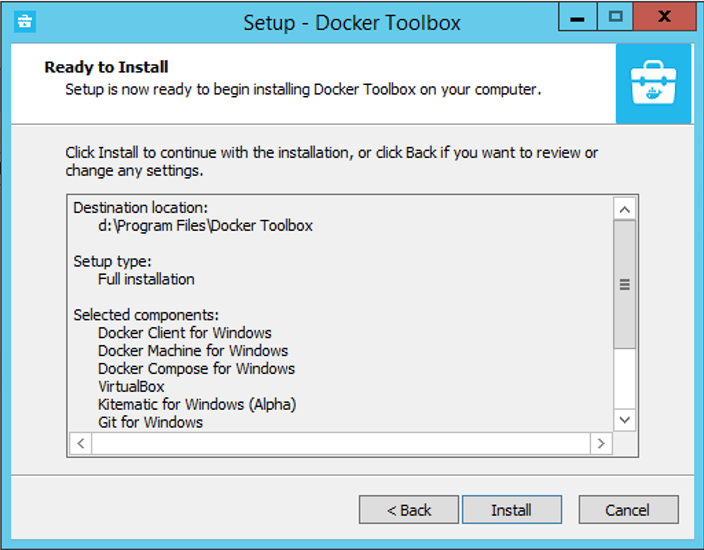
Click Install.
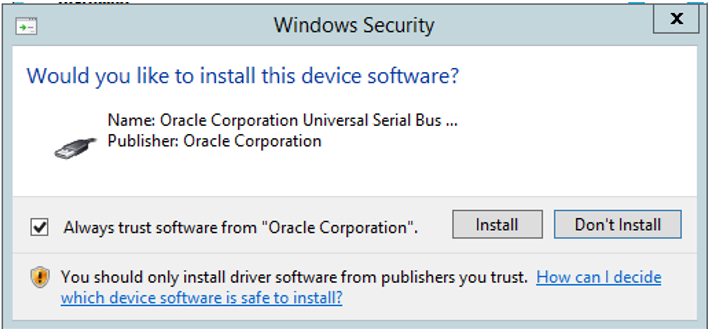
If you get the question to install ‘Oracle Corporation Universal Serial Bus’, click Install.
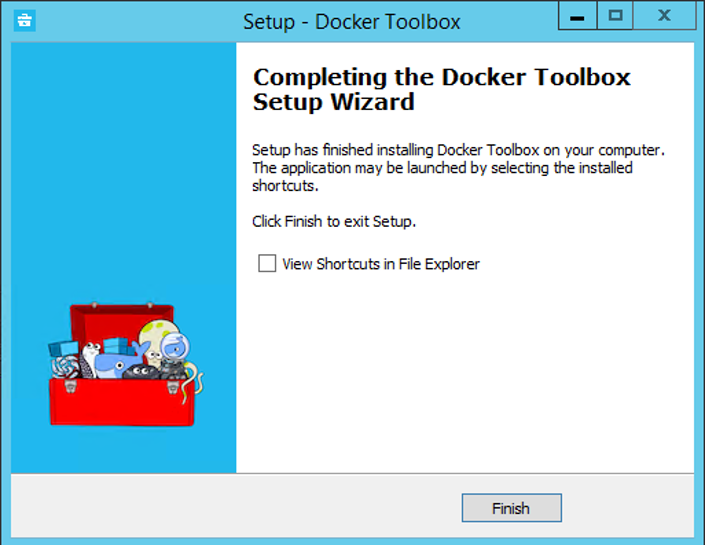
Uncheck ‘View Shortcuts in File Explorer’ and click Finish.
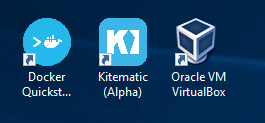
This should give you some new icons on the desktop for Oracle VM VirtualBox.
To get VBOX to run as a service you need to download VBoxVmService-5.1-Plum.exe from https://sourceforge.net/projects/vboxvmservice
This will only work with VirtualBox Version 5.1.
The Only help I found was here;
https://forums.virtualbox.org/viewtopic.php?f=6&t=4762&start=390
SETUP PAW
Important to reboot the Windows server before installing the PAW program.
You need to download the latest PAW installation file from IBM Fix Central.
Unzip the ipa_workspace_local_2.0.20.770.4.zip file to a folder on the server.
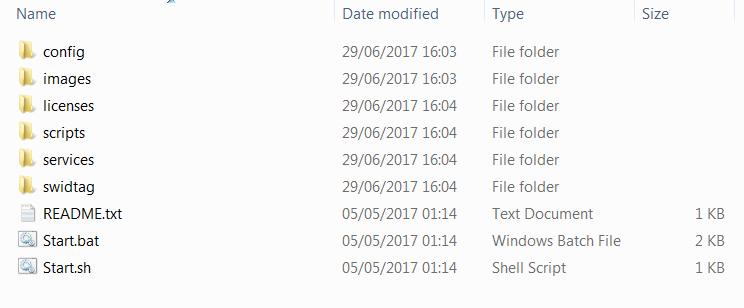
Place the files in an easy accessible folder, because you will check the log files here.
The start.bat file contain values you can change.

Open it in Notepad before installation, to change the memory the PAW image will use and the Ports the program will use. If it is run one its own server, then leave the default ports at 80 and 443.
In the case we install it on the same server where we have Cognos BI or IIS installed, then change the ports to 9580 and 9543 (so they will not collide with IIS port 80).
You should not change the CPU COUNT to less than 4 CPU, then it will become slow.
But your host server must have at least the same amount of CPU, and best if it have 2-4 Gb ram more than the PAW will use.
If your VMware host use the network 192.168.40.x you should change the Networks values to a different not used network.
Example of START.BAT shown below:
@echo off
REM Start up a bash shell and run the Windows start script for IBM Planning Analytics Workspace
SET PAW_DIR=%~dp0
SET DOCKER_MACHINE_NAME=paw
SET VM_MEMORY=6144
SET VM_CPU_COUNT=4
SET VM_DISK_SIZE=20000
SET HOSTONLY_CIDR=192.168.40.1/24
SET STATIC_IP=192.168.40.100
SET NETMASK=255.255.255.0
SET BROADCAST_IP=192.168.40.255
SET HTTP_PORT=9580
SET HTTPS_PORT=9543
REM Avoid a breaking change in Docker Compose 1.9
SET COMPOSE_CONVERT_WINDOWS_PATHS=1
REM Share the parent directory with the Virtual Machine
cd %PAW_DIR%/..
SET HOST_SHARED_FOLDER=%CD%
cd %PAW_DIR%
SETLOCAL ENABLEEXTENSIONS
SET KEY_NAME=”HKEY_LOCAL_MACHINE\SOFTWARE\GitForWindows”
SET VALUE_NAME=”InstallPath”
FOR /F “tokens=2*” %%A IN (‘REG.exe query “%KEY_NAME%” /v “%VALUE_NAME%”‘) DO (set GIT_PATH=%%B)
IF NOT “%GIT_PATH%”==”” (
SET BASH_PATH=%GIT_PATH%\bin\bash.exe
) ELSE (
SET BASH_PATH=C:\Program Files\Git\bin\bash.exe
)
if exist “%BASH_PATH%” (
SET TERM=
start “IBM Planning Analytics Workspace Administration” “%BASH_PATH%” –login -i “scripts\winstart.sh”
) else (
@echo on
echo Install Docker Toolbox for Windows and try again.
explorer “https://www.docker.com/products/docker-toolbox”
pause
)
On the Windows server right click on start and select ‘command prompt (admin)’.
In the CMD window, CD to the folder where you have your Start.bat.
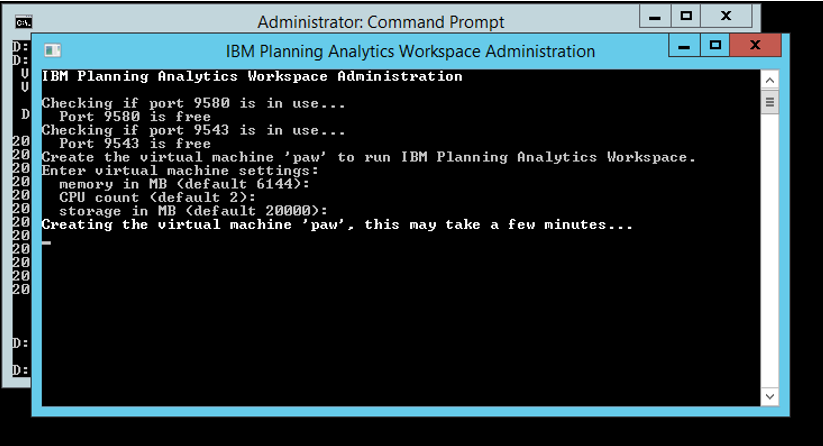
Enter START.BAT to start the PAW installation.
You must enter START.BAT, if you enter only START it will fail.
The program will check the ports,
and give you an option to change the memory and cpu usage.
Creating the virtual machine “paw” takes a very long time.
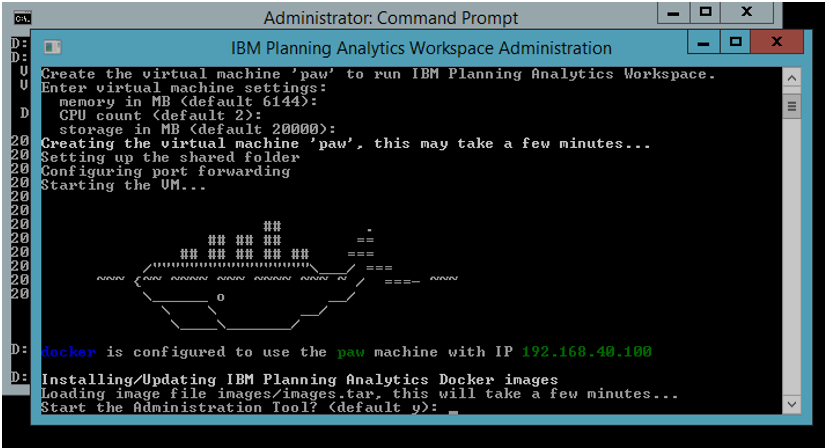
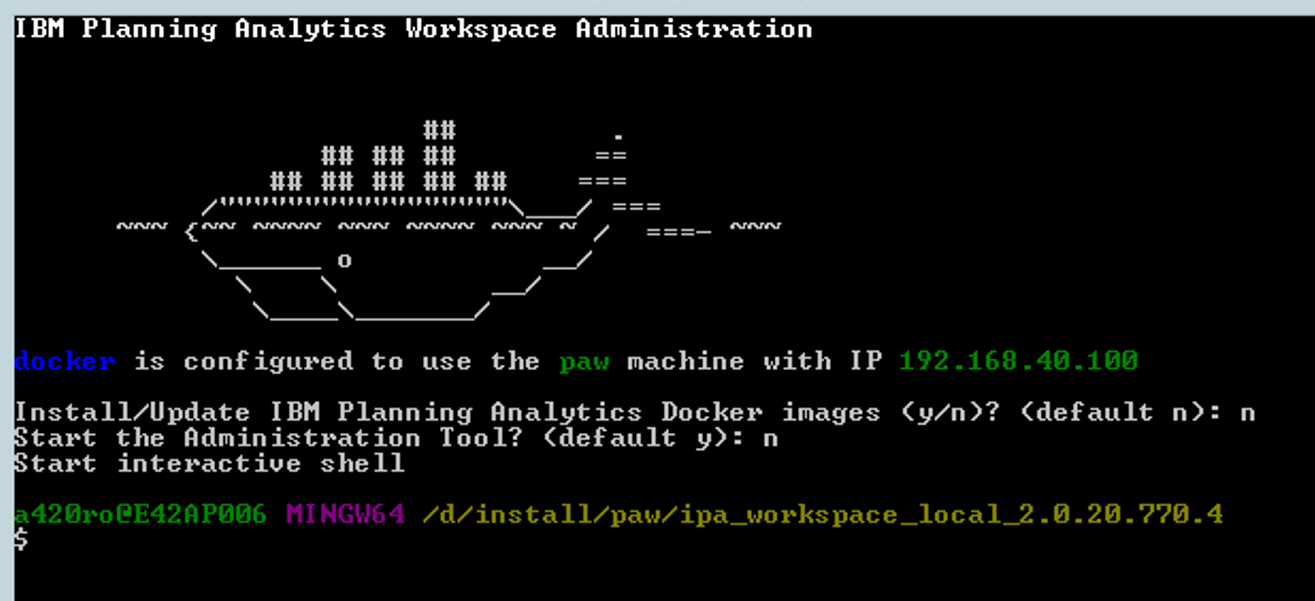
Press Y when you get the question about starting the Administration Tool.
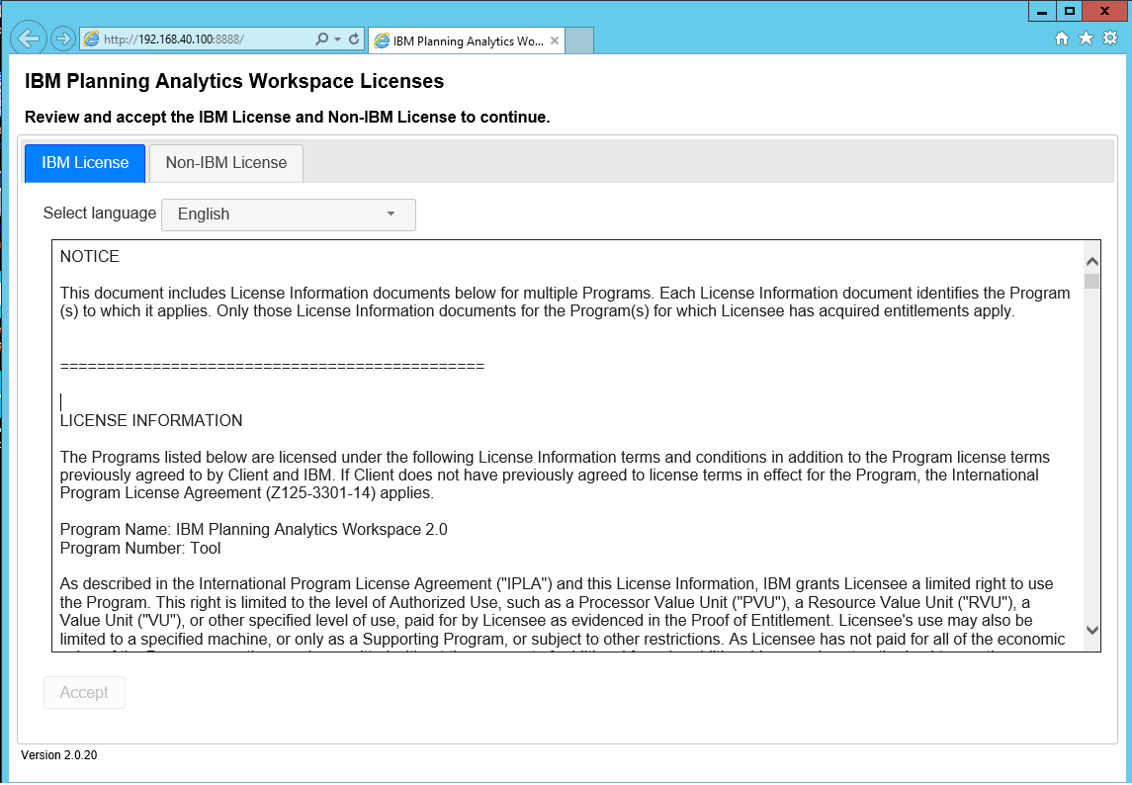
This will start a IE Browser one your host accessing the Admin page, accept both license before you can move on.
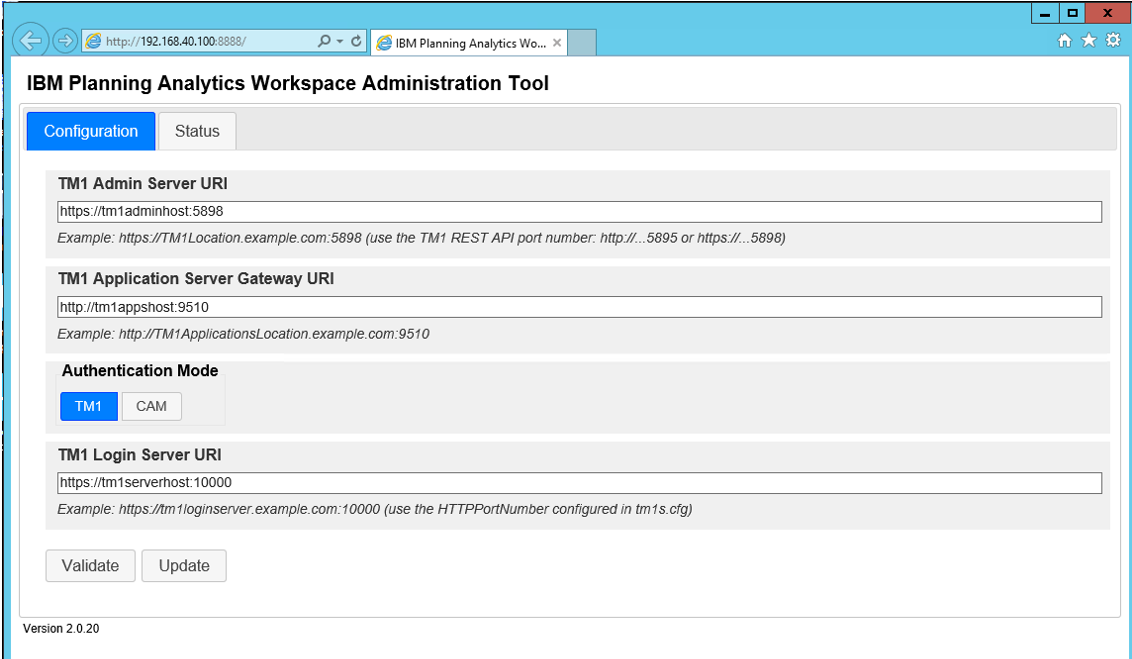
In the Configuration tab you should enter your TM1 servers name.
TM1 Admin server URI = https://PAservername.domain.com:5898
TM1 Application Server Gateway URI = http://PAservername.domain.com:9510
Under Authentication Mode when using TM1 you should point to the Window server where you have your TM1 instance using a specific port, that will be your TM1 application to control who will have access to the Administration tool.
TM1 Login Server URI=https://PAservername.domain.com:12545
(Note: that all new functions use the new HTTPport for access)

Click on validate button, to check the values you entered are working.
If you get an Error: Request timed out after 10010ms, you maybe have entered the wrong port number.
Click UPDATE when you get the Validate to work.
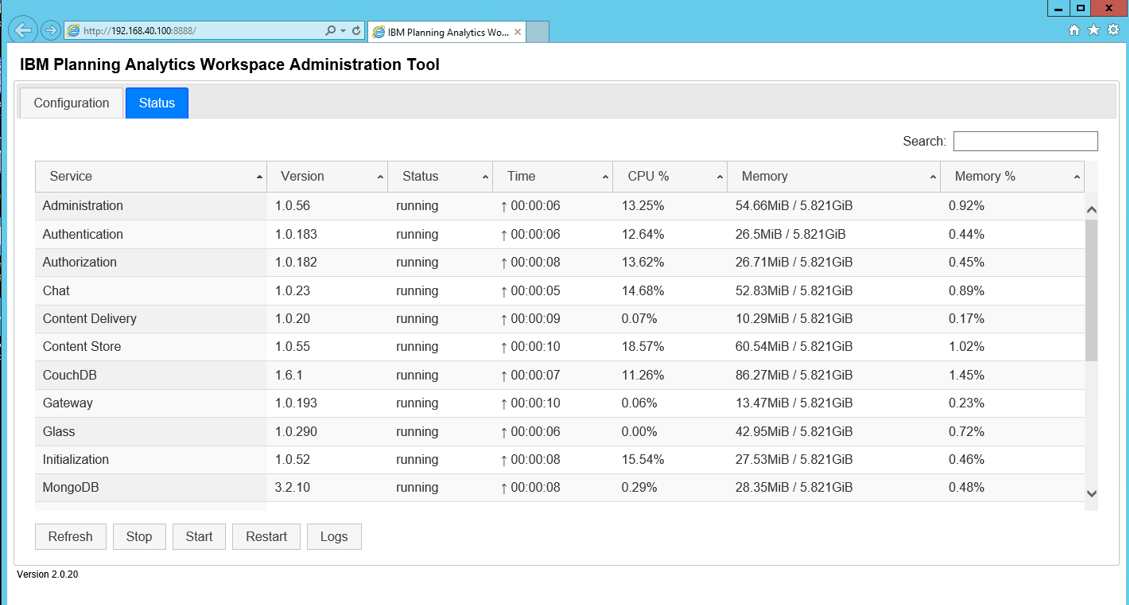
The start of PAW will take some time, click on STATUS and then on REFRESH to see the progress.
When CPU usage is low like 1%, then it is ready and you can surf to the PAW (Planning Analytics Workspace).
Surf to http://PAwservername:9580/
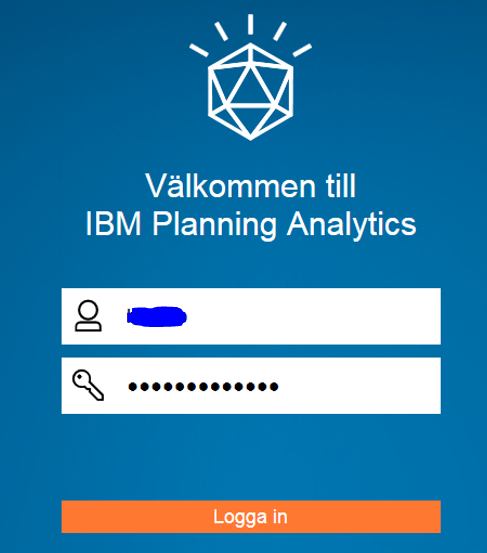
Login with the user and password you have in your TM1 application.
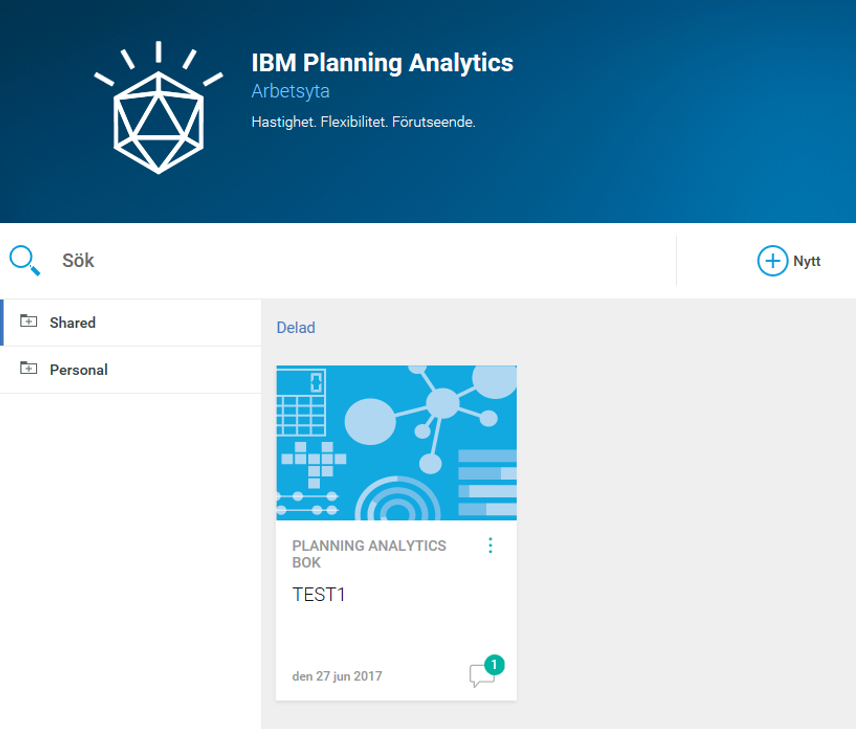
In our test, click on a new book and expand and drag some view of the cube onto the canvas.
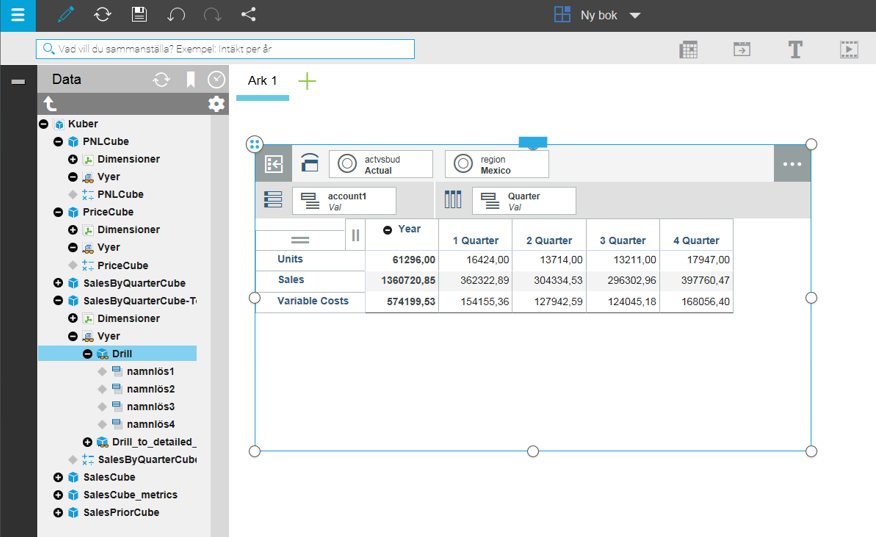
Click on Save icon up at the left side to save your designs.
Here some Error messages you may get when installing PAW
(The log files are found in folder d:\install\ipa_workspace_local_2.0.20.770.4\log\admintool)
Error:
Docker Machine is not installed. Please re-run Toolbox Installer and try again.
Solution:
Reboot your Windows server.
Error:
Creating CA: D:\vbox\certs\ca.pem
Creating client certificate: D:\vbox\certs\cert.pem
Running pre-create checks…
(paw) Image cache directory does not exist, creating it at D:\vbox\cache…
(paw) No default Boot2Docker ISO found locally, downloading the latest release…
(paw) Latest release for github.com/boot2docker/boot2docker is v17.05.0-ce
(paw) Downloading D:\vbox\cache\boot2docker.iso from https://github.com/boot2docker/boot2docker/releases/download/v17.05.0-ce/boot2docker.iso…
(paw)
Solution:
Good you had internet connection, so it could download the file.
Error:
Running pre-create checks…
Error with pre-create check: “This computer doesn’t have VT-X/AMD-v enabled. Enabling it in the BIOS is mandatory”
Solution:
Change the VMWARE host to support VTX.
Error:
Invalid command line. Found extra arguments [–virtualbox-no-share –virtualbox-hostonly-cidr 192.168.40.1/24 –virtualbox-memory 6144 –virtualbox-cpu-count 4 –virtualbox-disk-size 20000 paw]
Solution:
You have been changing the file \scripts\winstart.sh in attempt to get past the VTX issue.
Check that you have not missed a space.
Error:
Running pre-create checks…
(paw) Image cache directory does not exist, creating it at C:\machine\cache…
(paw) No default Boot2Docker ISO found locally, downloading the latest release…
Error with pre-create check: “Get https://api.github.com/repos/boot2docker/boot2docker/releases/latest: dial tcp: lookup api.github.com: getaddrinfow: No such host is known.”
Solution:
Place the file boot2docker.iso in correct folder, d:\vbox\cache
Try again to run the Start.bat file
TO SETUP PAW TO USE CAM
If not already started, run START.BAT, and select NO on update PAW, instead say YES to start the Admin configuration.
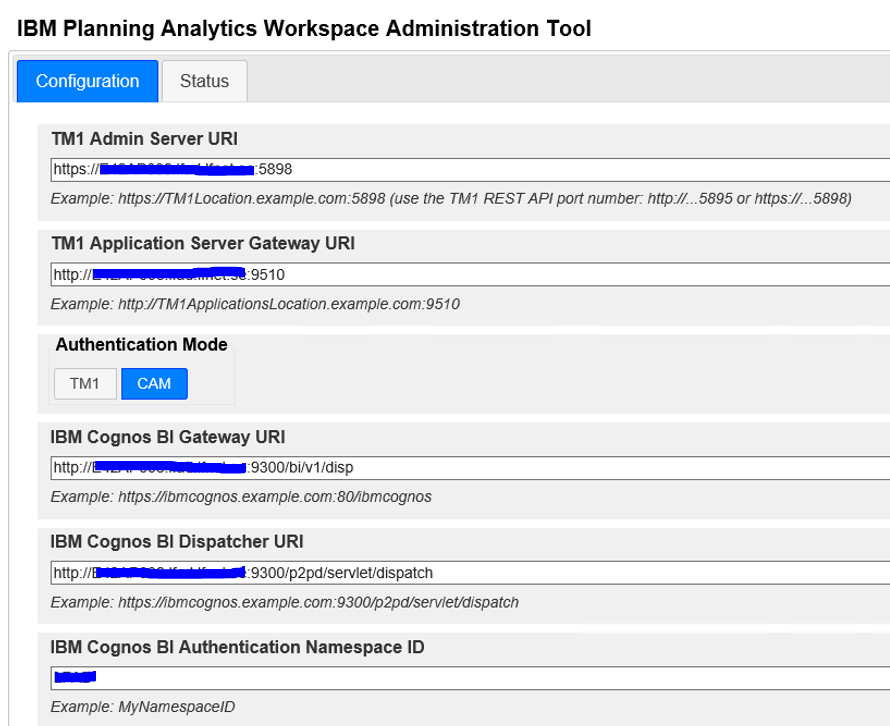
Here at the Configuration tab click on CAM button and fill in the values for the BI server.
IBM Cognos BI Gateway URI = http://CAservername.domain.com:9300/bi/v1/disp
IBM Cognos BI Dispatcher URI = http://CAservername.domain.com:9300/p2pd/servlet/dispatch
IBM Cognos BI Authentication Namespace ID = Exact the same Namespace ID you entered in Cognos Configuration for CA11 (this is case sensitive).
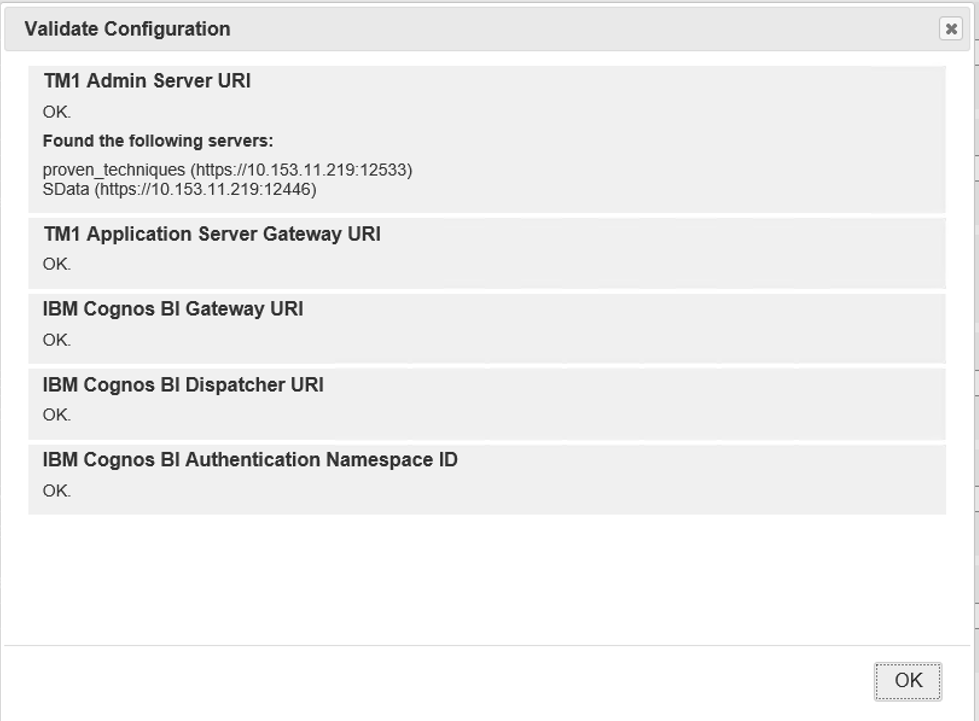
Click on validate and OK.
Go to status tab and click on the RESTART button to make the changes take effect.
Error you may see when working in PAW;
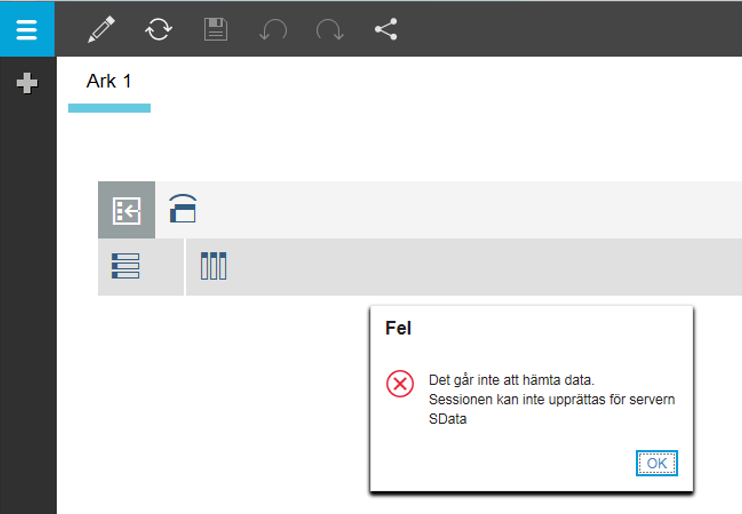
Error:
Cannot get the data.
Cannot create the session for server SDATA.
Solution:
The SDATA application use Native security and you have setup PAW to use CAM security.
Only use CAM security enabled TM1 applications with your PAW installation.
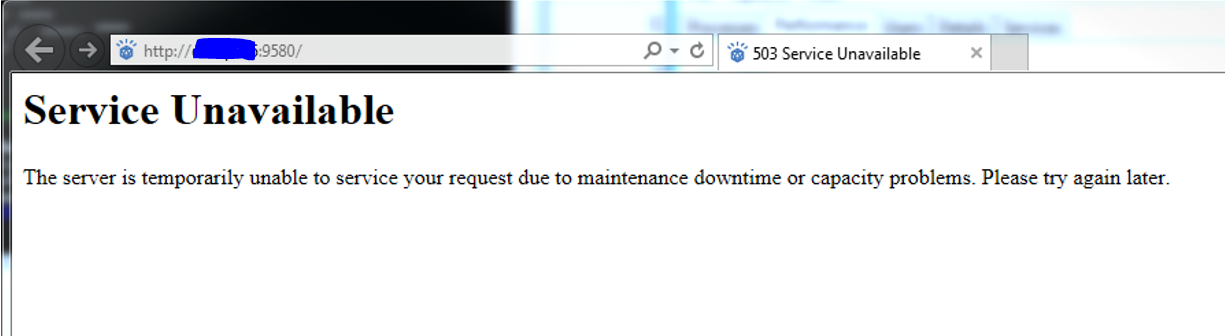
Error:
The server it temporarily unable to service your request due to maintenance downtime or capacity problems. Please try again later.
Solution:
Wait or reboot the services.
SETUP TO RUN AS A SERVICE
Important to reboot the windows server before configuring PAW to be run as a service.
Rigth click on VBoxVmService-5.1-Plum.exe and select run as administrator.

Mark “I accept the agreement” and click next.
Click install.
Click finish.
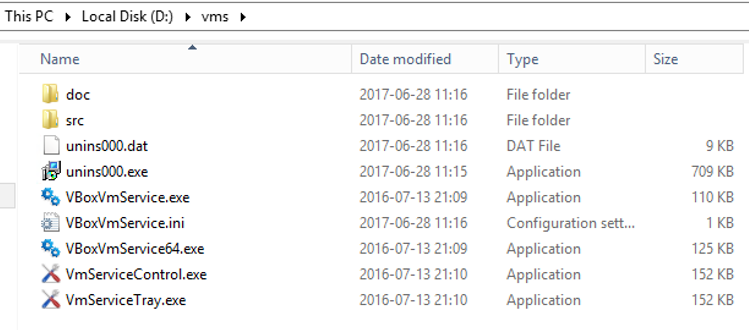
Open the file d:\vms\VBoxVmService.ini in notepad.
Looks like this;
[Settings]
VBOX_USER_HOME=C:\Users\admin\.VirtualBox
RunWebService=no
PauseShutdown=5000
[Vm0]
VmName=ubuntu
ShutdownMethod=savestate
AutoStart=yes
[Vm1]
VmName=winxp
ShutdownMethod=savestate
AutoStart=no
Change it to point out your location for images that is d:\vbox\machines
Change it to handle the paw image and take away the last image.
Should look like this now
[Settings]
VBOX_USER_HOME=D:\VBOX\machines
RunWebService=no
PauseShutdown=5000
[Vm0]
VmName=paw
ShutdownMethod=acpipowerbutton
AutoStart=yes
Save the file.
Restart the server.
The log file will be written to d:\vms\VBoxVmService.log
Check the log file to ensure the service start up correct.
You must test reboot of the Windows server to find the best settings for this vbox service settings to work with PAW.
Example of Error you can get:
Error:
Callee RC E_FAIL (0x80004005)
Solution:
You have too little memory free, the last shutdown of the vbox did not work.
Reboot the Windows server.
HOW TO BACKUP THE PAW
Run the START.BAT from a command prompt to get to a java prompt.

Enter scripts/paw.sh stop to stop the server
Enter scripts/backup.sh to stop paw services and make a backup and start them again
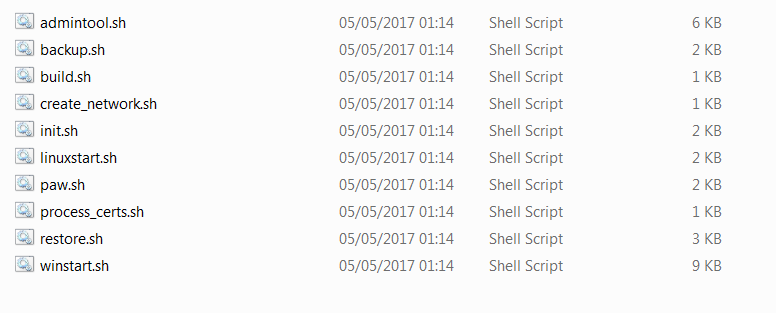
All the example scripts you can use, are in this folder, d:\install\ipa_workspace_local_2.0.20.770.4\scripts
Explore and create better scripts for your use.
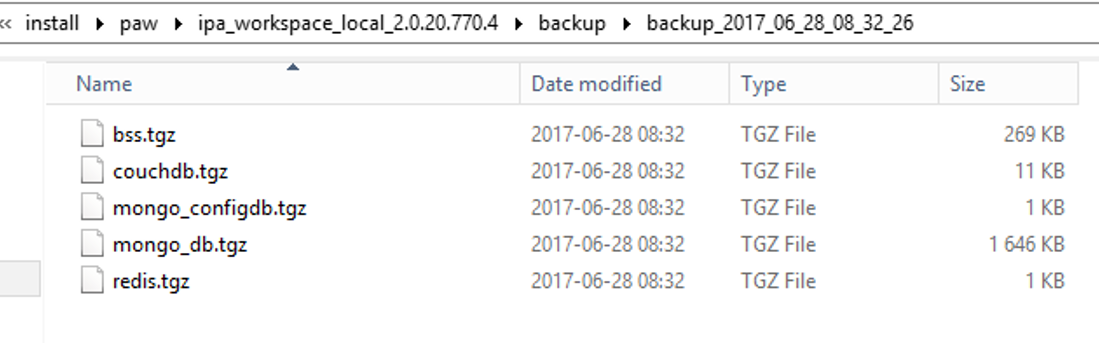
The backup files are stored in a folder under d:\install\ipa_workspace_local_2.0.20.770.4\backup.
The TM1 application, can you backup with a bat file that contain this lines (you need to adjust the paths for your environment);
REM execute the backup command on data folder
“d:\program files\7-zip\7z” a d:\pal\planning\work\backup\tm1backup.zip -r d:\pal\planning\datafiles\*.*
TM1 reboot
Stop these WINDOWS services before you reboot your server with PA 2.0 Local
NET STOP VBOXVMSERVICE
NET STOP “IBM COGNOS”
NET STOP “IBM COGNOS TM1”
NET STOP SDATA
NET STOP PROVEN_TECHNIQUES
NET STOP PLANNING
NET STOP TM1ADMSDX64
When TM1 instance is down, you can also make a backup of the log files folder.
More information:
https://www.ibm.com/communities/analytics/planning-analytics/blog/
Note: in code you need to replace “ with ” to make it work.
How install new PAW on new Windows version: https://www.youtube.com/watch?v=6REUFVQD-xA