Product:
Cognos Controller 11.0.1200
Microsoft Windows 2019 server
Microsoft SQL 2016 server
Issue:
How install Cognos Controller 11?
Solution:
This are an example of the steps to install Cognos Controller 11. (Some information below may be incorrect or not needed)
For best guides follow the IBM documentation. https://www.ibm.com/docs/en/cognos-controller/11.0.1?topic=icclo-installing-configuring-cognos-controller-one-computer
Before any work with Cognos Controller – take a extra SQL backup of the database.
Download the software from here:
You need to get both the RTM version and any fix pack you need to install.
https://www.ibm.com/support/pages/downloading-ibm-cognos-controller-1101
https://www.ibm.com/support/pages/node/6849235
Install IIS on the server that will run Cognos Controller. Microsoft .NET Framework 4.7.2 must be installed on the Controller Web Services Server computer. Install sqlncli.msi driver version 11.4.7462.6 or later version for SQL server.
Select the following when you add the Web Server (IIS) role to the windows server:
- .NET Framework 4.5 and 3.5
- ASP
- ASP.NET
- CGI
- ISAPI Extensions
- ISAPI Filters
- .NET Extensibility
- IIS Management Console
- IIS Management Scripts and Tools
- HTTP Activation
- HTTP Redirection
- Directory Browsing
Cognos Controller 11 only supports Microsoft SQL server database, you need to create one database, if you not already have one from an old version of Cognos Controller. Ensure that the database collation sequence is case insensitive, and is the same for both the SQL server (tempdb database) and the Controller database. (Recommended: SQL_Latin1_General_CP1_CI_AS ) Controller tables owned by dbo are not supported. If you have dbo as the default table owner you must change it, easiest is to create a new database from start in SSMS.
To create a schema named cognos:
IF (NOT EXISTS (SELECT * FROM sys.schemas WHERE name = 'cognos'))
BEGIN
EXEC ('CREATE SCHEMA [cognos] AUTHORIZATION [dbo]')
END
To change schema on one table:
ALTER SCHEMA cognos
TRANSFER dbo.Employees
To change default schema for a user in SQL:
ALTER USER cognos WITH DEFAULT_SCHEMA=cognos EXECUTE AS USER='cognos'
If you do a upgrade of Cognos Controller 11 on a old server, you need to uninstall the previous Cognos Controller 10 version first.
Check if the anti-virus software on the Windows server is compatible with you installing of software.
Copy the installation media to the server and unzip it.
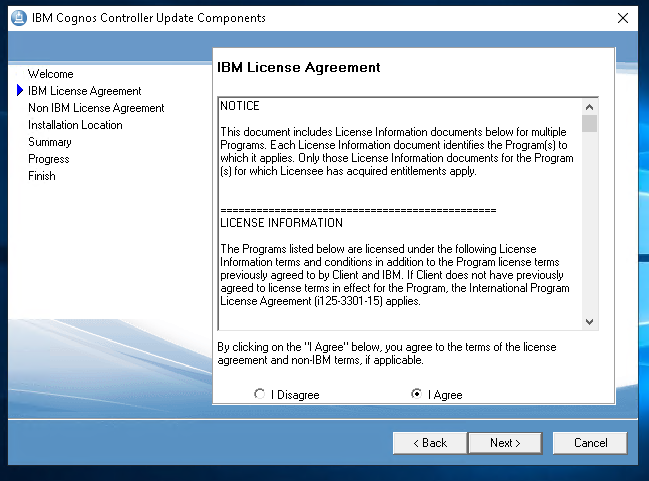
Run (as a administrator) the issetup.exe from folder C:\install\cntrl_11.0.1_win_ml.tar\winx64h\ to install Cognos Controller.
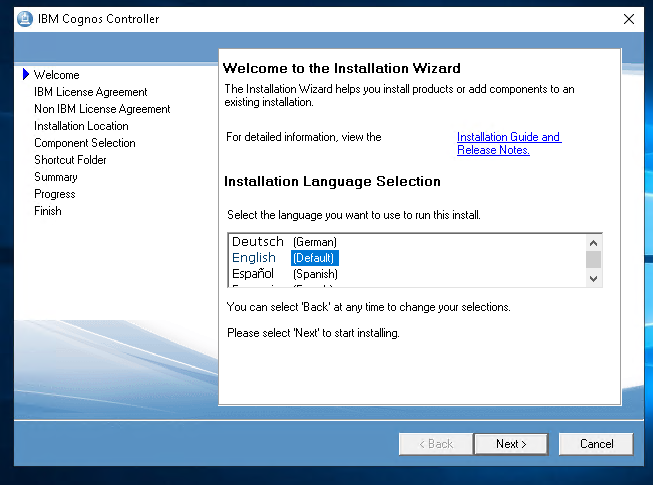
Click Next

Mark I agree and Click Next
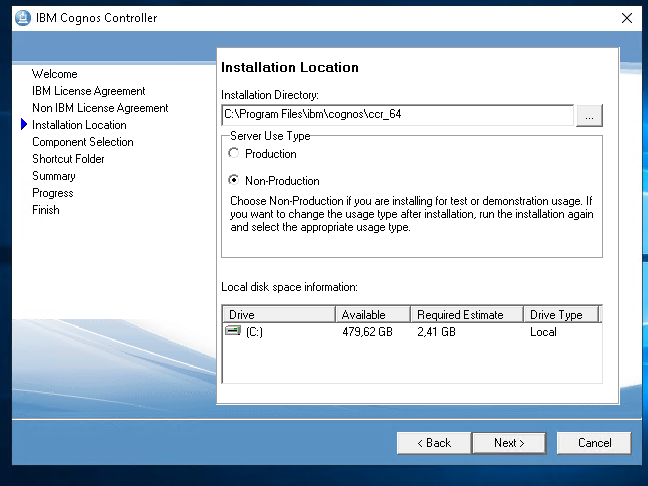
Mark non-production (if not production server) and click Next

Click Yes
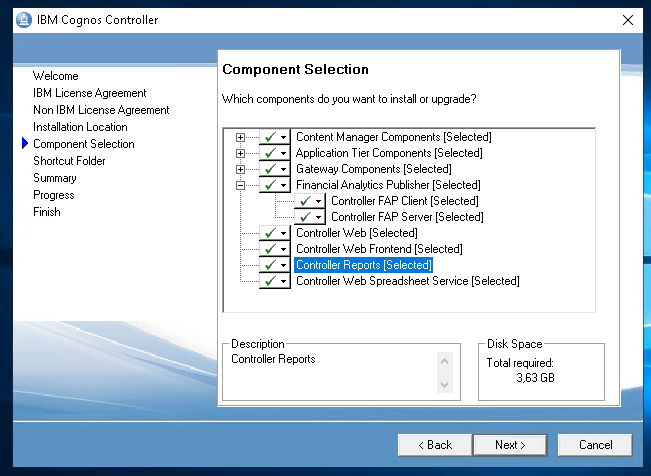
Normally you select all. In some cases the FAP is only installed on your TM1 server. Controller Web is only needed if you going to use it.
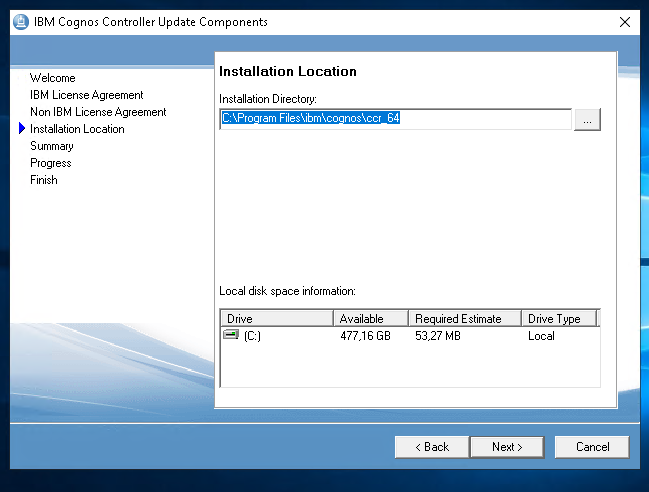
Click Next.
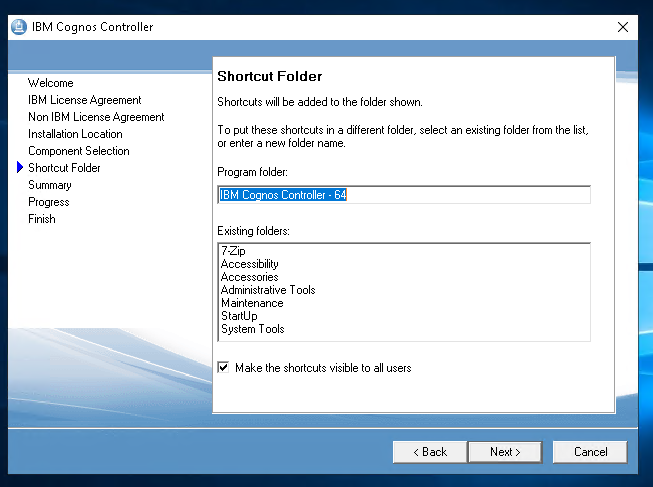
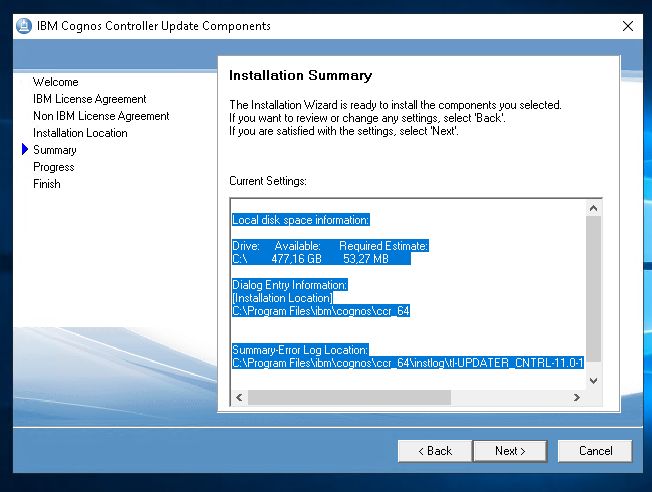
Click Next

Click Next
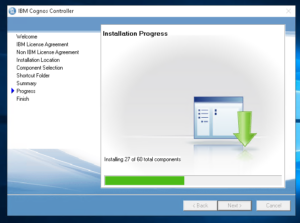
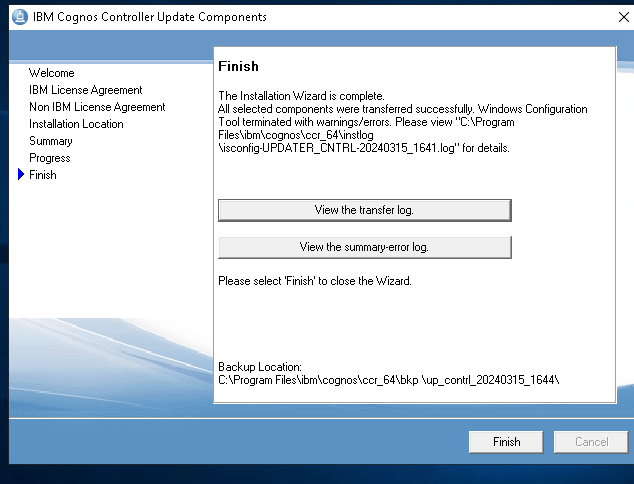
Wait until it is done
Click Finish.
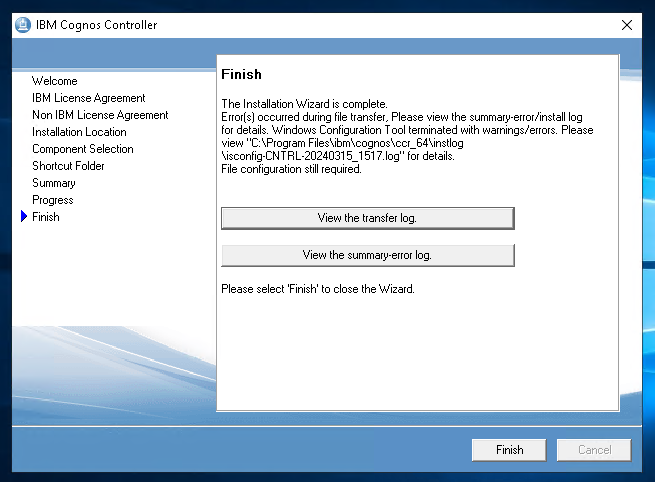
In the log file you can find this messages:
Install component: VFP
Component Version: VFP-AW64-ML-RTM-9.0.2120.0
File “C:\Users\ADMINI~1\AppData\Local\Temp\COG_2\server\vfp9r.dll” successfully extracted.
File “C:\Users\ADMINI~1\AppData\Local\Temp\COG_2\server\vfp9renu.dll” successfully extracted.
File “C:\Users\ADMINI~1\AppData\Local\Temp\COG_2\server\vfp9t.dll” successfully extracted.
File “C:\Users\ADMINI~1\AppData\Local\Temp\COG_2\vers\vfp-winx64h-app-9.0.2120.0-inst.ver” successfully extracted.
File “C:\Users\ADMINI~1\AppData\Local\Temp\COG_2\vers\vfp-winx64h-app-inst.ver” successfully extracted.
Successfully created directory “C:\Windows\system32\server\”.
Successfully copied file “C:\Users\ADMINI~1\AppData\Local\Temp\COG_2\server\vfp9r.dll” to file “C:\Windows\system32\server\vfp9r.dll”.
Self registration of file using command line “C:\Windows\system32\regsvr32.exe /s “C:\Windows\system32\server\vfp9r.dll””.
Error: Failed system command “C:\Windows\system32\regsvr32.exe /s “C:\Windows\system32\server\vfp9r.dll””.
Error: Application has returned exit code “3”.
Successfully deleted file “C:\Users\ADMINI~1\AppData\Local\Temp\COG_2\server\vfp9r.dll”.
Successfully set value “C:\Windows\system32\server\vfp9r.dll” for key “HKEY_LOCAL_MACHINE\SOFTWARE\Microsoft\Windows\CurrentVersion\SharedDLLs”.
Successfully copied file “C:\Users\ADMINI~1\AppData\Local\Temp\COG_2\server\vfp9renu.dll” to file “C:\Windows\system32\server\vfp9renu.dll”.
Self registration of file using command line “C:\Windows\system32\regsvr32.exe /s “C:\Windows\system32\server\vfp9renu.dll””.
Error: Failed system command “C:\Windows\system32\regsvr32.exe /s “C:\Windows\system32\server\vfp9renu.dll””.
Error: Application has returned exit code “4”.
Successfully deleted file “C:\Users\ADMINI~1\AppData\Local\Temp\COG_2\server\vfp9renu.dll”.
Successfully set value “C:\Windows\system32\server\vfp9renu.dll” for key “HKEY_LOCAL_MACHINE\SOFTWARE\Microsoft\Windows\CurrentVersion\SharedDLLs”.
Successfully copied file “C:\Users\ADMINI~1\AppData\Local\Temp\COG_2\server\vfp9t.dll” to file “C:\Windows\system32\server\vfp9t.dll”.
Self registration of file using command line “C:\Windows\system32\regsvr32.exe /s “C:\Windows\system32\server\vfp9t.dll””.
Error: Failed system command “C:\Windows\system32\regsvr32.exe /s “C:\Windows\system32\server\vfp9t.dll””.
Error: Application has returned exit code “3”.
Successfully deleted file “C:\Users\ADMINI~1\AppData\Local\Temp\COG_2\server\vfp9t.dll”.
Successfully set value “C:\Windows\system32\server\vfp9t.dll” for key “HKEY_LOCAL_MACHINE\SOFTWARE\Microsoft\Windows\CurrentVersion\SharedDLLs”.
Successfully deleted file “C:\Users\ADMINI~1\AppData\Local\Temp\COG_2\vers\vfp-winx64h-app-9.0.2120.0-inst.ver”.
Successfully deleted file “C:\Users\ADMINI~1\AppData\Local\Temp\COG_2\vers\vfp-winx64h-app-inst.ver”.
Successfully added value “1” for key “VFP” under section “Component List” in file “C:\Program Files\ibm\cognos\ccr_64\uninstall\uninst.ini”.
Install component: VFPCOM
Component Version: VFPCOM-AW64-ML-RTM-9.0.2123.0
File “C:\Users\ADMINI~1\AppData\Local\Temp\COG_2\server\vfpcom.dll” successfully extracted.
File “C:\Users\ADMINI~1\AppData\Local\Temp\COG_2\vers\vfpcom-winx64h-app-9.0.2123.0-inst.ver” successfully extracted.
File “C:\Users\ADMINI~1\AppData\Local\Temp\COG_2\vers\vfpcom-winx64h-app-inst.ver” successfully extracted.
Successfully copied file “C:\Users\ADMINI~1\AppData\Local\Temp\COG_2\server\vfpcom.dll” to file “C:\Windows\system32\server\vfpcom.dll”.
Self registration of file using command line “C:\Windows\system32\regsvr32.exe /s “C:\Windows\system32\server\vfpcom.dll””.
Error: Failed system command “C:\Windows\system32\regsvr32.exe /s “C:\Windows\system32\server\vfpcom.dll””.
Error: Application has returned exit code “3”.
Successfully deleted file “C:\Users\ADMINI~1\AppData\Local\Temp\COG_2\server\vfpcom.dll”.
Successfully set value “C:\Windows\system32\server\vfpcom.dll” for key “HKEY_LOCAL_MACHINE\SOFTWARE\Microsoft\Windows\CurrentVersion\SharedDLLs”.
Successfully deleted file “C:\Users\ADMINI~1\AppData\Local\Temp\COG_2\vers\vfpcom-winx64h-app-9.0.2123.0-inst.ver”.
Successfully deleted file “C:\Users\ADMINI~1\AppData\Local\Temp\COG_2\vers\vfpcom-winx64h-app-inst.ver”.
Successfully added value “1” for key “VFPCOM” under section “Component List” in file “C:\Program Files\ibm\cognos\ccr_64\uninstall\uninst.ini”.
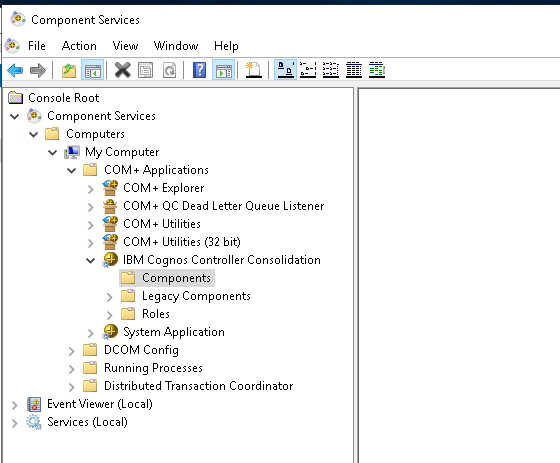
Above error in log file show that the COM objects for Cognos Controller was not installed. Uninstall cognos controller and do the installation again.
Error: Failed to retrieve environment variable “JAVA_HOME”.
Error: Processing XML file “C:\Program Files\ibm\cognos\ccr_64\bin\wct\ccrconfigwebserver.xml” returned errors. View the file “C:\Program Files\ibm\cognos\ccr_64\instlog\isconfig-CNTRL-20240315_1517.log” for details.
Successfully added value “1” for key “CCRWEBSERVER_VERC” under section “Component List” in file “C:\Program Files\ibm\cognos\ccr_64\uninstall\uninst.ini”.
Above error is common, but should not affect the software performance.
Error: Processing XML file “C:\Program Files\ibm\cognos\ccr_64\frontend\fcmconfigfrontendserver.xml” returned errors. View the file “C:\Program Files\ibm\cognos\ccr_64\instlog\isconfig-CNTRL-20240315_1517.log” for details.
Successfully added value “1” for key “CCRFCMFRONTEND_VERC” under section “Component List” in file “C:\Program Files\ibm\cognos\ccr_64\uninstall\uninst.ini”.
Above error we have no clue what it is.
Run the upgrade/fix pack from folder like C:\install\up_cntrl_winx64h_11.0.1200.36_ml.tar\winx64h\issetup.exe
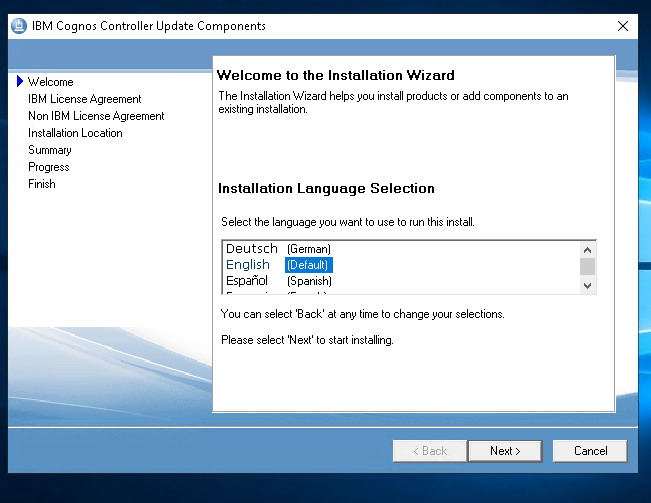
Click Next
Click Next
Select same path as before and click Next
Click Next
Wait
Click Finish.
Reboot the windows server.
Check the cmplst.txt file that the correct controller version is installed:
LICENSE_CONTROLLER_version=LICENSE_CONTROLLER-AW64-ML-RTM-11.0.1.2-0
LICENSE_CONTROLLER_name=IBM Cognos 8 License
SWTAG_NP_CONTROLLER_version=SWTAG_NP_CONTROLLER-AW64-ML-RTM-11.0.1.5-0
SWTAG_NP_CONTROLLER_name=SWTAG CONTROLLER – Non-Production
CONTRL_version=CCR-AW64-ML-RTM-11.0.1.203-0
CONTRL_name=IBM Cognos Controller
LICENSE_FP_CONTROLLER_version=LICENSE_FP_CONTROLLER-AW64-ML-RTM-10.4.2200.4-0
LICENSE_FP_CONTROLLER_name=IBM Cognos License
[Product Update Information]
CONTRL_UPDATE_version=CCR-AW64-ML-RTM-11.0.1200.36-0
CONTRL_UPDATE_name=IBM Cognos Controller Update
[Main Applications]
Copy the sqljdbc42.jar driver to folders like C:\Program Files\ibm\cognos\ccr_64\server\FAP\lib and C:\Program Files\ibm\cognos\ccr_64\server\integration and C:\Program Files\ibm\cognos\ccr_64
Start Cognos Configuration and setup the values needed, start with the database connection to your Cognos Controller database.
See more details in how to setup old cognos controller here https://www.ibm.com/support/pages/node/213339
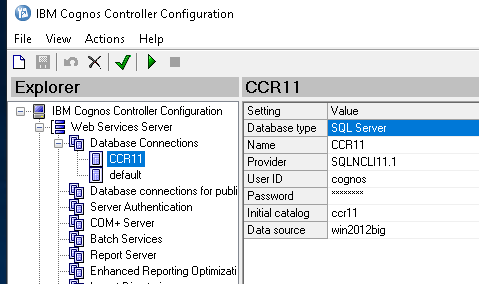
The provider should be SQLNCLI11.1 and data source is the name of the windows database server. You should use a db server name and not ip address.
Click test connection, click save icon, and then click run icon – to start the DBCONVERT program. Here you need to upgrade your Cognos Controller database to the new version. https://www.ibm.com/support/pages/ibm-cognos-controller-builds-ccr-name-and-database-version
| Updater Kit |
Build |
FCM Web |
Client (classic) |
CCR Version |
DB Version |
Comment |
| 11.0.1200.1015 |
11.0.1200.55 |
11.0.1200.10 |
11.0.1200.8 |
11.0.1.2 IF2 |
1015 |
|
| 11.0.1200.1002 |
11.0.1200.37 |
11.0.1200.10 |
11.0.1200.8 |
11.0.1.2 IF1 |
1015 |
Available on Passport Adv. (full installation) |
| 11.0.1200.36 |
11.0.1200.28 |
11.0.1200.10 |
11.0.1200.8 |
11.0.1 FP2 |
1015 |
Generally available (FixCentral) |
| 11.0.1000.8 |
11.0.1000.6 |
11.0.1000.1 |
11.0.1000.2 |
11.0.1 FP1 |
1013 |
Generally available (FixCentral) |
| 11.0.1.203 |
11.0.1.148 |
11.0.1.144 |
11.0.1.117 |
11.0.1 |
1012 |
Available on Passport Adv. (full installation) |
| 11.0.0.1009 |
11.0.0.39 |
11.0.0.93 |
11.0.0.22 |
11.0.0.0 IF1 |
1011 |
Generally available (FixCentral) |
| 11.0.0.106 |
11.0.0.34 |
11.0.0.85 |
11.0.0.17 |
11.0.0.0 RTM |
1011 |
Available on Passport Adv. (full installation) |
| 10.4.2200.222 |
10.4.2200.228 |
10.4.2200.79 |
10.4.2200.77 |
10.4.2.2 IF9 |
1010 |
|
If you have a demand for TLS 1.2 in your Windows environment or run old version of Windows, then you can get a error like below when you click “connect”.
** ERROR: com.microsoft.sqlserver.jdbc.SQLServerException: Drivrutinen kunde inte upprätta en säker anslutning till SQL Server med SSL-kryptering (Secure Sockets Layer). Fel: “Unexpected rethrowing”.
Can it be that SQL Server 2005 that uses 3DES algorithm in TLS connection and with new versions of JRE, this algorithm is disabled, Or the database is an older database (like SQL Server 2014) which does not allow higher security standards like TLS 1.2.
Then You need to start DBCONV program from a bat file with this settings (save it in a text file called DBCONV.BAT and run it) :
https://www.ibm.com/support/pages/how-configure-force-controller-use-tls-12


"C:\Program Files\IBM\cognos\ccr_64\bin\jre\8.0\bin\java.exe" -cp com.ibm.cognos.ccr.dbconv.ui.DbConvGUI"C:\Program Files\ibm\cognos\ccr_64\bin64\jre\8.0\bin\javaw.exe" -Dcom.ibm.jsse2.overrideDefaultTLS=true -Dcom.ibm.jsse2.overrideDefaultProtocol=TLSv12 -cp "C:\ProgramFiles\ibm\cognos\ccr_64\DbConv.jar";"C:\Program Files\ibm\cognos\ccr_64\server\integration\antlr-3.2.jar";"C:\Program Files\ibm\cognos\ccr_64\server\integration\ccr-common.jar";"C:\Program Files\ibm\cognos\ccr_64\server\integration\ccr-integration-server.jar";"C:\Program Files\ibm\cognos\ccr_64\server\integration\ccr-integration.jar";"C:\Program Files\ibm\cognos\ccr_64\server\integration\ccr-xml.jar";"C:\Program Files\ibm\cognos\ccr_64\server\integration\cglib-nodep-2.1_3.jar";"C:\Program Files\ibm\cognos\ccr_64\server\integration\commons-beanutils-1.8.3.jar";"C:\Program Files\ibm\cognos\ccr_64\server\integration\commons-beanutils-bean-collections-1.8.3.jar";"C:\Program Files\ibm\cognos\ccr_64\server\integration\commons-beanutils-core-1.8.3.jar";"C:\Program Files\ibm\cognos\ccr_64\server\integration\commons-cli-1.1.jar";"C:\Program Files\ibm\cognos\ccr_64\server\integration\commons-codec-1.8.jar";"C:\Program Files\ibm\cognos\ccr_64\server\integration\commons-collections-3.2.1.jar";"C:\Program Files\ibm\cognos\ccr_64\server\integration\commons-dbcp-1.2.2.jar";"C:\Program Files\ibm\cognos\ccr_64\server\integration\commons-io-2.4.jar";"C:\Program Files\ibm\cognos\ccr_64\server\integration\commons-lang-2.3.jar";"C:\Program Files\ibm\cognos\ccr_64\server\integration\commons-logging-1.1.1.jar";"C:\Program Files\ibm\cognos\ccr_64\server\integration\commons-pool-1.3.jar";"C:\Program Files\ibm\cognos\ccr_64\server\integration\db2jcc.jar";"C:\Program Files\ibm\cognos\ccr_64\server\integration\DBConv.jar";"C:\Program Files\ibm\cognos\ccr_64\server\integration\icu4j-4_8_1_1.jar";"C:\Program Files\ibm\cognos\ccr_64\server\integration\jsr173_1.0_api.jar";"C:\Program Files\ibm\cognos\ccr_64\server\integration\jython.jar";"C:\Program Files\ibm\cognos\ccr_64\server\integration\log4j-1.2.8.jar";"C:\Program Files\ibm\cognos\ccr_64\server\integration\ngtm1api.jar";"C:\Program Files\ibm\cognos\ccr_64\server\integration\ojdbc6.jar";"C:\Program Files\ibm\cognos\ccr_64\server\integration\resolver.jar";"C:\Program Files\ibm\cognos\ccr_64\server\integration\spring.jar";"C:\Program Files\ibm\cognos\ccr_64\server\integration\sqljdbc42.jar";"C:\Program Files\ibm\cognos\ccr_64\server\integration\stringtemplate-3.2.jar";"C:\Program Files\ibm\cognos\ccr_64\server\integration\xbean.jar";"C:\Program Files\ibm\cognos\ccr_64\server\integration\xbean_xpath.jar";"C:\Program Files\ibm\cognos\ccr_64\server\integration\xmlbeans-qname.jar";"C:\Program Files\ibm\cognos\ccr_64\server\integration\xmlpublic.jar" com.ibm.cognos.ccr.dbconv.ui.DbConvGUI
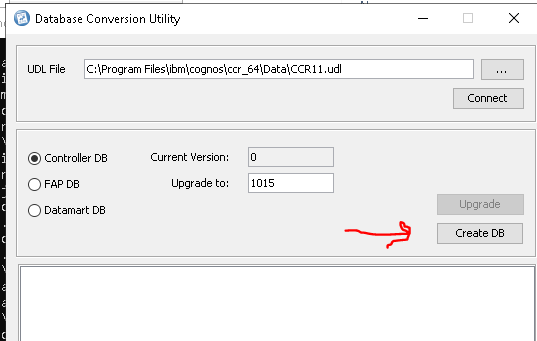
If this is a new empty database – you need to click Create DB (this will erase the database, and create a empty controller database).
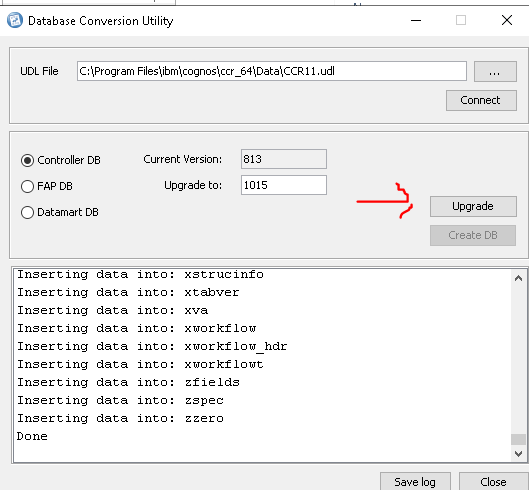
Then do a upgrade of the cognos controller database.
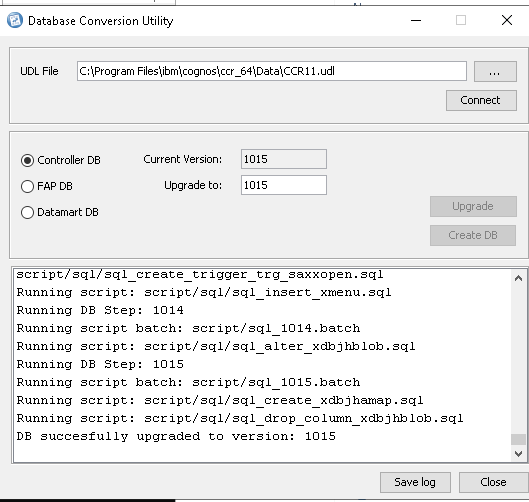
You should get to above picture without errors, if the upgrade of the cognos controller database was successful.
Click Close
Setup of IIS Manager:
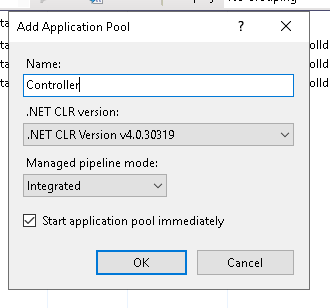
- In the Internet Information Services (IIS) Manager, select Application Pools.
- Create a new Controller application pool and then from the Actions pane, select Advanced Settings.
- Set the .Net CLR Version to v.4.0.
- Set Enable 32-Bit Applications to False.
- Set Identity to LocalSystem and time-out to 600.
- Click OK.

- If you do not have CA11 installed, you can point the ibmcognos virtual directory to a empty folder like webcontent.
- Expand Sites and under your web site, create the following virtual directories as shown in the table. If you are installing on the same machine as IBM Cognos Analytics, create the virtual directories under the ibmcognos virtual directory.
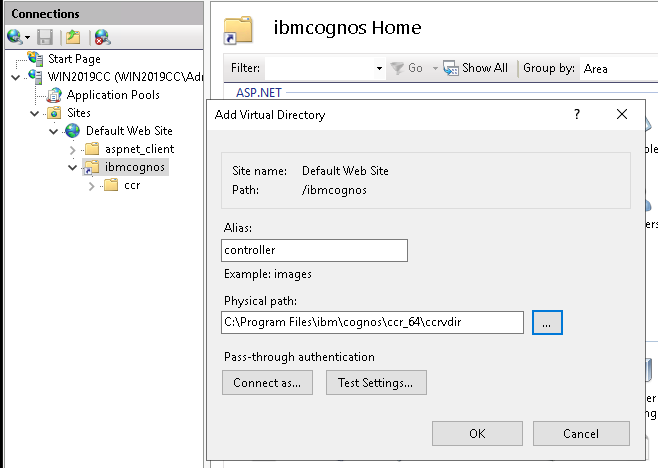
- Select the controller virtual directory.
- double click on HTTP redirect.
- Select Redirect Requests to this destination and enter the following path:
/controllerbin/app.publish/CCR.application
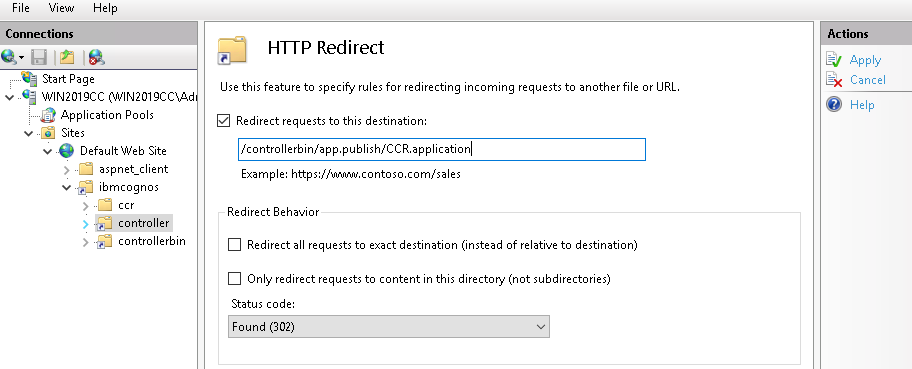
- Click Apply.
- Right-click your web site and click Add Application.
- Set Alias to ControllerServer.
- Set Application pool to Controller.
- In the PhysicalPath field, enter controller_install_location/ControllerProxyServer.
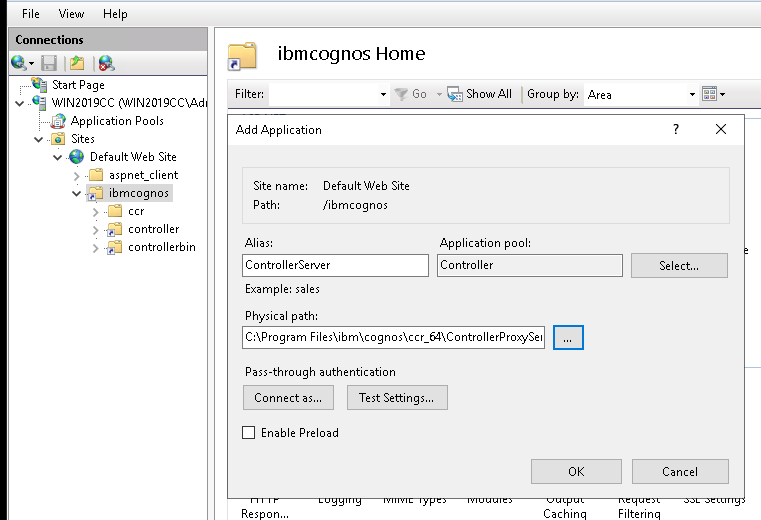
- Click OK.
- When you only use native login in Cognos Controller, keep the authentication in IIS to Anonymous Authentication.
On the Cognos Controller server Open C:\Program Files\IBM\cognos\ccr_64\ControllerProxyServer\Web.config and add
<add key="ccrReports" value="http://[servername]:9082/fcm.reports/report" />
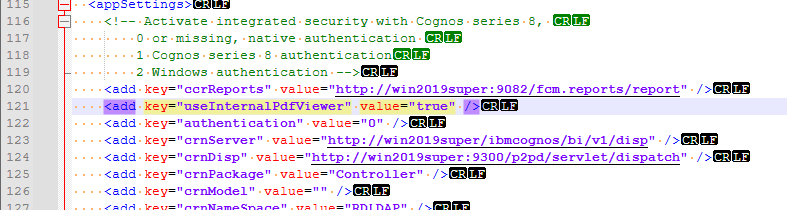
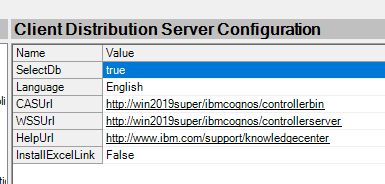
Ensure you use space and not tabs inside the config file. Change the localhost settings to the servername in cognos controller configuration, so the client program can find the cognos controller server.
Go to folder C:\Program Files\ibm\cognos\ccr_64\fcmweb\wlp\etc\
Open the file server.env inside notepad++
Add the following line:
JAVA_HOME=C:/Program Files/IBM/cognos/ccr_64/fcmweb/jre
Save the changes to the file.
Setup of Cognos Configuration:
Use FQDN server name instead of only the server name.
Above should you not change, it is configured from the report server settings.
Above you must fill out with the full server and domain name.
Start the batch service in Cognos Controller.
https://www.ibm.com/support/pages/summary-description-windows-services-ibm-cognos-controller-typically-found-controller-application-server
When you run a report in Cognos Controller 11 and get a error like:
HTTP Error 404.0 – Not Found
The resource you are looking for has been removed, had its name changed, or is temporarily unavailable.
The value in cognos controller configuration report server (http://localhost/ibmcognos/cgi-bin/cognos.cgi) is pointing to a not working website server. Try to change it to http://cognosanalyticsserver/ibmcognos/bi/v1/disp and ensure that all IIS functions are installed in the Web Server.
HTTP Error 405.0 – Method Not Allowed
The page you are looking for cannot be displayed because an invalid method (HTTP verb) is being used.
Then you maybe are pointing to a none existent CA11 server in cognos controller configuration report server section. Add the “ccrReports” value in web.config to solve it (this will use the Cognos Controller internal report server).
We can’t open this file
This can be that we are using a wrong database connection, try to connect to a other SQL version than 2016.
If you do not have a adobe pdf viewer installed on your laptop. Add the value <add key=”useInternalPdfViewer” value=”true” /> to the servers web.config file. Then cognos controller should use its internal pdfviewer.
You have to reboot the windows server, for the service FCMREPORTS to get any changes to the web.config file to take affect.
You get above error when you run a report in Cognos Controller, when the java is not correct point out in the server.env file for IBM Cognos Controller Reports.
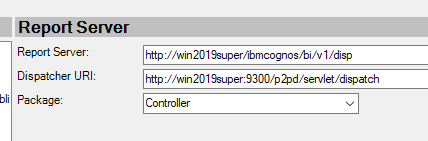
Setup of connection to Cognos Analytics:
If you use CA11 for authentication, then in cognos configuration enter the Report Server to http://CAservername.domain.com/ibmcognos/bi/v1/disp and Dispatcher URI to http://CAservername.domain.com:9300/p2pd/servlet/dispatch
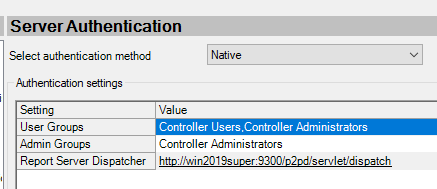
You need to create the roles Controller Administrators and Controller Users in CA11 if it is a new installation, then add the users that should use cognos controller to above roles. Follow IBM documentation for more exact steps.
And The Controller Administrators role must be a member of the Controller Users role in Cognos Analytics.
Setup of the Cognos Controller Client:
To install the cognos controller client copy the file ccrlocalclient64.msi to a local folder (c:\install) from C:\Program Files\ibm\cognos\ccr_64\webcontent\ccr folder on the the windows server.
Create a setupccr.bat file with this content:
msiexec.exe /qb /i CCRLocalClient64.msi WSSURL=”http://controllerservername.domain.com/ibmcognos/controllerserver”
Run the bat file as administrator to install the cognos controller client silent.
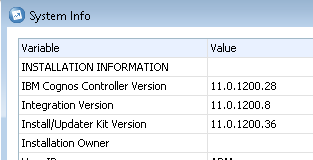
After you login to Cognos Controller client, you can check the version in help menu – system info.
If you get a error like WebView is missing, then you must install WebView on the client from https://developer.microsoft.com/en-us/microsoft-edge/webview2/?form=MA13LH#download to get the Help menu to work properly inside cognos controller client.
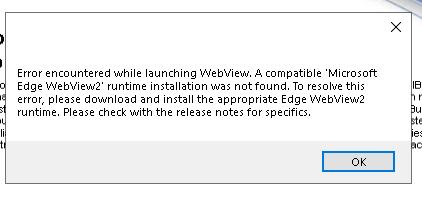
Under Evergreen Standalone Installer, click the x64 download button.
Download and run the installer file MicrosoftEdgeWebView2RuntimeInstallerX64.exe
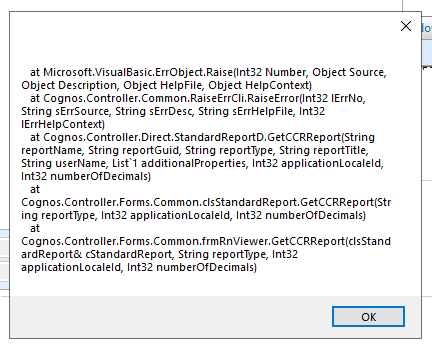
If you when you test menu – maintain – jobs – define, get a error like this:
com.ibm.cognos.ccr.integration.IntegrationFacadeException: org.eclipse.core.runtime.adaptor.EclipseStarter failed!
at com.ibm.cognos.ccr.integration.IntegrationServiceAdapter$MyEclipseStarter.run(IntegrationServiceAdapter.java:168)
at java.lang.Thread.run(Thread.java:825)
Caused by: com.ibm.cognos.ccr.common.FatalException: Failed to launch!
at com.ibm.cognos.ccr.integration.application.internal.IntegrationApplication.start(Unknown Source)
at org.eclipse.equinox.internal.app.EclipseAppHandle.run(EclipseAppHandle.java:196)
at org.eclipse.core.runtime.internal.adaptor.EclipseAppLauncher.runApplication(EclipseAppLauncher.java:134)
at org.eclipse.core.runtime.internal.adaptor.EclipseAppLauncher.start(EclipseAppLauncher.java:104)
at org.eclipse.core.runtime.adaptor.EclipseStarter.run(EclipseStarter.java:388)
at com.ibm.cognos.ccr.integration.IntegrationServiceAdapter$MyEclipseStarter.run(IntegrationServiceAdapter.java:166)
… 1 more
Caused by: com.ibm.cognos.ccr.common.NoSuchModelException: Unable to find instance of model of type: configproperty[ConfigPropertyModel]
Check if it works better if you use a newer SQL server version, that can communication with the TLS security that the java parts need.
You can try to setup all this:
https://www.ibm.com/support/pages/how-configure-force-controller-use-tls-12
To setup Controller FAP, there are a few new steps, that is outlined here that you must follow:
https://www.ibm.com/docs/en/cognos-controller/11.0.1?topic=administration-fap-web-configuration
More Information:
https://www.ibm.com/docs/en/cognos-controller/11.0.1?topic=icclo-installing-configuring-cognos-controller-one-computer
https://www.ibm.com/support/pages/which-sql-collations-are-supported-controller
https://www.ibm.com/support/pages/how-enable-local-pdf-rendering-when-running-standard-reports-enabling-pdfviewer-using-parameter-useinternalpdfviewer
https://simonlearningsqlserver.wordpress.com/tag/changetable/
https://www.ibm.com/support/pages/server-not-reachable-or-still-initializing-faulting-application-path-cprogram-filesibmcognosccr64frontendprunsrvexe-launching-controller-web-caused-corrupt-configjs-file
https://github.com/microsoft/mssql-jdbc/releases/tag/v10.2.0
https://www.ibm.com/support/pages/how-configure-force-controller-use-tls-12
https://www.ibm.com/support/pages/how-install-deploy-controller-client-silently-without-user-input
