Product:
Cognos Controller 10.4
Microsoft Windows 2016
Oracle database 12c

Problem:
Get a error message when open Command Center dialog inside Cognos Controller client , in a new installation.

Error Messages examples:
Caused by: com.ibm.cognos.ccr.common.NoSuchModelException: Unable to find instance of model of type: configproperty[ConfigPropertyModel]…….
Caused by: com.ibm.cognos.ccr.common.WebServiceConnectionException: exceptionId=ERR.ANY.WEBSERVICECONNECTIONEXCEPTION.SERVICE_FAILED, …..
Caused by: com.ibm.cognos.ccr.common.ResponseException: FAIL:com.ibm.cognos.ccr.common.SQLRollbackException: Failed to rollback transaction….

Solutions to check:

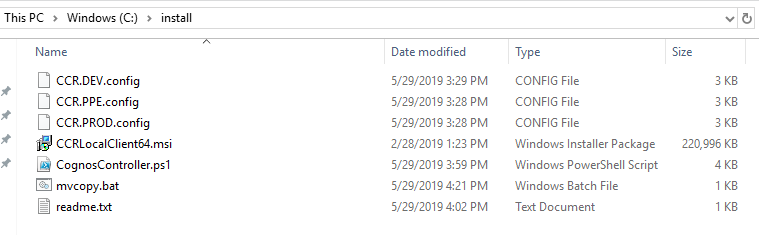
Workaround is to use OJDBC5.JAR file in this locations on the Controller server:
c:\Program Files\ibm\cognos\ccr_64
c:\Program Files\ibm\cognos\ccr_64\server\integration
c:\Program Files\ibm\cognos\ccr_64\server\FAP\lib
Even do CA11 can work with OJDBC7.JAR file, it may not be that Cognos Controller can it.

Check that file ccr-system-properties.properties and ccr-dbTypes.properties
in folder c:\Program Files\ibm\cognos\ccr_64\server\integration
are updated with Oracle information.
https://www-01.ibm.com/support/docview.wss?uid=swg21995182
https://www.ibm.com/support/knowledgecenter/en/SS9S6B_10.3.1/com.ibm.swg.ba.cognos.ctrl_inst.10.3.1.doc/t_usealternatejdbcdriver.html

https://www-01.ibm.com/support/docview.wss?uid=swg22006798

Setup a TNS_ADMIN windows system variable to point to the TNSNAMES.ORA file
https://www-01.ibm.com/support/docview.wss?uid=swg21882992

Oracle driver OJDBC7.JAR file, will work for Cognos Controller, if you do not edit the ccr-dbTypes.properties file – leave it as default.

https://www-01.ibm.com/support/docview.wss?uid=swg22006798

Product:
Cognos Controller 10.4
Microsoft Windows 2016

Problem:
How create one silent install package, that can install to different environments. If the install script run in DEV it should point to the DEV controllerserver (e.g. by updating the ccr.exe.config file), same script should work for PROD.

Suggested Solution:
In case your terminal servers host name point out if it is DEV or PROD, like this;
DEV servers have TT in there servername like TT2345.
PROD servers have SRV in there servername like SRV2345, and PPE have PP in the servername.
Then you can create 3 uniq ccr.exe.config files, with a predefined line for each environment;
<add key=”WSSUrl” value=”http://DEVSERVER.COMPANY.COM/ibmcognos/controllerserver”/>


Place all files in the same folder on the server. 3 files of ccr.exe.config, with the middle part replaced with the environment tag. The client ccrlocalclient64.msi file and a BAT file with below code;
REM=================replace italic with your values=========
cd /D %~dp0
msiexec /qb /i CCRLocalClient64.Msi IBM_COGNOS_CONTROLLER=”C:\Program Files\IBM\IBM Cognos Controller Local Client” WSSURL=http://controllerserver.company.com/ibmcognos/controllerserver HELPURL=http://webserver.company.com/ibmcognos/documentation/en/welcome.html

@setlocal enableextensions enabledelayedexpansion
@echo off
set COGNOSVAL=NULL
call :CheckEnv %COMPUTERNAME%
call :CopyFile

Goto ScriptEND

:CheckEnv
echo %1
set str1=%1
if not x%str1:tt=%==x%str1% set COGNOSVAL=DEV
if not x%str1:pp=%==x%str1% set COGNOSVAL=PPE
if not x%str1:srv=%==x%str1% set COGNOSVAL=PROD
Goto END

:CopyFile
copy /Y ccr.%COGNOSVAL%.config “C:\Program Files\IBM\IBM Cognos Controller Local Client\CCR.exe.config”
copy /Y CognosController.ps1 “C:\ProgramData\Microsoft\Windows\Start Menu\Programs\StartUp\CognosController.ps1”
Goto END

:ScriptEND
endlocal
:END
REM=====================end of code==============

We also copy a ps1 file to the startup folder of Windows 2016.
The powershell cognoscontroller.ps1 file is run when a user logon to the terminal server, in that ps1 script you can have code to set that excel can open XLT files, and other things.

Update the BAT file with the your prod servers WSSURL and HELPURL, if the servername does not match Controller client is installed with this values.

Above show the line to update in the ccr.exe.config file.
The content of this file is copied to the users windows profile C:\Users\username\AppData\Roaming\Cognos\ccr\ccr.config, when they start Cognos Controller Client for the first time.
To make above work, the Terminal Servers should not use a roaming profile.
Run the BAT file to install Cognos Controller, and it will copy the correct ccr.exe.config file to your program files folder.

More Information:
https://docs.microsoft.com/en-us/windows-server/storage/folder-redirection/deploy-roaming-user-profiles
https://ss64.com/ps/push-location.html
https://www.tachytelic.net/2017/10/find-startup-folder-windows-server-2012-windows-server-2016/

https://www-01.ibm.com/support/docview.wss?uid=swg21640592

https://www-01.ibm.com/support/docview.wss?uid=swg21967963

https://allthingscognos.wordpress.com/category/cognos-controller/

Product:
Cognos Controller 10.3.1
Microsoft Windows 2012 R2 (Windows NT 6.2)

Issue:
What are the recommended settings for IIS Application Pools?

Recommendation:
For cognos controller and ICAPool that are used with Cognos Controller, recommended timeout is 600 minutes.
Login to the Cognos Controller Server.
Open Internet Information Services (IIS) Manager
Click on Applications Pools
Click on NET v4.5 or the one created for Controller.

Change Idle Time-Out (minutes) to 600.
Click OK.
Do the same for the other Applications Pool used by Cognos.

Cognos Controller Applications Pool should use the local system account.

Set the Cognos BI timeout value to same, open Cognos Configuration, and go to Security – Authentication, and change to 36000 seconds.

Save and restart your Cognos services in correct order. Cognos Content Manager service first.

Then you should change recycling of Application Pool for Cognos Controller to be at a defined time, and not after 29 hours.

Change this to it to be recycled at 1 AM at night, like below.

Also ensure that the logging of the recycling is active, this is not default in Windows 2012, see below to have it active.

More Information:
https://www-01.ibm.com/support/docview.wss?uid=swg21969315
https://www-01.ibm.com/support/docview.wss?uid=swg21990348

https://www-01.ibm.com/support/docview.wss?uid=swg21643735

https://www-01.ibm.com/support/docview.wss?uid=swg21692450

Product:
Planning Analytics 2.0.5
Microsoft Windows server 2016

Problem:
When open the tm1server.log file, the time is 2 hour off the local time or so. This is because default all tm1 logging is done in GMT time.

Solution:
Create a tm1s-log.properties file with below content and place it in same folder as your tm1s.cfg file.

#
# Enable INFO level logging through the shared memory appender, by default. The server # will write informational messages, as well as errors and warnings to the log file.
#

log4j.logger.TM1=INFO, S1

# S1 is set to be a SharedMemoryAppender
log4j.appender.S1=org.apache.log4j.SharedMemoryAppender
# Specify the size of the shared memory segment
log4j.appender.S1.MemorySize=5 MB
# Specify the max filesize
log4j.appender.S1.MaxFileSize=100 MB
# Specify the max backup index
log4j.appender.S1.MaxBackupIndex=20
# Specify GMT or Local timezone
log4j.appender.S1.TimeZone=Local
# adds info about process locks to the tm1 server log file
Log4j.logger.TM1.Lock.Exception=DEBUG

More Information:

https://www-01.ibm.com/support/docview.wss?uid=swg22003062

http://www.tquate.com/blog/configuring-and-enabling-logging-tm1/
https://exploringtm1.com/changing-tm1-server-log-time-zone-stamp/
https://www-01.ibm.com/support/docview.wss?uid=swg21459102

Product:
Planning Analytics 2.0.5
Microsoft Windows 2016 Server

Problem:
How move NTFS and File Share security to a new server? We have shared a MANUALINPUT folder on the TM1 server, where selected users can update text files with data. This csv file are read into the TM1 application with use of a TI process. Now we setup a bigger Windows server and want to move over the windows security setup.

Suggested solution:
Test this steps in a test server first, to ensure they work in your environment.

You have created the folder d:\tm1app\manualinput
Login on your old TM1 server and open a command prompt as administrator.
Enter this command to save the security:
icacls d:\tm1app\manualinput /save ntfspermissions.txt /c
Copy the txt file over to the new PAL server
Enter this to restore the security:
icacls d:\tm1app /restore ntfspermissions.txt /c

/t parameter to icacls will include all subfolders in the security file.

The user that have access to the file share is stored in the registry, so on your old TM1 server you need to open REGEDIT.


Expand Regedit to the following location:
HKLM\SYSTEM\CurrentControlSet\Services\LanmanServer\Shares
Right-click the Shares registry key and select Export. Enter a file name like sharepermissions.reg.
Copy the reg file to the new PAL server.
Open the reg file in notepad, to ensure you only got the SHARES you want to be there.
If there are extra shares you do not want on the new server, erase this lines and save the file.

Open Regedit and go to HKLM\SYSTEM\CurrentControlSet\Services\LanmanServer\Shares
Right-click the Shares registry key and select Export. Enter a file name like backuppermissions.reg. This to have a backup of the settings in registry before you apply the new values.
Double click on the reg file from the other server, to import the values.


After the file is imported, you have to reboot the windows server to make the change take affect.

Note that the servers need to be in the same domain, for this to work, so the users are the same in both servers.

More information:
https://www.itechtics.com/backup-restore-ntfs-permissions/
http://woshub.com/how-to-backup-and-restore-ntfs-permissions-using-icacls/