Product:

Cognos Analytics 11.2.4

Issue:

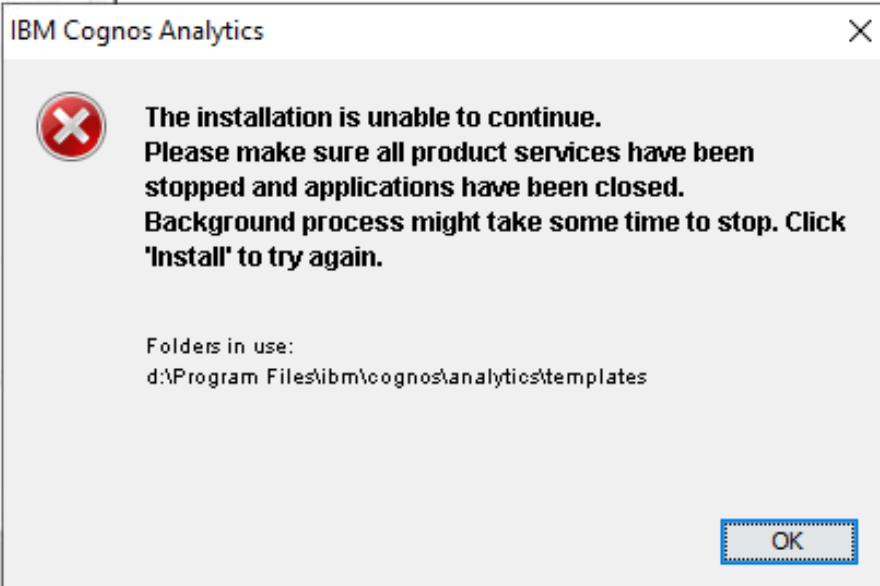
Can not install CA11 as there are file in use.

Solution:

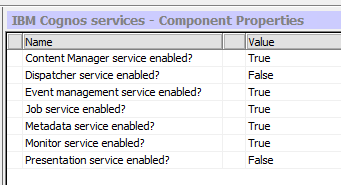
Stop the ibm cognos service and set it to manual in windows services manager.

Stop the IIS ( World Wide Web Publishing Service ) and set it (W3SVC) to manual.

Reboot the Windows server, to clear the memory.

Login as administrator again.

Go to the folder where you have the CA11 media.

Now start the installation from; a file like analytics-installer-3.7.21-win.exe

https://www.ibm.com/support/pages/ibm-cognos-analytics-1124-fix-pack-2 

Ensure that you have backed up the content store database, and saved the cognos configuration as a text file, before you start the upgrade of Cognos Analytics.

If the setup fail during installation, you may have files to restore in folder C:\Program Files\ibm\cognos\analytics\install_backup

More Information:

https://www.ibm.com/support/pages/how-upgrade-your-version-cognos-analytics

https://docs.oracle.com/en/industries/health-sciences/inform/cognos1124-install/index.html?toc.htm?227090.htm

https://docs.oracle.com/en/industries/life-sciences/inform/cognos1124fp2-install/index.html?toc.htm?227238.htm

The IBM Cognos Analytics installation consists of two components: the installer executable and a repository zip file.

  1. Download the ca_instl_win_3.6.39.exe and ca_srv_win64_11.2.4.zip files from My Oracle Support (MOS) in Patch 23294044.
  2. Right click on ca_instl_win_3.6.39.exe, and select Run as administrator.
  3. Select the language to use for the installation, and click Next.

    The Repository selection page appears.

  4. Click Choose, browse to the server repository where the ca_srv_win64_11.2.4.zip file is located, click Open, and then click Next.

    The install getting started page appears.

  5. Select IBM Cognos Analytics, and click Next.
  6. Review and accept the license agreement, and click Next.
  7. In the Installation location field, browse to or type the drive and destination folder for the Cognos Analytics application (for example E:\cognos\c11), and click Next.

    If the Folder does not exist message appears, click Yes to create the folder.

  8. Select the appropriate installation type and components depending on your server configuration, and click Next. Do not select the Optional Gateway component.

    Server Configuration

    To install…

    Installation type

    Choose components

    Single server

    Content Manager and Report Server

    Custom

    Content Tier (mandatory)

    Application Tier

    Active Content Manager

    Custom

    Content Tier (mandatory)

    Application Tier

    Distributed environment

    Standby Content Manager

    Custom

    Content Tier (mandatory)

    Application Tier (mandatory)

    Report Server

    Custom

    Application Tier (mandatory)

  9. Review the pre-installation summary, and click Install.

    The installation program installs the components that you selected. This takes several minutes. When the component installation is complete, the Complete page appears.

  10. Click Done.
  11. On the Complete page, click Done.
  12. Open the cmplst.txt file in the Cognos installation directory.
  13. Look for the line Manifest=casrv-manifest-11.2.4-2212070924-winx64h.json to confirm that Cognos Analytics 11.2.4 is installed successfully.


Upgrade to IBM Cognos Analytics 11.2.4 FP2

Install IBM Cognos Analytics 11.2.4 FP2 software on all the applicable servers:

  1. Download the analytics-installer-3.7.12-win.exe and casrv-11.2.4-2307061628-winx64h.zip files from My Oracle Support (MOS) in patch 23294044.
  2. Stop all IBMCOGNOS and IIS services, set them to manual.
  3. Reboot the Windows server to clear the memory before starting the installation.
  4. Right click on analytics-installer-3.7.12-win.exe, and select Run as administrator.
  5. Select the language to use for the installation, and click Next.

    The Repository selection page appears.

  6. Click Choose, browse to the server repository where the casrv-11.2.4-2307061628-winx64h.zip file is located, click Open, and then click Next.

    The install getting started page appears.

  7. Select IBM Cognos Analytics, and click Next.
  8. Review and accept the license agreement, and click Next.
  9. In the Installation location field, browse to or type the drive and destination folder for the Cognos Analytics application (for example E:\cognos\c11), and click Next.

    A warning appears informing you that you are installing in the same location as a previous location and that files will be overwritten.

  10. Click Yes to agree to choose this location.
  11. Review the pre-installation summary, and click Install.

    A warning appears informing you about failure in pre-action installation step. Click OK to continue.

  12. Click Done.
  13. On the Complete page, click Done.
  14. Open the cmplst.txt file in the Cognos installation directory.
  15. Look for the line casrv-manifest-11.2.4-2307061628-winx64h.json to confirm that Cognos Analytics 11.2.4 FP2 is installed successfully.
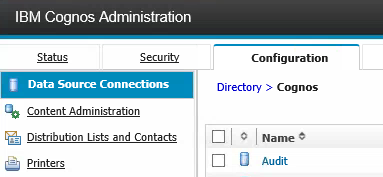
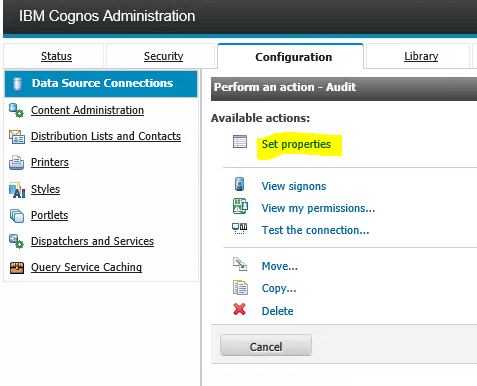
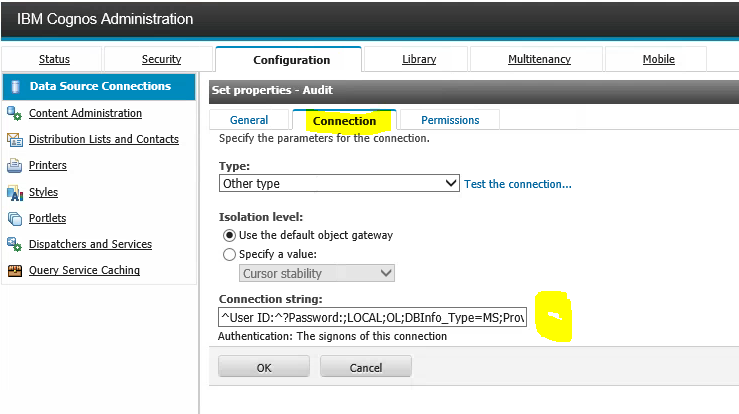
  16. Go into Cognos Configuration – check that the environment values are correct – click save.
  17. Change the IBMCOGNOS service to automatic, the same for the WWW service.
  18. Reboot the Windows server.
  19. Wait 20 minutes.
  20. Check that you can login to Cognos Analytics.


Problems solved can be found in the Fix List for Cognos Analytics 11.2.4 FP2

Entitled Bundled Customers use this link Cognos Analytics 11.2.4 FP2 to get access to download Cognos Analytics Fix Pack 2.

Product:

Cognos Analytics 11.1.7

Microsoft SQL server 2019

Issue:

Try to connect to content store database from CA11 installation, in Cognos Configuration give you a error message.

Solution:

Error message:

Content Manager failed to connect to the content store. The connection string is “jdbc:sqlserver://192.168.1.77:1433;databaseName=ca11update;applicationName=IBM_C11_CM”. The error encountered is: “Login failed for user ‘cognos’. ClientConnectionId:

Then you have enter the wrong password.

Error message:

Content Manager failed to connect to the content store. The connection string is “jdbc:sqlserver://192.168.1.77:1433;databaseName=ca11update;applicationName=IBM_C11_CM”. The error encountered is: “Cannot open database “ca11update” requested by the login. The login failed. ClientConnectionId

Then you have enter the wrong name of the database.


More information:

https://www.ibm.com/support/pages/content-manager-failed-start-because-it-could-not-load-driver-commicrosoftsqlserverjdbcsqlserverdriver-when-starting-ibm-cognos-service

https://community.flexera.com/t5/FlexNet-Manager-Knowledge-Base/Analytics-Cognos-connection-to-SQL-server-fails-when-server-is/ta-p/113351

https://www.ibm.com/support/pages/cm-sys-5003-content-manager-not-configured-listen-tcpip-when-starting-cognos-bi-service

Product:
Cognos Analytics 11.1.7
Microsoft Windows 2019

Problem:

User can not login to CA11, they get a blank page or spinning icon.

Possible Solution:

Ensure the user URL they enter in the web browser end with / and not only /bi

Valid URL for Cognos:

http://servername.domain.com/ibmcognos/bi/

http://servername.domain.com/ibmcognos/bi/v1/disp/

NOT valid URL:

http://servername.domain.com/ibmcognos/bi

The last word in the URL is considered a file, that need to exist, in that folder (D:\Program Files\ibm\cognos\analytics\webcontent) – if the URL does not end with /.


Clear the cache in the users web browser or try a different web browser like chrome.

If it does not help, check the cognos server log file for more information: D:\Program Files\ibm\cognos\analytics\logs\cognosserver.log

More Information:

https://www.ibm.com/support/pages/how-set-sample-custom-login-page-ca-112x 

https://www.ibm.com/docs/en/cognos-analytics/11.1.0?topic=settings-defining-authentication-parameters-login-urls 

https://pmsquare.com/analytics-blog/2023/6/13/the-ultimate-guide-to-cognos

https://www.ibm.com/docs/en/cognos-analytics/11.1.0?topic=gateway-configure-cognos-analytics-your-web-server

https://www.ibm.com/support/pages/blank-screen-when-logging-https-enabled-cognos-analytics-1117-environment

https://www.ibm.com/docs/en/cognos-analytics/11.1.0?topic=services-configuring-iis-in-cognos-analytics

Product:

Cognos Analytics 11

Issue:

During installation of a fix pack on top of a existing installation of CA11 you get a error.

Solution:

Close all instance of file explorer – if you have a window open of the folder where you are going to install Cognos product, you will get a error like this.

You also need write access to the drive where you read the installation media from.

More Information:

https://www.ibm.com/support/pages/how-upgrade-your-version-cognos-analytics

https://www.ibm.com/docs/en/SSEP7J_11.1.0/com.ibm.swg.ba.cognos.inst_cr_winux.doc/inst_cr_winux.pdf

Product:
Cognos Analytics 11.1.7 if9
kit_version=11.1.7-2204120500
Manifest=casrv-manifest-11.1.7-2204120500-winx64h.json
Microsoft Windows 2016 Server

Issue:
You have downloaded the interim fix of CA11 and put it on a file share to install from.

The user you install with have only READ-ONLY access to the file share shared folder.

When run the installation you get strange errors, like:

The installation is unable to continue. Please make sure all product services have been stopped and applications have been closed.

Solution:

Ensure the user that you install with have full rights to the windows share where the cognos media files are.

Connect to \\servername\d$ if needed, to get the correct rights.

The installation program need write access to the folder where the media is stored.

More Information:

https://www.ibm.com/support/pages/node/6525664

https://www.ibm.com/support/pages/ibm-cognos-analytics-1117-fix-pack-4

https://www.ibm.com/support/pages/ibm-cognos-analytics-11x-fix-lists

https://www.ibm.com/support/pages/how-upgrade-your-version-cognos-analytics

Product:
Cognos Analytics 11.1.7
Microsoft Windows 2019 server

Issue:

I have installed all of cognos on the windows server, but only want it to act as Content Manager, in a multi server setup. What service should be running?

Solution:

Go into Cognos Configuration on your CM server.

Set all to False, except this services:

Content Manager service enabled?
Event management service enabled?
Job service enabled?
Metadata service enabled?
Monitor service enabled?

Save the configuration and restart all your CA11 servers.

More information:

https://www.ibm.com/docs/en/cognos-analytics/11.2.0?topic=architecture-cognos-analytics-services

Schedule jobs in CA11 is handled by the Monitor service.

Product:

Cognos Analytics 11.1.7
Microsoft Windows 2016 server

Issue:
When try to change a old data source, in Cognos Analytics, the icon to change setting is missing.

Go to IBM Cognos Administration from the Manage menu by click on Administration console.
Click on Configuration tab.
Select the data source connection you want to change. For example Audit.

Then click on the more link for that data source.

Now click on Set Properties.

Click on the connections tab.

Here is now the pencil icon missing. This can be because the data source type is Other.

Solution:

Then you need to edit the data source direct in the string field.
Here you can change to other database server.

^User ID:^?Password:;LOCAL;OL;DBInfo_Type=MS;Provider=SQLOLEDB;User ID=%s;Password=%s;Data Source=SeRvErNaMe;Provider_String=Initial Catalog=AUDIT_PRD;@COLSEQ=

After you changed the Data Source value to your database server, click on OK.
This can be because the new version of CA11 does not support SQLOLEDB anymore.

Click on the link to test the data source again.

Click TEST button.

You should get a “Succeeded” Status if it works right.

More Information:

https://www.ibm.com/docs/en/cognos-analytics/11.1.0?topic=rt-data-servers-no-longer-supported-in-cognos-analytics

https://www.ibm.com/support/pages/equivalent-oledb-cognos-analytics

Product:
Cognos Analytics 11.1.7
Microsoft Windows 2019 Server

Issue:
After change to use HTTPS in Cognos Configuration, you get a error when you save.

[Populate authentication settings] [ WARNING ] Failed to populate the authentication settings to server

Solution:
When change values in Cognos Configuration that have with certificates, you need to first stop the “IBM Cognos” windows service.
Then you can save the configuration without warnings.


More Information:

To active Cognos internal certificate, you need to inside Cognos Configuration on your Content Manager server change HTTP to HTTPS under environment – group properties.
Check that server FQDN is at Cognos – Cryptography ;DNS names and Server common name.
Save will create the certificate files.

Start CMD, and move to folder C:\Program Files\ibm\cognos\analytics\bin
Run this to export the Cognos certificate
ThirdPartyCertificateTool.bat -E -T -p NoPassWordSet -r ca.cer

Start MMC on your Windows server where Cognos Gateway is installed, and certificates and go to “Trusted Root Certification Authority”. Right click to Import certs.
Select the ca.cer file and import it.

Inside IIS manager, go to \ibmcognos\bi folder and click on URL Rewrite icon.
Click on Reverse proxy Rules to edit.
At action properties – Rewrite URL: change the http to https

https://servername.domain.com:9300/bi/{R:0}
Click apply in the right corner.
Exit IIS manager.

On PA server open Command Prompt as an Administrator and navigate to the \bin64\ directory.

Execute the following command to import/trust the certificate for Tm1 admin:
gsk8capicmd_64 -cert -add -db “C:\Program Files\ibm\cognos\tm1_64\bin64\ssl\ibmtm1.kdb” -stashed -label caRoot -file “C:\Program Files\ibm\cognos\tm1_64\bin64\ssl\ca.cer” -format ascii -trust enable

Go to \bin64\jre\bin\ to import it to PMPSVC java keystore.
keytool.exe -import -trustcacerts -file “C:\Program
Files\ibm\cognos\tm1_64\bin64\ssl\ca.cer” -keystore “C:\Program
Files\ibm\cognos\tm1_64\bin64\ssl\tm1store” -alias caRoot -storepass applix

You need also to add the ca.cer file to the correct keystore for TM1WEB.


https://www.ibm.com/support/pages/node/879929

Configure Planning Analytics 2.0 TM1 Server with SSL Cognos BI Dispatcher (ibm.com)

How to Configure Planning Analytics to Connect to an SSL Secured Cognos Dispatcher (ibm.com)

Configuring TM1 Server to trust the SSL certificate on CA Side (ibm.com)

https://www.ibm.com/support/pages/configuring-ibm-cognos-analyticsbi-https-enabled-web-server

https://www.ibm.com/docs/en/cognos-analytics/11.0.0?topic=components-configuring-ssl-cognos

Product:
Cognos Analytics 11.1.7
Microsoft Windows 2019 Server

Problem:
The selection of non-production environment is missing from the installation of CA11, why?

Solution:
New Cognos BI version have that you set the production or non-production from inside the Cognos Connection portal.

After you have done the installation, go into the production environment – go to Manage – Licenses and select Production. Click Apply.

This will make the files in folder C:\Program Files\ibm\cognos\analytics\iso-swid to change names.

You have both a production and non-production file here, CA11 will switch the ending .sample to the file that is not used. It will also keep the file date, so you will not easy notice the switch.

The content of the file does not change, only a smart switch of the file name ending. The ILMT program will pick up this file to report on what type of installation you have.


More information:

https://www.ibm.com/support/knowledgecenter/SSEP7J_11.1.0/com.ibm.swg.ba.cognos.ag_manage.doc/c_license_roles.html

What to know before IBM Audits Your IBM Cognos Analytics and Planning Analytics Licenses.

https://www-03.ibm.com/software/sla/sladb.nsf

https://www.softwareone.com/en/blog/all-articles/2020/10/20/ibm-licensing-understanding-the-basics

https://www.middlecon.se/var-nya-ilmt-expert-christer-borg/

Product:
Cognos Analytics 11.1.7
Microsoft Windows 2019 server

Problem:

Error in cognosserver.log file on a new installation.

2021-01-28T09:31:51.384+0100 ERROR Audit.RTUsage.cms.CAM.AAA.SRVC [Thread-51] qjl2C9lhh82hwvqyyvM4MyGG2lldydCyGw49dw4l 0 NA 192.168.1.28 9300 8C38E8DDD4011089DE605BFA04DA4A10EEBABF5DFCA9E0C4BAF46FADC73864A4 qjl2C9lhh82hwvqyyvM4MyGG2lldydCyGw49dw4l_0_ AAA 5964 Logon <parameters><item name=”namespace”><![CDATA[AD]]></item><item name=”username”><![CDATA[admin]]></item><item name=”display name”><![CDATA[admin]]></item><item name=”CAMID”><![CDATA[CAMID(“AD:u:8791a873dc836d499a0fc7f6000540d2″)]]></item><item name=”REMOTE_ADDR”><![CDATA[::1]]></item><item name=”TENANTID”><![CDATA[]]></item></parameters> Success Account /directory/AD/account/admin

Solution:

This is normally not a error, only the basic logging that a user have logged in to the CA11 (ibmcognos) portal. Best would be not to flag it as ERROR, more like INFO.

Only happens when you have BASIC logging activated in Administration.


More information:

https://www.ibm.com/support/pages/apar/PH12785

https://www.ibm.com/support/pages/how-trace-authentication-issues-cognos-bi-cam-trace-aaa-trace

Log files are found in folder C:\Program Files\ibm\cognos\analytics\logs