Product:
Cognos Controller 10.3
Microsoft Windows 2012 R2 server

Problem:
One user does not get the Cognos Controller menu to work inside Microsoft Excel 365.
When user try to add the COM add in there is a error like COM import fail.

Solution:
Close Excel and Close Cognos Controller Client.
Enter REGEDIT on run command on start menu on users laptop.
Inside [HKEY_CURRENT_USER\Software\Microsoft\Office\Excel]
Right click on Excel branch and select export

Save the file as regbackup.reg in a location you can find (d:\temp)
The delete the rows below addins, that is for Cognos Controller.
[HKEY_CURRENT_USER\Software\Microsoft\Office\Excel\Addins]

Start Cognos Controller client on your laptop and login in.
Click on the icon for excel inside Cognos Controller client.
This should start the Excel program locally, and also install the Controller link to excel again. This take time, as the start of Excel is slow. When excel is fully started, check that the controller menu work.

More information
https://www.ibm.com/support/pages/controller-excel-link-microsoft-excel-addin-was-disabled-when-opening-data-entry-form
https://www.ibm.com/support/pages/troubleshooting-failed-register-excellink-addin-add-method-addins-class-failed-error-when-using-excel-link
https://www.ibm.com/support/pages/troubleshooting-controller-excel-link-com-add-disappears-each-time-excel-closed-relaunched

Product:
Cognos Controller 10.4.2
Microsoft SQL 2019 database

Problem:
When from inside Microsoft SQL Management Studio do a restore on top of a existing database (ControllerTest) from a backup of a other database (ControllerProd) you get an error.

Restore of database “ControllerTest” failed.
Additional information:
System.Data.SQLClient.SQLError: Exclusive access could not be obtained because the database is in use.

Solution:
On the Cognos Controller server, stop the IBM Cognos Controller Batch Service. When that is stopped, then normally there should not be any sessions from the Cognos Controller server to the Database server – as long there is no person inside Cognos Controller Client working.

More information:
https://www.ibm.com/support/pages/how-backup-and-restore-db2-databases-use-cognos-controller
https://www.ibm.com/support/pages/how-migrate-upgrade-upsize-existing-database-new-later-version-controller

To check if there are missing SQL logins inside the restored controller database run below command from Query window in Microsoft SQL Management studio for that particular database.
EXEC sp_change_users_login ‘Report’;

If the SQL login for controller is listed, run below command to connect it.
EXEC sp_change_users_login ‘Auto_Fix’, ‘cognos’;

http://dbadiaries.com/using-sp_change_users_login-to-fix-sql-server-orphaned-users

Product:
Cognos Controller 10.4.2
Microsoft Windows 2016 server
Microsoft SQL 2019 database

Problem:
When try to connect to the database with the DBCONV tool you get a error. The data connection test inside Controller Configuration worked fine.
ERROR: com.microsoft.sqlserver.jdbc.SQLServerException:
Login failed for user ‘cognos’.
ClientConnectionId:ca120094-…

Solution:
The SQL login has a period in the password. Please use only Letters and numbers in the password used for Cognos Controller.

Go into Microsoft SQL Management studio.
Select the SQL login used for the controller database.
Change the password to a simpler one.
Update the password in Controller Configuration.
Test and save again.
Click on the icon to convert the database.
Click on connect.
Click on upgrade.

More information:
https://www.ibm.com/support/pages/how-migrate-upgrade-upsize-existing-database-new-later-version-controller

Product:
Cognos Analytics 11.1.7
Microsoft Windows 2019 server

Problem:
Error when using Event Studio in a multi server installation of CA 11.1.7 .

Error:
CAM-CRP-1655 Member coordination host in Configuration Group is not configured properly

Solution:
Ensure that Server Common Name is the FQDN of the server and not the word CAMUSER, as it was in old version of Cognos.

From Cognos Analytics 11.1.7 you must use Fully Qualified Domain Names for the following Cognos Configuration fields, even when you do not use SSL.

Environment
Gateway URI
External dispatcher URI
Internal dispatcher URI
Dispatcher URI for external applications
Content Manager URIs
Environment > Configuration Group
Group contact host
Member coordination host
Security > Cryptography > Cognos
Server common name
Subject Alternative Name > DNS names
Subject Alternative Name > IP addresses

More information:
https://blogs.perficient.com/2020/07/31/whats-new-in-cognos-analytics-11-1-7

https://www.ibm.com/support/knowledgecenter/en/SSEP7J_11.1.0/com.ibm.swg.ba.cognos.inst_cr_winux.doc/t_configuresslforcognos8.html

Product:
Planning Analytics 2.0.9
Planning Analytics Workspace 54
Microsoft Windows 2016 server

Problem:
Sum up on a hierarchy?

Suggested solution:
Turn on hierarchy (virtual dimensions) by adding EnableNewHierarchyCreation=T to the TM1 applications tm1s.cfg file.
Ensure that you have free memory on the server before you turn this one.

Login to paw and open a new book.
Right click on the dimension, and select edit dimension. Click on attributes icon.
Right click on the attribute you want to create a hierarchy for.

The new hierarchy is shown as a dimension.

There are 3 first hierarchy created at first time, the one with same name is for backward compatibility, your new one, and levels. If you delete a member from a hierarchy – it is only removed from that virtual dimension. To delete a leaf member, you should delete it from the leaves hierarchy. Then data and all existing of that member is removed from all hierarchy’s.

Start PAX and connect to your TM1 application.
Right click on the cube that contain the data you want to see, and select Exploration.

Expand the dimension to see the new hierarchy. Drag the hierarchy to the rows area. Now you got the report summarized on the Plants.

Convert the report to a quick report.


Create a excel report the way you want and reference the result on the quick report sheet. Publish the report to TM1WEB.

Hierarchy can only be used in Explorations and Quick Reports. If you add members to the leaves, you have to recreate the dimension with a TI script to get the new members added.

More information:
https://code.cubewise.com/blog/mastering-hierarchies-in-ibm-tm1-and-planning-analytics
https://exploringtm1.com/creating-virtual-dimensions-in-tm1-planning-analytics/

Product:
Planning Analytics 2.0.9
Planning Analytics Workspace 54
Microsoft Windows 2016 server

Problem:
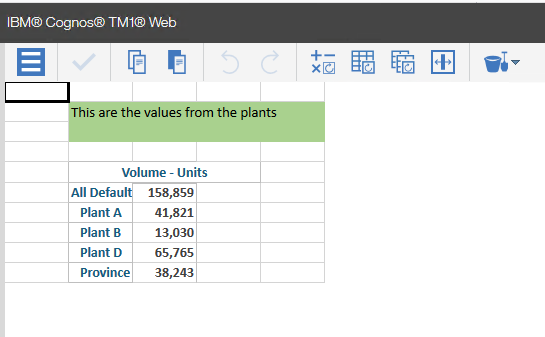
How sum up values from a group of accounts, in an Excel report?
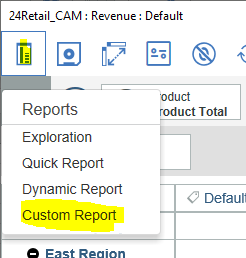
Suggested solution:
Create a hidden dynamic report with the given subset in the TM1RPTROW and a sum underneath, then refer the sum.

Mark out the accounts that you want to sum with some text in the attribute, like here in planning samples, we set AccountCatagory to text “coffee”.

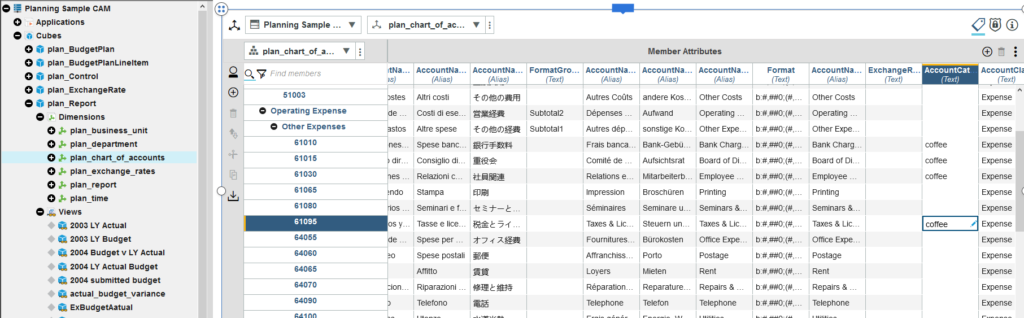
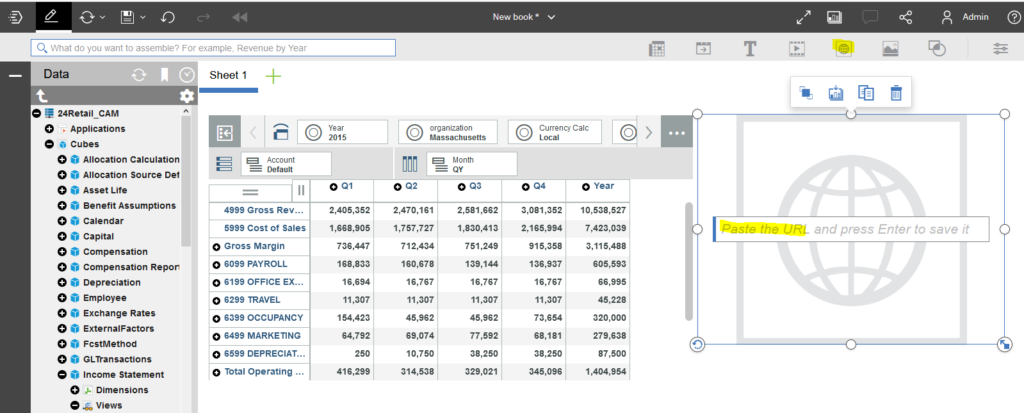
Go to Planning Analytics Workspace (PAW) and open a new book.
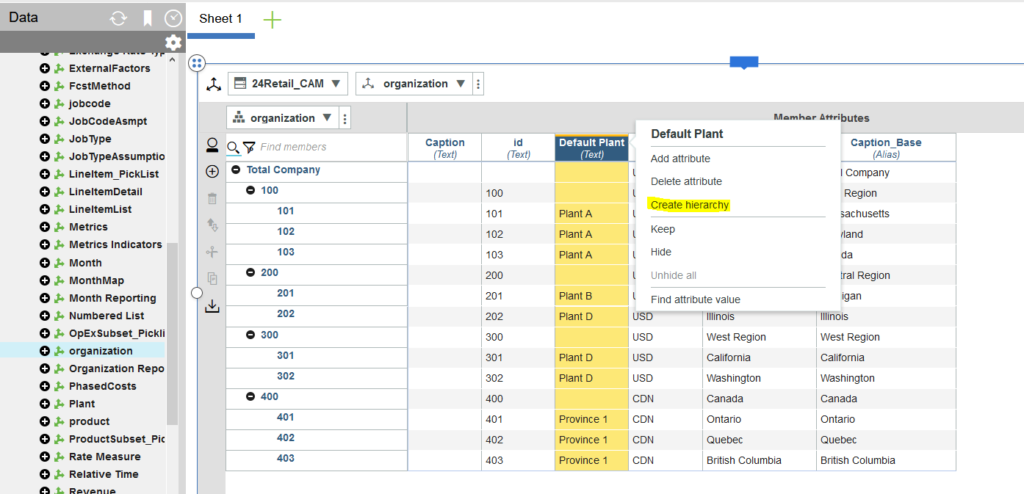
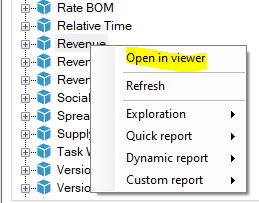
Expand the Dimensions, and for your “plan_chart_of_accounts” right click and select Edit dimension.
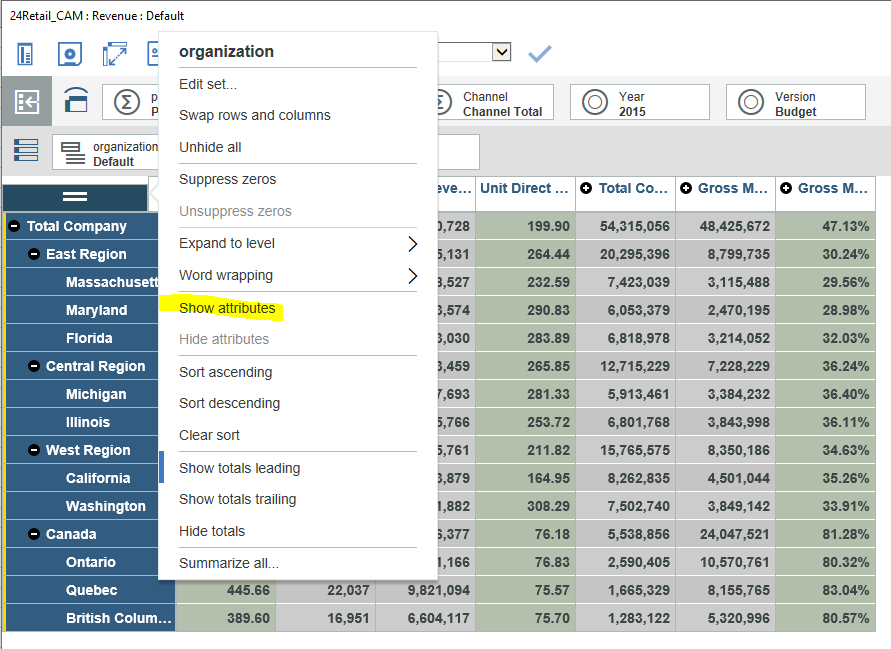
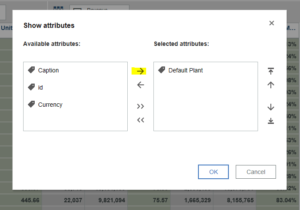
Click on icon for Member attribute mode in top right corner of the view.
Scroll to the column you want to edit, in out example AccountCatagory.
Enter the word “coffee” on the rows you want selected.
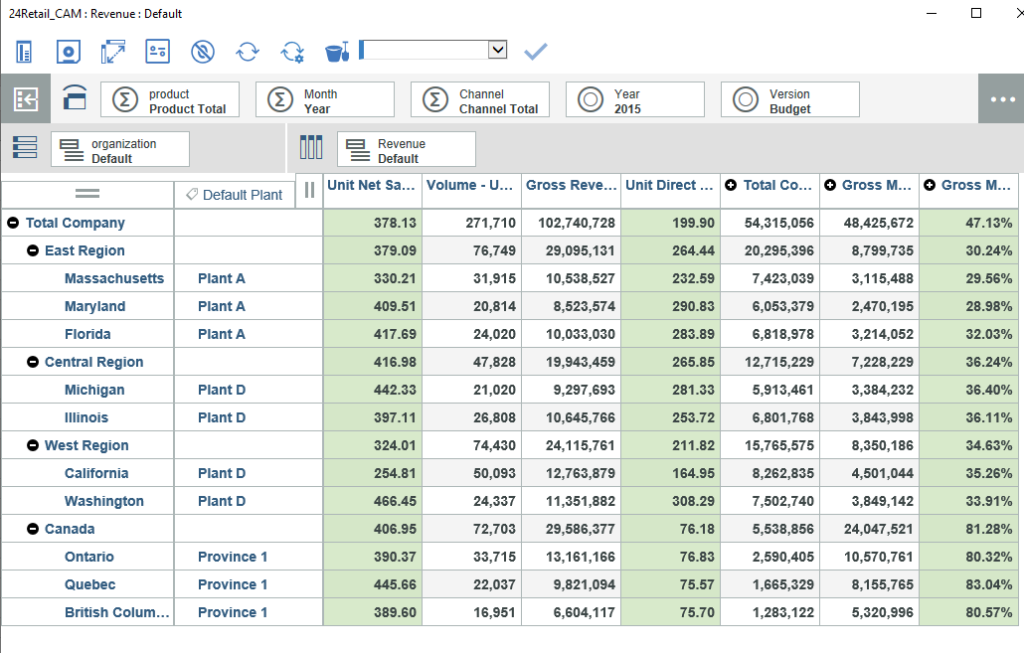
Updates are save direct to the dimension (tm1 database).

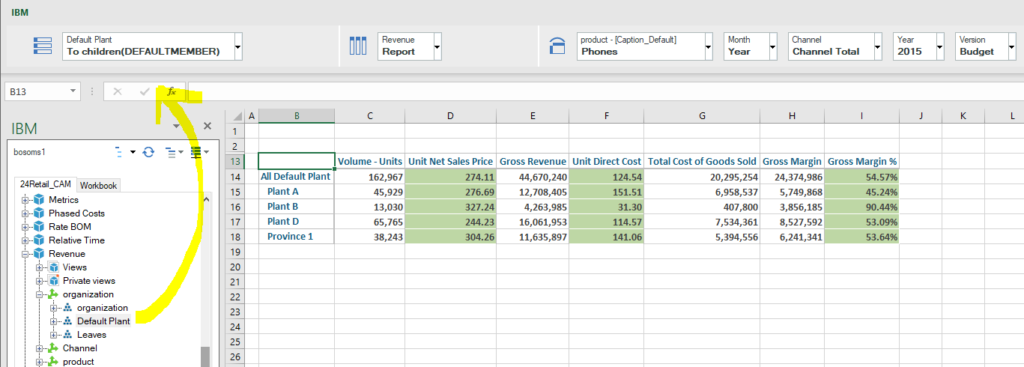
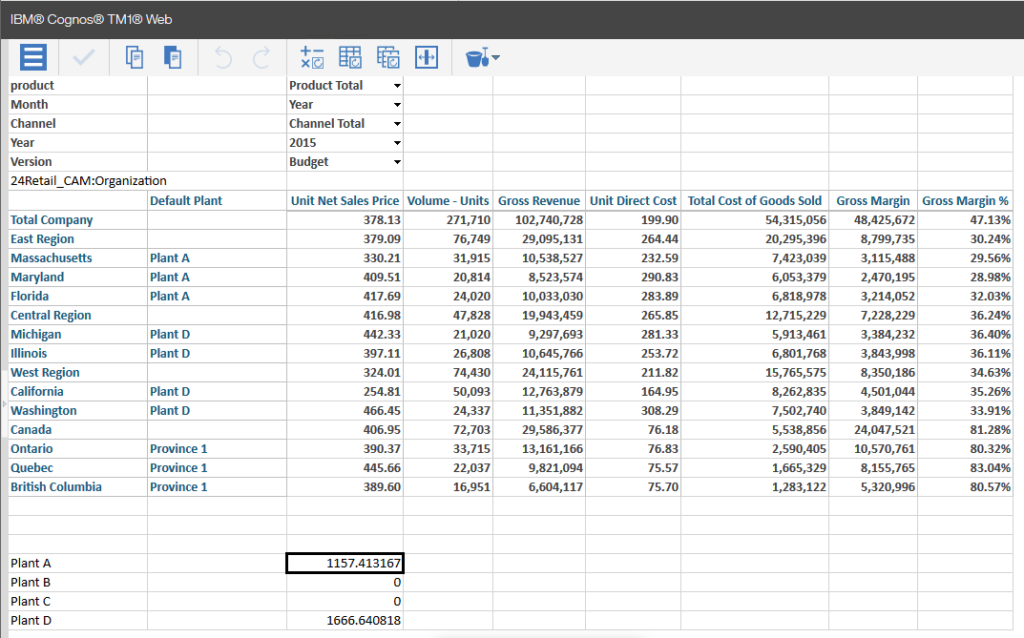
Go to Planning Analytics for Excel (PAX) and connect to your planning sample.
Expand the views on the right side and import a view that contain the columns you want.

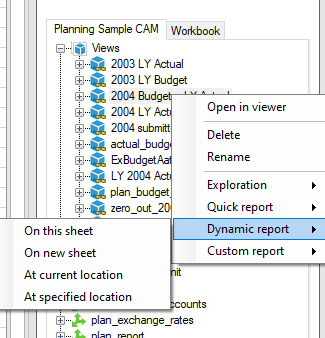
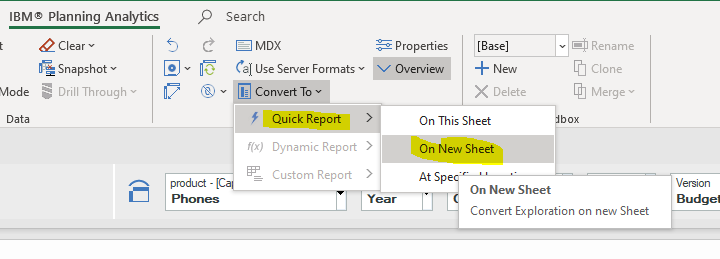
On the view, right click and select dynamic report on new sheet.
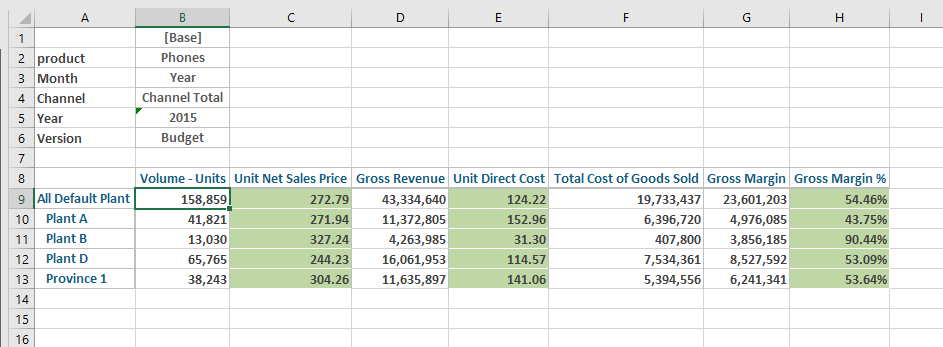
Click on “Show Format Areas”.
In cell B11 insert the MDX formula:

‘{FILTER(TM1SUBSETALL([plan_chart_of_accounts].[plan_chart_of_accounts]) , (INSTR(1 , [plan_chart_of_accounts].[plan_chart_of_accounts].CURRENTMEMBER.PROPERTIES(“AccountCategory”) , “coffee” , 1) >= 1))}

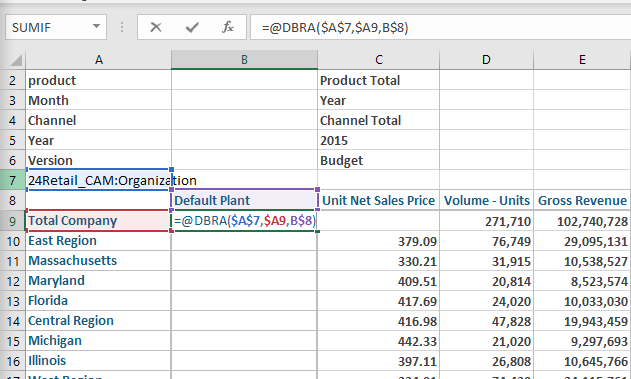
In cell B21 update the TM1RPTROW to have a reference to the MDX formula last:

=@TM1RPTROW($B$12,”Planning Sample CAM:plan_chart_of_accounts”,,,”AccountName”,FALSE,B$11)

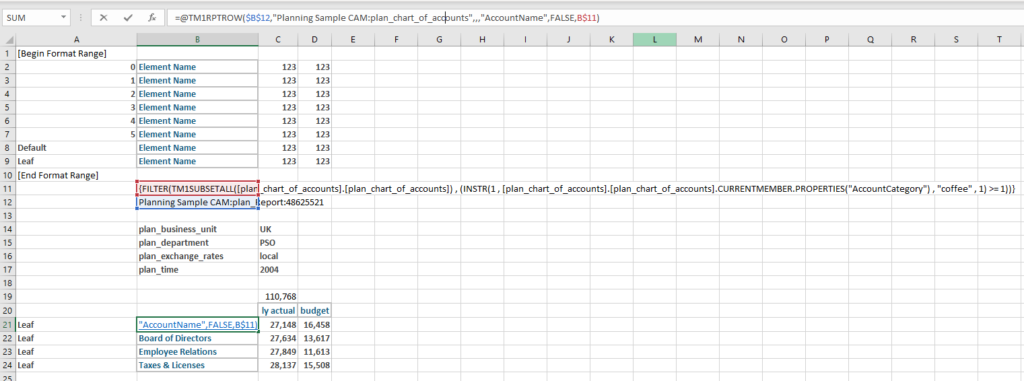
Above B$11 will give that the TM1RPTROW use the MDX formula to select accounts.
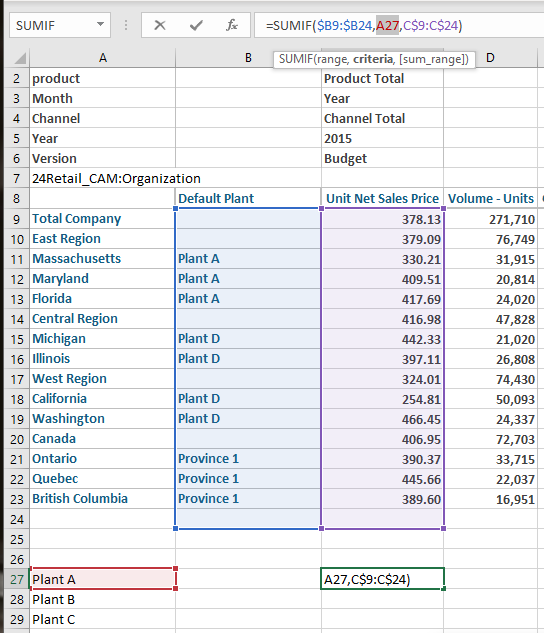
Then you need to sum up this values to a single cell.


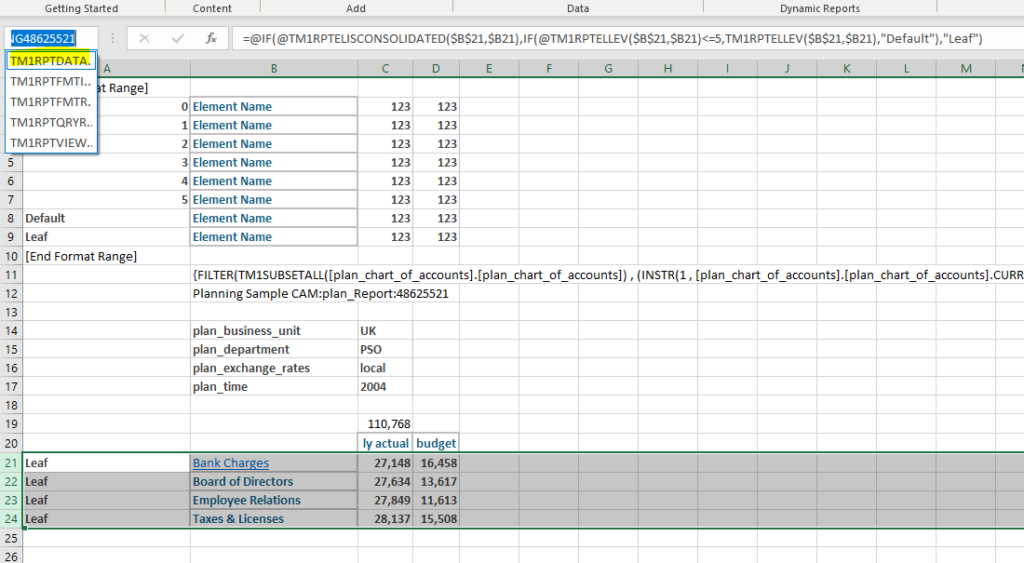
Open the drop down of areas and mark the tm1rptdatarng line and press ctrl+c to copy the value.
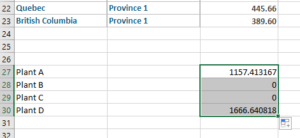
Go to cell C19 and enter a SUM formula with INDEX:

=SUM(INDEX(TM1RPTDATARNG48625521,0,3))

Replace the TM1RPTDATARNG48625521 with your unique area name.
This should give that this always sum up the values in column 3 (ly actual) to this cell.

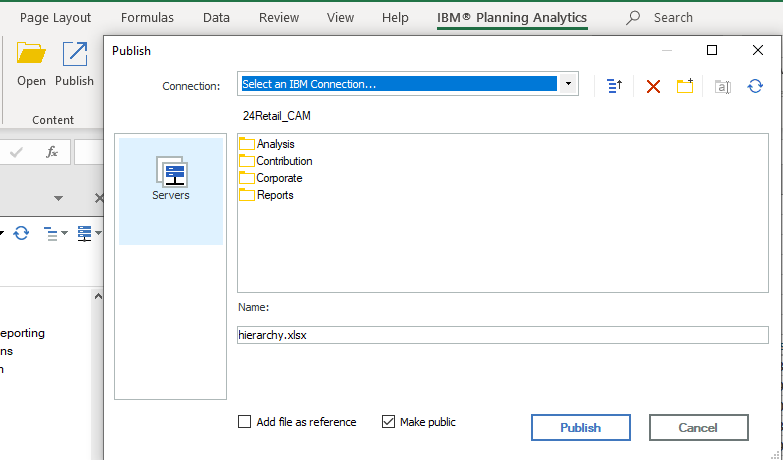
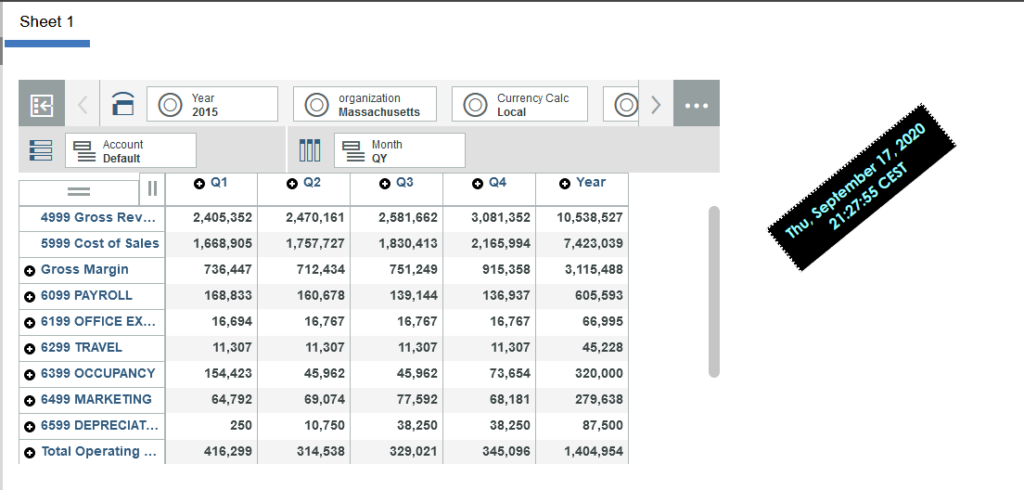
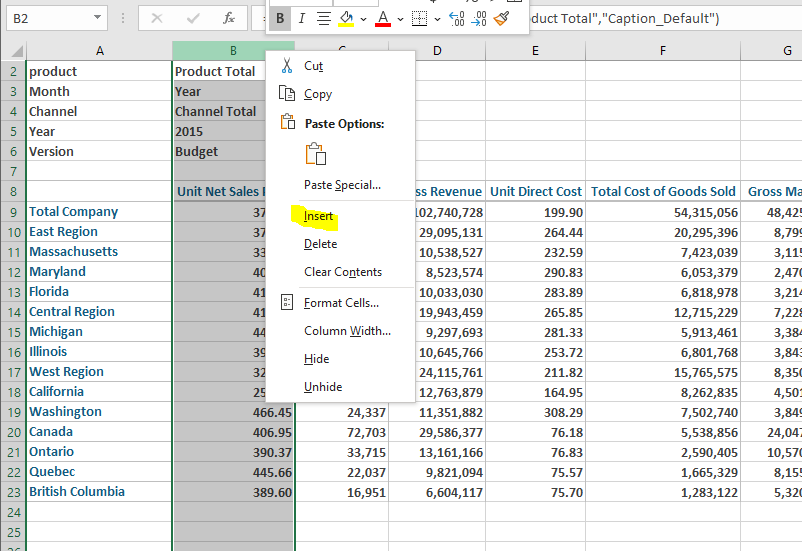
Now create a new sheet in the excel workbook.
Insert the dynamic report you want, and on the last line enter a reference to above cell.

=Sheet2!C19


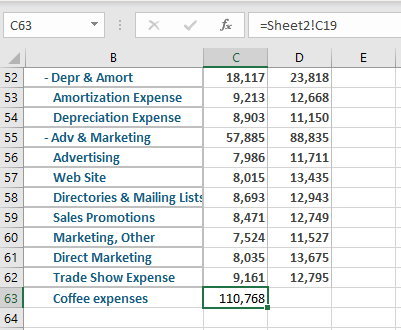
This will update this cell with the value from the other sheet.


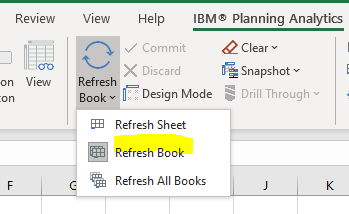
You need to refresh the book for the numbers to be updated.

You can hide the second sheet in the excel workbook, then the report is only one page.

There is better ways to solve this – check out the links below.

More information:
https://cubewise.com/blog/tm1-attributes-things-to-be-aware/
https://docs.microsoft.com/en-us/analysis-services/multidimensional-models/mdx/mdx-member-properties-intrinsic-member-properties?view=asallproducts-allversions&viewFallbackFrom=sql-server-ver15
https://www.tm1forum.com/viewtopic.php?t=13759
https://www.bihints.com/creating_dynamic_subsets_in_applix_tm1_with_mdx_a_primer
https://docs.microsoft.com/en-us/sql/mdx/iif-mdx?view=sql-server-ver15
https://docs.microsoft.com/en-us/sql/mdx/instr-mdx?view=sql-server-ver15
https://www.tm1forum.com/viewtopic.php?t=14731
https://www.contextures.com/xlFunctions01.html
https://exceljet.net/formula/sum-range-with-index

Product:
Planning Analytics 2.0.9
Planning Analytics Workspace 54
Microsoft Windows 2016 server

Problem:
How add a nice clock to the dashboard?

Suggested Solution:
Create a separate html page on your IIS server (or external) that all users can reach.

In that HTML page have this code only:
<!DOCTYPE html>
<html>
<body>

<iframe src=”https://free.timeanddate.com/clock/i7gqbnya/n239/fn6/fs16/fc9ff/tc000/ftb/bas2/bat1/bacfff/pa8/tt0/tw1/th1/ta1/tb4″ frameborder=”0″ width=”217″ height=”60″></iframe>

</body>
</html>

( you can create your own clock at site https://www.timeanddate.com/ )
Then copy the HTML code to a webpage that you save as default.html on your site. Any links need to be renamed to use https instead of http in the code, otherwise you get a blank page in paw.
(the default.html page will be the default page shown when a user browse to that url).

Inside PAW open the sheet you want to add a clock to.

Click on URL icon, and paste in the URL to your page.

https://time.tm1.dk/default.htm

Important that you enter HTTPS, as you can only use HTTPS pages inside PAW.
You can rotate the URL block and cut the empty space, then it looks nice when you leave edit mode in PAW.

More information:
https://blog.octanesolutions.com.au/adding-images-in-paw

Product:
Planning Analytics 2.0.9
Planning Analytics for Excel
Microsoft Windows 2016 Server

Problem:
How sum a selection of accounts on a PAX custom report?

Suggested Solution:
Start Excel and login as developer in your TM1 instance (we use 24Retail in our example)
Find the cube that contain the dimensions you want to work with.

Right-click and select Open in viewer.
Move the dimensions to where you want them.

Right click on row and select Show attributes, to preview them in the view.

Mark the attribute you want to see and click on arrow and OK.

Click on the reports icon to insert it to your excel sheet.

Select custom reports, to have it in that format.

Select the column B and right click to Insert a new column, to show the attribute.

Enter the cube and dimension in cell A7
Enter the Attribute name in cell B8
Enter the DBRA function in cell B9, like this: =@DBRA($A$7,$A9,B$8)

Drag the formula, by grab in the corner of the cell, to the whole column to get values.
Now you have the attribute listed.

Enter the attribute value you want to sum in cell A27 and below.
Enter the SUMIF function in cell A27, like this: =SUMIF($B9:$B24,A27,C$9:C$24)
The SUMIF function have this parameters =SUMIF(area to search after value in, value to look for, area to sum rows where value is).
Copy the formula down to the other rows.


Now you can hide column B if you want it to look more automatic.

In TM1WEB you click on “recalculate” icon, to get new values.
There exist other ways to solve this, use of hierarchies can be one.

More information:
https://www.ibm.com/support/knowledgecenter/SSD29G_2.0.0/com.ibm.swg.ba.cognos.tm1_dg_dvlpr.2.0.0.doc/tm1_dg_dvlpr.pdf
https://exploringtm1.com/display-tm1-attributes-in-excel/
https://cubewise.com/blog/attributes-in-pa/

http://public.dhe.ibm.com/software/data/cognos/documentation/docs/en/tm1/9.0sp3/is_document_1425_tm1websupportedexcelfeaturelist.pdf

Some excel function does not work in TM1WEB, you must test them first.

Recreating TM1 Alternate Hierarchies

https://code.cubewise.com/blog/mastering-hierarchies-in-ibm-tm1-and-planning-analytics


Product:
Planning Analytics 2.0.9
Microsoft Windows 2016 server

Problem:
Try to add a new TM1 instance, and when click save configuration get error message. You have recently change the CA11 security setup.
[ ERROR ] CAM-CRP-1315 Current configuration points to a different Trust Domain than originally configured.

Solution:
You are unable to generate Cryptographic keys after changing authentication for a TM1 server.

Inside Cognos Configuration save the configuration as text, name the file to pa_backup.xml
Stop both IBM Cognos service and IBM Cognos TM1 services.
Remove the C:\Program Files\ibm\cognos\tm1_64\temp\cam\freshness file.
Back up the existing cryptographic keys by copy the following directories to d:\temp\backup:

C:\Program Files\ibm\cognos\tm1_64\configuration\configuration\csk
C:\Program Files\ibm\cognos\tm1_64\configuration\certs

Delete the C:\Program Files\ibm\cognos\tm1_64\configuration\csk directory.
Clear the certs directory, except for the jCAPublisherKeystore file that you keep.

Rename cogstartup.xml to cogstartup.org.xml
Rename pa_backup.xml to cogstartup.xml in folder C:\Program Files\ibm\cognos\tm1_64\configuration

Open IBM® Cognos® Configuration for Planning Analytics, save the configuration and start the services, IBM Cognos TM1 and TM1 Admin Server.


If you have similar problem with CA11, you can save below in a text file (certclean.cmd) and then run it from a administration command. (but first you need to stop the IBM Cognos service, and after you need to open Cognos Configuration and click save.)

REM Export current configuration to an XML file
cd “C:\Program Files\ibm\cognos\analytics\bin64”
cogconfig.bat -e “C:\Program Files\ibm\cognos\analytics\configuration\backup.xml”

REM Remove current crypographic keys/information
md “C:\Program Files\ibm\cognos\analytics\configuration\backup_to_fix_problem”
move “C:\Program Files\ibm\cognos\analytics\configuration\cogstartup.xml” “C:\Program Files\ibm\cognos\analytics\configuration\backup_to_fix_problem”
move “C:\Program Files\ibm\cognos\analytics\configuration\caSerial” “C:\Program Files\ibm\cognos\analytics\configuration\backup_to_fix_problem”
move “C:\Program Files\ibm\cognos\analytics\configuration\certs\CAMCrypto.status” “C:\Program Files\ibm\cognos\analytics\configuration\backup_to_fix_problem”
move “C:\Program Files\ibm\cognos\analytics\configuration\certs\CAMKeystore” “C:\Program Files\ibm\cognos\analytics\configuration\backup_to_fix_problem”
move “C:\Program Files\ibm\cognos\analytics\configuration\certs\CAMKeystore.lock” “C:\Program Files\ibm\cognos\analytics\configuration\backup_to_fix_problem”
move “C:\Program Files\ibm\cognos\analytics\temp\cam\freshness” “C:\Program Files\ibm\cognos\analytics\configuration\backup_to_fix_problem”
ren “C:\Program Files\ibm\cognos\analytics\configuration\backup_to_fix_problem”
cd “C:\Program Files\ibm\cognos\analytics\configuration”
ren csk csk_backup_to_fix_problem

REM Copy new configuration
copy “C:\Program Files\ibm\cognos\analytics\configuration\backup.xml” “C:\Program Files\ibm\cognos\analytics\configuration\cogstartup.xml”

More Information:
https://www.ibm.com/support/knowledgecenter/SSEP7J_11.1.0/com.ibm.swg.ba.cognos.tg_bitshoot.doc/t_cam_crp_1315_errorwhensavingconfiguration.html

https://www.ibm.com/support/pages/ibm-cognos-service-fails-start-correctly-cfg-err-0106-cam-crp-1095-unable-find-encryption-certificate-alias-encryption-certificate-alias-encryption-errors-caused-expired-cryptographic-keys

Product:
Cognos Controller 10.3.1
Microsoft Windows 2016 server

Problem:
New users can not login to Cognos Controller. The client program stop after selection of database.
There are no error messages.

Solution:
The new users are on a different company, that have there own Windows Domain. When the cognos controller client start up, after selection of database, it talks to the Cognos Analytics server even do you use NATIVE security, as it will run the Cognos Reports on the CA server.
If Cognos Configuration is setup with only server-name and not FQDN (fully qualified domain names) e.g. servername.domain.com then the client computer can not find the cognos server and time out.
There are no error messages.

Workaround is to at the new company create a DNS alias, so that server is accessible within there domain. If CA11SERVER.COMPANY1.COM should be reached from COMPANY2.COM you need to create a alias in DNS server at COMPANY2.
Alias name: CA11SERVER
FQDN: CA11SERVER.COMPANY2.COM
FQDN for target host: CA11SERVER.COMPANY1.COM
This give a computer on COMPANY2 domain can browse to CA11SERVER, as it is found in the DNS.

Solution is to setup Cognos Configuration with FQDN always.

You can use this URL to test access to server in a browser (replace servername with your servername)
http://servername:9300/p2pd/servlet
http://servername:80/ibmcognos/controllerserver/ccrws.asmx

More Information:
https://www.mustbegeek.com/add-cname-record-in-windows-dns-server/
https://www.ibm.com/support/pages/remote-name-could-not-be-resolved-when-launching-controller-client