Product:
Cognos Analytics 11.1.7 Product_version=11.1 R7 (LTS)
Microsoft Windows 2019 Server
Microsoft SQL server 2016
Problem:
How install CA 11.1.7 on a Windows 2019 server?
Solution:
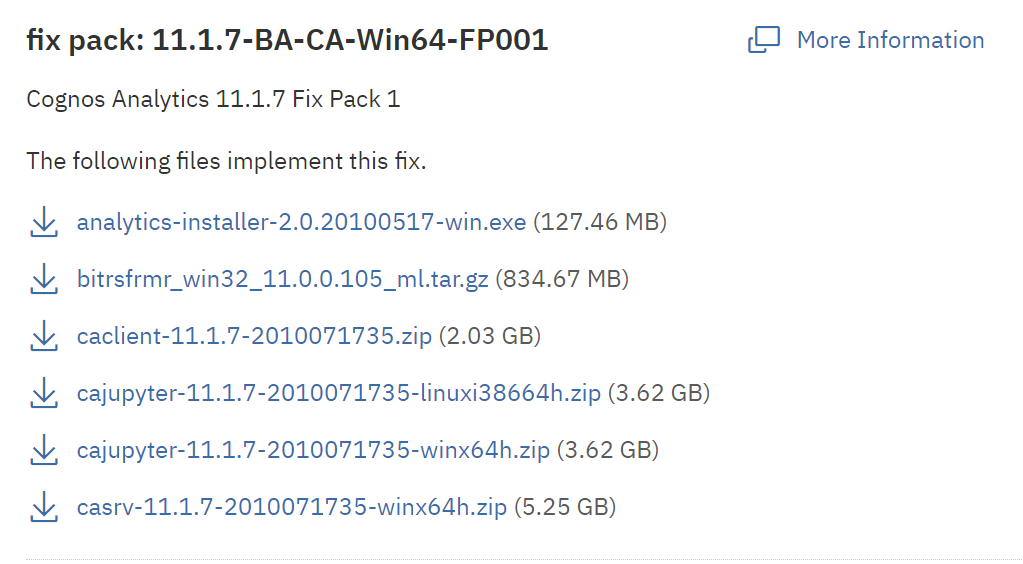
Follow the IBM Cognos instruction first, then use this as a compliment. Download latest fix pack from https://www.ibm.com/support/pages/node/6335329
https://www.ibm.com/support/pages/ibm-cognos-analytics-11x-fix-lists
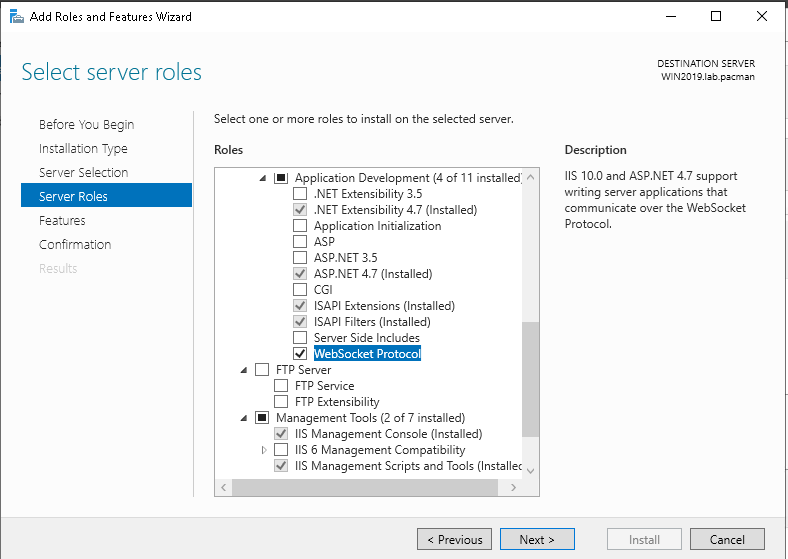
Install Web Server with NET framework 4.7 and Windows Authentication and WebSocket Protocol.
https://www.ibm.com/support/knowledgecenter/en/SSEP7J_11.1.0/com.ibm.swg.ba.cognos.inst_cr_winux.doc/t_single_server.html
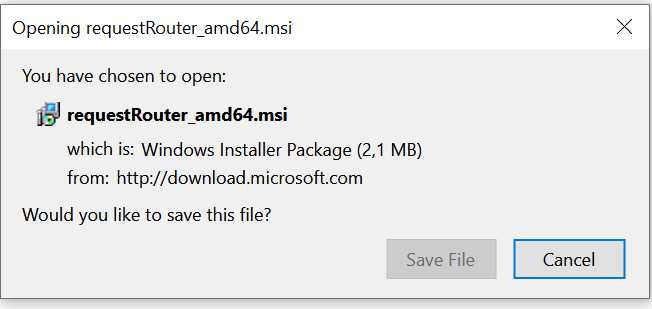
Install rewrite_amd64_en-US.msi and the Application Request Routing extension for IIS by going to the following URL: http://www.iis.net/downloads/microsoft/application-request-routing
Run setup of CA11 from file ca_instl_win_2.0.200618.exe
Click Next
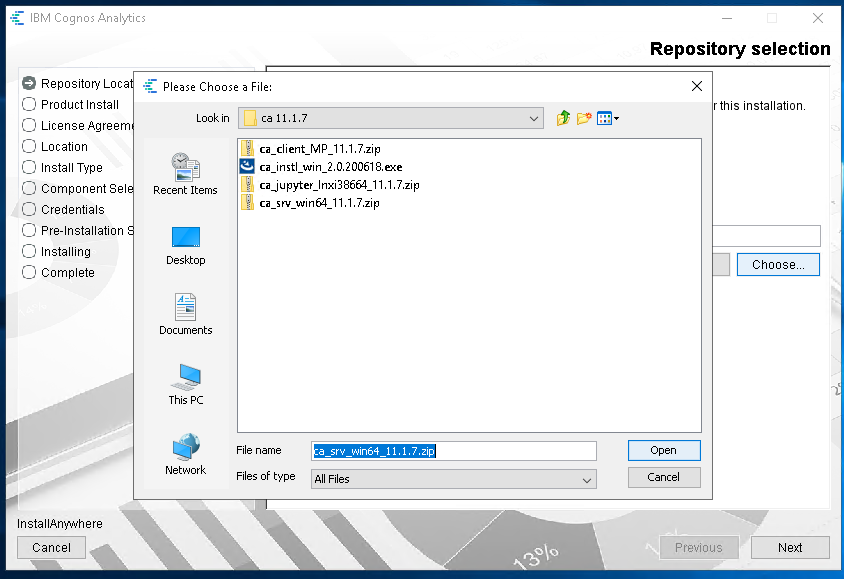
Click browse and select the ca_srv_win64_11.1.7.zip file and click Open and Next.
Choose IBM Cognos Analytics and click next.
Mark “I accept the terms of the License Agreement” and click Next.
Mark “Make shortcut visible to all users in the Start menu” and click Next.
Click Yes.
Select Custom and click Next.
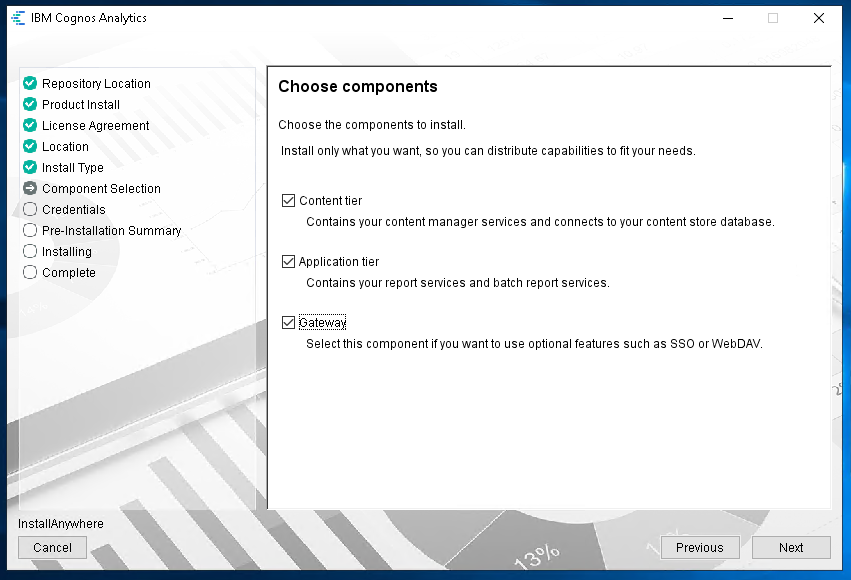
If installed on a single server, select all and click Next.
Click Install.
Click Done. (install the latest fix pack on top of your installation of CA11)

Add SQL driver sqljdbc42.jar to CA11 folder C:\Program Files\ibm\cognos\analytics\drivers
Prevent creation of DUMP files in CA11
Open file C:\Program Files\ibm\cognos\analytics\configuration\cclWinSEHConfig.xml in notepad++

Change to <env_var name="CCL_HWE_ABORT" value="0"/>
Save the xml file.
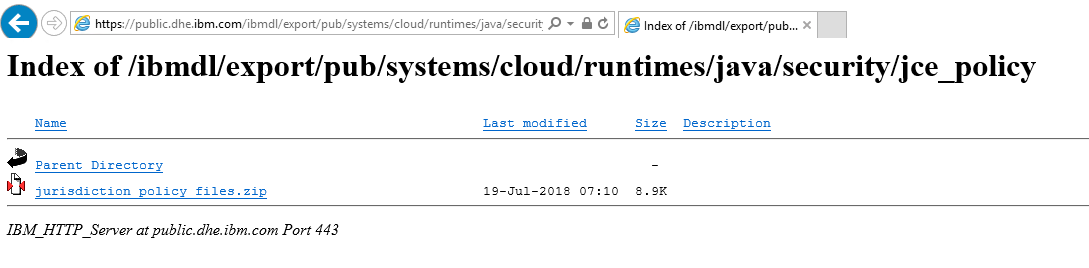
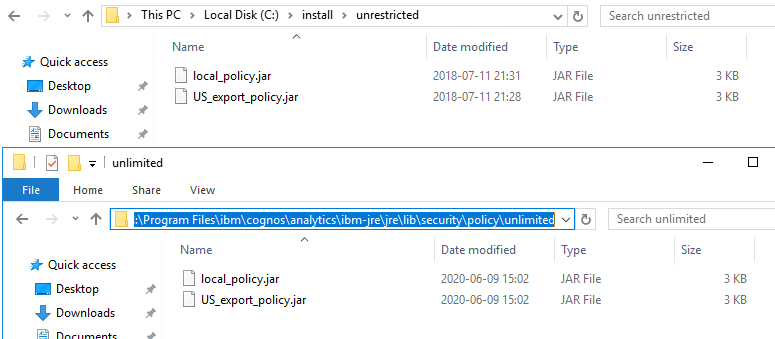
Download the new policy zip file from https://public.dhe.ibm.com/ibmdl/export/pub/systems/cloud/runtimes/java/security/jce_policy/
Unzip the file in a new folder (c:\install), creating folder C:\install\unrestricted.
Copy the two new files (US_export_policy.jar and local_policy.jar)to folder C:\Program Files\ibm\cognos\analytics\ibm-jre\jre\lib\security\policy\unlimited
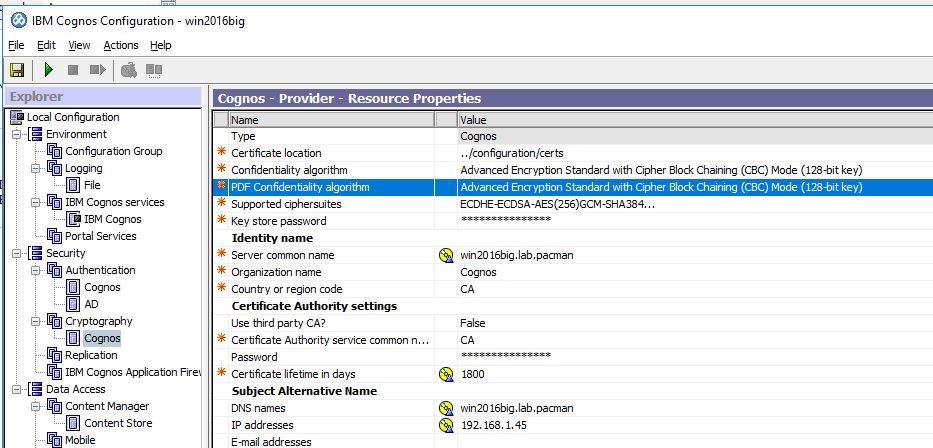
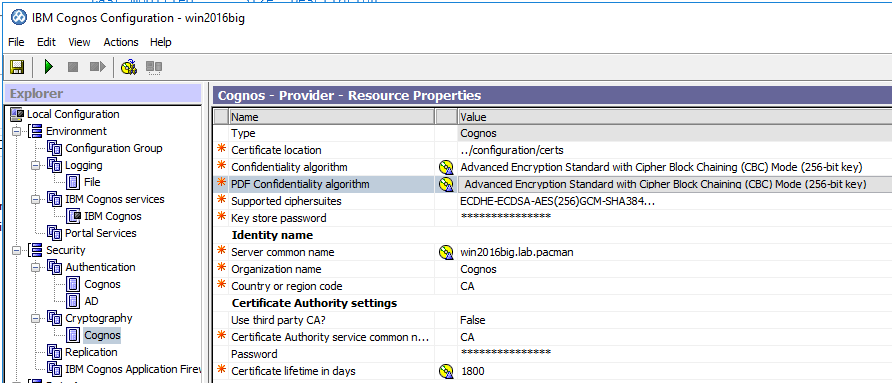
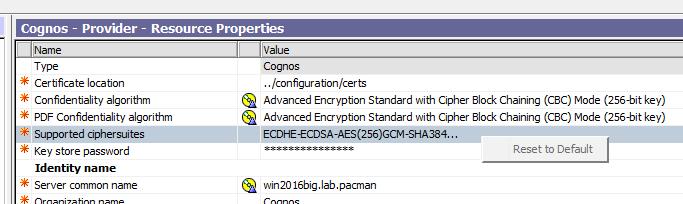
Open Cognos Configuration and go to Cryptography > Cognos. Change Confidentiality Algorithm and PDF Confidentiality Algorithm to Advanced encryption standard with Cipher Block Chaining (CBC) mode 256 bit key.
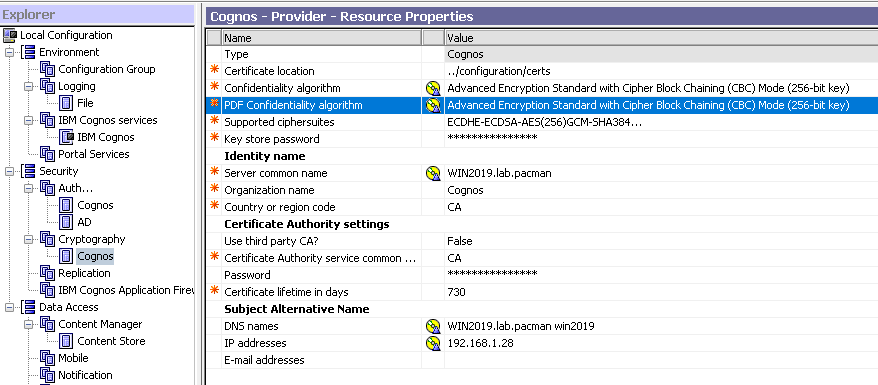
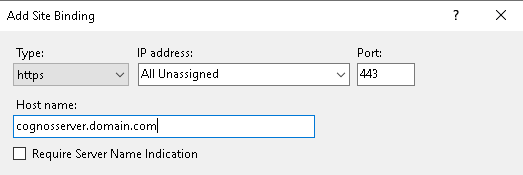
At subject alternative name for DNS names, enter both the FQDN and the HOSTNAME with a space between. You must use lowercase letters on all server names in Cognos Configuration.
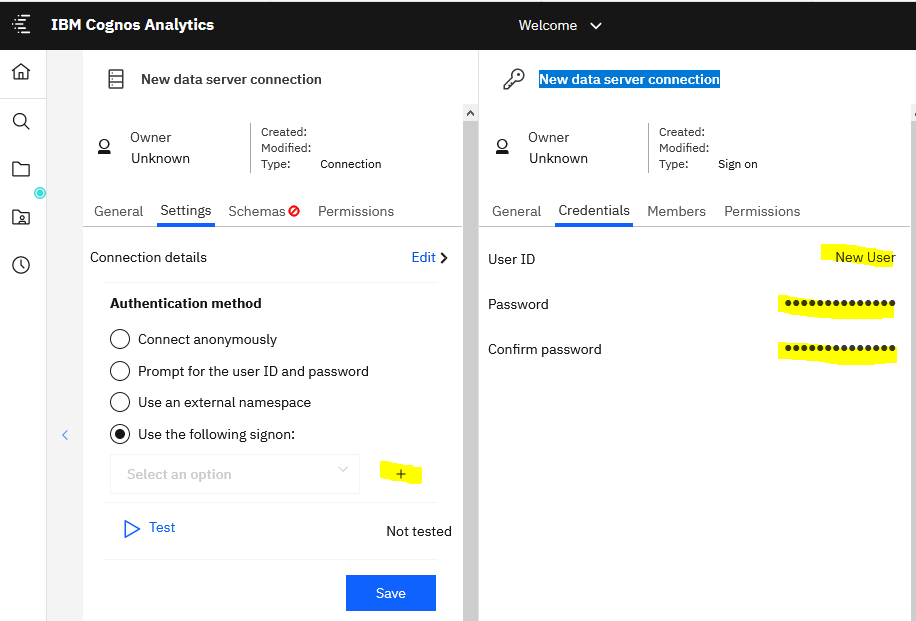
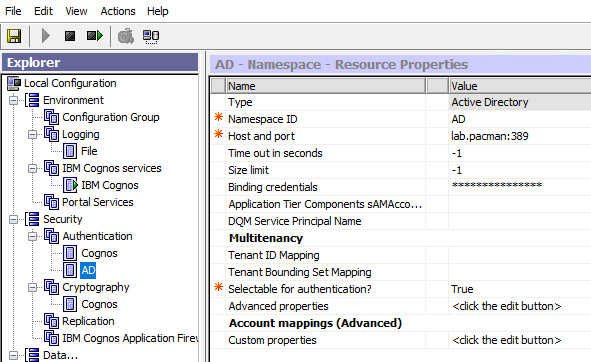
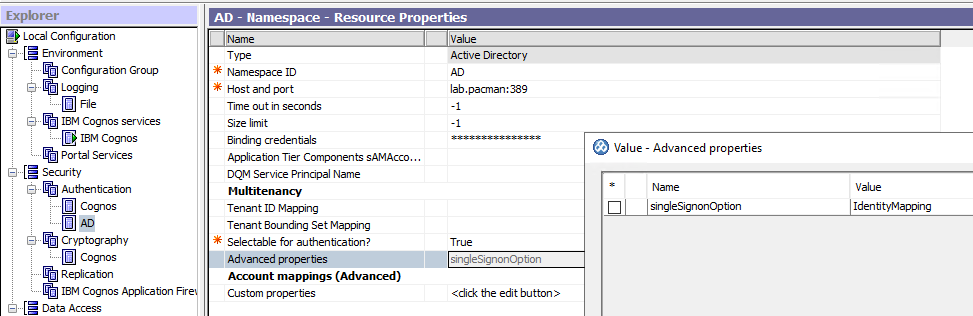
Configure the AD connection to your domain.
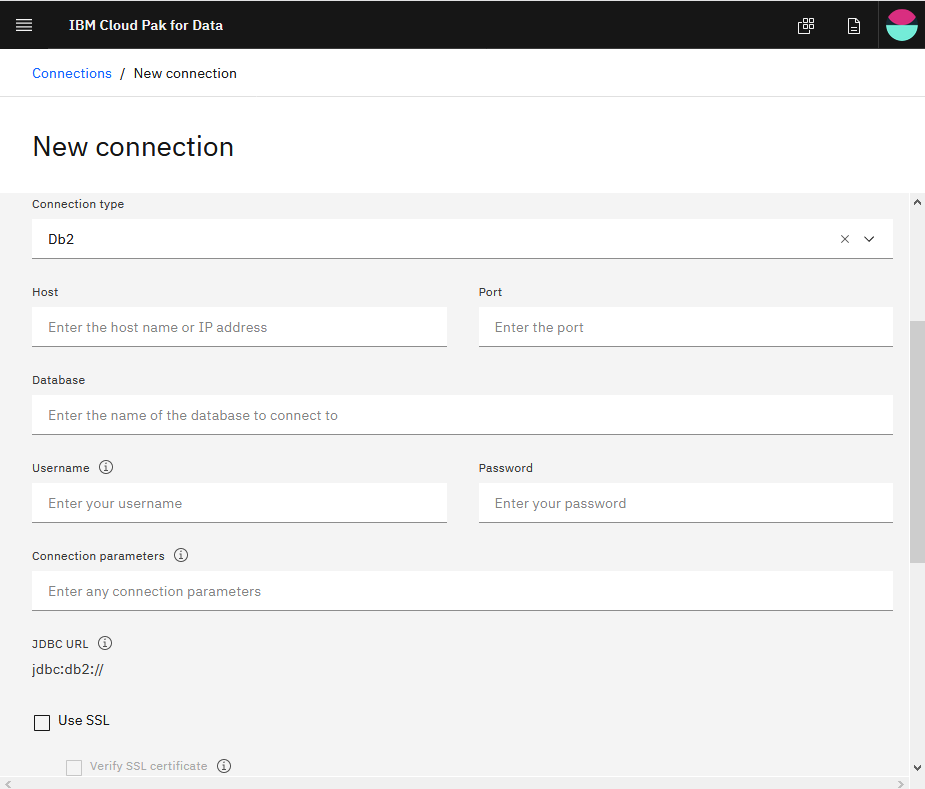
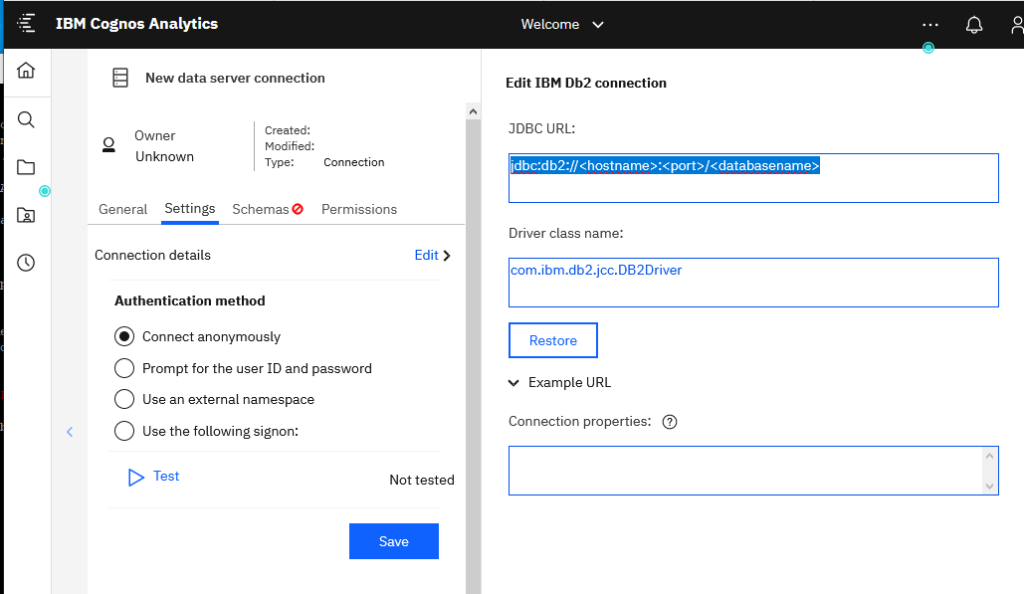
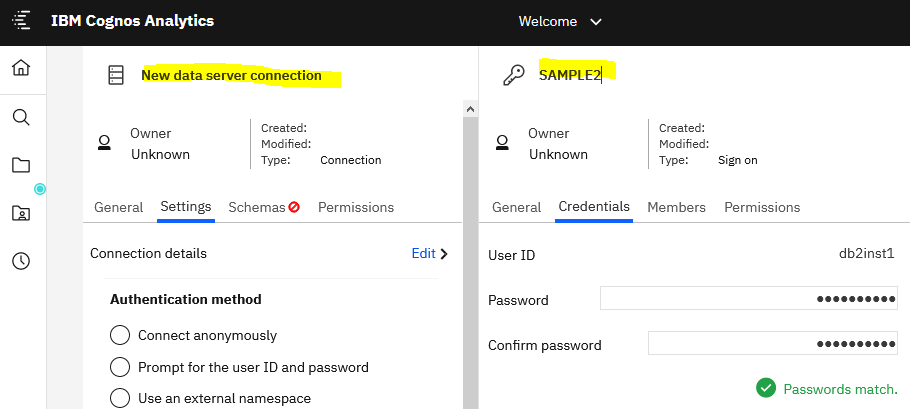
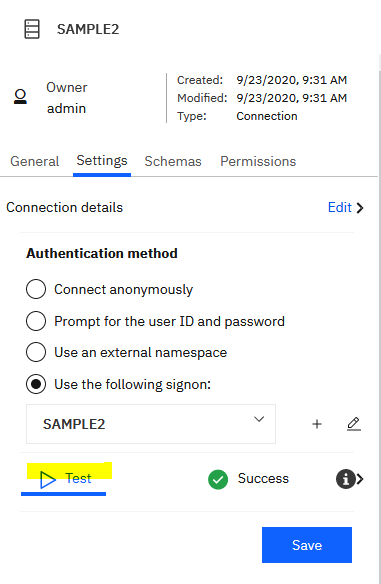
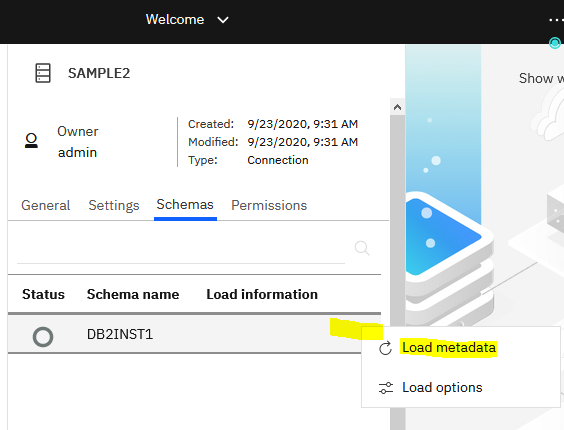
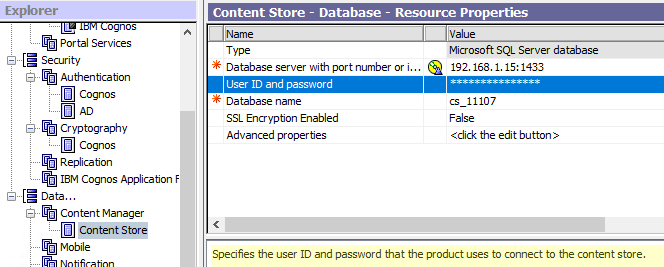
Remove the DB2 connection and create a new Microsoft SQL Server connection.
Configure the Content Store connection to your SQL server.
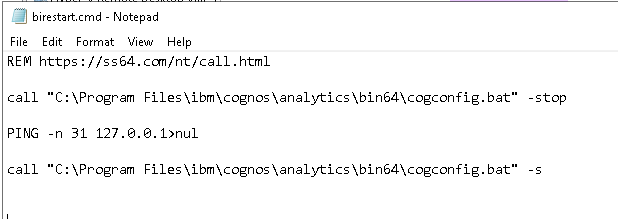
Save the configuration and start Cognos service.

Setup IIS with script found in folder C:\Program Files\ibm\cognos\analytics\cgi-bin\templates\IIS
Edit the file to include your servers name, then run the CA_IIS_Config.bat from a administrator CMD window.
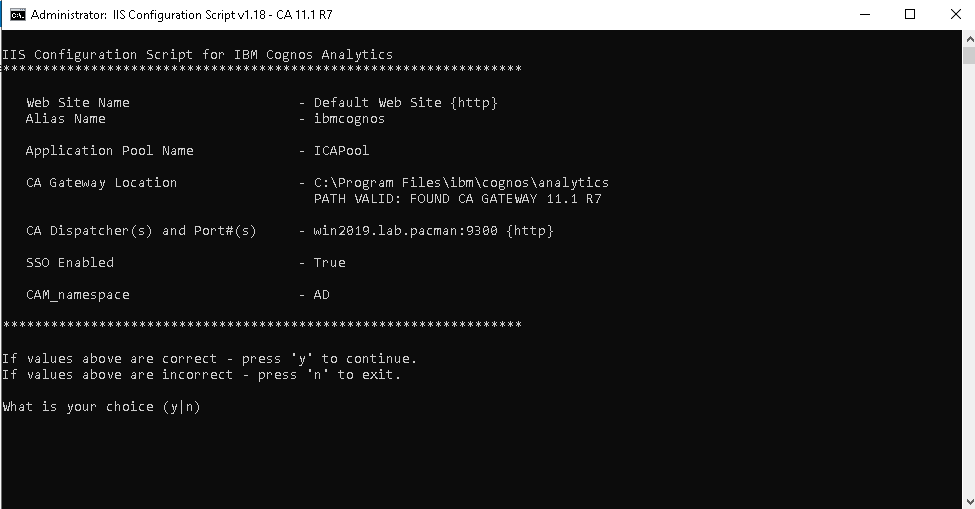
Ensure all is correct and press Y.
Check that you can access cognos on http://servername.domain.com/ibmcognos/
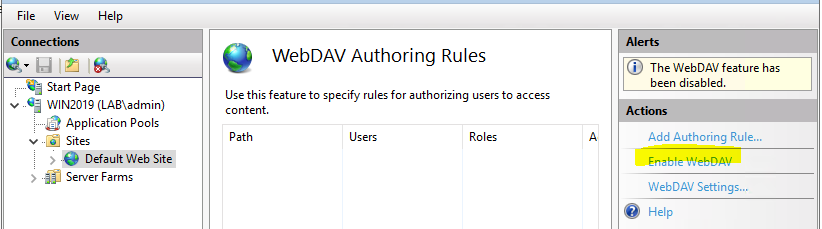
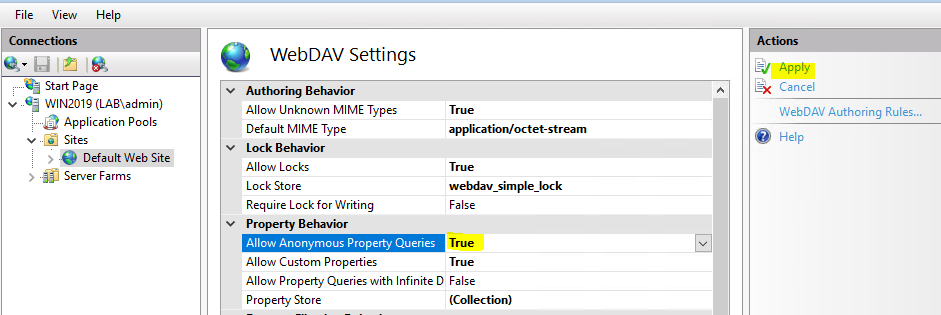
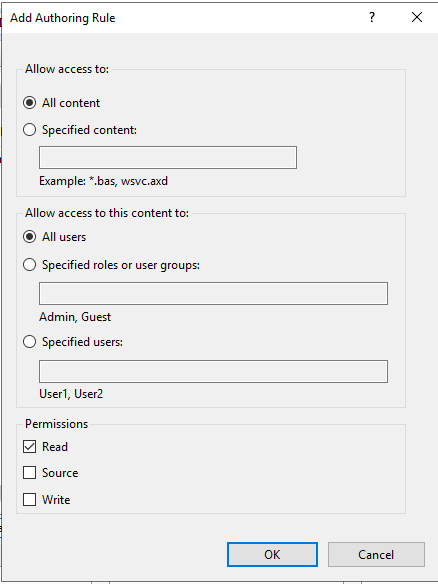
Setup WebDAV for report creators:
Install SQL 2012 native client, to make old report connections work (SQLNCLI11).
https://download.microsoft.com/download/B/E/D/BED73AAC-3C8A-43F5-AF4F-EB4FEA6C8F3A/ENU/x64/sqlncli.msi
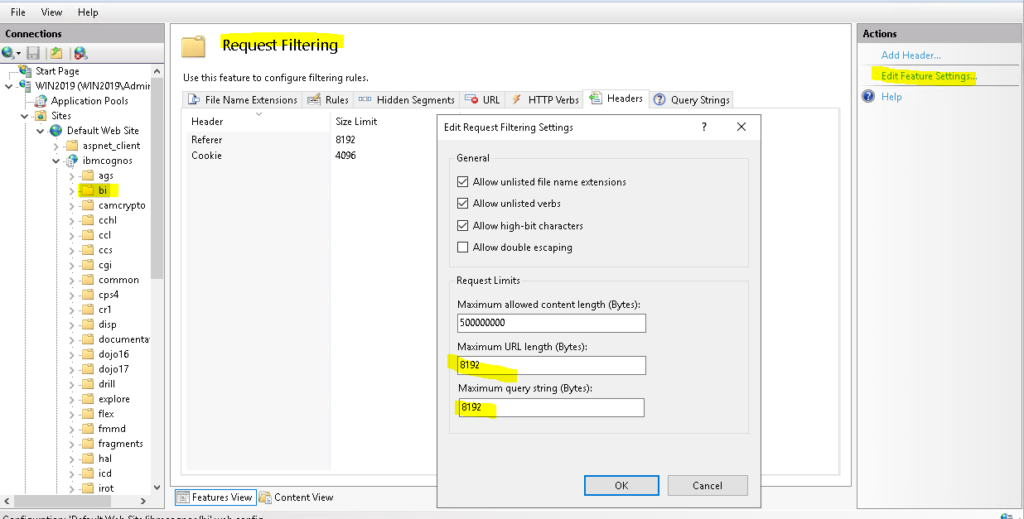
Open firewall ports 80 and 443 for clients, and ports 9300, 9362, 4300, 5701, 9301 for Cognos servers to be able to talk to each other.
Setup SSO with Kerberos Active Directory is possible (but not covered here)
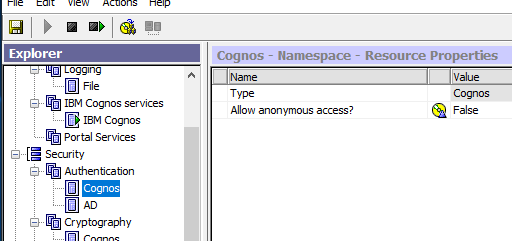
Set “Allow anonymous access” to False.
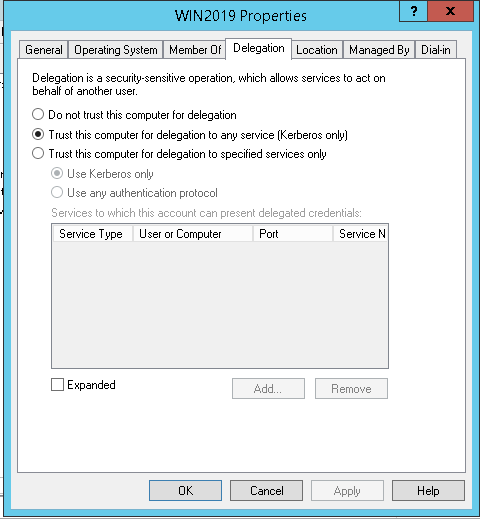
Change the log on user for the IBM Cognos service to a domain account, instead of Local System.

Set the server to trust for delegation inside the Active Directory.
 You need to do more;
https://techcommunity.microsoft.com/t5/iis-support-blog/setting-up-kerberos-authentication-for-a-website-in-iis/ba-p/347882
https://www.ibm.com/support/pages/enabling-single-signon-use-kerberos-authentication-constrained-delegation-ibm-cognos-business-intelligence
https://www.ibm.com/support/pages/what-does-parameter-singlesignonoption-do
Instead of kerberos can you use old windows login, inside cognos configuration setup (enter below values);
Save and restart Cognos, try to browse to http://caservername.domain.com/ibmcognos/
Show the Legacy Studios in CA11.1.x 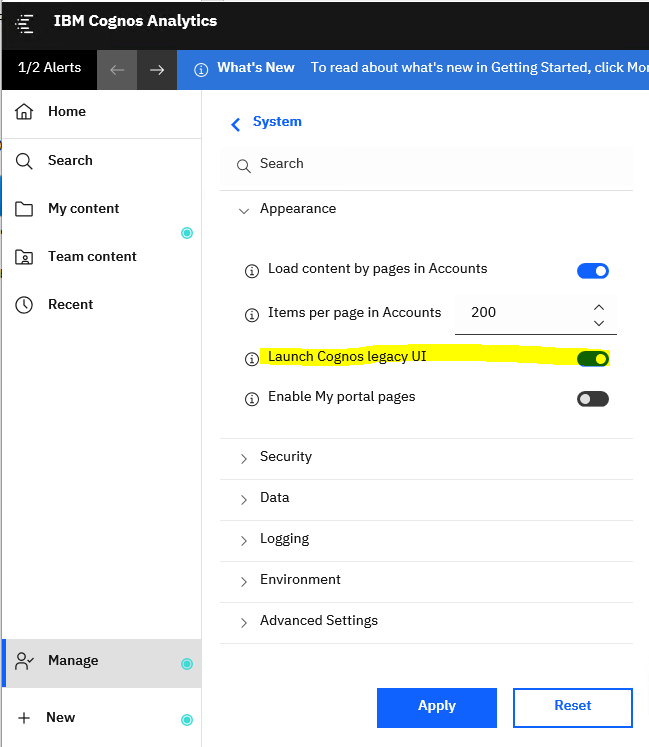
Check that they are active in Manage – Configuration – System – Appearance.
Please Note: In order to access the legacy studios, you must be using Internet Explorer or Mozilla Firefox.
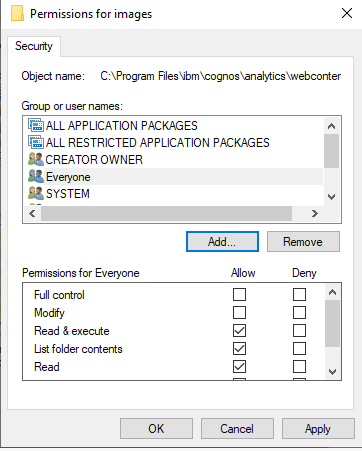
Setup the samples
https://www.ibm.com/support/knowledgecenter/SSEP7J_11.1.0/com.ibm.swg.ba.cognos.ig_smples.doc/ig_smples.pdf
Setup the skins
https://quebit.com/askquebit/IBM/creating-and-setting-a-default-theme-for-cognos-analytics-11-0-4/
For CA11 installations with many users, you can increase the Windows TCP ports;
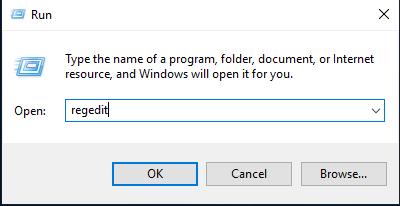
- Click on Start menu, run – Enter regedit
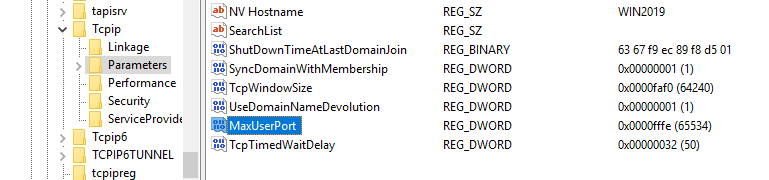
- In the HKEY_LOCAL_MACHINE\SYSTEM\CurrentControlSet\Services\Tcpip\Parameters directory, create a new DWORD-32 value named MaxUserPort.
- Set the properties for MaxUserPort to use a value of 65534 and a base of Decimal.
- In the same directory, add another DWORD-32 value named TcpTimedWaitDelay.
- Set the properties for TcpTimedWaitDelay to use a value of 50 and a base of Decimal.
The range for value is from 30 seconds to 300 seconds, with a default value of 240 seconds (4 minutes).
After closing the regedit application, restart your computer.
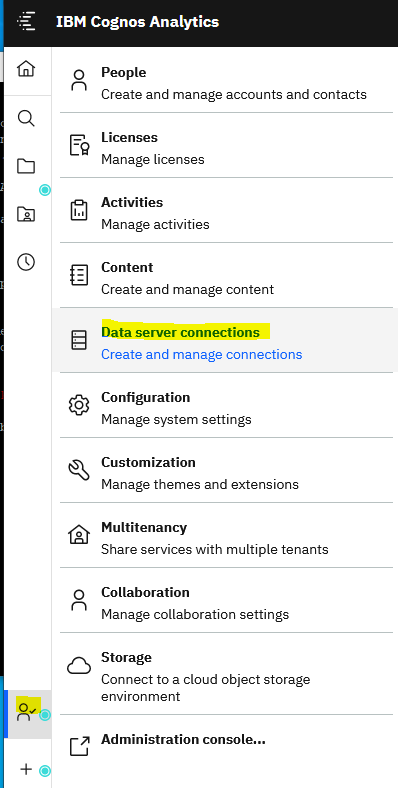
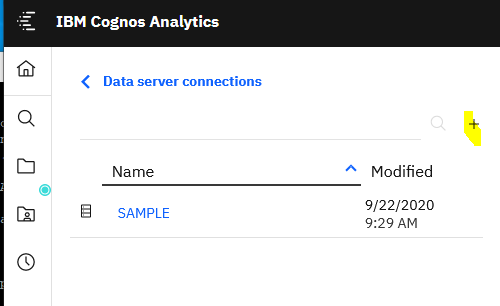
Data server connections to PA can give below error if TM1 cert is not loaded in the CA keystore.
XTR-ERR-0005 A request to TM1 resulted in error: “[400] javax.net.ssl.SSLHandshakeException: com.ibm.jsse2.util.h: PKIX path building failed: com.ibm.security.cert.IBMCertPathBuilderException: unable to find valid certification path to requested target”.
Add Planning Analytics cert to the keystore. Copy the file \\paservername\c$\Program Files\ibm\cognos\tm1_64\bin64\ssl\tm1\ibmtm1.arm file to your CA11 server to folder c:\install.
Start C:\Program Files\ibm\cognos\analytics\ibm-jre\jre\bin\ikeyman.exe, run as administrator.
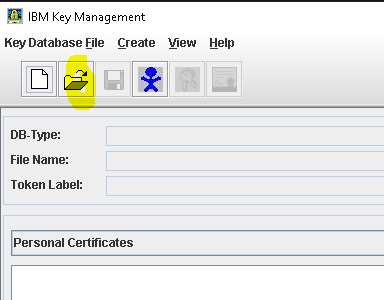
Click on open keystore. Select C:\Program Files\ibm\cognos\analytics\ibm-jre\jre\lib\security\cacerts file and open it with password changeit.
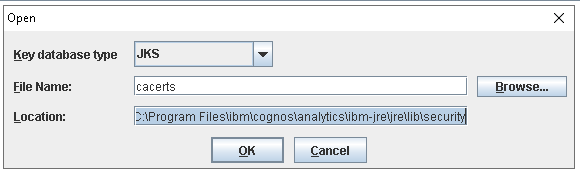
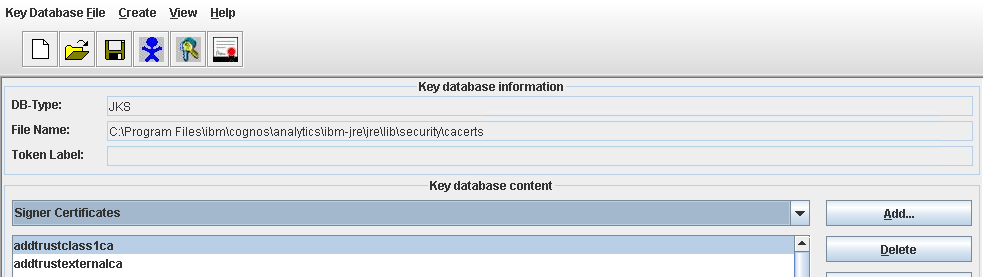
Switch to Signer Certificates and click Add.
Browse for c:\install\ibmtm1.arm and open it and give it the name TM1ServerCert.
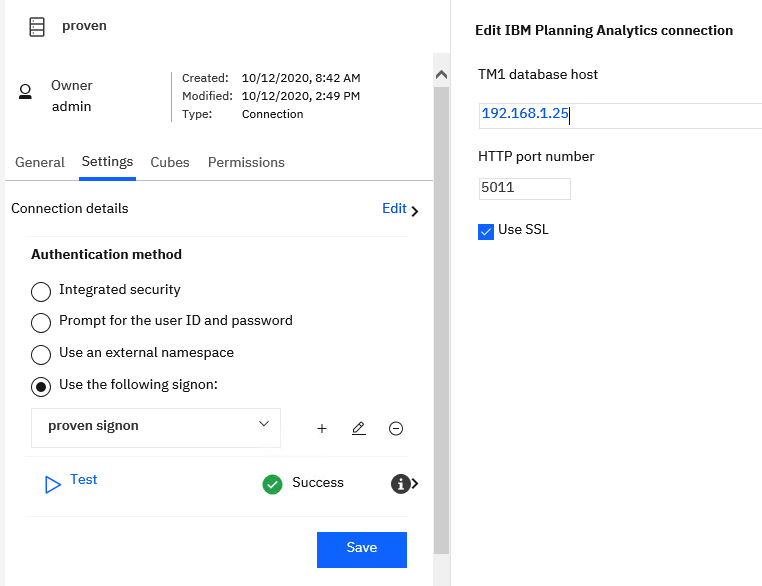
Data Server Connections to PA can give below error if the UseSSL=T is not correct in data connections.
XTR-ERR-0005 A request to TM1 resulted in error: “[400] java.net.SocketException: Connection reset”.
Ensure that the Use SSL is marked if the UseSSL=T is in the tm1s.cfg file for the TM1 instance. Planning Analytics have UseSSL=T as default, if the line is missing from tm1s.cfg file.
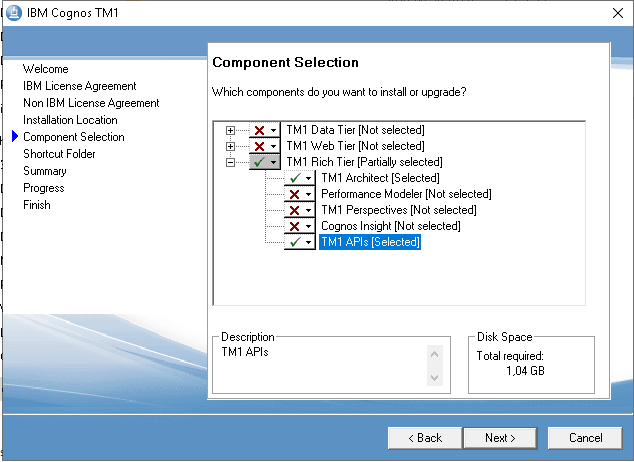
To be able to connect to old TM1; run installation of PA, on CA server, with issetup.exe from \\servername\fileshare\planninganalytics\tm1_winx64h_2.0.93.28_ml.tar\winx64h and select TM1APIs.
Report performance can be adjusted in different ways to match your hardware
https://senturus.com/resources/cognos-analytics-performance-tuning/
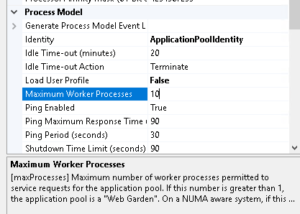
Go to Manage – Administration console.
Click on System at Status tab.
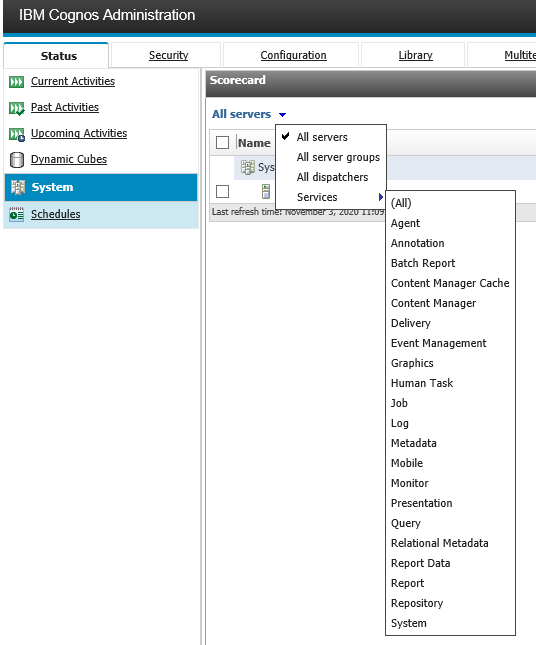
Click on All Servers drop down – go to Service – go to Report (or Batch Report)
Right click on ReportService and select Set Properties
Click on Settings tab – select Tuning in Category drop-down menu.
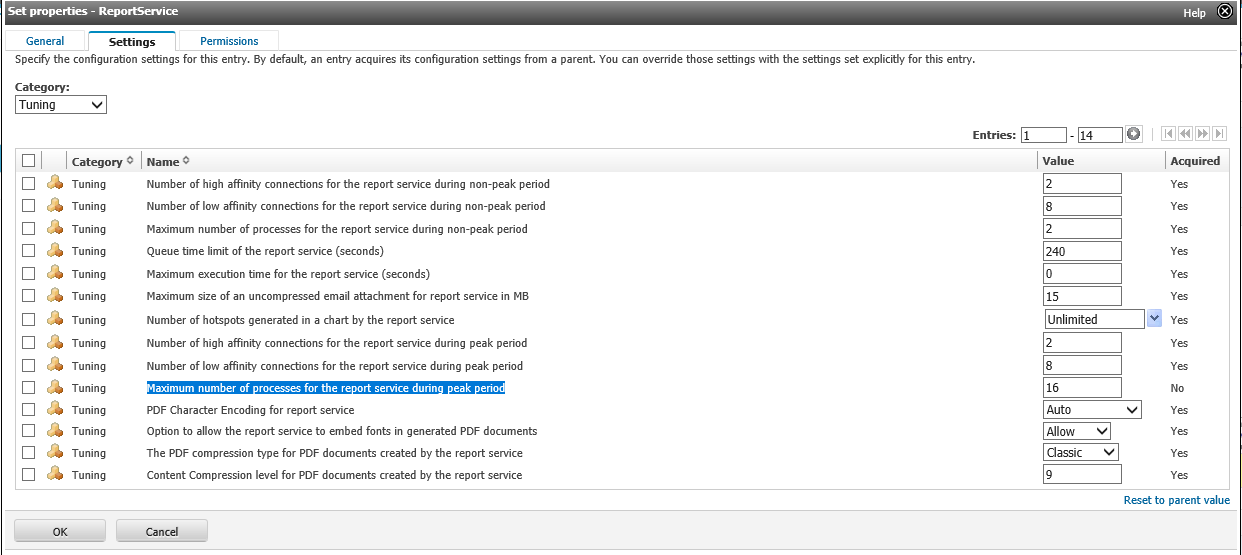
Set Maximum number of processes for the report service during peak period to a higher value, maybe start with the same number of CPU cores you have on the server. Do the same for Maximum number of processes for the report service during non-peak period, and also for Maximum number of processes for the batch report service during non-peak period.
Check that Number of low affinity connections for the report service during peak period is not below 8.
Values you set, depend on number of users and your hardware.
https://www.ibm.com/support/pages/how-improve-report-performance
More information:
https://www.ibm.com/support/pages/enabling-legacy-studios-cognos-analytics-111x
https://www.ibm.com/support/pages/sites/default/files/inline-files/ibm_fixlist_cognos_analytics_1117fp1_2.pdf
https://www.ibm.com/support/pages/xtr-err-0005-error-when-testing-ibm-planning-analytics-20x-datasource-ibm-cognos-analytics-1112
To show info about the Windows server, go to the command prompt and enter MSINFO32.EXE.
To list installed roles on server enter in powershell this command:
Get-WindowsFeature | Where-Object {$_. installstate -eq “installed”} | Format-List Name,Installstate > roles.txt
https://redmondmag.com/articles/2018/10/31/powershell-windows-server-roles-features.aspx
https://www.pelegit.co.il/how-to-get-all-roles-and-features-are-installed-on-server/


 .
.