Product:
Planning Analytics 2.0.9
Planning Analytics Workspace 55
Microsoft Windows 2016 server

Problem:
What to add cube security for new cognos groups from file.
You have created some cognos groups – GroupA and GroupB and filled them with Active Directory users.

You have added the group into TM1 Architect, to see that they are visible. This is done by right click on the Tm1 application and select security – clients/groups.

You have tested to add manually in TM1 architect, the values in the security cube.

Solution:

This can be solved in many ways, this is one example.
You have a text file with the groups and the new values. Here you add the other groups and there values you want to be setup.

Columns are cube to update, cube, cognos group, access rights.

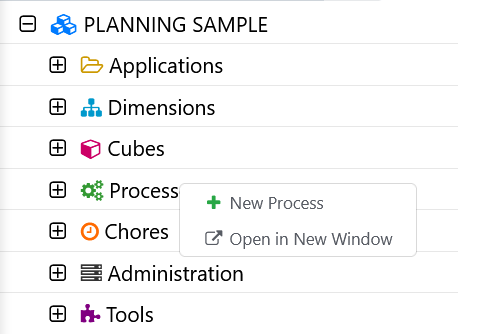
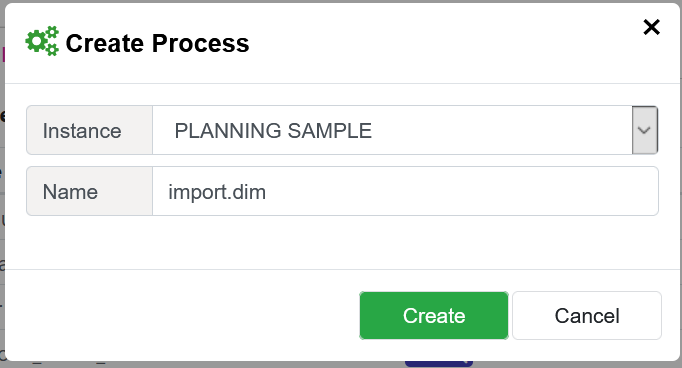
Go to PAW. Login to your TM1 Instance. Go to Processes and right click and select Create Process.

Enter a name, in our example ImportSecurityTI.

Click Create.

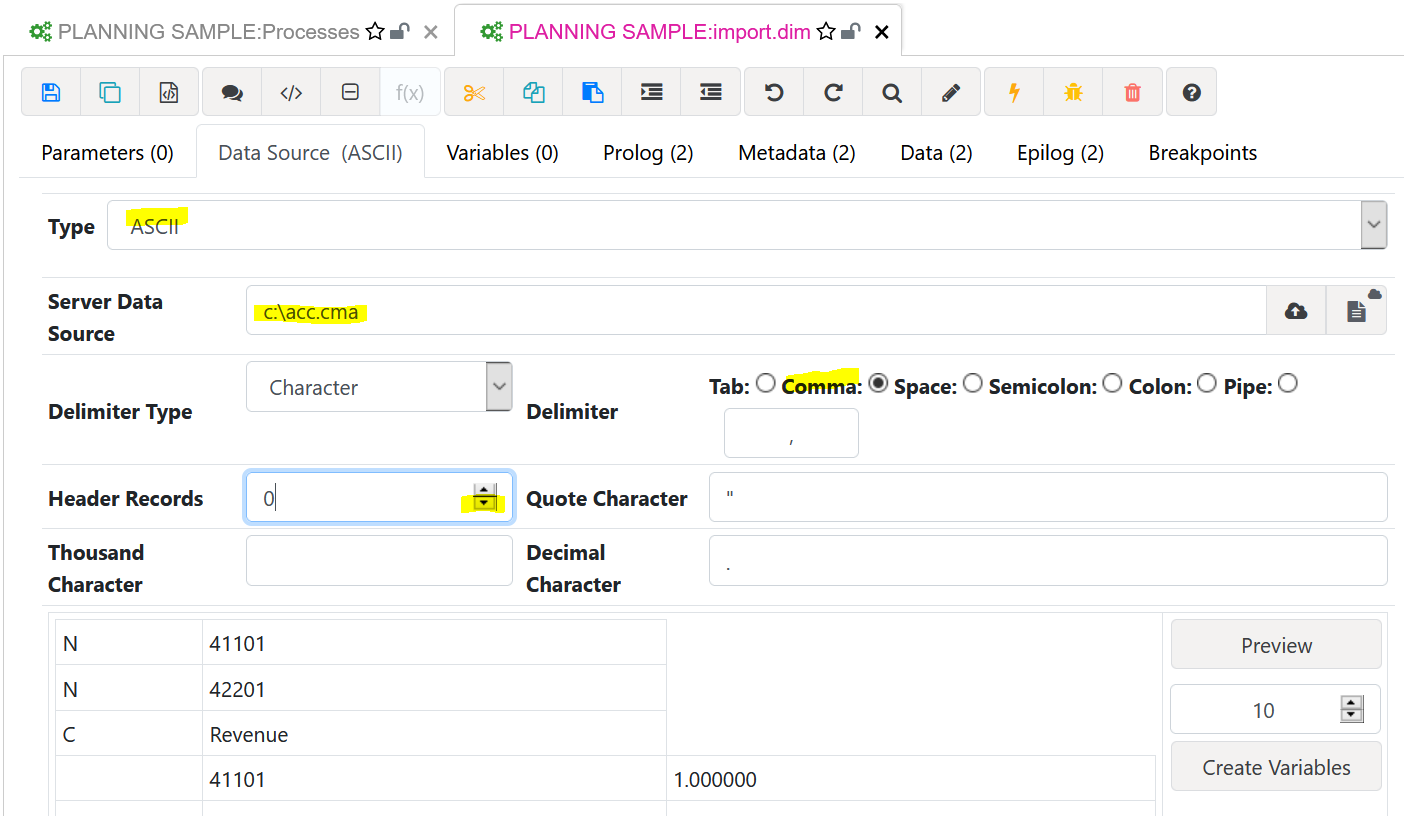
Click on file.

Drag you text file to the drop area, to load the file into the system.
This will copy the file to a folder under your data folder.


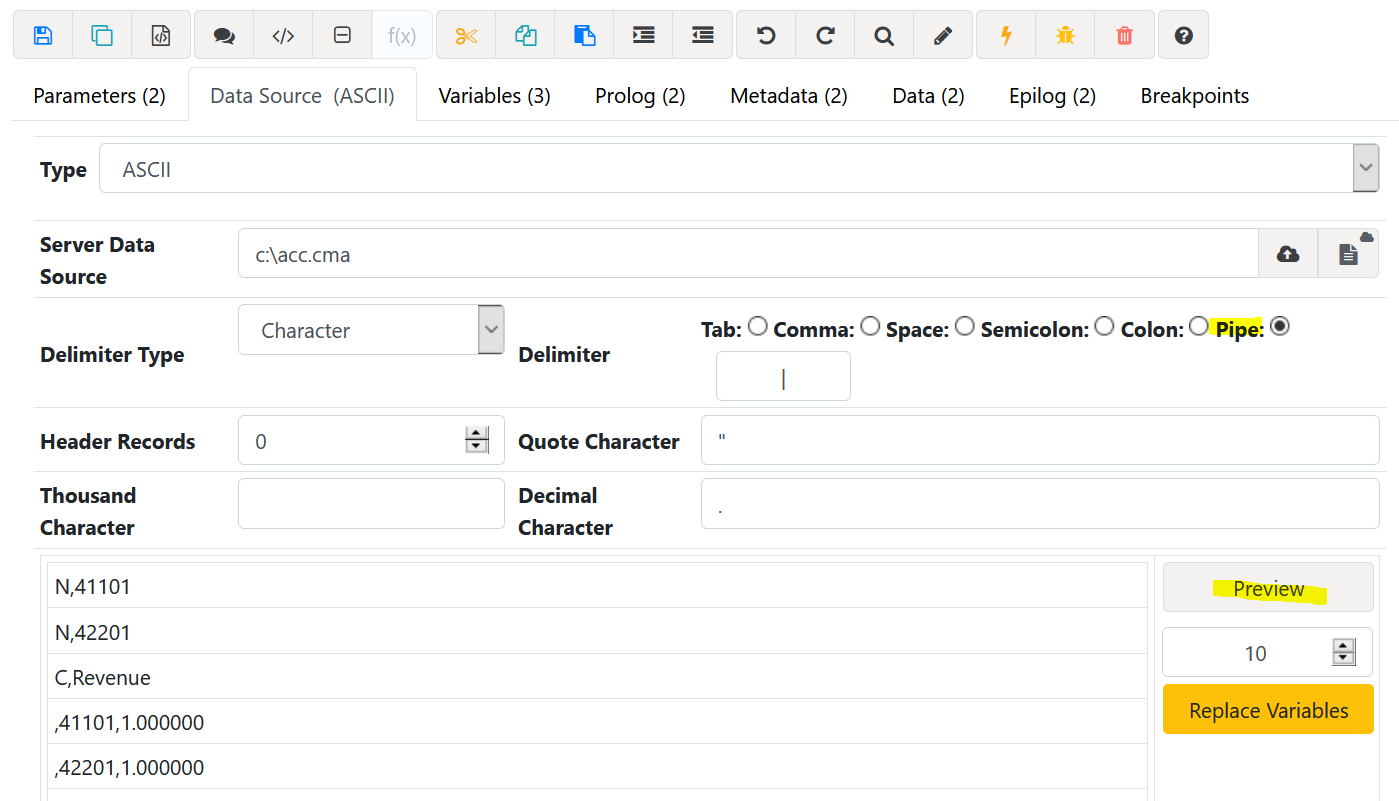
Click Next.  Select the delimiter you have in your file. Here we use comma.
Click preview.

Here we have a simple file, all columns are strings and we keep the default variables values of V1 to V4.
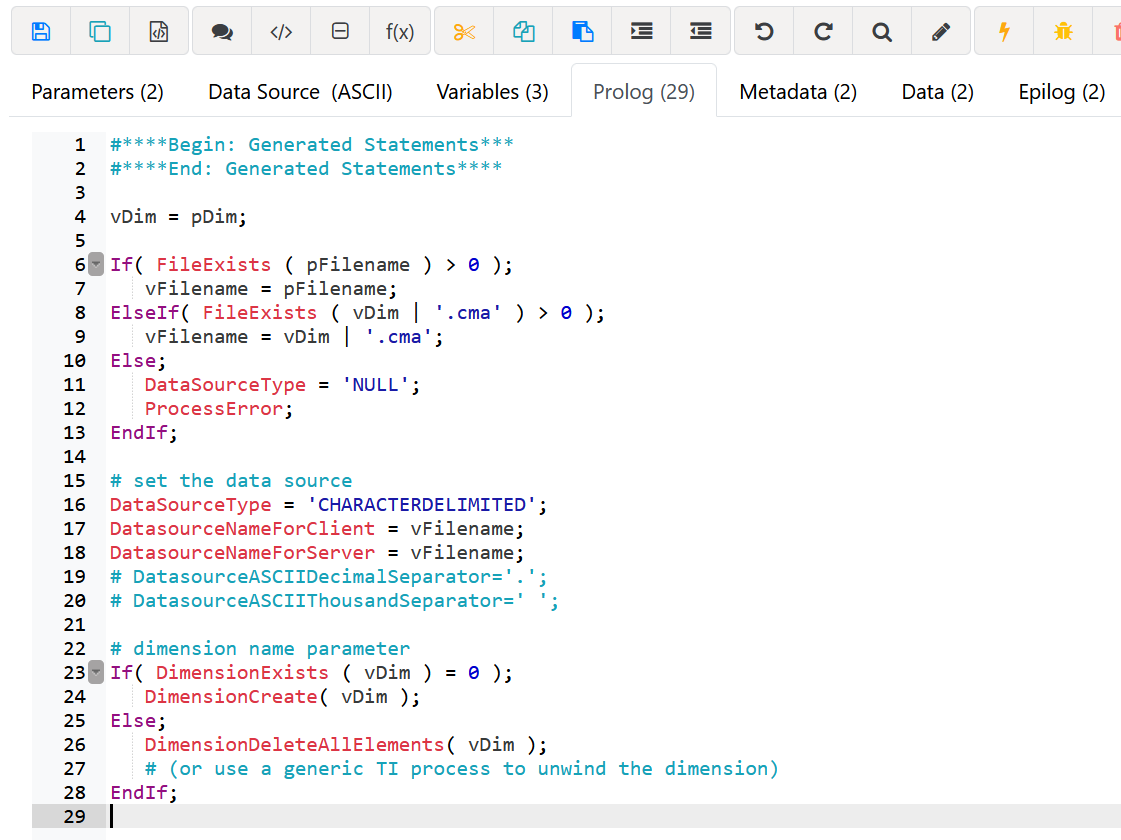
Click validate and save. Click on script.

Now enter code similar to this to make it populate the cube;

#Section Prolog
#****Begin: Generated Statements***
#****End: Generated Statements****

#——————————————————–
# setup the file to import
#——————————————————–

DataSourceType=’CHARACTERDELIMITED’;
# ASCII for comma is 44   http://www.asciitable.com/
DatasourceASCIIDelimiter=Char(44);
DatasourceASCIIHeaderRecords=0;
# ASCII for quates is 34
DatasourceASCIIQuoteCharacter=Char(34);

# place the file in below folder and paw will find the file
DatasourceNameForServer=’model_upload\CubeSecurity3.txt’;
# full path to the file and name – this is for Tm1 architect to find the file
DatasourceNameForClient=’C:\Program Files\ibm\cognos\tm1_64\samples\tm1\24Retail_CAM\data\model_upload\CubeSecurity3.txt’;

# set default values
sNAMESPACE= ‘CAMID(“:’;
sEND = ‘”)’;
sCUBE= ‘}CubeSecurity’;

#Section Metadata
#****Begin: Generated Statements***
#****End: Generated Statements****

#——————————————————–
# remove the ### for the debug lines to write variables to text file
#——————————————————–

### ASCIIOutput (‘c:\temp\debugout1.txt’, v1, v2, v3, v4 );
# check if string contain : (colon)
# SCAN(find , in string)
nSTART= scan ( ‘:’,v1);
if (nSTART <> 0);
# remove all before
# SUBST(string, beginning, length)
v1 = subst (v1, nSTART +1, (LONG( v1) – nSTART));
endif;

# add CAMID to the group (column 3)
# check that it does not already have : (colon)
nSTART= scan ( ‘:’,v3);
if (nSTART = 0);
# add value before to look like this “CAMID(“:GroupA”)”
# SUBST(string, beginning, length)
v3 = sNAMESPACE | v3 | sEND;
endif;

### ASCIIOutput (‘c:\temp\debugout2.txt’, v1, v2, v3, v4 );
# write values to the cube
# CellPutS (String, Cube, element1, element2, elementn )
CellPutS(v4,v1,v2,v3);

#Section Data
#****Begin: Generated Statements***
#****End: Generated Statements****

#Section Epilog
#****Begin: Generated Statements***
#****End: Generated Statements****

Click on validate – save – run buttons.

If all apostrophes are correct it should work fine.

More information:

nSTART= scan ( ‘:’,v1);
if (nSTART <> 0);

This will find the position in variable v1 where there are a colon. If there is none, then the value in nSTART is zero. At if we test that if not zero then do next line.

https://www.ibm.com/support/knowledgecenter/SSD29G_2.0.0/com.ibm.swg.ba.cognos.tm1_ref.2.0.0.doc/r_tm1_ref_scan.html

v1 = subst (v1, nSTART +1, (LONG( v1) – nSTART));

Here we replace variable v1 with a part of its content, we take one character to the right from the nSTART position and until end of string ( length of sting minus the start position).

v3 = sNAMESPACE | v3 | sEND;

The pipe character is to add strings together in TI processes. We add the predefined variables sNAMESPACE and sEND around the variable v3, to get it to look correct.

Concatenating Data in TM1 – How to Concatenate Variables in a TI or Rule

https://www.ibm.com/support/knowledgecenter/SSD29G_2.0.0/com.ibm.swg.ba.cognos.tm1_ref.2.0.0.doc/c_miscellaneousturbointegratorfunctions_n72f55.html

If you do not add the groups in security dialog before you run the script you get this error:

Process completed with errors
“24Retail_CAM:}CubeSecurity”,”Capital”,”GroupA”,”WRITE”,Data Source line (1) Error: MetaData procedure line (26): Invalid key: Dimension Name: “}Groups”, Element Name (Key): “CAMID(“:GroupA”)”

Product:
Planning Analytics 2.0.6
TM1SERVER_APP_version=TM1SERVER_APP-AW64-ML-RTM-11.0.6.71-0
Microsoft Windows 2016 server

Problem:
How check the SSL certificate in TM1WEB keystore?

Solution:
On the PA tm1WEB servern, start ikeyman.exe as administrator, from folder C:\Program Files\ibm\cognos\tm1web\jre\bin.
Click on open icon.


Open C:\Program Files\ibm\cognos\tm1_64\configuration\certs\CAMkeystore file.
Click OK and enter password: NoPassWordSet
Double click on the line encryption under Personal Certificates.

Here you can see when the server certificate expires. Click OK to close the dialog.
Select Signer Certificates in the Key database content drop-down list.
Find you company root certificate in the list, name can be anything you named it at setup.

When your find your company’s certificate, double click to see how long it is valid.
You can here use the ADD button to add new certificates if needed.

Important that the personal certificate is named encryption.

You can turn the use of SSL on and off with settings in Cognos Configuration. See more at this link:

https://www.ibm.com/support/pages/use-ikeyman-configure-custom-ssl-certificates-tm1web

More information:

Planning Analytics 2.0.9.2 and newer version have a different key-store for TM1WEB certificates.

IBM Planning Analytics: New Features

https://www.ibm.com/support/pages/node/291221
https://www.tm1forum.com/viewtopic.php?t=15433

https://docs.microsoft.com/en-us/sysinternals/downloads/procmon

Product:
Planning Analytics Workspace version 57
Microsoft Windows 2016 server

Problem:
How install PAW 57 on Windows 2016?

Solution:
Follow IBM guide lines in first place.
Download the ipa_workspace_local_win_2.0.57.1227.zip file from https://www.ibm.com/support/pages/node/6338663
Unzip the file and place the content in a separate folder like c:\ibm\paw57

Start a powershell prompt as administrator. Go to the c:\ibm\paw57 folder.
Run ./Start.ps1

Press Y

The script installs missing Windows software for you. Restart the Windows Server from above.
Login as same admin and go to folder c:\ibm\paw57 in a Powershell prompt.
Run ./Start.ps1 again.

If you want docker files to be on a different drive select Y above, you need a lot of space for the docker images. In our example we will use the default.

On our test server we have IIS running, that use port 80, so we need to change the ports used by PAW.

Rename the file paw.ps1.sample to paw.ps1 and edit it in notepad++.
Add the following lines in the file, substituting your preferred ports:

$env:PAGatewayHTTPPort="80"
$env:PAGatewayHTTPSPort="443"

In the paw.ps1 file, can you prepare many of the settings for PAW, we suggest this changes;

Enter the FQDN url to Planning Analytics server and TM1WEB server at rows:

$env:TM1Location=”https://tm1adminhost.domain.com:5898″

## Specify the URI of your TM1 Application Server.
## This should be the new installed TM1 web server
$env:TM1ApplicationsLocation=”http://tm1appshost.domain.com:9510″

You should test from Windows 2019 server that you can browse to the TM1 admin server with;
https://tm1adminservername.domain.com:5898/api/v1/Servers

As the cert is self signed, it is not trusted by the web browser, so you have to make a exception and proceed.

Here you get a list of all TM1 applications on that server. Note down the HTTPportNumber as you need it in the configuration, if you use Native security.


As we use CAM security – set # in front of the Tm1 security lines, as shown above.

$env:IBMCognosGatewayURL=”http://CAservername.domain.com:80/ibmcognos/bi/v1/disp”

$env:IBMCognosServlet=”http://CAservername.domain.com:9300/p2pd/servlet/dispatch”

Change the values to your Cognos Analytics server for the CAM authentication.
After you saved the changes in the paw.ps1 file, start the ./Start.ps1 again.

After the checks are OK, the installation starts. This take around 1 hour on a server with slow hard disks.
If you see this, please wait longer.
On question “Start the Administration Tool? (default y):” press Y and enter.
Your web browser will start and show a blank page.

Turn off the windows firewall on the windows server, to get access.

Scroll down the page and click Accept on both tabs.

As we have prepared the paw.ps1 file, the values should already be there, so you only need to click validate.

Above error is OK in version 57, as we do not use the PMHUB part anymore. Click on update.
Click on Status tab, and if no values listed, click on restart.

On the Windows server where Cognos Analytics is installed, you must update the C:\Program Files\ibm\cognos\analytics\webcontent\bi\pmhub.html file with the server and port of the PAW:

From a web browser go to http://pawservername.domain.com:81/ to login

To make docker commands to work, you must add docker folder to path.

Go to control panel – system – advanced system settings – advanced tab – Environment Variables.
Check that c:\program files\docker is there.
If you get issues, please restart the windows server as a first step to solve the issues.

Check the log files under /ibm/paw57/log/pa-gateway in notepad++ to find out more.


To prevent some internal database to get corrupted, you need to stop the PAW with command .\paw.ps1 stop and also add the shutdown script to windows routines.

  1. Go to folder C:\ibm\paw57\scripts
  2. Copy the scripts/shutdown.ps1 script to c:\ibm folder

  3. In a command window, open the Group Policy Editor (GPE) by running gpedit.msc.
  4. Expand Computer Configuration and select Windows Settings.

  5. Double-click Scripts (Startup/Shutdown) and click on shutdown line.
  6. Switch to the PowerShell Scripts tab.

  7. Click Add and find the shutdown.ps1 script in c:\ibm folder. Click OK.

How setup the PA agent

https://www.ibm.com/support/knowledgecenter/SSD29G_2.0.0/com.ibm.swg.ba.cognos.tm1_prism_gs.2.0.0.doc/t_paw_download_paa_agent.html

Browse to PAW and click on Administration.
Click on Agent, and then click Download Agent.

Copy the file paa-agent-pkg-2.0.57.1308.zip to the Planning Analytics server and unzip it in the c:\temp folder.  Start a CMD prompt with “Run as Administrator”. Go to c:\temp folder.
Run the upgrade with command: UpdatePAAAgent.bat “c:\program files\ibm\cognos\tm1_64”

After upgrade, you should see the version 2.0.57.1308, in PAW administration Agents dialog.

How setup TLS for PAW is described at this link;

https://www.ibm.com/support/knowledgecenter/SSD29G_2.0.0/com.ibm.swg.ba.cognos.tm1_inst.2.0.0.doc/t_paw_enable_ssl.html


You can check that docker is installed, by check that there are no errors in the C:\ProgramData\docker\panic.log file.

Go to folder c:\program files\docker and run command .\docker ps to see the pods running;

When PAW is running, above pods should be listed for the .\docker ps command.

error during connect: Get http://%2F%2F.%2Fpipe%2Fdocker_engine/v1.40/containers/json: open //./pipe/docker_engine: The system cannot find the file specified. In the default daemon configuration on Windows, the docker client must be run elevated to connect. This error may also indicate that the docker daemon is not running.
If you get errors like above, check that the docker service is started.

You can enter docker logs mongo to see the logfile for that pod.

If end user get above error, check that the firewall on the windows server where you run PAW is off, as below picture show.

If the paw service (docker) is stopped, you get a error like “Can’t reach this page” instead.

More information:
https://www.ibm.com/support/knowledgecenter/SSD29G_2.0.0/com.ibm.swg.ba.cognos.tm1_inst.2.0.0.doc/c_paw_config_file.html

https://www.ibm.com/support/knowledgecenter/SSD29G_2.0.0/com.ibm.swg.ba.cognos.tm1_inst.2.0.0.doc/c_paw_cannot_access_paw_local.html

https://www.ibm.com/support/pages/troubleshooting-planning-analytics-workspace-related-docker-issues

https://www.ibm.com/support/knowledgecenter/en/SSD29G_2.0.0/com.ibm.swg.ba.cognos.tm1_inst.2.0.0.doc/t_tm1_inst_tm1web_windows.html

https://www.ibm.com/support/knowledgecenter/SSD29G_2.0.0/com.ibm.swg.ba.cognos.tm1_prism_gs.2.0.0.doc/c_paw_nf_sc57_local.html

How to Install Planning Analytics Workspace to Windows 2016

Product:
Planning Analytics 2.0.9.3
Microsoft Windows 2019

Problem:
How do i use BedRock TI processes?

Solution:
Download the bedrock files from https://code.cubewise.com/bedrock
https://github.com/cubewise-code/bedrock
Click CODE icon and select download ZIP
Unzip the file, and copy the “main” folder to the TM1 server.


Rename the main folder to bedrock and place it under the configuration folder.


Update the tm1s.cfg with the additional bedrock data folder
DataBaseDirectory=../Data;Bedrock

Restart the Tm1 application.
Go into TM1 Architect, under View select “Display Control Objects” and now the bedrock TI process are visible.

If you open a bedrock TI process, there is instructions in the prolog tab.

To use a bedrock process, create a new process, and implement the ExecuteProcess command as shown before;

You can see in the parameters tab what values you should give;

Instructions are also found here https://github.com/cubewise-code/bedrock/wiki

You must update your TI process with some variables, to make it work:

This version of Bedrock had some variables that needed to be declared:
pLogoutput = 0;
pStrictErrorHandling = 1;
pSandbox = ”;
pSubN = 0;
Then for easy use, we added some variables of our own, for the values we change:

pCube = ‘resources’;
pFilter = ”;
pFilePath = ‘../scripts/’;
pFileName = ‘cube_export.txt’;

Above variables need to be added to the Executeprocess command at the right places.
Then you only need to change the above lines when you want to export to a different file.

Run the process and it will create a csv file with your data. That you later can import in other project.

Product:
Planning Analytics 2.0.9.3
Microsoft Windows 2019 Server

Problem:
How to install PA on Windows 2019 server?

Solution:
Follow IBM guide lines in the first place;

https://www.ibm.com/support/knowledgecenter/SSD29G_2.0.0/com.ibm.swg.ba.cognos.tm1_inst.2.0.0.doc/t_tm1_gs_inst_basic_install_on_windows.html

Download the latest service pack of the software

https://www.ibm.com/support/pages/ibm-planning-analytics-20-fix-lists

Copy the media over to the server and run as administrator the issetup.exe file.

Click Next
Mark “I Agree” and click Next
Select folder to install to and Production and click Next

(Tm1 Perspectives only work on workstation with Excel and NET Framework 4.6.1)
Click Next
Mark “Make the shortcuts visible to all users” and click Next
Click Next
Wait during install (takes 28 min depending on your hardware)
Click Finish.

Start IBM Cognos Configuration as “Run as administrator”.
If you will use TM1 Application web then you can increase memory for WLP

If used with CAM, setup the Gateway URI to be same as the Cognos Analytics URL.

Set the servername for PMPSVC to be the FQDN of the TM1 Windows Server.


Change the port from 9510 to 9511 for TM1 Application Server (pmpsvc).
Save the configuration.
Right click IBM Cognos TM1 and TM1 Admin Server and select Start.

To test the installation right click Planning Sample and click start.
Inside C:\Program Files\ibm\cognos\tm1_64\samples\tm1\PlanSamp\tm1s.cfg change to Language=eng to have tm1server log files in English.
Change Region in Control Panel on client computer to have English as Format, to get English menus in TM1 Architect. Or add Language=eng to file C:\ProgramData\Applix\TM1\tm1p.ini when TM1 Architect is not running, then you get English menu inside TM1 Architect with other Regional settings in Windows.

TM1WEB has it own installations package, that need to be downloaded from fix central.
https://exploringtm1.com/how-to-install-planning-analytics-spreadsheet-services/

Run analytics-installer-3.0.20091714-win.exe as administrator.
Select English and click Next.
Click Next.
Mark “I accept…” and click Next.

Click Next.
Click Install.

When done – change the IBM Cognos TM1 windows service to Automatic.

After you have decided if you use CAM authentication or not, browse to http://paservername.domain.com:9511/pmpsvc

First time you start Tm1 Application Web on port 9511, you need to change to correct port for tm1web.

Change to http://paservername.domain.com:9510/tm1web/Contributor.jsp

Click OK. This value is saved in file C:\Program Files\ibm\cognos\tm1_64\webapps\pmpsvc\WEB-INF\configuration\pmpsvc_config.xml, in case you want to change it later.


The new TM1WEB is now on the old URL http://paservername.domain.com:9510/tm1web/

# memory
-Xmx4096m
-Xms4096m

# generational concurrent garbage collection policy, useful for applications with many short-lived objects
-Xgcpolicy:gencon

# The size of the heap for the young generation, the objects which have a short life of time
-Xmn2048m

You can change the new TM1WEB memory settings in file C:\Program Files\ibm\cognos\tm1web\wlp\usr\servers\tm1web\jvm.options

<add key=”AdminHostName” value=”” /> value can you set in the C:\Program Files\ibm\cognos\tm1web\webapps\tm1web\WEB-INF\configuration\tm1web_config.xml file, to make users do not need to enter a admin host, and can select the TM1 applications direct from the drop down list.

To make SSO work with CAM setup, you need in your Web Browser (IE) set the Cognos server to be trusted or local intranet. Go to Internet Options – Security – Local Intranet – Sites – Advanced – Add – OK.

To use Cognos Authenticate Mode, you need to add this values to the tm1s.cfg file for your application.
ServerCAMURI=http://cognos-analytics.domain.com:9300/p2pd/servlet/dispatch
ClientCAMURI=http://cognos-analytics.domain.com:80/ibmcognos/bi/v1/disp

https://www.ibm.com/support/knowledgecenter/SSD29G_2.0.0/com.ibm.swg.ba.cognos.tm1_inst.2.0.0.doc/c_parametersinthetm1s.cfgfile_n1503fe.html

Inside Cognos Configuration setup a new TM1 application by point to the folder that contain the TM1S.CFG file. Save the change and start the TM1 instance by right click and select start.

To be able to add Cognos Users with TM1 architect, when in IntegratedSecurityMode=2 you need to add CognosGatewayURI = http://caserver.domain.com:80/ibmcognos/bi/v1/disp to file C:\ProgramData\Applix\TM1\tm1p.ini and in file C:\Users\%username%\AppData\Roaming\Applix\TM1\tm1p.ini

From PA server copy file C:\Program Files\ibm\cognos\tm1_64\bi_interop\bi_interop.zip to the CA server temp folder, and unzip it with https://www.7-zip.org/

Update the planning.html file (used by old PMPSVC) with
var planningServices = [“http://tm1webserver.domain.com:9510″,”http://tm1appwebserver.domain.com:9511″,”http://pawserver.domain.com”];

Update the pmhub.html file (used by PAW) with
var pmhubURLs = [“http://tm1webserver.domain.com:9510″,”http://tm1appwebserver.domain.com:9511″,”http://pawserver.domain.com”];

Update the tm1web.html file (used by TM1WEB) with
var tm1webServices = [“http://tm1webserver.domain.com:9510″,”http://tm1appwebserver.domain.com:9511″,”http://pawserver.domain.com”];


Copy the planning.html and pmhub.html file to the /webcontent/bi/ and /webcontent/ directory.
Create the folder C:\Program Files\ibm\cognos\analytics\webcontent\bi\tm1\web.
The tm1web.html file is copied in the new /webcontent/bi/tm1/web/ directory.
Rename the variables_TM1.xml.sample file to variables_TM1.xml inside CA Install Dir/templates/ps/portal folder.
Rename the variables_plan.xml.sample to variables_plan.xml inside CA Install Dir\templates\ps\portal folder.

If missing, copy icon_active_application.gif to CA Install Dir\webcontent\ps\portal\images folder.

Test by browse to http://tm1webservername.domain.com:9510/tm1web

This ports need to be open in the firewall:
To end users: 80, 9510, 9511
To TM1 developers: 80, 443, 9510, 9511, 5495, 5498, 5895, 5898, 8888, 9012, 9300, 12354-44312 (depending on your setup of TM1 instances)

https://www.ibm.com/support/knowledgecenter/SSD29G_2.0.0/com.ibm.swg.ba.cognos.tm1_inst.2.0.0.doc/c_tm1_inst_defaultvaluesfortm1installation.html

To ensure that Cognos TM1 Applications can properly detect a CAM session termination, set the pmpsvc session timeout to a value higher than the CAM session timeout in the fpmsvc_config.xml file.

Install of a new PA agent, needs to be done after installation of a new PAW version: https://pmsquare.com/analytics-blog/2019/1/10/when-upgrading-paw-dont-forget-to-upgrade-paa-agent

More information:
https://www.ibm.com/support/pages/node/6324657

https://www.ibm.com/support/pages/unable-start-ibm-planning-analytics-spreadsheet-services-and-ibm-cognos-tm1-service-same-host-server

https://www.ibm.com/support/knowledgecenter/SSD29G_2.0.0/com.ibm.swg.ba.cognos.tm1_nfg.2.0.0.doc/c_paw_nf_sc57_local.html

https://community.ibm.com/community/user/businessanalytics/blogs/nadine-mnch/2018/03/07/cognosanalytics-and-planninganalytics-integration-walkthrough-part-3

https://www.ibm.com/support/pages/node/286765

https://www.ibm.com/support/pages/changes-tm1web-deployment-planning-analytics-local-2055-release

TM1WEB version supported:
https://www.ibm.com/support/pages/node/6233252

https://www.ibm.com/support/pages/ibm-planning-analytics-microsoft-excel-conformance-requirements

Product:
Planning Analytics 2.0.9
Planning Analytics Workspace 54
Microsoft Windows 2016 server

Problem:
Sum up on a hierarchy?

Suggested solution:
Turn on hierarchy (virtual dimensions) by adding EnableNewHierarchyCreation=T to the TM1 applications tm1s.cfg file.
Ensure that you have free memory on the server before you turn this one.

Login to paw and open a new book.
Right click on the dimension, and select edit dimension. Click on attributes icon.
Right click on the attribute you want to create a hierarchy for.

The new hierarchy is shown as a dimension.

There are 3 first hierarchy created at first time, the one with same name is for backward compatibility, your new one, and levels. If you delete a member from a hierarchy – it is only removed from that virtual dimension. To delete a leaf member, you should delete it from the leaves hierarchy. Then data and all existing of that member is removed from all hierarchy’s.

Start PAX and connect to your TM1 application.
Right click on the cube that contain the data you want to see, and select Exploration.

Expand the dimension to see the new hierarchy. Drag the hierarchy to the rows area. Now you got the report summarized on the Plants.

Convert the report to a quick report.


Create a excel report the way you want and reference the result on the quick report sheet. Publish the report to TM1WEB.

Hierarchy can only be used in Explorations and Quick Reports. If you add members to the leaves, you have to recreate the dimension with a TI script to get the new members added.

More information:
https://code.cubewise.com/blog/mastering-hierarchies-in-ibm-tm1-and-planning-analytics
https://exploringtm1.com/creating-virtual-dimensions-in-tm1-planning-analytics/

Product:
Planning Analytics 2.0.9
Planning Analytics Workspace 54
Microsoft Windows 2016 server

Problem:
How sum up values from a group of accounts, in an Excel report?

Suggested solution:
Create a hidden dynamic report with the given subset in the TM1RPTROW and a sum underneath, then refer the sum.

Mark out the accounts that you want to sum with some text in the attribute, like here in planning samples, we set AccountCatagory to text “coffee”.

Go to Planning Analytics Workspace (PAW) and open a new book.
Expand the Dimensions, and for your “plan_chart_of_accounts” right click and select Edit dimension.
Click on icon for Member attribute mode in top right corner of the view.
Scroll to the column you want to edit, in out example AccountCatagory.
Enter the word “coffee” on the rows you want selected.
Updates are save direct to the dimension (tm1 database).

Go to Planning Analytics for Excel (PAX) and connect to your planning sample.
Expand the views on the right side and import a view that contain the columns you want.

On the view, right click and select dynamic report on new sheet.
Click on “Show Format Areas”.
In cell B11 insert the MDX formula:

‘{FILTER(TM1SUBSETALL([plan_chart_of_accounts].[plan_chart_of_accounts]) , (INSTR(1 , [plan_chart_of_accounts].[plan_chart_of_accounts].CURRENTMEMBER.PROPERTIES(“AccountCategory”) , “coffee” , 1) >= 1))}

In cell B21 update the TM1RPTROW to have a reference to the MDX formula last:

=@TM1RPTROW($B$12,”Planning Sample CAM:plan_chart_of_accounts”,,,”AccountName”,FALSE,B$11)

Above B$11 will give that the TM1RPTROW use the MDX formula to select accounts.
Then you need to sum up this values to a single cell.


Open the drop down of areas and mark the tm1rptdatarng line and press ctrl+c to copy the value.
Go to cell C19 and enter a SUM formula with INDEX:

=SUM(INDEX(TM1RPTDATARNG48625521,0,3))

Replace the TM1RPTDATARNG48625521 with your unique area name.
This should give that this always sum up the values in column 3 (ly actual) to this cell.

Now create a new sheet in the excel workbook.
Insert the dynamic report you want, and on the last line enter a reference to above cell.

=Sheet2!C19


This will update this cell with the value from the other sheet.


You need to refresh the book for the numbers to be updated.

You can hide the second sheet in the excel workbook, then the report is only one page.

There is better ways to solve this – check out the links below.

More information:
https://cubewise.com/blog/tm1-attributes-things-to-be-aware/
https://docs.microsoft.com/en-us/analysis-services/multidimensional-models/mdx/mdx-member-properties-intrinsic-member-properties?view=asallproducts-allversions&viewFallbackFrom=sql-server-ver15
https://www.tm1forum.com/viewtopic.php?t=13759
https://www.bihints.com/creating_dynamic_subsets_in_applix_tm1_with_mdx_a_primer
https://docs.microsoft.com/en-us/sql/mdx/iif-mdx?view=sql-server-ver15
https://docs.microsoft.com/en-us/sql/mdx/instr-mdx?view=sql-server-ver15
https://www.tm1forum.com/viewtopic.php?t=14731
https://www.contextures.com/xlFunctions01.html
https://exceljet.net/formula/sum-range-with-index

Product:
Planning Analytics 2.0.9
Planning Analytics Workspace 54
Microsoft Windows 2016 server

Problem:
How add a nice clock to the dashboard?

Suggested Solution:
Create a separate html page on your IIS server (or external) that all users can reach.

In that HTML page have this code only:
<!DOCTYPE html>
<html>
<body>

<iframe src=”https://free.timeanddate.com/clock/i7gqbnya/n239/fn6/fs16/fc9ff/tc000/ftb/bas2/bat1/bacfff/pa8/tt0/tw1/th1/ta1/tb4″ frameborder=”0″ width=”217″ height=”60″></iframe>

</body>
</html>

( you can create your own clock at site https://www.timeanddate.com/ )
Then copy the HTML code to a webpage that you save as default.html on your site. Any links need to be renamed to use https instead of http in the code, otherwise you get a blank page in paw.
(the default.html page will be the default page shown when a user browse to that url).

Inside PAW open the sheet you want to add a clock to.

Click on URL icon, and paste in the URL to your page.

https://time.tm1.dk/default.htm

Important that you enter HTTPS, as you can only use HTTPS pages inside PAW.
You can rotate the URL block and cut the empty space, then it looks nice when you leave edit mode in PAW.

More information:
https://blog.octanesolutions.com.au/adding-images-in-paw

Product:
Planning Analytics 2.0.9
Planning Analytics for Excel
Microsoft Windows 2016 Server

Problem:
How sum a selection of accounts on a PAX custom report?

Suggested Solution:
Start Excel and login as developer in your TM1 instance (we use 24Retail in our example)
Find the cube that contain the dimensions you want to work with.

Right-click and select Open in viewer.
Move the dimensions to where you want them.

Right click on row and select Show attributes, to preview them in the view.

Mark the attribute you want to see and click on arrow and OK.

Click on the reports icon to insert it to your excel sheet.

Select custom reports, to have it in that format.
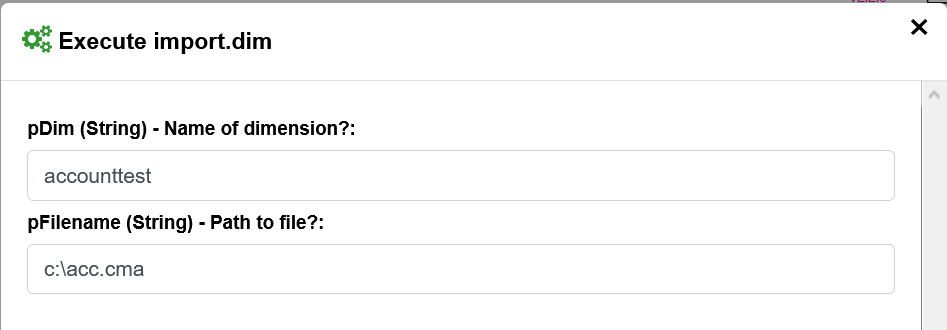
Select the column B and right click to Insert a new column, to show the attribute.

Enter the cube and dimension in cell A7
Enter the Attribute name in cell B8
Enter the DBRA function in cell B9, like this: =@DBRA($A$7,$A9,B$8)

Drag the formula, by grab in the corner of the cell, to the whole column to get values.
Now you have the attribute listed.

Enter the attribute value you want to sum in cell A27 and below.
Enter the SUMIF function in cell A27, like this: =SUMIF($B9:$B24,A27,C$9:C$24)
The SUMIF function have this parameters =SUMIF(area to search after value in, value to look for, area to sum rows where value is).
Copy the formula down to the other rows.


Now you can hide column B if you want it to look more automatic.

In TM1WEB you click on “recalculate” icon, to get new values.
There exist other ways to solve this, use of hierarchies can be one.

More information:
https://www.ibm.com/support/knowledgecenter/SSD29G_2.0.0/com.ibm.swg.ba.cognos.tm1_dg_dvlpr.2.0.0.doc/tm1_dg_dvlpr.pdf
https://exploringtm1.com/display-tm1-attributes-in-excel/
https://cubewise.com/blog/attributes-in-pa/

http://public.dhe.ibm.com/software/data/cognos/documentation/docs/en/tm1/9.0sp3/is_document_1425_tm1websupportedexcelfeaturelist.pdf

Some excel function does not work in TM1WEB, you must test them first.

Recreating TM1 Alternate Hierarchies

https://code.cubewise.com/blog/mastering-hierarchies-in-ibm-tm1-and-planning-analytics


Product:
Planning Analytics 2.0.9
Microsoft Windows 2016 server

Problem:
How can i find if a TM1 TI process contain any reference to other TM1 process?

Suggested solution:
Search in DOS in all the PRO files in data folder (normally the TI process are saved as text files with pro ending in data folder) for the name of the TI process.

On your TM1 server, start a CMD prompt as a Administrator.
Change to the folder where you have your TM1 application.
Enter below command to find the word “security” in all TI process for planning sample:
find  /i  “security”  “C:\Program Files\ibm\cognos\tm1_64\samples\tm1\plansamp\*.pro”

You will get a result similar to this;

but it lists all the files it search – so a better command can be to use FINDSTR

findstr /i /m /s “plan_load_budget_asci” “C:\Program Files\ibm\cognos\tm1_64\samples\tm1\plansamp\*.pro”

Above line will search for the TI process name plan_load_budget_asci

Inside the Test1.pro i had enter a reference to the other TI process – that way it is listed.

More information:
https://www.groovypost.com/howto/find-command-search-windows/

https://ss64.com/nt/find.html

https://ss64.com/nt/findstr.html

Running a TI Process from within another Process