Product:
Planning Analytics Workspace version 57
Microsoft Windows 2016 server

Problem:
How install PAW 57 on Windows 2016?

Solution:
Follow IBM guide lines in first place.
Download the ipa_workspace_local_win_2.0.57.1227.zip file from https://www.ibm.com/support/pages/node/6338663
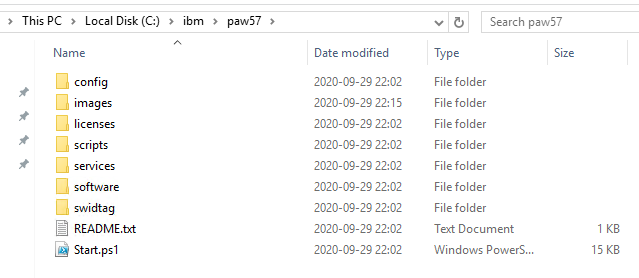
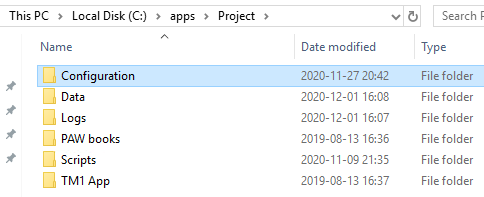
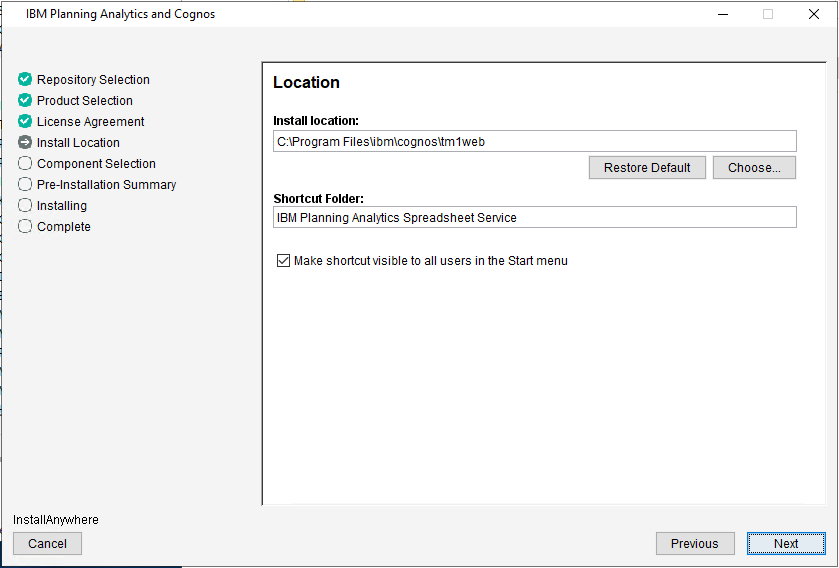
Unzip the file and place the content in a separate folder like c:\ibm\paw57

Start a powershell prompt as administrator. Go to the c:\ibm\paw57 folder.
Run ./Start.ps1

Press Y

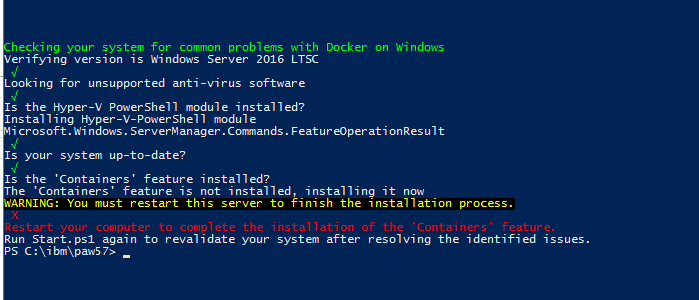
The script installs missing Windows software for you. Restart the Windows Server from above.
Login as same admin and go to folder c:\ibm\paw57 in a Powershell prompt.
Run ./Start.ps1 again.

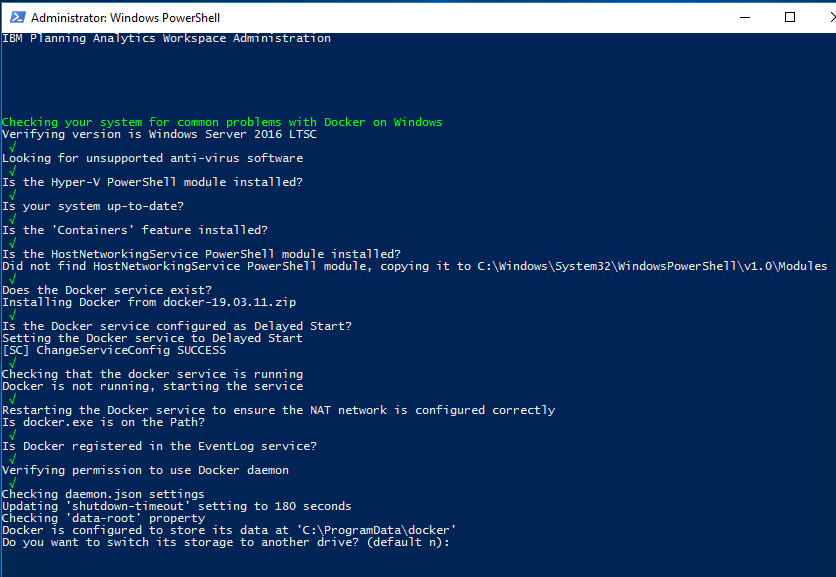
If you want docker files to be on a different drive select Y above, you need a lot of space for the docker images. In our example we will use the default.

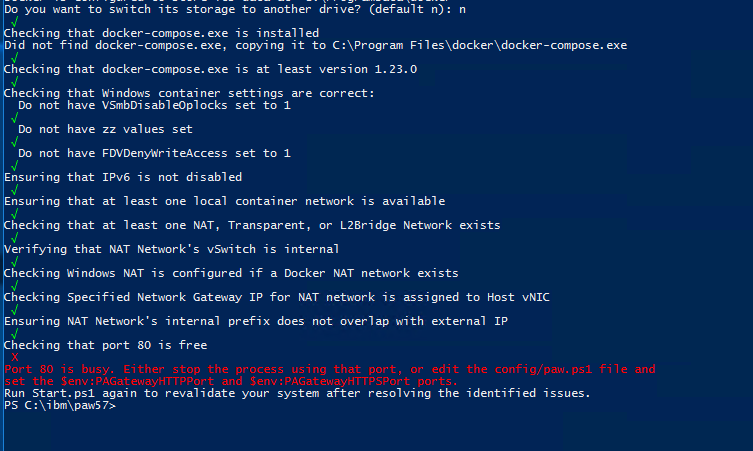
On our test server we have IIS running, that use port 80, so we need to change the ports used by PAW.

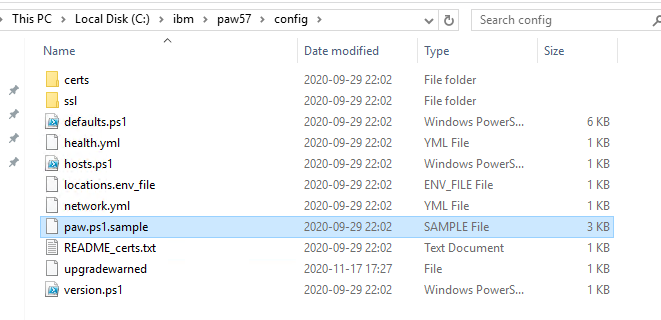
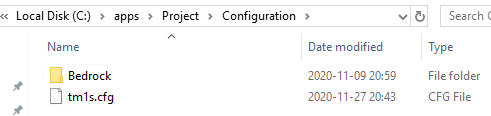
Rename the file paw.ps1.sample to paw.ps1 and edit it in notepad++.
Add the following lines in the file, substituting your preferred ports:

$env:PAGatewayHTTPPort="80"
$env:PAGatewayHTTPSPort="443"

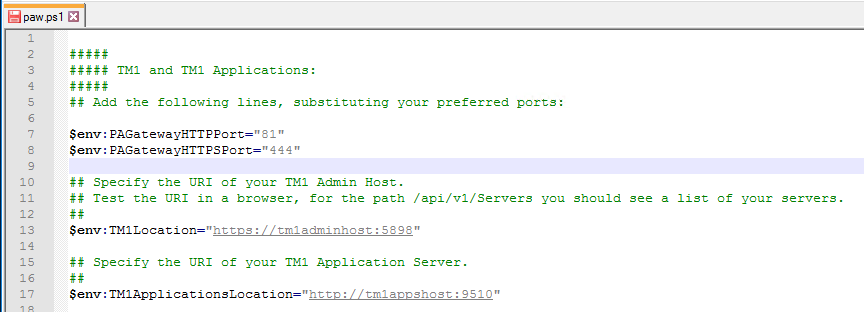
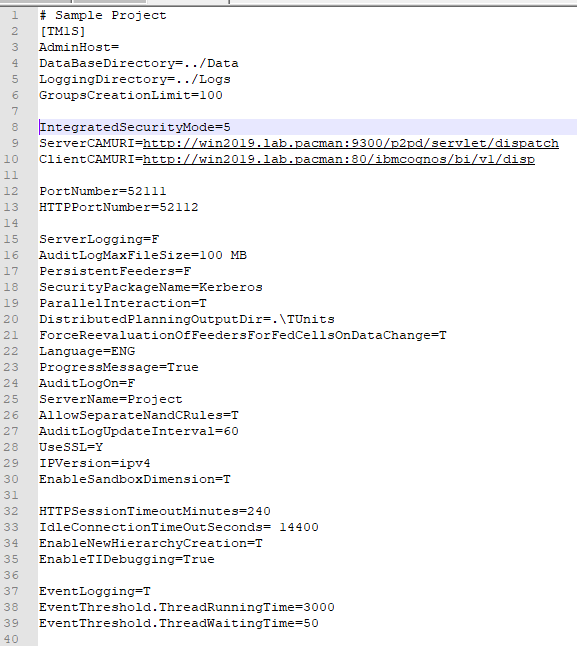
In the paw.ps1 file, can you prepare many of the settings for PAW, we suggest this changes;

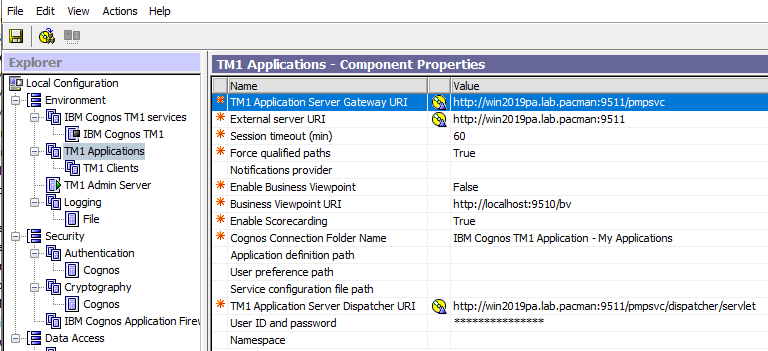
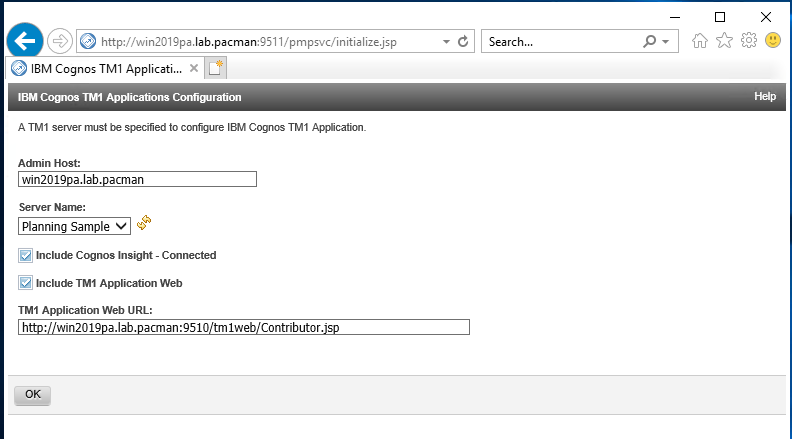
Enter the FQDN url to Planning Analytics server and TM1WEB server at rows:

$env:TM1Location=”https://tm1adminhost.domain.com:5898″

## Specify the URI of your TM1 Application Server.
## This should be the new installed TM1 web server
$env:TM1ApplicationsLocation=”http://tm1appshost.domain.com:9510″

You should test from Windows 2019 server that you can browse to the TM1 admin server with;
https://tm1adminservername.domain.com:5898/api/v1/Servers

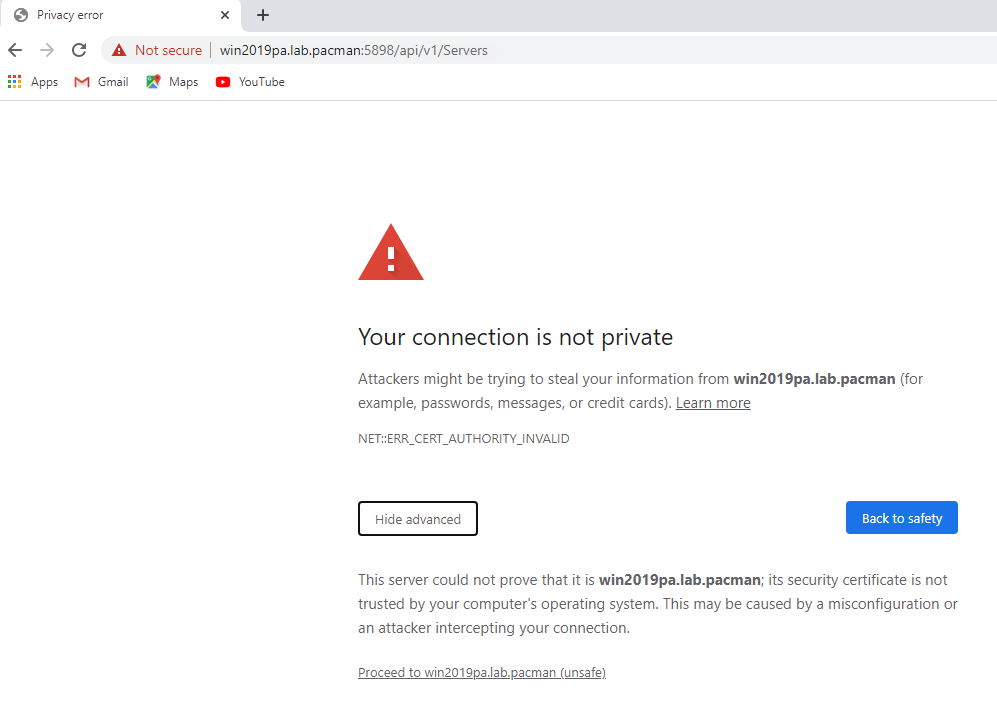
As the cert is self signed, it is not trusted by the web browser, so you have to make a exception and proceed.

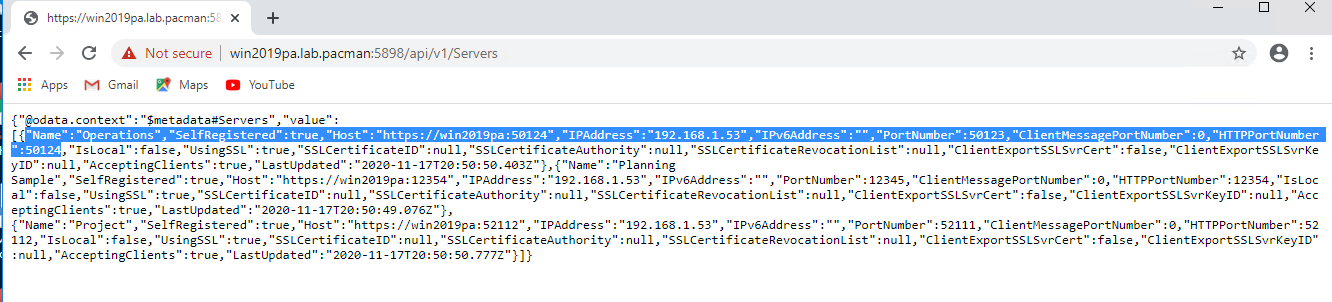
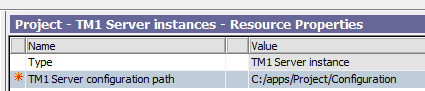
Here you get a list of all TM1 applications on that server. Note down the HTTPportNumber as you need it in the configuration, if you use Native security.


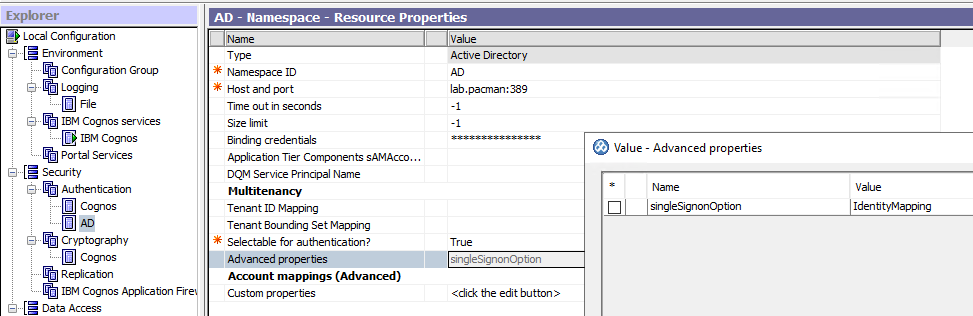
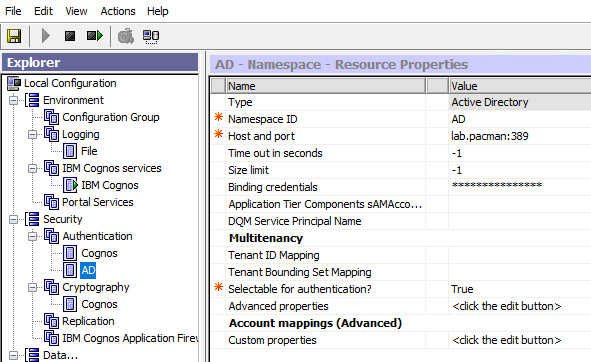
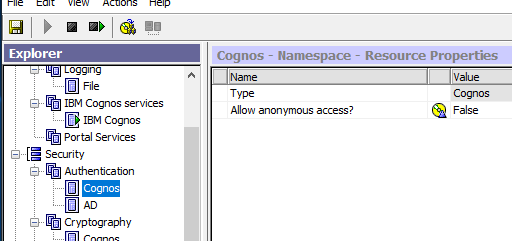
As we use CAM security – set # in front of the Tm1 security lines, as shown above.

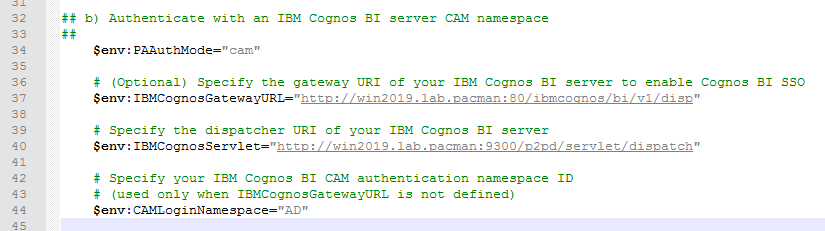
$env:IBMCognosGatewayURL=”http://CAservername.domain.com:80/ibmcognos/bi/v1/disp”

$env:IBMCognosServlet=”http://CAservername.domain.com:9300/p2pd/servlet/dispatch”

Change the values to your Cognos Analytics server for the CAM authentication.
After you saved the changes in the paw.ps1 file, start the ./Start.ps1 again.

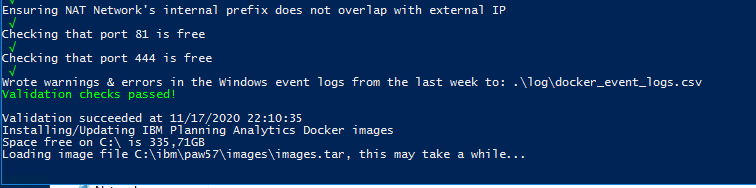
After the checks are OK, the installation starts. This take around 1 hour on a server with slow hard disks.
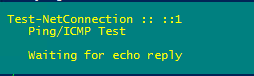
If you see this, please wait longer.
On question “Start the Administration Tool? (default y):” press Y and enter.
Your web browser will start and show a blank page.

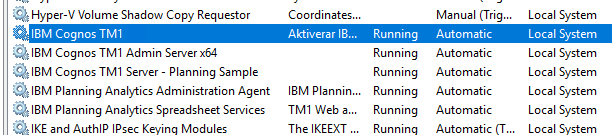
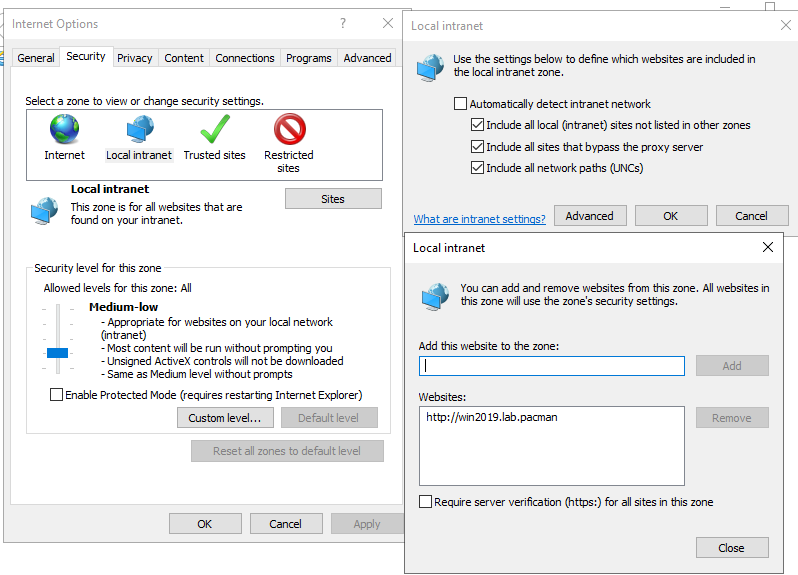
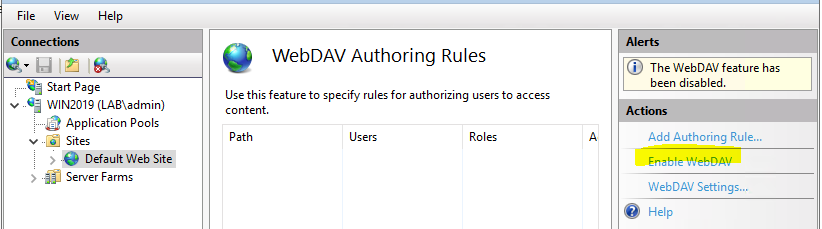
Turn off the windows firewall on the windows server, to get access.

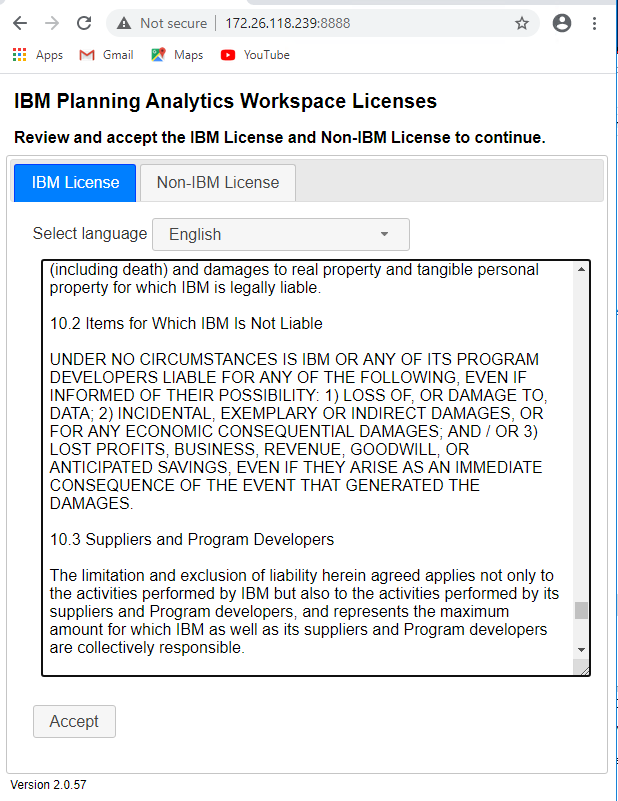
Scroll down the page and click Accept on both tabs.

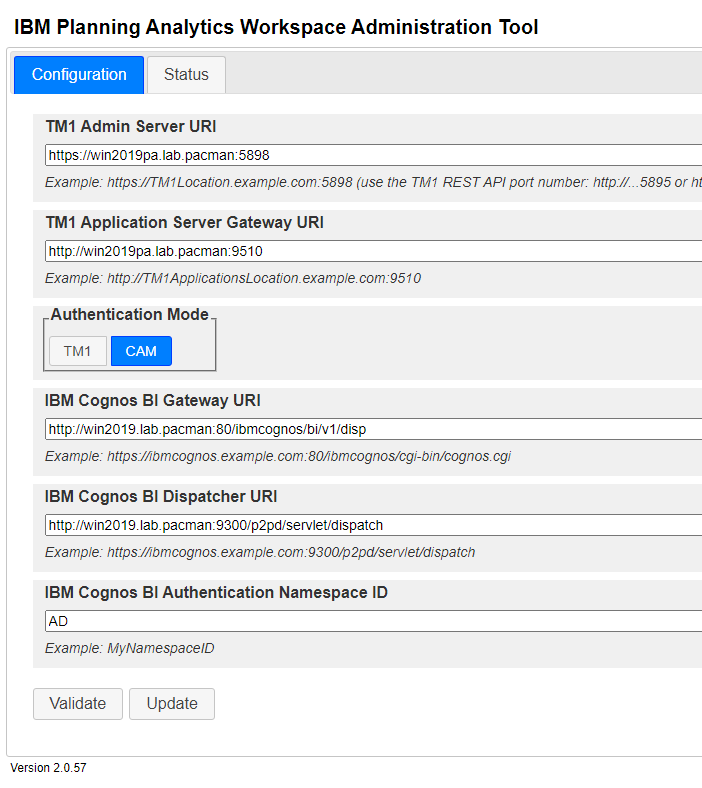
As we have prepared the paw.ps1 file, the values should already be there, so you only need to click validate.

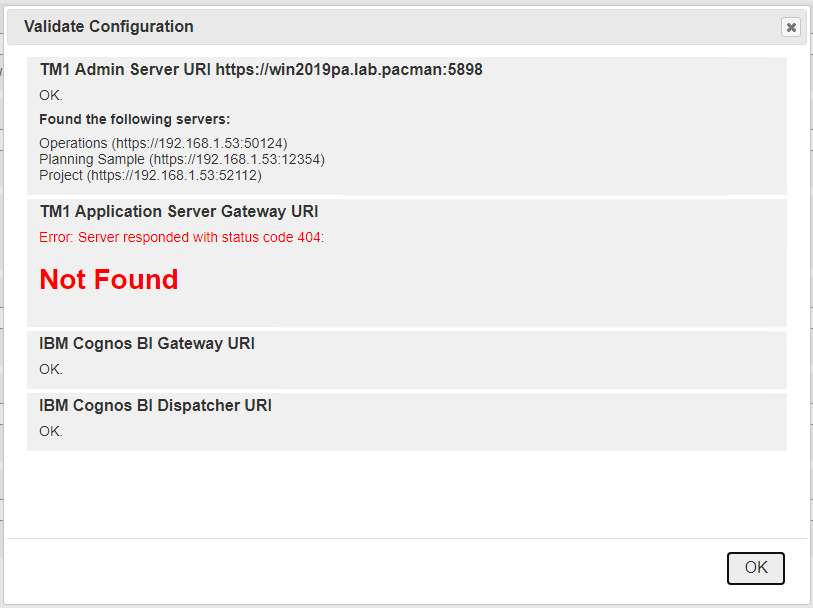
Above error is OK in version 57, as we do not use the PMHUB part anymore. Click on update.
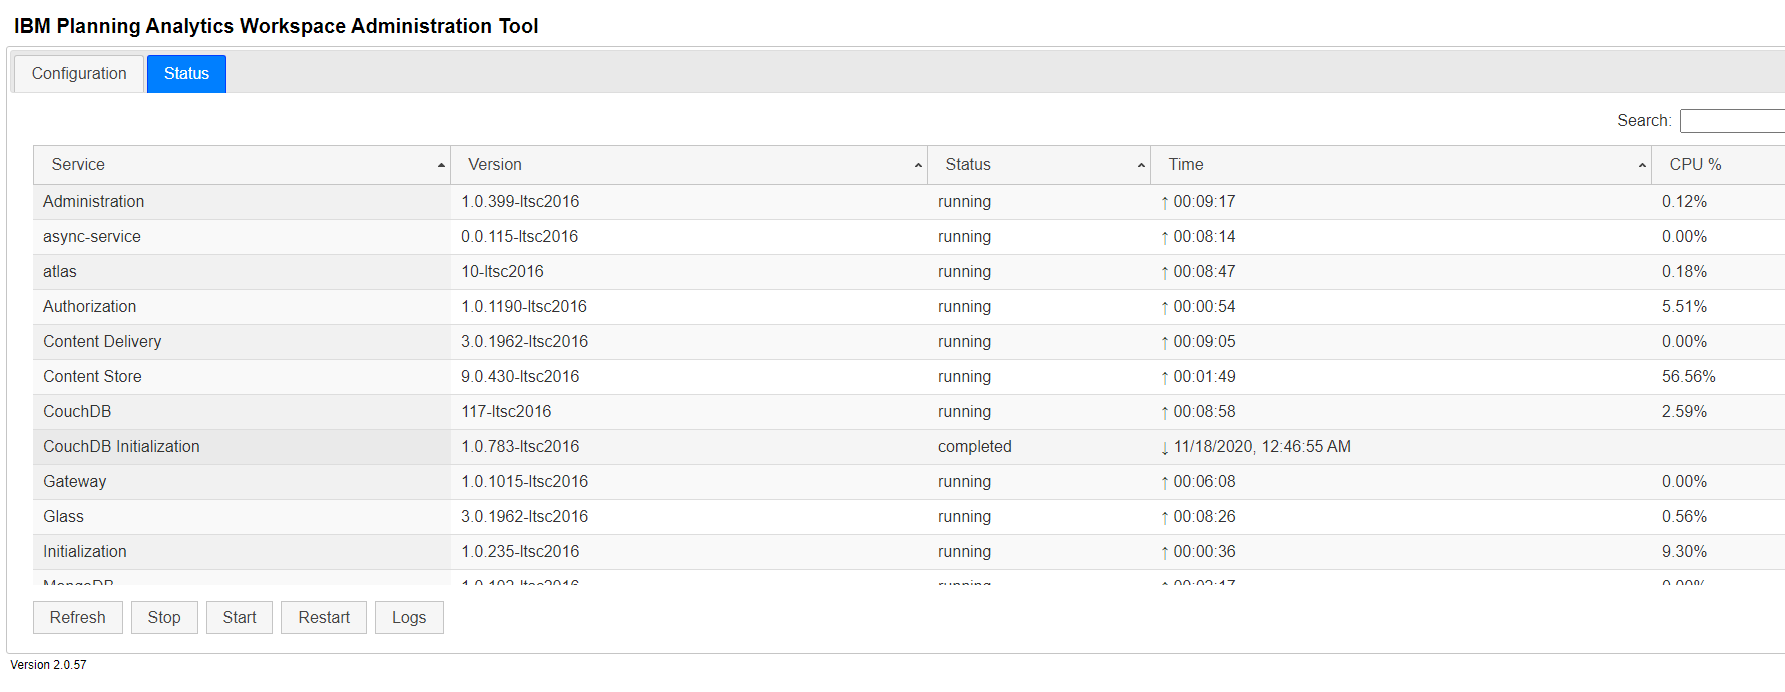
Click on Status tab, and if no values listed, click on restart.

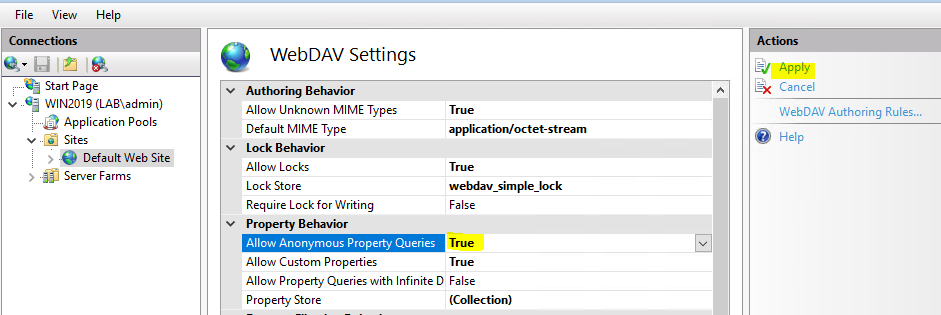
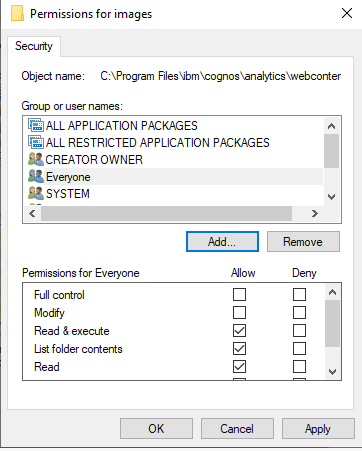
On the Windows server where Cognos Analytics is installed, you must update the C:\Program Files\ibm\cognos\analytics\webcontent\bi\pmhub.html file with the server and port of the PAW:

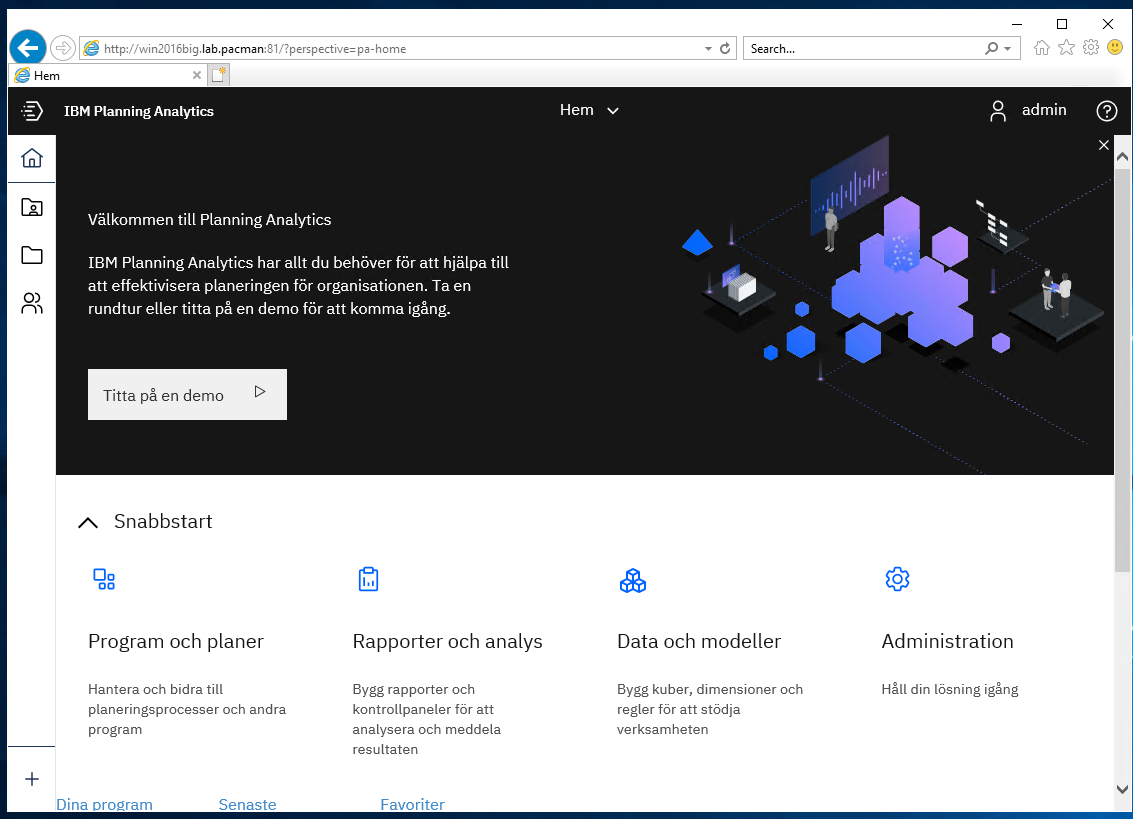
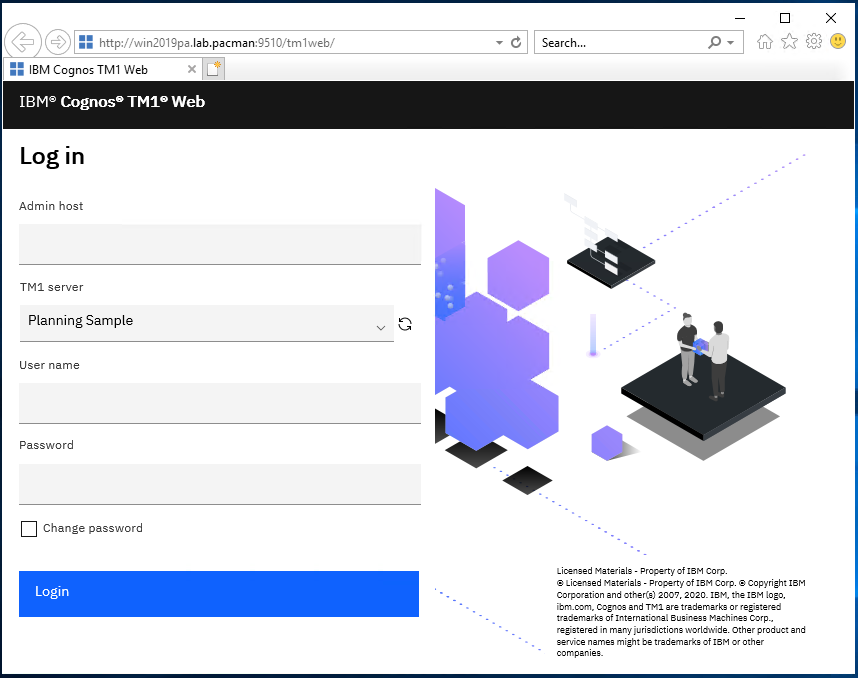
From a web browser go to http://pawservername.domain.com:81/ to login

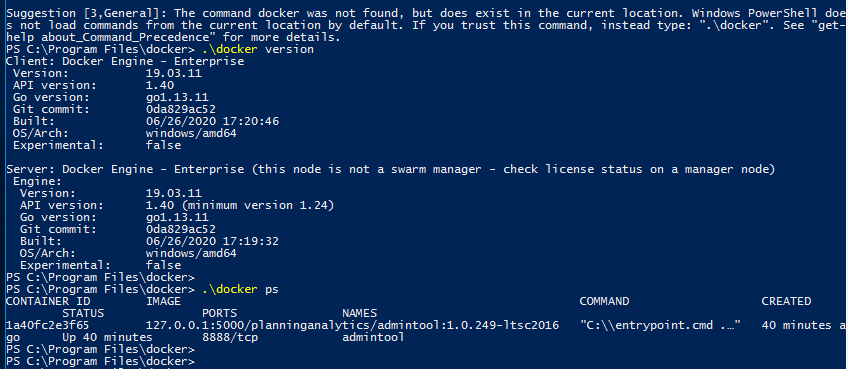
To make docker commands to work, you must add docker folder to path.

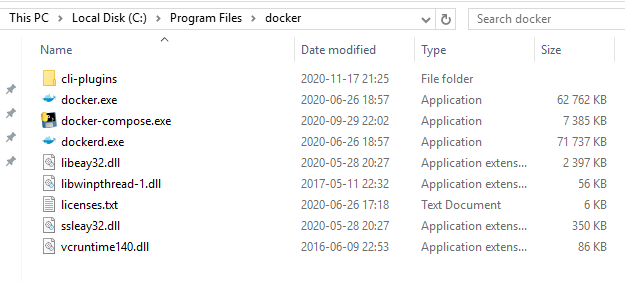
Go to control panel – system – advanced system settings – advanced tab – Environment Variables.
Check that c:\program files\docker is there.
If you get issues, please restart the windows server as a first step to solve the issues.

Check the log files under /ibm/paw57/log/pa-gateway in notepad++ to find out more.


To prevent some internal database to get corrupted, you need to stop the PAW with command .\paw.ps1 stop and also add the shutdown script to windows routines.

  1. Go to folder C:\ibm\paw57\scripts
  2. Copy the scripts/shutdown.ps1 script to c:\ibm folder

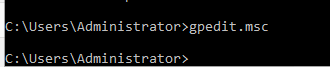
  3. In a command window, open the Group Policy Editor (GPE) by running gpedit.msc.
  4. Expand Computer Configuration and select Windows Settings.

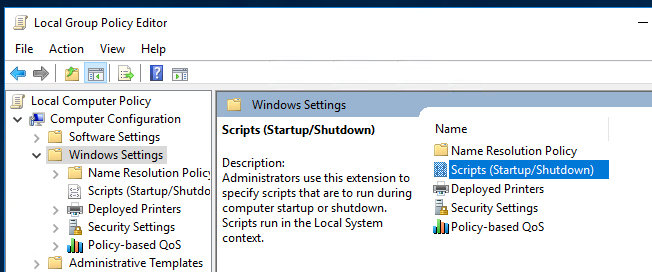
  5. Double-click Scripts (Startup/Shutdown) and click on shutdown line.
  6. Switch to the PowerShell Scripts tab.

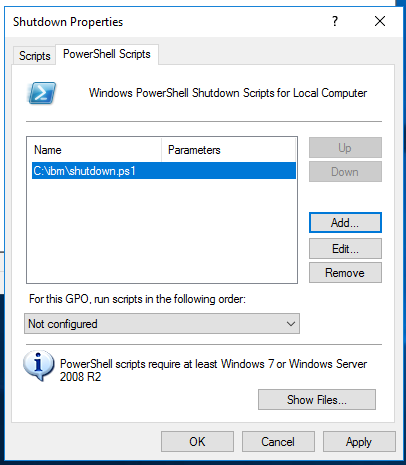
  7. Click Add and find the shutdown.ps1 script in c:\ibm folder. Click OK.

How setup the PA agent

https://www.ibm.com/support/knowledgecenter/SSD29G_2.0.0/com.ibm.swg.ba.cognos.tm1_prism_gs.2.0.0.doc/t_paw_download_paa_agent.html

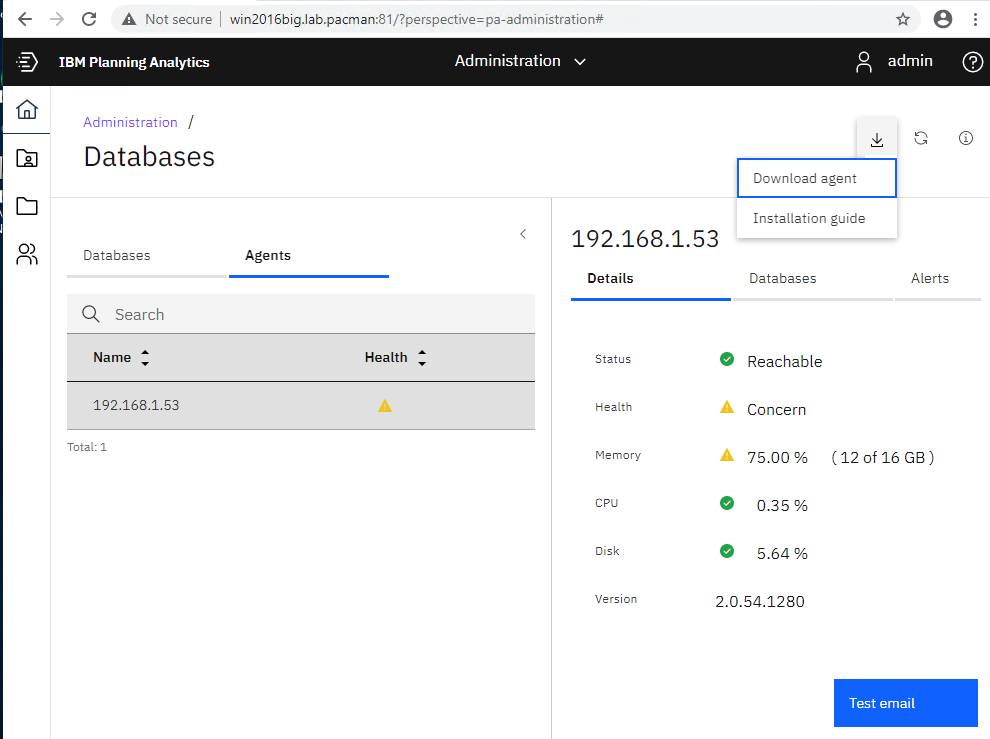
Browse to PAW and click on Administration.
Click on Agent, and then click Download Agent.

Copy the file paa-agent-pkg-2.0.57.1308.zip to the Planning Analytics server and unzip it in the c:\temp folder.  Start a CMD prompt with “Run as Administrator”. Go to c:\temp folder.
Run the upgrade with command: UpdatePAAAgent.bat “c:\program files\ibm\cognos\tm1_64”

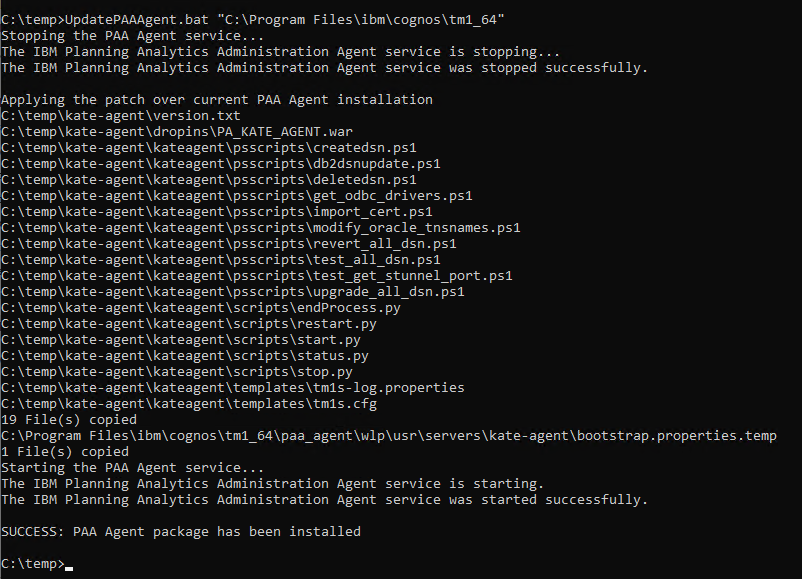
After upgrade, you should see the version 2.0.57.1308, in PAW administration Agents dialog.

How setup TLS for PAW is described at this link;

https://www.ibm.com/support/knowledgecenter/SSD29G_2.0.0/com.ibm.swg.ba.cognos.tm1_inst.2.0.0.doc/t_paw_enable_ssl.html


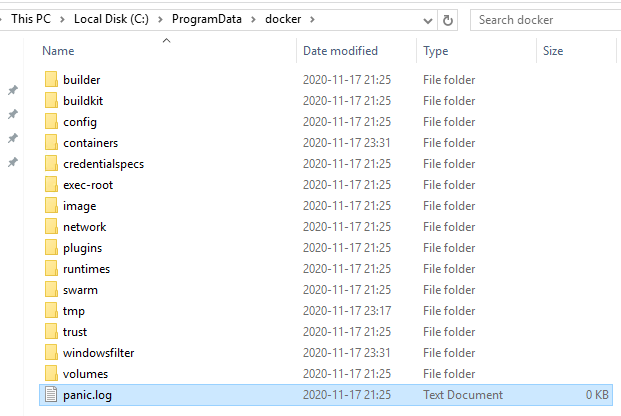
You can check that docker is installed, by check that there are no errors in the C:\ProgramData\docker\panic.log file.

Go to folder c:\program files\docker and run command .\docker ps to see the pods running;

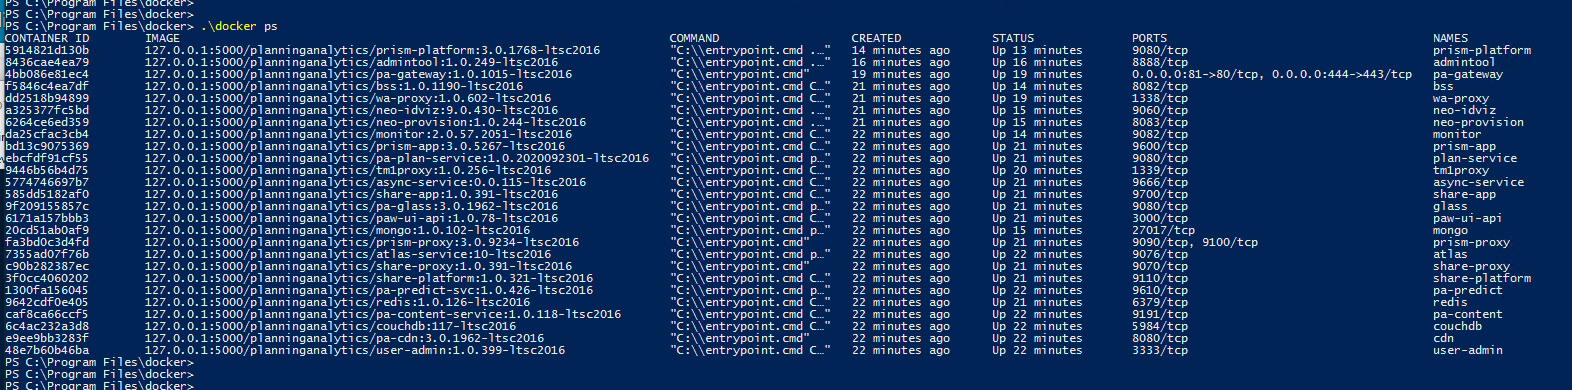
When PAW is running, above pods should be listed for the .\docker ps command.

error during connect: Get http://%2F%2F.%2Fpipe%2Fdocker_engine/v1.40/containers/json: open //./pipe/docker_engine: The system cannot find the file specified. In the default daemon configuration on Windows, the docker client must be run elevated to connect. This error may also indicate that the docker daemon is not running.
If you get errors like above, check that the docker service is started.

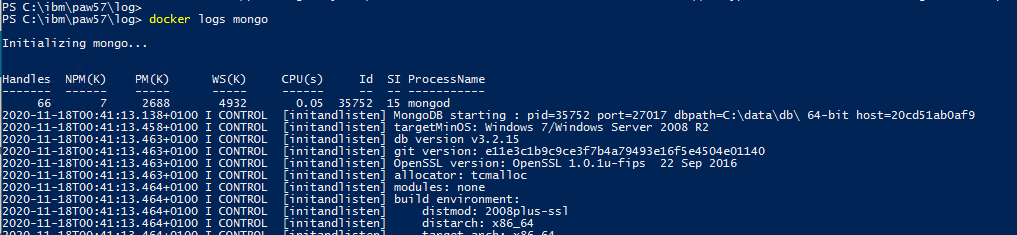
You can enter docker logs mongo to see the logfile for that pod.

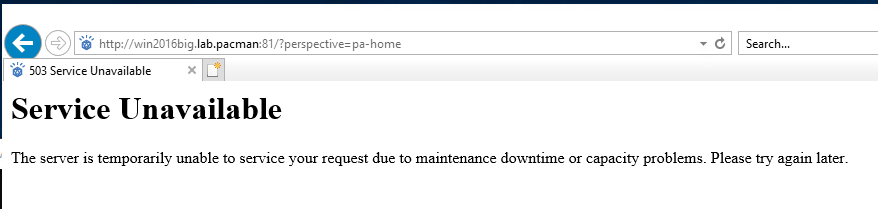
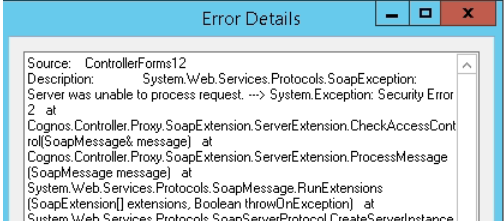
If end user get above error, check that the firewall on the windows server where you run PAW is off, as below picture show.

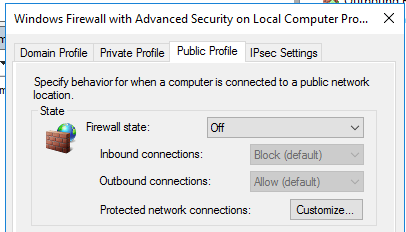
If the paw service (docker) is stopped, you get a error like “Can’t reach this page” instead.

More information:
https://www.ibm.com/support/knowledgecenter/SSD29G_2.0.0/com.ibm.swg.ba.cognos.tm1_inst.2.0.0.doc/c_paw_config_file.html

https://www.ibm.com/support/knowledgecenter/SSD29G_2.0.0/com.ibm.swg.ba.cognos.tm1_inst.2.0.0.doc/c_paw_cannot_access_paw_local.html

https://www.ibm.com/support/pages/troubleshooting-planning-analytics-workspace-related-docker-issues

https://www.ibm.com/support/knowledgecenter/en/SSD29G_2.0.0/com.ibm.swg.ba.cognos.tm1_inst.2.0.0.doc/t_tm1_inst_tm1web_windows.html

https://www.ibm.com/support/knowledgecenter/SSD29G_2.0.0/com.ibm.swg.ba.cognos.tm1_prism_gs.2.0.0.doc/c_paw_nf_sc57_local.html

How to Install Planning Analytics Workspace to Windows 2016

Product:
Planning Analytics 2.0.9.3
Microsoft Windows 2019

Problem:
How do i use BedRock TI processes?

Solution:
Download the bedrock files from https://code.cubewise.com/bedrock
https://github.com/cubewise-code/bedrock
Click CODE icon and select download ZIP
Unzip the file, and copy the “main” folder to the TM1 server.


Rename the main folder to bedrock and place it under the configuration folder.


Update the tm1s.cfg with the additional bedrock data folder
DataBaseDirectory=../Data;Bedrock

Restart the Tm1 application.
Go into TM1 Architect, under View select “Display Control Objects” and now the bedrock TI process are visible.

If you open a bedrock TI process, there is instructions in the prolog tab.

To use a bedrock process, create a new process, and implement the ExecuteProcess command as shown before;

You can see in the parameters tab what values you should give;

Instructions are also found here https://github.com/cubewise-code/bedrock/wiki

You must update your TI process with some variables, to make it work:

This version of Bedrock had some variables that needed to be declared:
pLogoutput = 0;
pStrictErrorHandling = 1;
pSandbox = ”;
pSubN = 0;
Then for easy use, we added some variables of our own, for the values we change:

pCube = ‘resources’;
pFilter = ”;
pFilePath = ‘../scripts/’;
pFileName = ‘cube_export.txt’;

Above variables need to be added to the Executeprocess command at the right places.
Then you only need to change the above lines when you want to export to a different file.

Run the process and it will create a csv file with your data. That you later can import in other project.

Product:
Planning Analytics 2.0.9.3
Microsoft Windows 2019 Server

Problem:
How to install PA on Windows 2019 server?

Solution:
Follow IBM guide lines in the first place;

https://www.ibm.com/support/knowledgecenter/SSD29G_2.0.0/com.ibm.swg.ba.cognos.tm1_inst.2.0.0.doc/t_tm1_gs_inst_basic_install_on_windows.html

Download the latest service pack of the software

https://www.ibm.com/support/pages/ibm-planning-analytics-20-fix-lists

Copy the media over to the server and run as administrator the issetup.exe file.

Click Next
Mark “I Agree” and click Next
Select folder to install to and Production and click Next

(Tm1 Perspectives only work on workstation with Excel and NET Framework 4.6.1)
Click Next
Mark “Make the shortcuts visible to all users” and click Next
Click Next
Wait during install (takes 28 min depending on your hardware)
Click Finish.

Start IBM Cognos Configuration as “Run as administrator”.
If you will use TM1 Application web then you can increase memory for WLP

If used with CAM, setup the Gateway URI to be same as the Cognos Analytics URL.

Set the servername for PMPSVC to be the FQDN of the TM1 Windows Server.


Change the port from 9510 to 9511 for TM1 Application Server (pmpsvc).
Save the configuration.
Right click IBM Cognos TM1 and TM1 Admin Server and select Start.

To test the installation right click Planning Sample and click start.
Inside C:\Program Files\ibm\cognos\tm1_64\samples\tm1\PlanSamp\tm1s.cfg change to Language=eng to have tm1server log files in English.
Change Region in Control Panel on client computer to have English as Format, to get English menus in TM1 Architect. Or add Language=eng to file C:\ProgramData\Applix\TM1\tm1p.ini when TM1 Architect is not running, then you get English menu inside TM1 Architect with other Regional settings in Windows.

TM1WEB has it own installations package, that need to be downloaded from fix central.
https://exploringtm1.com/how-to-install-planning-analytics-spreadsheet-services/

Run analytics-installer-3.0.20091714-win.exe as administrator.
Select English and click Next.
Click Next.
Mark “I accept…” and click Next.

Click Next.
Click Install.

When done – change the IBM Cognos TM1 windows service to Automatic.

After you have decided if you use CAM authentication or not, browse to http://paservername.domain.com:9511/pmpsvc

First time you start Tm1 Application Web on port 9511, you need to change to correct port for tm1web.

Change to http://paservername.domain.com:9510/tm1web/Contributor.jsp

Click OK. This value is saved in file C:\Program Files\ibm\cognos\tm1_64\webapps\pmpsvc\WEB-INF\configuration\pmpsvc_config.xml, in case you want to change it later.


The new TM1WEB is now on the old URL http://paservername.domain.com:9510/tm1web/

# memory
-Xmx4096m
-Xms4096m

# generational concurrent garbage collection policy, useful for applications with many short-lived objects
-Xgcpolicy:gencon

# The size of the heap for the young generation, the objects which have a short life of time
-Xmn2048m

You can change the new TM1WEB memory settings in file C:\Program Files\ibm\cognos\tm1web\wlp\usr\servers\tm1web\jvm.options

<add key=”AdminHostName” value=”” /> value can you set in the C:\Program Files\ibm\cognos\tm1web\webapps\tm1web\WEB-INF\configuration\tm1web_config.xml file, to make users do not need to enter a admin host, and can select the TM1 applications direct from the drop down list.

To make SSO work with CAM setup, you need in your Web Browser (IE) set the Cognos server to be trusted or local intranet. Go to Internet Options – Security – Local Intranet – Sites – Advanced – Add – OK.

To use Cognos Authenticate Mode, you need to add this values to the tm1s.cfg file for your application.
ServerCAMURI=http://cognos-analytics.domain.com:9300/p2pd/servlet/dispatch
ClientCAMURI=http://cognos-analytics.domain.com:80/ibmcognos/bi/v1/disp

https://www.ibm.com/support/knowledgecenter/SSD29G_2.0.0/com.ibm.swg.ba.cognos.tm1_inst.2.0.0.doc/c_parametersinthetm1s.cfgfile_n1503fe.html

Inside Cognos Configuration setup a new TM1 application by point to the folder that contain the TM1S.CFG file. Save the change and start the TM1 instance by right click and select start.

To be able to add Cognos Users with TM1 architect, when in IntegratedSecurityMode=2 you need to add CognosGatewayURI = http://caserver.domain.com:80/ibmcognos/bi/v1/disp to file C:\ProgramData\Applix\TM1\tm1p.ini and in file C:\Users\%username%\AppData\Roaming\Applix\TM1\tm1p.ini

From PA server copy file C:\Program Files\ibm\cognos\tm1_64\bi_interop\bi_interop.zip to the CA server temp folder, and unzip it with https://www.7-zip.org/

Update the planning.html file (used by old PMPSVC) with
var planningServices = [“http://tm1webserver.domain.com:9510″,”http://tm1appwebserver.domain.com:9511″,”http://pawserver.domain.com”];

Update the pmhub.html file (used by PAW) with
var pmhubURLs = [“http://tm1webserver.domain.com:9510″,”http://tm1appwebserver.domain.com:9511″,”http://pawserver.domain.com”];

Update the tm1web.html file (used by TM1WEB) with
var tm1webServices = [“http://tm1webserver.domain.com:9510″,”http://tm1appwebserver.domain.com:9511″,”http://pawserver.domain.com”];


Copy the planning.html and pmhub.html file to the /webcontent/bi/ and /webcontent/ directory.
Create the folder C:\Program Files\ibm\cognos\analytics\webcontent\bi\tm1\web.
The tm1web.html file is copied in the new /webcontent/bi/tm1/web/ directory.
Rename the variables_TM1.xml.sample file to variables_TM1.xml inside CA Install Dir/templates/ps/portal folder.
Rename the variables_plan.xml.sample to variables_plan.xml inside CA Install Dir\templates\ps\portal folder.

If missing, copy icon_active_application.gif to CA Install Dir\webcontent\ps\portal\images folder.

Test by browse to http://tm1webservername.domain.com:9510/tm1web

This ports need to be open in the firewall:
To end users: 80, 9510, 9511
To TM1 developers: 80, 443, 9510, 9511, 5495, 5498, 5895, 5898, 8888, 9012, 9300, 12354-44312 (depending on your setup of TM1 instances)

https://www.ibm.com/support/knowledgecenter/SSD29G_2.0.0/com.ibm.swg.ba.cognos.tm1_inst.2.0.0.doc/c_tm1_inst_defaultvaluesfortm1installation.html

To ensure that Cognos TM1 Applications can properly detect a CAM session termination, set the pmpsvc session timeout to a value higher than the CAM session timeout in the fpmsvc_config.xml file.

Install of a new PA agent, needs to be done after installation of a new PAW version: https://pmsquare.com/analytics-blog/2019/1/10/when-upgrading-paw-dont-forget-to-upgrade-paa-agent

More information:
https://www.ibm.com/support/pages/node/6324657

https://www.ibm.com/support/pages/unable-start-ibm-planning-analytics-spreadsheet-services-and-ibm-cognos-tm1-service-same-host-server

https://www.ibm.com/support/knowledgecenter/SSD29G_2.0.0/com.ibm.swg.ba.cognos.tm1_nfg.2.0.0.doc/c_paw_nf_sc57_local.html

https://community.ibm.com/community/user/businessanalytics/blogs/nadine-mnch/2018/03/07/cognosanalytics-and-planninganalytics-integration-walkthrough-part-3

https://www.ibm.com/support/pages/node/286765

https://www.ibm.com/support/pages/changes-tm1web-deployment-planning-analytics-local-2055-release

TM1WEB version supported:
https://www.ibm.com/support/pages/node/6233252

https://www.ibm.com/support/pages/ibm-planning-analytics-microsoft-excel-conformance-requirements

Product:
Cognos Analytics 11.1.7  Product_version=11.1 R7 (LTS)
Microsoft Windows 2019 Server
Microsoft SQL server 2016

Problem:
How install CA 11.1.7 on a Windows 2019 server?

Solution:
Follow the IBM Cognos instruction first, then use this as a compliment. Download latest fix pack from https://www.ibm.com/support/pages/node/6335329

https://www.ibm.com/support/pages/ibm-cognos-analytics-11x-fix-lists


Install Web Server with NET framework 4.7 and Windows Authentication and WebSocket Protocol.
https://www.ibm.com/support/knowledgecenter/en/SSEP7J_11.1.0/com.ibm.swg.ba.cognos.inst_cr_winux.doc/t_single_server.html

Install rewrite_amd64_en-US.msi and the Application Request Routing extension for IIS by going to the following URL: http://www.iis.net/downloads/microsoft/application-request-routing

Run setup of CA11 from file ca_instl_win_2.0.200618.exe
Click Next

Click browse and select the ca_srv_win64_11.1.7.zip file and click Open and Next.
Choose IBM Cognos Analytics and click next.
Mark “I accept the terms of the License Agreement” and click Next.
Mark “Make shortcut visible to all users in the Start menu” and click Next.
Click Yes.
Select Custom and click Next.

If installed on a single server, select all and click Next.
Click Install.
Click Done. (install the latest fix pack on top of your installation of CA11)


Add SQL driver sqljdbc42.jar to CA11 folder C:\Program Files\ibm\cognos\analytics\drivers

Prevent creation of DUMP files in CA11
Open file C:\Program Files\ibm\cognos\analytics\configuration\cclWinSEHConfig.xml in notepad++

Change to <env_var name="CCL_HWE_ABORT" value="0"/>

Save the xml file.

Download the new policy zip file from https://public.dhe.ibm.com/ibmdl/export/pub/systems/cloud/runtimes/java/security/jce_policy/
Unzip the file in a new folder (c:\install), creating folder C:\install\unrestricted.

Copy the two new files (US_export_policy.jar and local_policy.jar)to folder C:\Program Files\ibm\cognos\analytics\ibm-jre\jre\lib\security\policy\unlimited

Open Cognos Configuration and go to Cryptography > Cognos. Change Confidentiality Algorithm and PDF Confidentiality Algorithm to Advanced encryption standard with Cipher Block Chaining (CBC) mode 256 bit key.

At subject alternative name for DNS names, enter both the FQDN and the HOSTNAME with a space between. You must use lowercase letters on all server names in Cognos Configuration.
Configure the AD connection to your domain.

Remove the DB2 connection and create a new Microsoft SQL Server connection.
Configure the Content Store connection to your SQL server.

Save the configuration and start Cognos service.


Setup IIS with script found in folder C:\Program Files\ibm\cognos\analytics\cgi-bin\templates\IIS
Edit the file to include your servers name, then run the CA_IIS_Config.bat from a administrator CMD window.

Ensure all is correct and press Y.

Check that you can access cognos on http://servername.domain.com/ibmcognos/
Setup WebDAV for report creators:

  • Go to IIS Manager
  • Under Connections, expand your web server, Sites, and select Default Web Site.
  • Double-click WebDAV Authoring.
  • Click Enable WebDAV.

  • Click WebDAV Settings.

  • If you have anonymous access enabled, select True for Allow Anonymous Property Queries, and click Apply.
  • Select the /bi/samples/images directory
  • Double-click WebDAV Authoring.
  • Click Add Authoring Rule.
    Select All content and All users and Read Permissions and click OK.
  • Right-click the /images you added authoring rules to, and click Edit Permissions.

  • Click Security tab, and click edit. Click add and enter everyone. (or a user group that should have access) and click check names.
  • Click OK.
  • Click OK again.

Install SQL 2012 native client, to make old report connections work (SQLNCLI11).

https://download.microsoft.com/download/B/E/D/BED73AAC-3C8A-43F5-AF4F-EB4FEA6C8F3A/ENU/x64/sqlncli.msi

Open firewall ports 80 and 443 for clients, and ports 9300, 9362, 4300, 5701, 9301 for Cognos servers to be able to talk to each other.

Setup SSO with Kerberos Active Directory is possible (but not covered here)

Set “Allow anonymous access” to False.
Change the log on user for the IBM Cognos service to a domain account, instead of Local System.

Set the server to trust for delegation inside the Active Directory.
You need to do more;

https://techcommunity.microsoft.com/t5/iis-support-blog/setting-up-kerberos-authentication-for-a-website-in-iis/ba-p/347882

https://www.ibm.com/support/pages/enabling-single-signon-use-kerberos-authentication-constrained-delegation-ibm-cognos-business-intelligence

https://www.ibm.com/support/pages/what-does-parameter-singlesignonoption-do

Instead of kerberos can you use old windows login, inside cognos configuration setup (enter below values);

Save and restart Cognos, try to browse to http://caservername.domain.com/ibmcognos/

Show the Legacy Studios in CA11.1.x
Check that they are active in Manage – Configuration – System – Appearance.
Please Note: In order to access the legacy studios, you must be using Internet Explorer or Mozilla Firefox.

Setup the samples
https://www.ibm.com/support/knowledgecenter/SSEP7J_11.1.0/com.ibm.swg.ba.cognos.ig_smples.doc/ig_smples.pdf

Setup the skins
https://quebit.com/askquebit/IBM/creating-and-setting-a-default-theme-for-cognos-analytics-11-0-4/

For CA11 installations with many users, you can increase the Windows TCP ports;

  1. Click on Start menu, run – Enter regedit
  2. In the HKEY_LOCAL_MACHINE\SYSTEM\CurrentControlSet\Services\Tcpip\Parameters directory, create a new DWORD-32 value named MaxUserPort.
  3. Set the properties for MaxUserPort to use a value of 65534 and a base of Decimal.
  4. In the same directory, add another DWORD-32 value named TcpTimedWaitDelay.
  5. Set the properties for TcpTimedWaitDelay to use a value of 50 and a base of Decimal.

    The range for value is from 30 seconds to 300 seconds, with a default value of 240 seconds (4 minutes).

    After closing the regedit application, restart your computer.

Data server connections to PA can give below error if TM1 cert is not loaded in the CA keystore.
XTR-ERR-0005 A request to TM1 resulted in error: “[400] javax.net.ssl.SSLHandshakeException: com.ibm.jsse2.util.h: PKIX path building failed: com.ibm.security.cert.IBMCertPathBuilderException: unable to find valid certification path to requested target”.

Add Planning Analytics cert to the keystore. Copy the file \\paservername\c$\Program Files\ibm\cognos\tm1_64\bin64\ssl\tm1\ibmtm1.arm file to your CA11 server to folder c:\install.
Start C:\Program Files\ibm\cognos\analytics\ibm-jre\jre\bin\ikeyman.exe, run as administrator.

Click on open keystore. Select C:\Program Files\ibm\cognos\analytics\ibm-jre\jre\lib\security\cacerts file and open it with password changeit.


Switch to Signer Certificates and click Add.
Browse for c:\install\ibmtm1.arm and open it and give it the name TM1ServerCert.

Data Server Connections to PA can give below error if the UseSSL=T is not correct in data connections.
XTR-ERR-0005 A request to TM1 resulted in error: “[400] java.net.SocketException: Connection reset”.

Ensure that the Use SSL is marked if the UseSSL=T is in the tm1s.cfg file for the TM1 instance. Planning Analytics have UseSSL=T as default, if the line is missing from tm1s.cfg file.

To be able to connect to old TM1; run installation of PA, on CA server, with issetup.exe from \\servername\fileshare\planninganalytics\tm1_winx64h_2.0.93.28_ml.tar\winx64h and select TM1APIs.

Report performance can be adjusted in different ways to match your hardware
https://senturus.com/resources/cognos-analytics-performance-tuning/

Go to Manage – Administration console.
Click on System at Status tab.

Click on All Servers drop down – go to Service – go to Report (or Batch Report)
Right click on ReportService and select Set Properties
Click on Settings tab – select Tuning in Category drop-down menu.

Set Maximum number of processes for the report service during peak period to a higher value, maybe start with the same number of CPU cores you have on the server. Do the same for Maximum number of processes for the report service during non-peak period, and also for Maximum number of processes for the batch report service during non-peak period.
Check that Number of low affinity connections for the report service during peak period is not below 8.
Values you set, depend on number of users and your hardware.

https://www.ibm.com/support/pages/how-improve-report-performance

More information:

https://www.ibm.com/support/pages/enabling-legacy-studios-cognos-analytics-111x

https://www.ibm.com/support/pages/sites/default/files/inline-files/ibm_fixlist_cognos_analytics_1117fp1_2.pdf

https://www.ibm.com/support/pages/xtr-err-0005-error-when-testing-ibm-planning-analytics-20x-datasource-ibm-cognos-analytics-1112
To show info about the Windows server, go to the command prompt and enter MSINFO32.EXE.

To list installed roles on server enter in powershell this command:

Get-WindowsFeature | Where-Object {$_. installstate -eq “installed”} | Format-List Name,Installstate >  roles.txt

https://redmondmag.com/articles/2018/10/31/powershell-windows-server-roles-features.aspx

https://www.pelegit.co.il/how-to-get-all-roles-and-features-are-installed-on-server/

Product:
Cognos Controller 10.4.0 IF2
Microsoft Windows 10

Problem:
After update to a new version of Excel,  the program crash when you inside the cognos controller data entry form click preview to open the sheet.
Gone from version Microsoft Office 365 ProPlus 16.0.13029.20308  to version Microsoft 365 Apps for Enterprise 16.0.13127.20408 of Microsoft Excel.

Error:

Faulting application name: EXCEL.EXE, version: 16.0.13127.20408, time stamp: 0x5f56c50b

Faulting module name: KERNELBASE.dll, version: 6.3.9600.19724, time stamp: 0x5ec50c3e

Exception code: 0xe0434352

Fault offset: 0x000156e8

Faulting process id: 0x1a384

Faulting application start time: 0x01d69707dd729044

Faulting application path: C:\Program Files (x86)\Microsoft Office\Root\Office16\EXCEL.EXE

Faulting module path: C:\Windows\SYSTEM32\KERNELBASE.dll

or

Standard Error

Source:              ControllerForms12

Description:     System.Web.Services.Protocols.SoapException: Server was unable to process request. —> System.Exception: Security Error 2

at Cognos.Controller.Proxy.SoapExtension.ServerExtension.CheckAccessControl(SoapMessage& message)

at Cognos.Controller.Proxy.SoapExtension.ServerExtension.ProcessMessage(SoapMessage message)

Solution:
Start Microsoft Excel
Go to Options
Click on Advanced
Scroll down to Formulas
Untick “Enable multi-threaded calculation”

Save and test again.

More information:
https://www.ibm.com/support/pages/office-365-supported-controller

https://www.ibm.com/support/pages/intermittent-excel-has-stopped-working-crasherrors-when-using-report-generator-reports-run-run-reports-or-forms-triggered-multi-threading

https://www.ibm.com/support/pages/intermittently-reports-run-hangs-near-completion-eg-84-report