Product:
Planning Analytics 2.0.9.17
Microsoft Windows Server 2019
Problem:
I want to copy a csv file to azure file storage from folder on TM1 server. How to do it?
Solution:
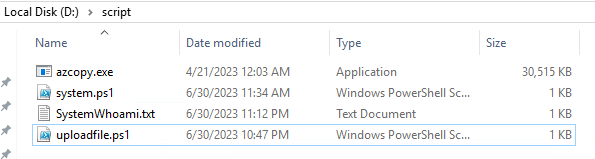
Create a folder where you store both your azxopy.exe and ps1 script (d:\script). https://learn.microsoft.com/en-us/azure/storage/common/storage-use-azcopy-v10
Create a folder where you store the file you want to send (d:\temp).
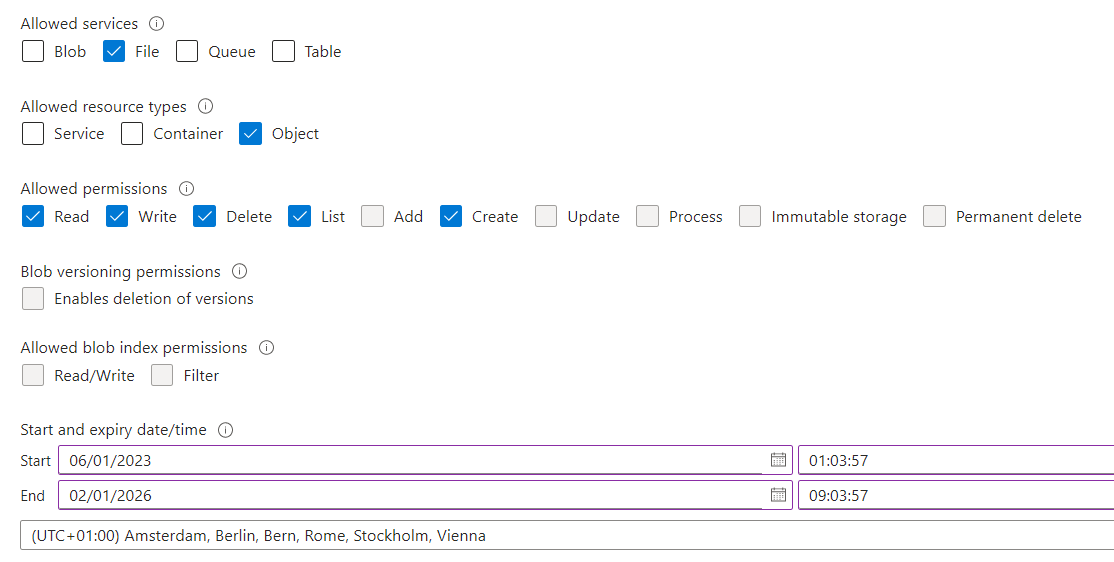
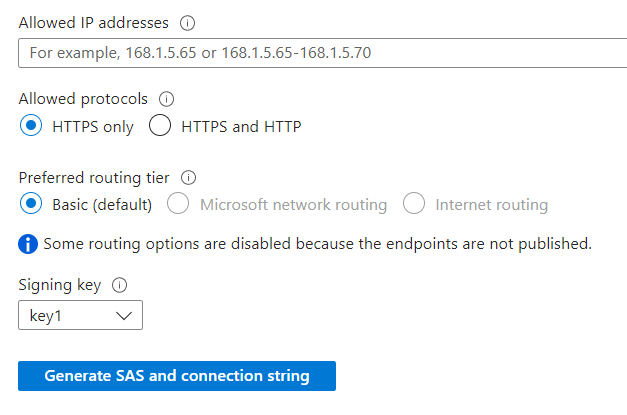
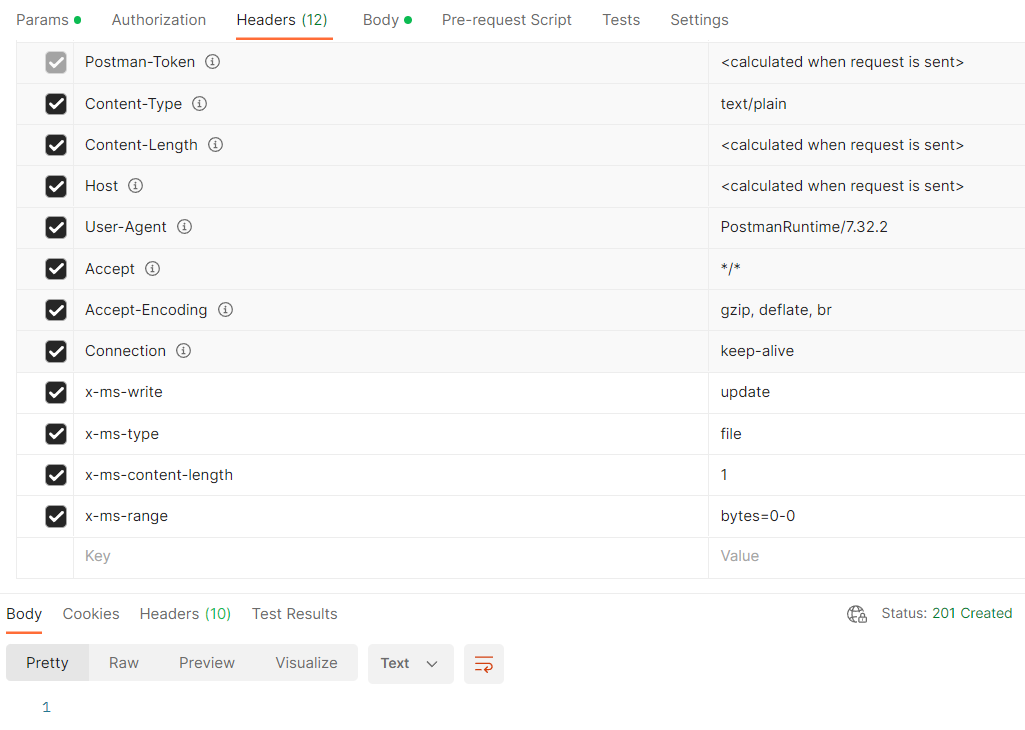
In the AZURE FILE STORAGE account you need to create a SAS key. https://adamtheautomator.com/azure-sas-token/
With that key, create below powershell script, and save it as uploadfile.ps1 in your d:\script folder.
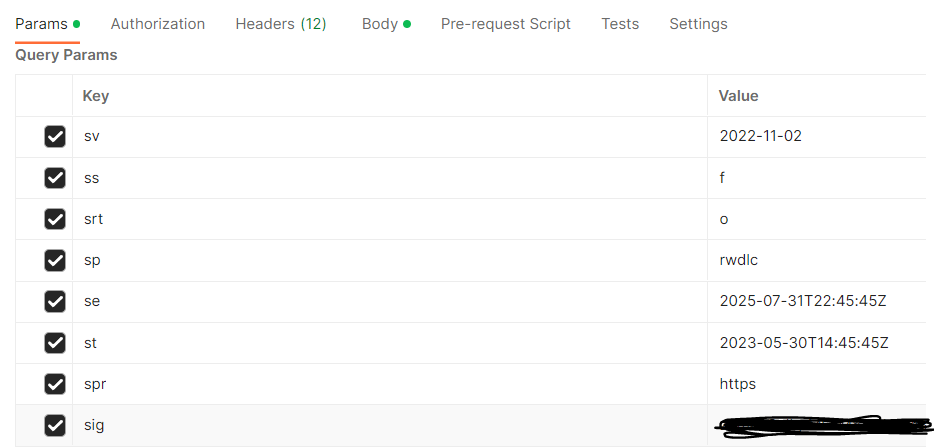
$env:AZCOPY_CRED_TYPE = "Anonymous";
$env:AZCOPY_CONCURRENCY_VALUE = "AUTO";
$env:AZCOPY_LOG_LOCATION="d:\temp\";
d:\script\azcopy.exe copy "d:\Temp\testfile1.txt" "https://yourstorageaccountname.file.core.windows.net/input/testfile1.txt?sv=2022-12-03&ss=f&srt=sco&sp=rwlc&se=2023-08-09T19%3A35%3A07Z&st=2023-06-29T11%3A35%3A07Z&spr=https&sig=yoursaskeytokenandtheotherstuff3D" --overwrite=prompt --from-to=LocalFile --follow-symlinks --put-md5 --follow-symlinks --preserve-smb-info=true --disable-auto-decoding=false --recursive --log-level=INFO;
$env:AZCOPY_CRED_TYPE = "";
$env:AZCOPY_CONCURRENCY_VALUE = "";
You need to replace some parts above, with your values from the SAS key.
AZCOPY_LOG_LOCATION will write the log file from azcopy to that temp folder, instead of a folder under the user account.
You must provide full path to all folders, e.g. d:\script\azcopy.exe, otherwise the TI process will not find the files, and you will not get any errors.
Replace testfile1.txt with the name of the file you want to upload. You need to provide the filename both at source and target folder.
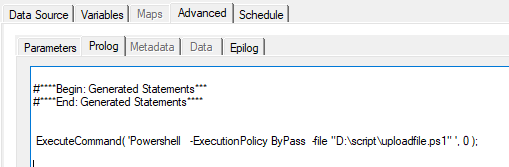
Then you need to create a TM1 process – with below in the prolog tab:
ExecuteCommand( 'Powershell -ExecutionPolicy ByPass -file "D:\script\uploadfile.ps1" ', 0 );
If you have issues; you can try with this:
ExecuteCommand( 'Powershell -noprofile -noninteractive -ExecutionPolicy ByPass -file "D:\script\uploadfile.ps1" ', 0 );
To see who is running powershell, create a powershell file with this content (d:\script\system.ps1):
try {
$Who = whoami.exe
}
catch {
$Who = Write-Output "Error Message: $($_.Exception.Message) Error on line $($_.InvocationInfo.ScriptLineNumber)"
}
finally {
$Who | Out-File -FilePath 'd:\Script\SystemWhoami.txt'
}
Then in TM1 call that ps1 file with this command:
ExecuteCommand( 'Powershell -ExecutionPolicy ByPass -file "D:\script\system.ps1" ', 0 );
This will create a file in the d:\script\ folder that contain the person who run the script:
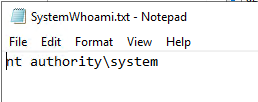
If the TM1 application is run by the system account, you will get above result. If the TM1 service is run by a windows user, that name will show in above file.
The TM1 process call to a powershell file with a azcopy command is working with the system account running the Tm1 application.
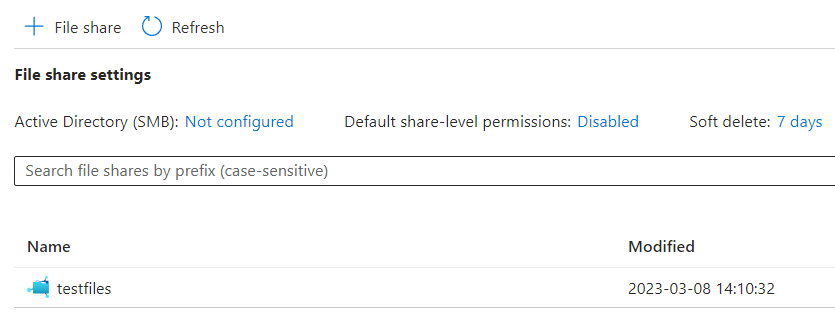
Browse to your AZURE file storage account and check if the file was uploaded.
If the file exist in the AZURE file storage, the transfer will not succeed.
If it still does not work, check if TM1 windows server had execution of scripts disabled.
In some cases when the powershell does not work, it can be needed to add two folders to the c drive:
(32Bit, always)
C:\Windows\System32\config\systemprofile\Desktop
(64Bit)
C:\Windows\SysWOW64\config\systemprofile\Desktop
Please note that file storage does not support all authentications methods that other azure storage does.
- local <-> Azure Blob (SAS or OAuth authentication)
- local <-> Azure Files (Share/directory SAS authentication)
- local <-> Azure Data Lake Storage Gen2 (SAS, OAuth, or SharedKey authentication)
For a Azure file storage you must use SAS or KEY, to access.
More Information:
https://powershelltoolbox.tech/testing-powershell-scripts-as-the-system-account/
https://www.aramar.co.uk/using-powershell-in-planning-analytics/
https://www.tm1forum.com/viewtopic.php?t=14763
https://sahayagodson.medium.com/azcopy-sync-with-task-scheduler-8a59fba1755a
https://learn.microsoft.com/en-us/azure/storage/common/storage-sas-overview
https://www.51sec.org/2022/08/12/using-azcopy-to-migrate-local-files-to-azure-blob-storage/
https://bluexp.netapp.com/blog/azure-cvo-blg-how-to-upload-files-to-azure-blob-storage#H_H2
https://gist.github.com/DaveRuijter/b530c84020950c729cb9e15efbfe04ce
https://www.smikar.com/using-azcopy-with-azure-storage/
Usage:
azcopy copy [source] [destination] [flags]
Aliases:
copy, cp, c
Examples:
Upload a single file by using OAuth authentication. If you have not yet logged into AzCopy, please run the azcopy login command before you run the following command.
– azcopy cp “/path/to/file.txt” “https://[account].blob.core.windows.net/[container]/[path/to/blob]”
Same as above, but this time also compute MD5 hash of the file content and save it as the blob’s Content-MD5 property:
– azcopy cp “/path/to/file.txt” “https://[account].blob.core.windows.net/[container]/[path/to/blob]” –put-md5
Upload a single file by using a SAS token:
– azcopy cp “/path/to/file.txt” “https://[account].blob.core.windows.net/[container]/[path/to/blob]?[SAS]”
Upload a single file by using a SAS token and piping (block blobs only):
– cat “/path/to/file.txt” | azcopy cp “https://[account].blob.core.windows.net/[container]/[path/to/blob]?[SAS]” –from-to PipeBlob
Upload a single file by using OAuth and piping (block blobs only):
– cat “/path/to/file.txt” | azcopy cp “https://[account].blob.core.windows.net/[container]/[path/to/blob]” –from-to PipeBlob
Upload an entire directory by using a SAS token:
– azcopy cp “/path/to/dir” “https://[account].blob.core.windows.net/[container]/[path/to/directory]?[SAS]” –recursive=true
or
– azcopy cp “/path/to/dir” “https://[account].blob.core.windows.net/[container]/[path/to/directory]?[SAS]” –recursive=true –put-md5
Upload a set of files by using a SAS token and wildcard (*) characters:
– azcopy cp “/path/*foo/*bar/*.pdf” “https://[account].blob.core.windows.net/[container]/[path/to/directory]?[SAS]”
Upload files and directories by using a SAS token and wildcard (*) characters:
– azcopy cp “/path/*foo/*bar*” “https://[account].blob.core.windows.net/[container]/[path/to/directory]?[SAS]” –recursive=true
Upload files and directories to Azure Storage account and set the query-string encoded tags on the blob.
– To set tags {key = “bla bla”, val = “foo”} and {key = “bla bla 2”, val = “bar”}, use the following syntax :
– azcopy cp “/path/*foo/*bar*” “https://[account].blob.core.windows.net/[container]/[path/to/directory]?[SAS]” –blob-tags=”bla%20bla=foo&bla%20bla%202=bar”
– Keys and values are URL encoded and the key-value pairs are separated by an ampersand(‘&’)
– https://docs.microsoft.com/en-us/azure/storage/blobs/storage-blob-index-how-to?tabs=azure-portal
– While setting tags on the blobs, there are additional permissions(‘t’ for tags) in SAS without which the service will give authorization error back.
Download a single file by using OAuth authentication. If you have not yet logged into AzCopy, please run the azcopy login command before you run the following command.
– azcopy cp “https://[account].blob.core.windows.net/[container]/[path/to/blob]” “/path/to/file.txt”
Download a single file by using a SAS token:
– azcopy cp “https://[account].blob.core.windows.net/[container]/[path/to/blob]?[SAS]” “/path/to/file.txt”
Download a single file by using a SAS token and then piping the output to a file (block blobs only):
– azcopy cp “https://[account].blob.core.windows.net/[container]/[path/to/blob]?[SAS]” –from-to BlobPipe > “/path/to/file.txt”
Download a single file by using OAuth and then piping the output to a file (block blobs only):
– azcopy cp “https://[account].blob.core.windows.net/[container]/[path/to/blob]” –from-to BlobPipe > “/path/to/file.txt”
Download an entire directory by using a SAS token:
– azcopy cp “https://[account].blob.core.windows.net/[container]/[path/to/directory]?[SAS]” “/path/to/dir” –recursive=true
A note about using a wildcard character (*) in URLs:
There’s only two supported ways to use a wildcard character in a URL.
– You can use one just after the final forward slash (/) of a URL. This copies all of the files in a directory directly to the destination without placing them into a subdirectory.
– You can also use one in the name of a container as long as the URL refers only to a container and not to a blob. You can use this approach to obtain files from a subset of containers.
Download the contents of a directory without copying the containing directory itself.
– azcopy cp “https://[srcaccount].blob.core.windows.net/[container]/[path/to/folder]/*?[SAS]” “/path/to/dir”
Download an entire storage account.
– azcopy cp “https://[srcaccount].blob.core.windows.net/” “/path/to/dir” –recursive
Download a subset of containers within a storage account by using a wildcard symbol (*) in the container name.
– azcopy cp “https://[srcaccount].blob.core.windows.net/[container*name]” “/path/to/dir” –recursive
Download all the versions of a blob from Azure Storage to local directory. Ensure that source is a valid blob, destination is a local folder and versionidsFile which takes in a path to the file where each version is written on a separate line. All the specified versions will get downloaded in the destination folder specified.
– azcopy cp “https://[srcaccount].blob.core.windows.net/[containername]/[blobname]” “/path/to/dir” –list-of-versions=”/another/path/to/dir/[versionidsFile]”
Copy a subset of files within a flat container by using a wildcard symbol (*) in the container name without listing all files in the container.
– azcopy cp “https://[srcaccount].blob.core.windows.net/[containername]/*” “/path/to/dir” –include-pattern=”1*”
Copy a single blob to another blob by using a SAS token.
– azcopy cp “https://[srcaccount].blob.core.windows.net/[container]/[path/to/blob]?[SAS]” “https://[destaccount].blob.core.windows.net/[container]/[path/to/blob]?[SAS]”
Copy a single blob to another blob by using a SAS token and an OAuth token. You have to use a SAS token at the end of the source account URL if you do not have the right permissions to read it with the identity used for login.
– azcopy cp “https://[srcaccount].blob.core.windows.net/[container]/[path/to/blob]?[SAS]” “https://[destaccount].blob.core.windows.net/[container]/[path/to/blob]”
Copy one blob virtual directory to another by using a SAS token:
– azcopy cp “https://[srcaccount].blob.core.windows.net/[container]/[path/to/directory]?[SAS]” “https://[destaccount].blob.core.windows.net/[container]/[path/to/directory]?[SAS]” –recursive=true
Copy all blob containers, directories, and blobs from storage account to another by using a SAS token:
– azcopy cp “https://[srcaccount].blob.core.windows.net?[SAS]” “https://[destaccount].blob.core.windows.net?[SAS]” –recursive=true
Copy a single object to Blob Storage from Amazon Web Services (AWS) S3 by using an access key and a SAS token. First, set the environment variable AWS_ACCESS_KEY_ID and AWS_SECRET_ACCESS_KEY for AWS S3 source.
– azcopy cp “https://s3.amazonaws.com/[bucket]/[object]” “https://[destaccount].blob.core.windows.net/[container]/[path/to/blob]?[SAS]”
Copy an entire directory to Blob Storage from AWS S3 by using an access key and a SAS token. First, set the environment variable AWS_ACCESS_KEY_ID and AWS_SECRET_ACCESS_KEY for AWS S3 source.
– azcopy cp “https://s3.amazonaws.com/[bucket]/[folder]” “https://[destaccount].blob.core.windows.net/[container]/[path/to/directory]?[SAS]” –recursive=true
Please refer to https://docs.aws.amazon.com/AmazonS3/latest/user-guide/using-folders.html to better understand the [folder] placeholder.
Copy all buckets to Blob Storage from Amazon Web Services (AWS) by using an access key and a SAS token. First, set the environment variable AWS_ACCESS_KEY_ID and AWS_SECRET_ACCESS_KEY for AWS S3 source.
– azcopy cp “https://s3.amazonaws.com/” “https://[destaccount].blob.core.windows.net?[SAS]” –recursive=true
Copy all buckets to Blob Storage from an Amazon Web Services (AWS) region by using an access key and a SAS token. First, set the environment variable AWS_ACCESS_KEY_ID and AWS_SECRET_ACCESS_KEY for AWS S3 source.
– azcopy cp “https://s3-[region].amazonaws.com/” “https://[destaccount].blob.core.windows.net?[SAS]” –recursive=true
Copy a subset of buckets by using a wildcard symbol (*) in the bucket name. Like the previous examples, you’ll need an access key and a SAS token. Make sure to set the environment variable AWS_ACCESS_KEY_ID and AWS_SECRET_ACCESS_KEY for AWS S3 source.
– azcopy cp “https://s3.amazonaws.com/[bucket*name]/” “https://[destaccount].blob.core.windows.net?[SAS]” –recursive=true
Copy blobs from one blob storage to another and preserve the tags from source. To preserve tags, use the following syntax :
– azcopy cp “https://[account].blob.core.windows.net/[source_container]/[path/to/directory]?[SAS]” “https://[account].blob.core.windows.net/[destination_container]/[path/to/directory]?[SAS]” –s2s-preserve-blob-tags=true
Transfer files and directories to Azure Storage account and set the given query-string encoded tags on the blob.
– To set tags {key = “bla bla”, val = “foo”} and {key = “bla bla 2”, val = “bar”}, use the following syntax :
– azcopy cp “https://[account].blob.core.windows.net/[source_container]/[path/to/directory]?[SAS]” “https://[account].blob.core.windows.net/[destination_container]/[path/to/directory]?[SAS]” –blob-tags=”bla%20bla=foo&bla%20bla%202=bar”
– Keys and values are URL encoded and the key-value pairs are separated by an ampersand(‘&’)
– https://docs.microsoft.com/en-us/azure/storage/blobs/storage-blob-index-how-to?tabs=azure-portal
– While setting tags on the blobs, there are additional permissions(‘t’ for tags) in SAS without which the service will give authorization error back.
Copy a single object to Blob Storage from Google Cloud Storage (GCS) by using a service account key and a SAS token. First, set the environment variable GOOGLE_APPLICATION_CREDENTIALS for GCS source.
– azcopy cp “https://storage.cloud.google.com/[bucket]/[object]” “https://[destaccount].blob.core.windows.net/[container]/[path/to/blob]?[SAS]”
Copy an entire directory to Blob Storage from Google Cloud Storage (GCS) by using a service account key and a SAS token. First, set the environment variable GOOGLE_APPLICATION_CREDENTIALS for GCS source.
– azcopy cp “https://storage.cloud.google.com/[bucket]/[folder]” “https://[destaccount].blob.core.windows.net/[container]/[path/to/directory]?[SAS]” –recursive=true
Copy an entire bucket to Blob Storage from Google Cloud Storage (GCS) by using a service account key and a SAS token. First, set the environment variable GOOGLE_APPLICATION_CREDENTIALS for GCS source.
– azcopy cp “https://storage.cloud.google.com/[bucket]” “https://[destaccount].blob.core.windows.net/?[SAS]” –recursive=true
Copy all buckets to Blob Storage from Google Cloud Storage (GCS) by using a service account key and a SAS token. First, set the environment variables GOOGLE_APPLICATION_CREDENTIALS and GOOGLE_CLOUD_PROJECT=<project-id> for GCS source
– azcopy cp “https://storage.cloud.google.com/” “https://[destaccount].blob.core.windows.net/?[SAS]” –recursive=true
Copy a subset of buckets by using a wildcard symbol (*) in the bucket name from Google Cloud Storage (GCS) by using a service account key and a SAS token for destination. First, set the environment variables GOOGLE_APPLICATION_CREDENTIALS and GOOGLE_CLOUD_PROJECT=<project-id> for GCS source
– azcopy cp “https://storage.cloud.google.com/[bucket*name]/” “https://[destaccount].blob.core.windows.net/?[SAS]” –recursive=true
Flags:
–as-subdir True by default. Places folder sources as subdirectories under the destination. (default true)
–backup Activates Windows’ SeBackupPrivilege for uploads, or SeRestorePrivilege for downloads, to allow AzCopy to see read all files, regardless of their file system permissions, and to restore all permissions. Requires that the account running AzCopy already has these permissions (e.g. has Administrator rights or is a member of the ‘Backup Operators’ group). All this flag does is activate privileges that the account already has
–blob-tags string Set tags on blobs to categorize data in your storage account
–blob-type string Defines the type of blob at the destination. This is used for uploading blobs and when copying between accounts (default ‘Detect’). Valid values include ‘Detect’, ‘BlockBlob’, ‘PageBlob’, and ‘AppendBlob’. When copying between accounts, a value of ‘Detect’ causes AzCopy to use the type of source blob to determine the type of the destination blob. When uploading a file, ‘Detect’ determines if the file is a VHD or a VHDX file based on the file extension. If the file is either a VHD or VHDX file, AzCopy treats the file as a page blob. (default “Detect”)
–block-blob-tier string upload block blob to Azure Storage using this blob tier. (default “None”)
–block-size-mb float Use this block size (specified in MiB) when uploading to Azure Storage, and downloading from Azure Storage. The default value is automatically calculated based on file size. Decimal fractions are allowed (For example: 0.25).
–cache-control string Set the cache-control header. Returned on download.
–check-length Check the length of a file on the destination after the transfer. If there is a mismatch between source and destination, the transfer is marked as failed. (default true)
–check-md5 string Specifies how strictly MD5 hashes should be validated when downloading. Only available when downloading. Available options: NoCheck, LogOnly, FailIfDifferent, FailIfDifferentOrMissing. (default ‘FailIfDifferent’) (default “FailIfDifferent”)
–content-disposition string Set the content-disposition header. Returned on download.
–content-encoding string Set the content-encoding header. Returned on download.
–content-language string Set the content-language header. Returned on download.
–content-type string Specifies the content type of the file. Implies no-guess-mime-type. Returned on download.
–cpk-by-name string Client provided key by name let clients making requests against Azure Blob storage an option to provide an encryption key on a per-request basis. Provided key name will be fetched from Azure Key Vault and will be used to encrypt the data
–cpk-by-value Client provided key by name let clients making requests against Azure Blob storage an option to provide an encryption key on a per-request basis. Provided key and its hash will be fetched from environment variables
–decompress Automatically decompress files when downloading, if their content-encoding indicates that they are compressed. The supported content-encoding values are ‘gzip’ and ‘deflate’. File extensions of ‘.gz’/’.gzip’ or ‘.zz’ aren’t necessary, but will be removed if present.
–disable-auto-decoding False by default to enable automatic decoding of illegal chars on Windows. Can be set to true to disable automatic decoding.
–dry-run Prints the file paths that would be copied by this command. This flag does not copy the actual files.
–exclude-attributes string (Windows only) Exclude files whose attributes match the attribute list. For example: A;S;R
–exclude-blob-type string Optionally specifies the type of blob (BlockBlob/ PageBlob/ AppendBlob) to exclude when copying blobs from the container or the account. Use of this flag is not applicable for copying data from non azure-service to service. More than one blob should be separated by ‘;’.
–exclude-path string Exclude these paths when copying. This option does not support wildcard characters (*). Checks relative path prefix(For example: myFolder;myFolder/subDirName/file.pdf). When used in combination with account traversal, paths do not include the container name.
–exclude-pattern string Exclude these files when copying. This option supports wildcard characters (*)
–exclude-regex string Exclude all the relative path of the files that align with regular expressions. Separate regular expressions with ‘;’.
–follow-symlinks Follow symbolic links when uploading from local file system.
–force-if-read-only When overwriting an existing file on Windows or Azure Files, force the overwrite to work even if the existing file has its read-only attribute set
–from-to string Specified to nudge AzCopy when resource detection may not work (e.g. piping/emulator/azure stack); Valid FromTo are pairs of Source-Destination words (e.g. BlobLocal, BlobBlob) that specify the source and destination resource types. All valid FromTos are: BlobBlob, BlobFSLocal, BlobFile, BlobLocal, BlobPipe, FileBlob, FileFile, FileLocal, FilePipe, GCPBlob, LocalBlob, LocalBlobFS, LocalFile, PipeBlob, PipeFile, S3Blob
-h, –help help for copy
–include-after string Include only those files modified on or after the given date/time. The value should be in ISO8601 format. If no timezone is specified, the value is assumed to be in the local timezone of the machine running AzCopy. E.g. ‘2020-08-19T15:04:00Z’ for a UTC time, or ‘2020-08-19’ for midnight (00:00) in the local timezone. As of AzCopy 10.5, this flag applies only to files, not folders, so folder properties won’t be copied when using this flag with –preserve-smb-info or –preserve-smb-permissions.
–include-attributes string (Windows only) Include files whose attributes match the attribute list. For example: A;S;R
–include-before string Include only those files modified before or on the given date/time. The value should be in ISO8601 format. If no timezone is specified, the value is assumed to be in the local timezone of the machine running AzCopy. E.g. ‘2020-08-19T15:04:00Z’ for a UTC time, or ‘2020-08-19’ for midnight (00:00) in the local timezone. As of AzCopy 10.7, this flag applies only to files, not folders, so folder properties won’t be copied when using this flag with –preserve-smb-info or –preserve-smb-permissions.
–include-directory-stub False by default to ignore directory stubs. Directory stubs are blobs with metadata ‘hdi_isfolder:true’. Setting value to true will preserve directory stubs during transfers.
–include-path string Include only these paths when copying. This option does not support wildcard characters (*). Checks relative path prefix (For example: myFolder;myFolder/subDirName/file.pdf).
–include-pattern string Include only these files when copying. This option supports wildcard characters (*). Separate files by using a ‘;’.
–include-regex string Include only the relative path of the files that align with regular expressions. Separate regular expressions with ‘;’.
–list-of-versions string Specifies a file where each version id is listed on a separate line. Ensure that the source must point to a single blob and all the version ids specified in the file using this flag must belong to the source blob only. AzCopy will download the specified versions in the destination folder provided.
–metadata string Upload to Azure Storage with these key-value pairs as metadata.
–no-guess-mime-type Prevents AzCopy from detecting the content-type based on the extension or content of the file.
–overwrite string Overwrite the conflicting files and blobs at the destination if this flag is set to true. (default ‘true’) Possible values include ‘true’, ‘false’, ‘prompt’, and ‘ifSourceNewer’. For destinations that support folders, conflicting folder-level properties will be overwritten this flag is ‘true’ or if a positive response is provided to the prompt. (default “true”)
–page-blob-tier string Upload page blob to Azure Storage using this blob tier. (default ‘None’). (default “None”)
–preserve-last-modified-time Only available when destination is file system.
–preserve-owner Only has an effect in downloads, and only when –preserve-smb-permissions is used. If true (the default), the file Owner and Group are preserved in downloads. If set to false, –preserve-smb-permissions will still preserve ACLs but Owner and Group will be based on the user running AzCopy (default true)
–preserve-permissions False by default. Preserves ACLs between aware resources (Windows and Azure Files, or ADLS Gen 2 to ADLS Gen 2). For Hierarchical Namespace accounts, you will need a container SAS or OAuth token with Modify Ownership and Modify Permissions permissions. For downloads, you will also need the –backup flag to restore permissions where the new Owner will not be the user running AzCopy. This flag applies to both files and folders, unless a file-only filter is specified (e.g. include-pattern).
–preserve-posix-properties ‘Preserves’ property info gleaned from stat or statx into object metadata.
–preserve-smb-info Preserves SMB property info (last write time, creation time, attribute bits) between SMB-aware resources (Windows and Azure Files). On windows, this flag will be set to true by default. If the source or destination is a volume mounted on Linux using SMB protocol, this flag will have to be explicitly set to true. Only the attribute bits supported by Azure Files will be transferred; any others will be ignored. This flag applies to both files and folders, unless a file-only filter is specified (e.g. include-pattern). The info transferred for folders is the same as that for files, except for Last Write Time which is never preserved for folders. (default true)
–preserve-symlinks If enabled, symlink destinations are preserved as the blob content, rather than uploading the file/folder on the other end of the symlink
–put-md5 Create an MD5 hash of each file, and save the hash as the Content-MD5 property of the destination blob or file. (By default the hash is NOT created.) Only available when uploading.
–recursive Look into sub-directories recursively when uploading from local file system.
–s2s-detect-source-changed Detect if the source file/blob changes while it is being read. (This parameter only applies to service to service copies, because the corresponding check is permanently enabled for uploads and downloads.)
–s2s-handle-invalid-metadata string Specifies how invalid metadata keys are handled. Available options: ExcludeIfInvalid, FailIfInvalid, RenameIfInvalid. (default ‘ExcludeIfInvalid’). (default “ExcludeIfInvalid”)
–s2s-preserve-access-tier Preserve access tier during service to service copy. Please refer to [Azure Blob storage: hot, cool, and archive access tiers](https://docs.microsoft.com/azure/storage/blobs/storage-blob-storage-tiers) to ensure destination storage account supports setting access tier. In the cases that setting access tier is not supported, please use s2sPreserveAccessTier=false to bypass copying access tier. (default true). (default true)
–s2s-preserve-blob-tags Preserve index tags during service to service transfer from one blob storage to another
–s2s-preserve-properties Preserve full properties during service to service copy. For AWS S3 and Azure File non-single file source, the list operation doesn’t return full properties of objects and files. To preserve full properties, AzCopy needs to send one additional request per object or file. (default true)
Flags Applying to All Commands:
–cap-mbps float Caps the transfer rate, in megabits per second. Moment-by-moment throughput might vary slightly from the cap. If this option is set to zero, or it is omitted, the throughput isn’t capped.
–log-level string Define the log verbosity for the log file, available levels: INFO(all requests/responses), WARNING(slow responses), ERROR(only failed requests), and NONE(no output logs). (default ‘INFO’). (default “INFO”)
–output-level string Define the output verbosity. Available levels: essential, quiet. (default “default”)
–output-type string Format of the command’s output. The choices include: text, json. The default value is ‘text’. (default “text”)
–skip-version-check Do not perform the version check at startup. Intended for automation scenarios & airgapped use.
–trusted-microsoft-suffixes string Specifies additional domain suffixes where Azure Active Directory login tokens may be sent. The default is ‘*.core.windows.net;*.core.chinacloudapi.cn;*.core.cloudapi.de;*.core.usgovcloudapi.net;*.storage.azure.net’. Any listed here are added to the default. For security, you should only put Microsoft Azure domains here. Separate multiple entries with semi-colons.
https://ecapitaladvisors.com/blog/implementing-email-notifications-in-a-day/