Product:
Cognos Analytics Extended Audit 11
Microsoft Windows 2019 server

Issue:

Setup AuditExt as of this page, https://developer.ibm.com/technologies/analytics/tutorials/ibm-cognos-11-audit-extension/

but when run, it fails, check of log file (D:\Program Files\ibm\cognos\analytics\logs\c11AuditExtension.log) show a error message:

Violation of PRIMARY KEY constraint ‘PK_AE_CA_SEC_MEM’. Cannot insert duplicate key in object ‘dbo.AE_SECURITY_MEMBERS’

Solution:

The issue can be that you reach max.items limit, and get above error in the log file.

Stop the Cognos BI service.
Go to folder D:\Program Files\ibm\cognos\analytics\wlpdropins\AuditExt.war\WEB-INF\classes

Open c11AuditExtension.properties in Notepad++

Change this lines:

false — will not save the report xml in the audit database. option.ca.include.specifications: A Content Audit option that determines if the audit should record the specification XML of any reports/queries/analyses that it finds. Possible values are true and false. The default value is true. If this parameter is set to false, less database space will be used.
0 option.ca.max.duration: A Content Audit option that limits the maximum length of time, in seconds, that the audit should be run for. If this time is exceeded, the audit is terminated and recorded as a failure. If it is set to a value of zero, no time limit will be applied. The default value is 1800 (30 minutes).
0 option.aa.max.duration: An Account Audit option that limits the maximum length of time, in seconds, that the audit should be run for. If this time is exceeded, the audit is terminated and recorded as a failure. If it is set to a value of zero, no time limit will be applied. The default value is 1800 (30 minutes).
0 option.aa.max.items: An Account Audit option that limits the maximum number of items that will be processed by the audit. If the number is exceeded, the audit is terminated and recorded as a failure. If it is set to a value of zero, no limit will be applied. The default value is 10000.
0 option.ra.max.duration: A Role Audit option that limits the maximum length of time, in seconds, that the audit should be run for. If this time is exceeded, the audit is terminated and recorded as a failure. If it is set to a value of zero, no time limit will be applied. The default value is 1800 (30 minutes).
0 option.ra.max.items: A Role Audit option that limits the maximum number of items that will be processed by the audit. If the number is exceeded, the audit is terminated and recorded as a failure. If it is set to a value of zero, no limit will be applied. The default value is 30000.
false — will not check my folders option.aa.include.content: An Account Audit option that determines if the audit should process the content of users’ My Folders. If set, this will cause a mini-Content Audit to be run for each user’s content where it exists. Possible values are true and false. The default value is true.

Save the file.
Start IBM Cognos windows service.
Browse to http://servername.domain.com:9300/AuditExt/ to run the “collection event” again.

After you have loaded the Audit Extension report package (AuditExt_deployment_c11_20181003), you can can run a report called “Audit Run Report” to see if the collection of audit data was successful.

Of course you need to create a data source called “audit_extension” to your database where you store the audit data.

Under the teams folder – Cognos Audit Extension – Role Audit – Capabilites available to Users report, can be the one that give you a detail view of the license possibility for each user. You need to test your way forward.


More information:
https://www.ironsidegroup.com/video/bi-expert/cognos-audit-extension-your-secret-weapon/

https://www.envisn.com/envisn-cognos-blog/bid/102863/Using-IBM-Cognos-10-Audit-Extensions

https://www.wisdomjobs.com/e-university/ibm-cognos-tutorial-196/auditing-4398.html

https://www.bspsoftware.com/knowledgebase/how-does-license-auditor-work/

Product:
Cognos Analytics 11

Microsoft Windows 2019 server

Issue:
Faster way to check license, than use Audit extensions?

https://developer.ibm.com/technologies/analytics/tutorials/ibm-cognos-11-audit-extension/

Suggested solution:
Download and install MetaManager.
https://www.bspsoftware.com/products/metamanager/Download/

Unzip the 64bit file to a folder. You can install MetaManager on your laptop. (You only need port 80 and 9300 open in the firewall to be able to access the cognos servers from your laptop).

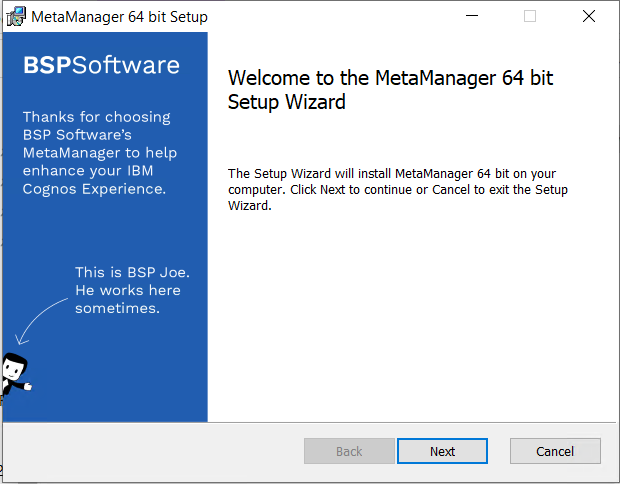
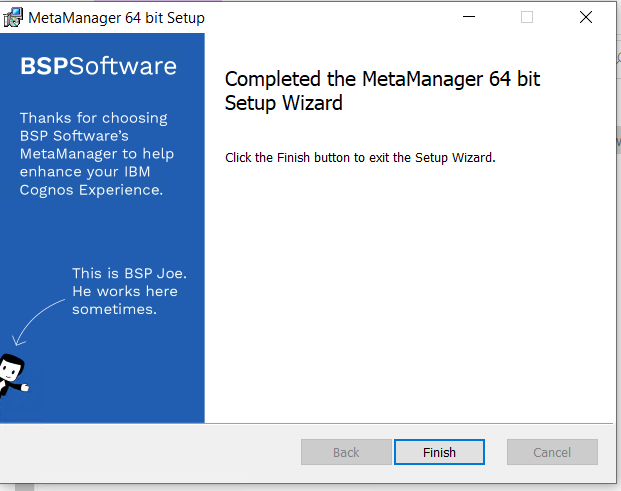
Run installation by click on the MetaManagerWixSetup.msi file

Click Next

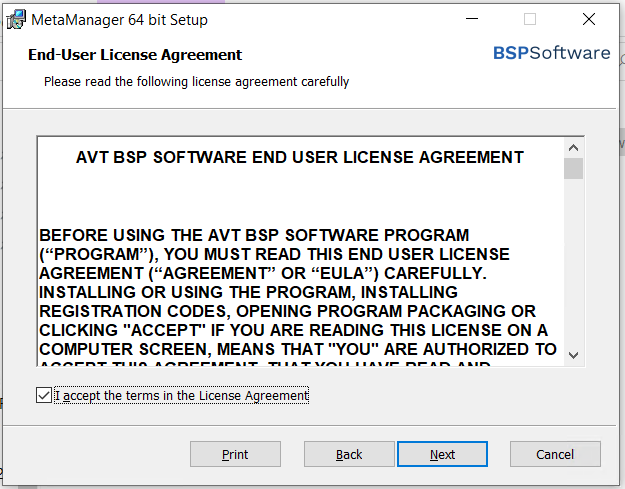
Accept the license and click Next

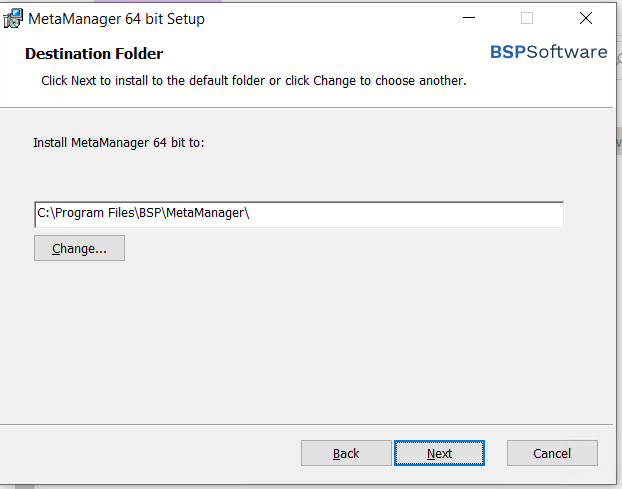
Click Next

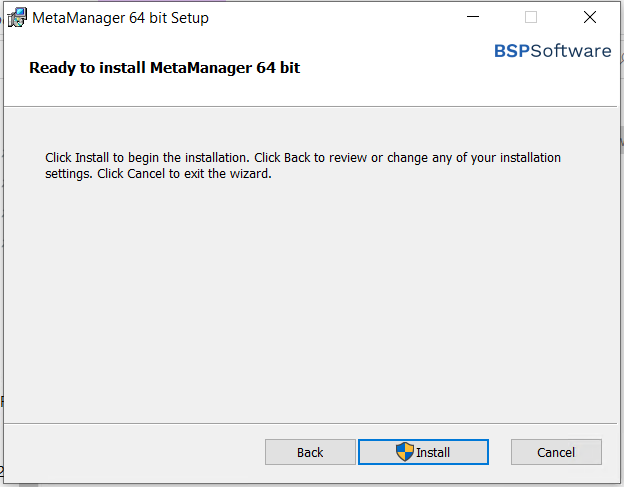
Click Install

Request a trail licenses from https://www.bspsoftware.com/products/metamanager/freestuff/

You need a trail license for each computer.

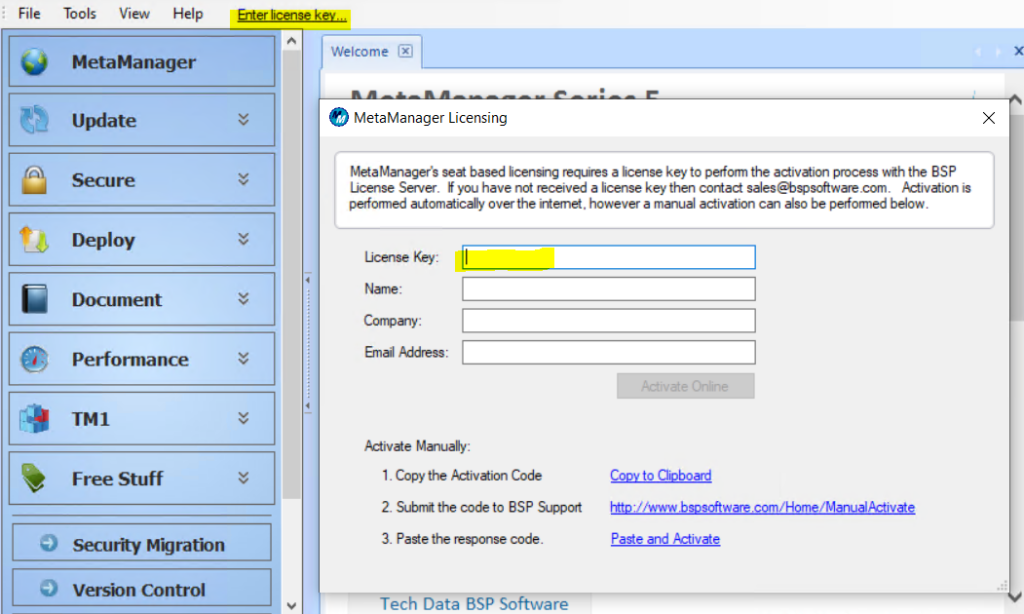
Activate the license, from inside the program by click on Enter license key;
Enter the information you got in mail from techdata:

“Thank you for your interest in MetaManager.

This license key will unlock free functionality in MetaManager including the BSP License Auditor module”

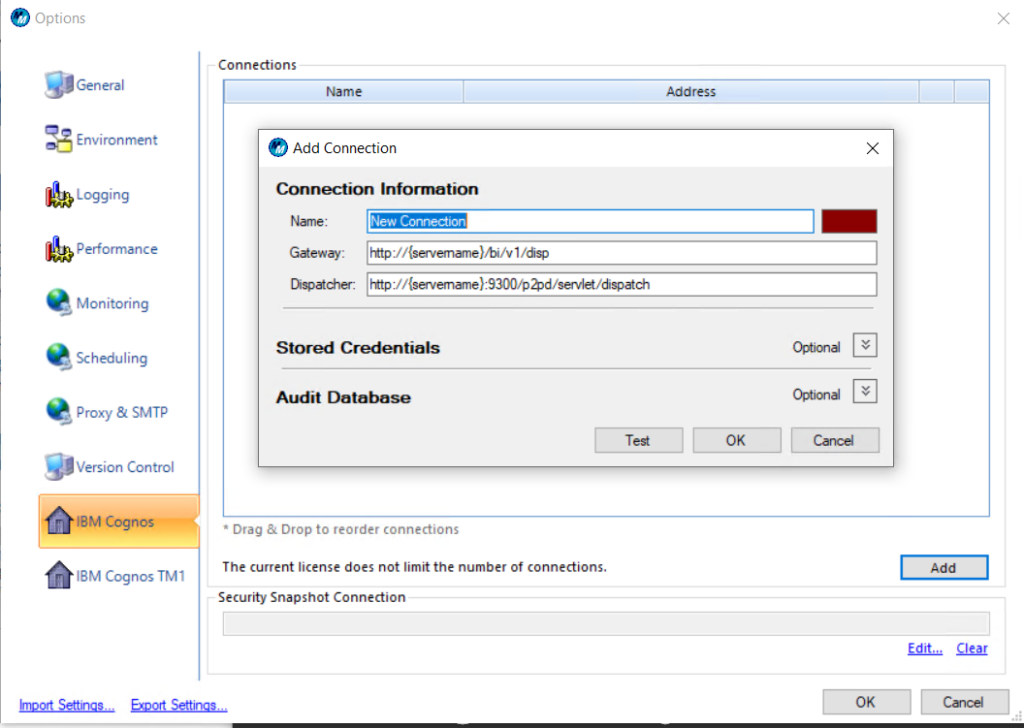
Setup the Cognos Connection, by go to tools – options. Click on IBM Cognos and add:

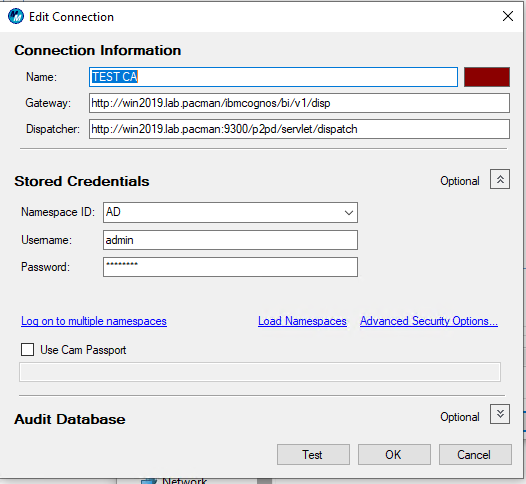
Enter a name, and the FQDN for the cognos server, and expand and enter your Cognos Admin account.

Namespace ID must be same as you have set as namespace in cognos configuration.

Click Test and OK.

You can access all your CA11 environment from one installation of Meta Manager. (you only need port 80 and 9300 to be open in firewall between your computer and the cognos servers).

Run the license scan:

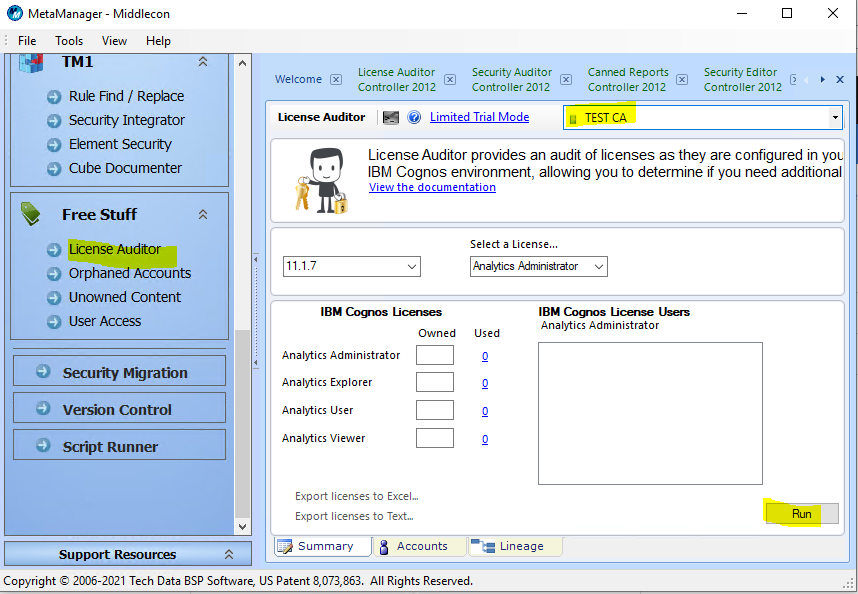
Go to License Auditor – select your site from drop-down – click on Run.

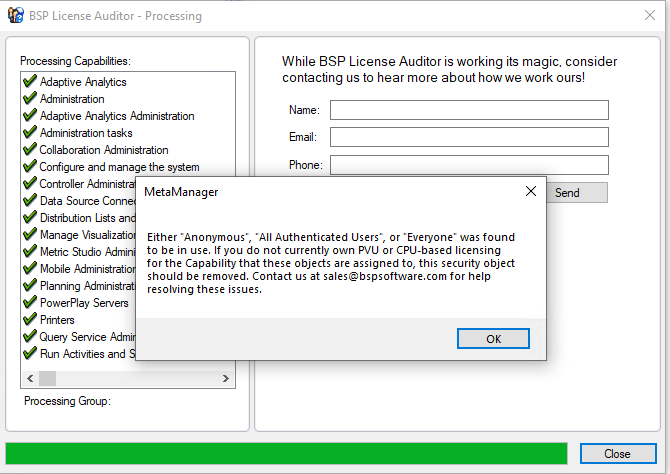
Click OK and Close, to go to the result.

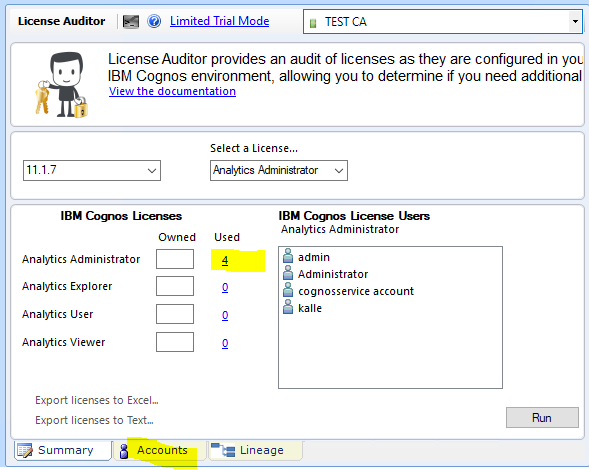
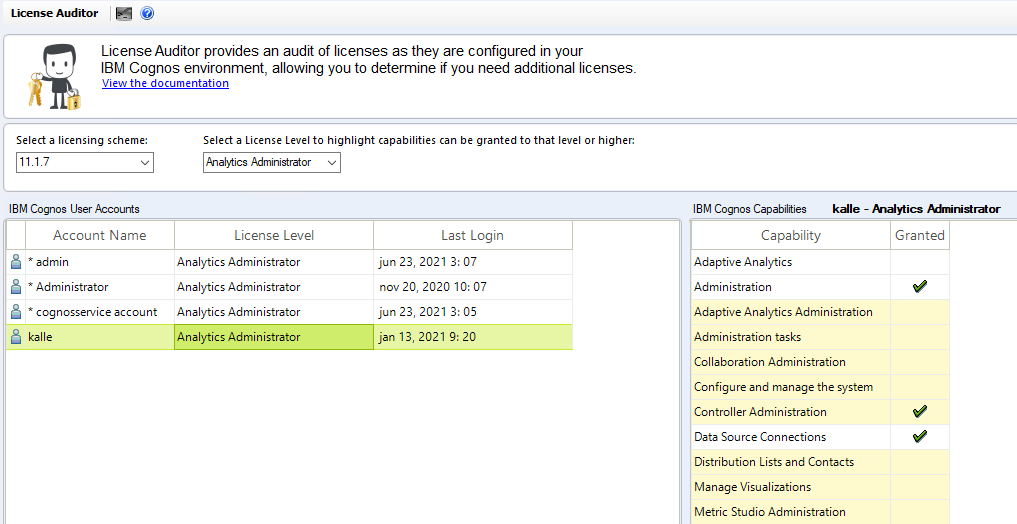
To see the administrators, click on the number or click on Accounts.

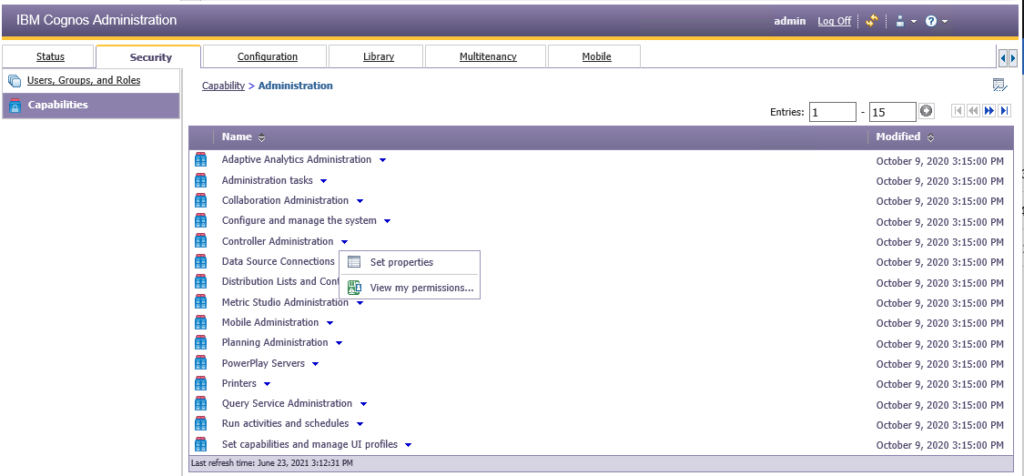
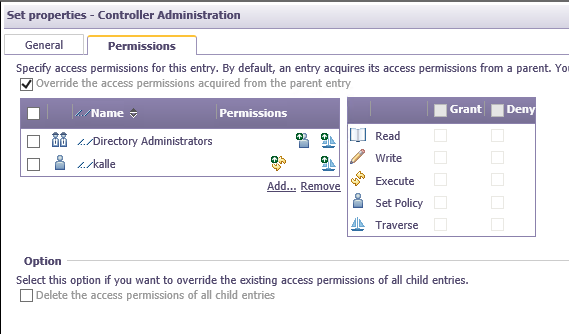
By select “Analytics Administrator” in drop down, you see what yellow capabilities that trigger that this user is Administrator.  The astrix* before a name indicate that the user is in the System Administrator group. Yellow lines tell that this user is consider as a Cognos Administrator, if he should not be it, you must go to Cognos Administration, Security tab, and Capabilities. Then click on “set properties” to find the users in that area.

Check you Cognos Security tabs Capabilities, to remove users and groups that should not be in the one capability; that will be triggered as administrator license.

Under permissions, remove the user or group that should not be there. If a user has Grant Execute rights he is consider to have this capability.

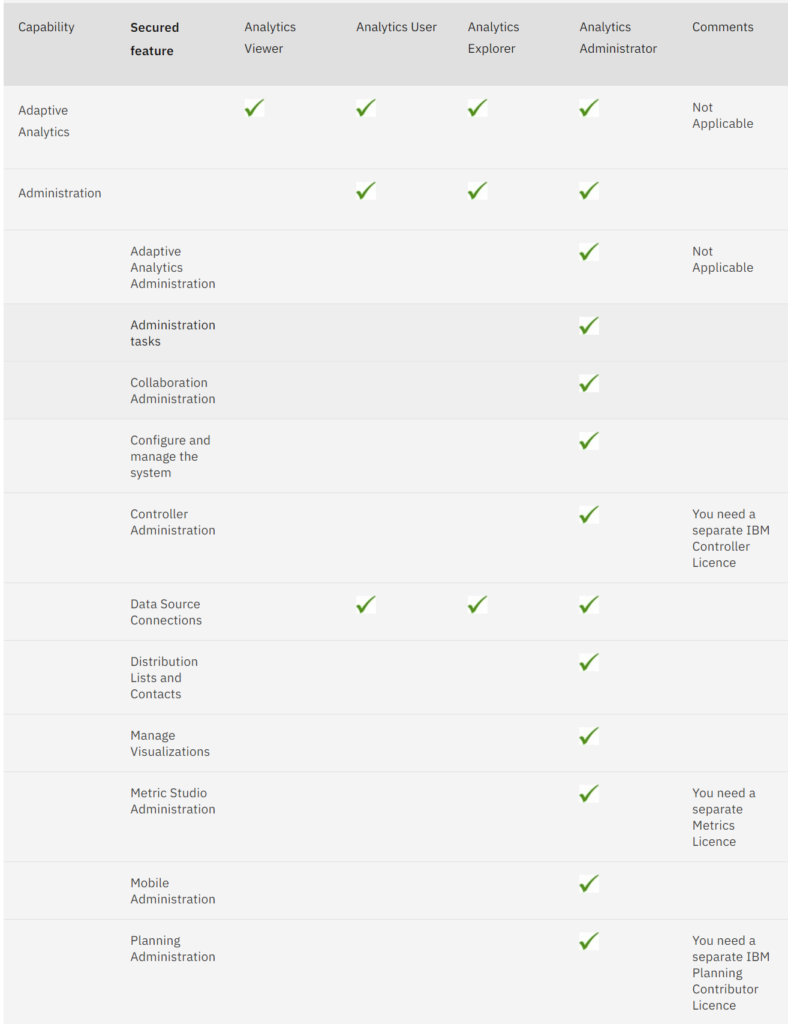
This list show the values that trigger different license roles (all values in the link):

https://www.ibm.com/docs/en/cognos-analytics/11.1.0?topic=licenses-default-permissions-based

Meta-manager calculate license this way;

https://www.bspsoftware.com/knowledgebase/how-does-license-auditor-work/

More information:

Avnet BSP Software

https://www.bspsoftware.com/products/metamanager/pricing/

https://www.pmsquare.asia/pmsquare/

https://www-03.ibm.com/software/sla/sladb.nsf/lilookup/441D74E2925A72EA8525828300720001?OpenDocument

https://www.ibm.com/docs/en/cognos-analytics/11.1.0?topic=licenses-license-roles

https://www.bspsoftware.com/knowledgebase/installing-metamanager/
Contact your IBM partner for help with the license audit:

http://www.middlecon.se/licensoversyner-behovs/

Product:
Planning Analytics 2.0.9.7
Microsoft Windows 2019 server

Problem:
What java keystore should i use for PA?

Follow official documentation in the first place, as the solution change with different versions of Cognos.

Suggested solution:

https://www.ibm.com/docs/en/planning-analytics/2.0.0?topic=itw-configure-ssl-planning-analytics-tm1-webspreadsheet-services-existing-keystore

Make a backup of the ssl folder before you change anything.

The JAVA Keystore used by PMPSVC.  Open Command Prompt as an Administrator and navigate to the <tm1 install dir>\bin64\jre\bin\ directory.

Execute the following command to import/trust the certificate:

keytool.exe -import -trustcacerts -file “C:\Program Files\ibm\cognos\tm1_64\bin64\ssl\caRoot.cer” -keystore “C:\Program Files\ibm\cognos\tm1_64\bin64\ssl\tm1store” -alias caRoot -storepass applix

The JAVA Keystore used by TM1WEB.  Open Command Prompt as an Administrator and navigate to the <tm1 install dir>\bin64\jre\bin\ directory.

Execute the following command to import/trust the certificate:

keytool.exe -import -trustcacerts -file “C:\Program Files\ibm\cognos\tm1web\bin64\ssl\caRoot.cer” -keystore “C:\Program Files\ibm\cognos\tm1web\bin64\ssl\tm1store” -alias caRoot -storepass applix


More information:

https://www.sslshopper.com/article-most-common-java-keytool-keystore-commands.html

Java Keytool Commands for Creating and Importing

These commands allow you to generate a new Java Keytool keystore file, create a CSR, and import certificates. Any root or intermediate certificates will need to be imported before importing the primary certificate for your domain.

  • Generate a Java keystore and key pair
    keytool -genkey -alias mydomain -keyalg RSA -keystore keystore.jks  -keysize 2048
  • Generate a certificate signing request (CSR) for an existing Java keystore
    keytool -certreq -alias mydomain -keystore keystore.jks -file mydomain.csr
  • Import a root or intermediate CA certificate to an existing Java keystore
    keytool -import -trustcacerts -alias root -file Thawte.crt -keystore keystore.jks
  • Import a signed primary certificate to an existing Java keystore
    keytool -import -trustcacerts -alias mydomain -file mydomain.crt -keystore keystore.jks
  • Generate a keystore and self-signed certificate (see How to Create a Self Signed Certificate using Java Keytoolfor more info)
    keytool -genkey -keyalg RSA -alias selfsigned -keystore keystore.jks -storepass password -validity 360 -keysize 2048

Java Keytool Commands for Checking

If you need to check the information within a certificate, or Java keystore, use these commands.

  • Check a stand-alone certificate
    keytool -printcert -v -file mydomain.crt
  • Check which certificates are in a Java keystore
    keytool -list -v -keystore keystore.jks
  • Check a particular keystore entry using an alias
    keytool -list -v -keystore keystore.jks -alias mydomain

Other Java Keytool Commands

  • Delete a certificate from a Java Keytool keystore
    keytool -delete -alias mydomain -keystore keystore.jks
  • Change a Java keystore password
    keytool -storepasswd -new new_storepass -keystore keystore.jks
  • Export a certificate from a keystore
    keytool -export -alias mydomain -file mydomain.crt -keystore keystore.jks
  • List Trusted CA Certs
    keytool -list -v -keystore $JAVA_HOME/jre/lib/security/cacerts
  • Import New CA into Trusted Certs
    keytool -import -trustcacerts -file /path/to/ca/ca.pem -alias CA_ALIAS -keystore $JAVA_HOME/jre/lib/secur

https://www.ibm.com/support/pages/how-configure-custom-ssl-certificates-planning-analytics-20-and-201

https://www.ibm.com/support/pages/how-configure-planning-analytics-connect-ssl-secured-cognos-dispatcher

https://docs.bmc.com/docs/decisionsupportserverautomation/89/using-third-party-certification-authority-certificates-656916032.html 


Product:
Planning Analytics Workspace 2.0.9.3

PAA Agent Version 2.0.63.1420
Microsoft Windows 2019 server

Issue:
This request cannot be understood by the server. This might be because there is a problem with the syntax. Retry this action.

Above error when you in PAW click on Administration – Databases – Planning Sample – Configuration.

Solution:
The user who login to PAW need to be local Admin inside the TM1 instance, to be able to see and change the configuration (tm1s.cfg) from the PAW administration page.

Go into Tm1 Architect, open the TM1 instance, right click and select security – Clients/Groups:
Find your username, and mark that you are ADMIN.
Click OK.

The user can restart the TM1 instance from PAW, without being ADMIN inside the TM1 application.

More information:

https://www.ibm.com/docs/en/SSD29G_2.0.0/com.ibm.swg.ba.cognos.tm1_inst.2.0.0.doc/tm1_inst.pdf

https://www.ibm.com/docs/en/planning-analytics/2.0.0?topic=workspace-monitor-administer-databases


Product:
Cognos Analytics 11.1.7

Microsoft Windows 2016 server

Issue:
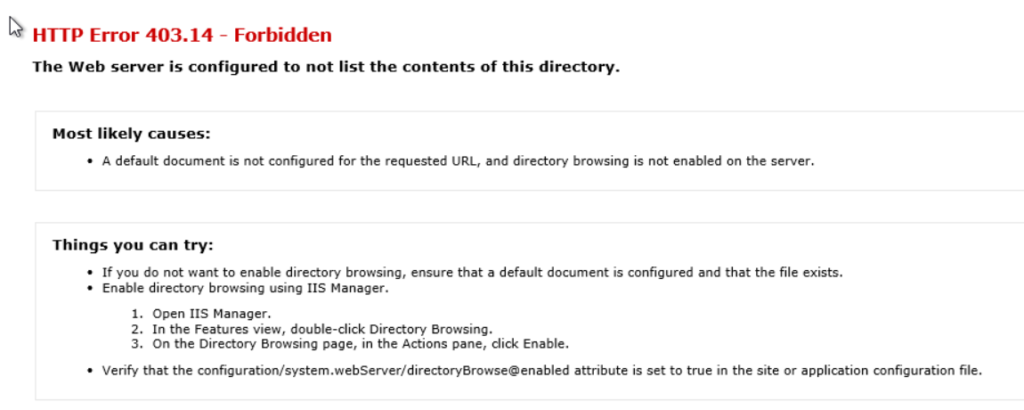
When browse to IBMCOGNOS site you get a error message. This after a upgrade of cognos on a old server.

You change the Cognos Application pool to use localsystem as identity, but it did not help.

If you browse to controller test site; http://servername.domain.com/ibmcognos/controllerserver/ccrws.asmx or if you try http://servername.domain.com/ibmcognos/bi/v1/disp , then it works.

Solution:
Check the folder C:\inetpub\wwwroot for any web.config file.

This can be like this:

Rename the web.config file and restart iis with dos command : iisreset.

More Information:
https://www.ibm.com/support/pages/http-403-forbidden-error-message-when-accessing-cognos-anlaytics-1104-or-higher-gateway-url-iis-server

https://docs.microsoft.com/en-us/troubleshoot/iis/http-status-code

Product:
Cognos Analytics 11.0.13

kit_version=11.0.13.18102214
kit_name=IBM Cognos Analytics

Microsoft Windows 2012 server

Issue:
What is Director Administrator counted as kind of license?

Guessed Solution:
Director Administrator is classified as a administrator license.

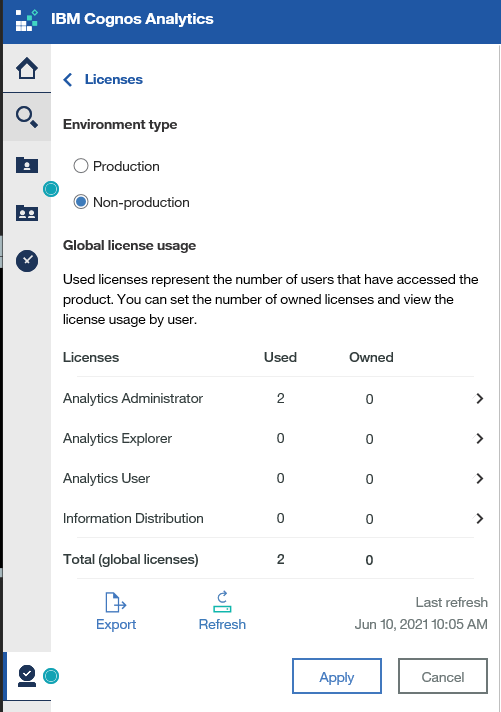
Inside Cognos Analytics you can get a list of the users that have access to the system.
Go to Manage – Licenses – Export to get a list of user.

The view show only users who have logged into Cognos.
If you change a user from Administrator to User, that person must login to Cognos, before above list is updated with his correct license status.

The exported csv file, list all people that have somehow connected to cognos security.

The level 3 is a Analytic Administrator and level 1 is a Analytic User.
-1 in level show the user have not logged into Cognos, but he is listed in the security groups.

https://www.ibm.com/docs/en/cognos-analytics/11.0.0?topic=managing-licenses

To be sure about license talk to a IBM partner or read the license documents:

https://www-03.ibm.com/software/sla/sladb.nsf/lilookup/F7DA13804AF37FA3852586D8005820E1?OpenDocument

More information:

https://senturus.com/blog/cognos-analytics-using-license-roles-specify-permissions/

https://www.ibm.com/docs/en/cognos-analytics/11.0.0?topic=licenses-default-permissions-based

https://www.bspsoftware.com/products/metamanager/

To get a detailed report of users capabilities, you can install and use Cognos 11 audit extensions;

https://developer.ibm.com/technologies/analytics/tutorials/ibm-cognos-11-audit-extension/

http://www.middlecon.se/vara-omraden/licensoptimering/

Product:
Planning Analytics 2.0.9 TM1_version=TM1-AW64-ML-RTM-11.0.97.6-0
Cognos Analytics 11.1.7 Product_version=11.1 R7 (LTS)

Microsoft Windows 2019 server with CA11 and PA
Red Hat Linux with PAW

Issue:
How add SSL certificates to the Cognos servers?

Use the official documentation in the first place, this is only a suggestion.
This instruction may not cover all the steps you need to do.

ADD TM1 CERT TO CA11:
The TM1 certificate need to be added to the CA11 keystore once, to be able to run reports on TM1 data.
https://www.ibm.com/support/pages/configure-datasource-ibm-planning-analytics-20x-ibm-cognos-analytics-1106

Go to <Cognos Analytics installation>\jre\bin and execute ikeyman.exe as administrator

Select Open a key database file, and navigate to the cacerts keystore located in <Cognos Analytics installation>\jre\lib\security. As type select JKS.

On prompt enter password changeit

In the drop down, switch from Personal Certificates to Signer Certificates

On the right select Add

Browse for the certificate file ibmtm1.arm located in <Planning Analytics Install>\bin64\ssl.
On prompt enter an alias for the certificate in the keystore, exempli gratia: TM1Server.
Click OK
Exit ikeyman.

Suggested Solution:

Backup configuration and ssl and security folders before you do any changes.

SETUP CERTIFICATE FOR IIS:
Go to Internet Information Service Manager.
Select the server and click on Server Certificates icon.
Click Create Certificate Request.
Fill in the Distinguished Name properties, important that COMMON NAME is the servername.
Select “Microsoft RSA SChannel Cryptographic Provider” and Bit Length: 2048
Save the result in a request.txt file.
Send this request to your Certificate Authority, or if you use Microsoft CA, go to the website and click Certificate Request link. Mostly named “Request a certificate”.
Select Submit a certificate request by using a base-64-encoded CMC or PKCS #10 file, or submit a renewal request by using a base-64-encoded PKCS #7 file.
Copy the text from you request.txt file and paste it into the Saved Request field.
Select “Web Server” in the Certificate Template dropdown.
Enter the DNS servername in Additional attributes, like SAN:dns=servername.domain.com
Click Submit.
Requesting for certificate in Windows 2012 – Deep Security (trendmicro.com)

In the Certificate Issued dialog you select Base 64 encoded.
Download the certificate  (certnew.cer) and the certificate chain.
In IIS manager go to “complete certificate request”
Select the cer file you got.
Enter the Friendly name to your servername:  servername.domain.com
Leave certificate store to be personal and click OK.

If this is a new server, you need to import the root and issuing certificates to the Trusted Root Certification Authorities tab inside Certificate Manager. To access Certificate Manager, click the Start button, type certmgr.msc in the search field, and click the Enter key. More info in link;

https://www.sslshopper.com/article-installing-an-ssl-certificate-in-windows-server-2008-iis-7.0.html

BIND CERT TO WEBSITE
Go to IIS Manager, select “Default Web site” and click on Bindings.
Click Add.
Select Type HTTPS and select your server certificate.
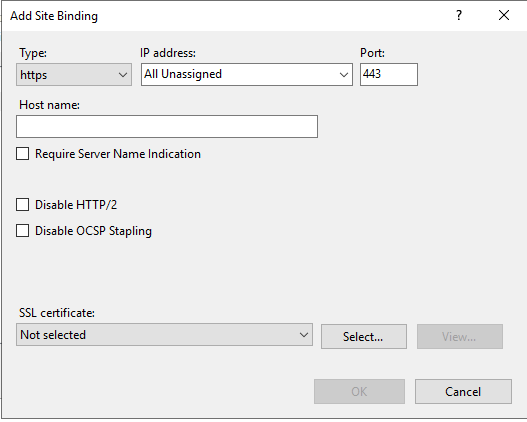
Click OK.
Remove the HTTP binding and any old HTTPS certificates.
Click Close.

Inside Cognos Configuration change Gateway URI to point to https://servername.domain.com:443/ibmcognos/bi/v1/disp
Inside TM1S.CFG file change ClientCAMURI to be the same (https://servername.domain.com:443/ibmcognos/bi/v1/disp)

Inside C:\ProgramData\Applix\TM1\tm1p.ini you may need to update; CognosGatewayURI = https://servername.domain.com:443/ibmcognos/bi/v1/disp

You may need to export a pfx file with the key value from inside Certificate Manager on your windows server, right click on servername in Server Certificate and select export.

CHANGE CA11 TO USE INTERNAL SSL
Stop the cognos service.
Inside Cognos Configuration, change to HTTPS on all points under environment tab.
Click on save in Cognos Configuration, this will create the new cert and place it in CA keystore.
Open a command prompt as administrator.
Go to folder d:\Program Files\ibm\cognos\analytics\bin and enter below command, to export the cert:

ThirdPartyCertificateTool.bat -E -T -p NoPassWordSet -r ca.cer

Go to certmgr.msc, go to Trusted Root Certification Authorities tab, right click to import the ca.cer certificate.

If you not already have done so, you need to export the root and indeterminate certificates from your IIS Cognos website. Open a web browser, and on the certificate click – view and then export for each cert.

IIS 10 Exporting/Importing SSL Certificates | digicert.com
Rename the certificate files to not have space in there names.
Copy the certificate files to your Cognos server folder d:\Program Files\ibm\cognos\analytics\bin
Open a command prompt as administrator and go to folder C:\Program Files\ibm\cognos\analytics\bin
Enter command to import (the order of import is crucial)
ThirdPartyCertificateTool.bat -i -T -r Root.cer -p NoPassWordSet
ThirdPartyCertificateTool.bat -i -T -r Issuing.cer -p NoPassWordSet
ThirdPartyCertificateTool.bat -i -T -r Servername.cer -p NoPassWordSet

Start Cognos BI.

Go to IIS Manager, select \ibmcognos\bi folder.
Click on URL Rewrite.
Click on Reverse Proxy rule.
Edit the rule to use HTTPS instead of HTTP.
https://servername.domain.com:9300/bi/{R:0}
Click apply in top right corner.
Exit IIS manager.

CHANGE TM1 TO USE SSL

Stop TM1 services.

Change TM1S.CFG to have;
ServerCAMURI=https://servername.domain.com:9300/p2pd/servlet/dispatch
ClientCAMURI=https://servername.domain.com:443/ibmcognos/bi/v1/disp

UseSSL=T
CAMUseSSL=T

Copy your ca.cer file to the Planning Analytics folder d:\Program Files\ibm\cognos\tm1_64\bin64\ssl;

Open a command prompt as administrator and go to folder C:\Program Files\ibm\cognos\tm1_64\bin64

Import to Tm1 admin server with command:

gsk8capicmd_64 -cert -add -db “d:\Program Files\ibm\cognos\tm1_64\bin64\ssl\ibmtm1.kdb” -stashed -label caRoot -file “d:\Program Files\ibm\cognos\tm1_64\bin64\ssl\ca.cer” -format ascii -trust enable

Open a command prompt as administrator and go to folder C:\Program Files\ibm\cognos\tm1_64\jre\bin

Import to Tm1 App Web (PMPSVC) server with command:
keytool.exe -import -trustcacerts -file “d:\Program Files\ibm\cognos\tm1_64\bin64\ssl\ca.cer” -keystore “d:\Program Files\ibm\cognos\tm1_64\bin64\ssl\tm1store” -alias caRoot -storepass applix

Change the file D:\Program Files\ibm\cognos\tm1_64\webapps\pmpsvc\WEB-INF\configuration\fpmsvc_config.xml to have https at 3 places:

<external uri=”https://servername.domain.com:9510″/>

<gateway uri=”https://servername.domain.com:443/ibmcognos/bi/v1/disp”/>

<dispatcher uri=”https://servername.domain.com:9300/p2pd/servlet/dispatch”/>

Save the file.

Go to d:\program files\ibm\cognos\tm1_64\jre\bin and execute ikeyman.exe as administrator.
Open D:\Program Files\ibm\cognos\tm1_64\configuration\certs\CAMkeystore file as PKC$12 type.
Enter password NoPassWordSet.
Rename encryption to encryptionold.
Click Export/import button:
Mark Import Key.
Select your server pfx file and click OK.
Enter the password you got at the export of the pfx file.
Change label to encryption and click apply.

Switch to Signer Certificates.
Click Add.
Select your root.cer file from the file system and click OK.
Enter a name e.g. rootcert
Repeat for any intermediate certificates
Click Add.
Select your issuing.cer file from the file system and click OK.
Enter a name e.g. issuingcert

Click Add.
Select  D:\Program Files\ibm\cognos\tm1_64\bin64\ssl\ibmtm1.arm file.
On prompt enter an alias for the certificate in the keystore, e.g. TM1Server.

Exit ikeyman program.
Use IKeyMan to Configure Custom SSL Certificates for TM1Web (ibm.com)

Open Cognos Configuration for TM1 (planning analytics).
Add the StandaloneCertificateAuthority property under the Local Configuration > Advanced Properties
section and set it to True.

Under Environment change Gateway URI to
https://servername.domain.com:443/ibmcognos/bi/v1/disp
and Content Manger URI to
https://servername.domain.com:9300/p2pd/servlet

Under TM1 Applications change TM1 Application Server gateway URI to
https://servername.domain.com:9510/pmpsvc
and change External server URI to
https://servername.domain.com:9510
and change TM1 Application Server Dispatcher URI to
https://servername.domain.com:9510/pmpsvc/dispatcher/servlet

Under Security > Cryptography > Cognos set Use third party CA? to True.

Save and start TM1 services.

If this is a new installation, you need to update the d:\Program Files\ibm\cognos\analytics\webcontent\bi\planning.html and d:\Program Files\ibm\cognos\analytics\webcontent\bi\tm1\web\tm1web.html files with HTTPS.

SETUP OF SSL FOR NEW TM1WEB

Copy your previous created pfx file (that contain the hole chain of certificates) to folder d:\Program Files\ibm\cognos\tm1web\bin64\ssl.

Stop the IBM Planning Analytics Spreadsheet Service.
Open d:\Program Files\ibm\cognos\tm1web\wlp\usr\servers\tm1web\server.xml.new in notepad++.
Update this row to set your https port
<httpEndpoint id=”defaultHttpEndpoint” httpPort=”-1″ httpsPort=”9511″ host=”*” removeServerHeader=”true”>
</httpEndpoint>
Add this row to point out the certificate pfx file to use
<keyStore id=”defaultKeyStore” location=”${wlp.user.dir}/../../bin64/ssl/cert.pfx” password=”cognos” />
Change cognos to the password you have for your pfx file.
Save the file as server.xml
In a command prompt go to folder d:\Program Files\ibm\cognos\tm1web\jre\bin
Enter this command to import the standard TM1 server cert to the new keystore
keytool -importcert -keystore ..\..\bin64\ssl\cert.pfx -storepass cognos -storetype pkcs12 -noprompt -alias ibmtm1 -file ..\..\bin64\ssl\ibmtm1.arm

Copy your Root and Intermediate certificate files to your \tm1web\bin64\ssl\ directory

Import the Root and Intermediate certificates with this command:
keytool.exe -import -trustcacerts -file “..\..\bin64\ssl\root.cer” -keystore “..\..\bin64\ssl\tm1store” -alias ca -storepass applix
keytool.exe -import -trustcacerts -file “..\..\bin64\ssl\issuing.cer” -keystore “..\..\bin64\ssl\tm1store” -alias intca -storepass applix

CER or PEM files should both work.

Start your IBM Planning Analytics Spreadsheet Service.

https://www.ibm.com/docs/en/planning-analytics/2.0.0?topic=itw-configure-ssl-new-deployments-planning-analytics-tm1-webspreadsheet-services
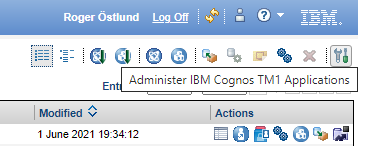
You need to browse to you TM1 APP WEB (https://servername.domain.com:9510/pmpsvc) application, and click on Administration icon. Mark the TM1 Application Web client row, and click on edit.
Change the thinclient URL to be https://servername.domain.com:9511/tm1web/Contributor.jsp.
Click OK and OK, to exit the settings.

REQUEST SSL FROM LINUX PAW

Connect to your Linux server with PUTTY program.
Stop your paw with command: sudo ./paw.sh stop
Go to your /data/ibm/paw63 folder.
Run below command to request a certificate:
sudo openssl req -newkey rsa:2048 -nodes -keyout privatekey.pem -out paw.csr
Answer the questions, and you have your file.
Copy the paw.csr file to your CA authority, or IIS website, and repeat previous process to get a certificate. Save the file as Base 64 encoded certificate chain.

SETUP SSL FOR PAW
Copy your certnew.p7b file to linux server folder /data/ibm/paw63.

Copy your private key to a new pem file:
sudo cp privatekey.pem pa_workspace.pem
Change access to files with command:
sudo chmod 777 pa_workspace.pem

Add the certificates to the pem file:
sudo openssl pkcs7 -print_certs -in certnew.p7b >> pa_workspace.pem
Erase the not needed lines, with servernames etc, in the pem file:

sudo nano pa_workspace.pem

-----END CERTIFICATE-----  
-----BEGIN CERTIFICATE----- 

Copy the pa_workspace.pem file to the config folder:
sudo cd /data/ibm/paw63/config
sudo mv pa-workspace.pem pa-old-workspace.pem
sudo cp /data/ibm/paw63/pa_workspace.pem pa-workspace.pem

Add lines to paw.env file:

sudo nano paw.env

add this lines

export EnableSSL=true

export ServerName=pawservername.domain.com

also change to HTTPS instead of HTTP, in lines like export TM1ApplicationsLocation=”https://servername.domain.com:9511″

Save the file.
Copy the ca.cer, issuing.cer and root.cer files to folder /data/ibm/paw63/config/certs.
Go to the scripts folder
sudo cd /data/ibm/paw63/scripts
Run the process to import the certificate in the paw keystore:
sudo ./process_certs.sh

Start paw with command:
sudo ./paw.sh

https://www.ibm.com/docs/en/planning-analytics/2.0.0?topic=servers-configure-tls-planning-analytics-workspace-local

If this is a new installation, you need to update D:\Program Files\ibm\cognos\analytics\webcontent\bi\pmhub.html file with HTTPS values.

// Update the following to point to the location of the pmhub service(s)
var pmhubURLs = [“https://pawservername”,”https://pawservername.domain.com”];


IMPORT CA CERT TO FRAMEWORK MANAGER
Open a cmd prompt as administrator.
Go to “C:\Program Files (x86)\ibm\cognos\fm\bin\” folder.
Copy the ca.cer file to the same folder.
Enter this command:
ThirdPartyCertificateTool.bat -i -T -r ca.cer -p NoPassWordSet

More information:

Securing Jupyter Notebook Server – IBM Documentation

https://www.ibm.com/support/pages/configure-datasource-ibm-planning-analytics-20x-ibm-cognos-analytics-1106

https://www.ibm.com/support/pages/how-configure-ssl-planning-analytics-web-tier-using-gskit-using-existing-signed-certificate

TM1WEB, an error has occurred when using TLS

Product:
Planning Analytics Workspace 63
Red Hat Linux
Issue:
Need more space for the PAW installation. Docker will create is files in /var/ sub-folder.

Use df -h command to check space on your linux server.

Error:
Looks like something went wrong in step “installing/updating IBM planning analytics Docker images”… Check the log file /…..
in images.log : no space left on device

Solution:

Create folders, where you have space, sudo mkdir /data/docker

Stop docker service sudo systemctl stop docker

Update the file /etc/docker/daemon.json with sudo nano daemon.json

{
“graph” : “/data/docker”
}

Save with CTRL+O and exit with CTRL+X.

Start docker with sudo systemctl start docker

To restart the full Linux server enter: sudo reboot

Then run the installation of PAW ./Start.sh script again.

More information:

Storage requirements can vary, you need at least 100 GB for the /var/lib/docker directory and sufficient space for at least two Planning Analytics Workspace installation packages wherever you choose to install them.

https://www.ibm.com/docs/en/planning-analytics/2.0.0?topic=local-prerequisites

https://phase2.github.io/devtools/common-tasks/stopping-containers-and-cleanup/

How install docker:

If you have Red Hat Enterprise Linux Server release 7.9 (Maipo) then you may need to do this steps to be able to install docker before paw.
(to check Linux version enter cat /etc/redhat-release)

(this is if you get the error message: No package docker available.)

subscription-manager repos –enable=rhel-7-server-rpms

subscription-manager repos –enable=rhel-7-server-extras-rpms

subscription-manager repos –enable=rhel-7-server-optional-rpms

yum -y install docker

systemctl start docker

systemctl enable docker

How To Install Docker on CentOS 7 / RHEL 7

sudo docker version gives:

Client:
Version: 1.13.1
API version: 1.26
Package version: docker-1.13.1-205.git7d71120.el7_9.x86_64
Go version: go1.10.3
Git commit: 7d71120/1.13.1
Built: Wed Mar 31 06:52:27 2021
OS/Arch: linux/amd64

Server:
Version: 1.13.1
API version: 1.26 (minimum version 1.12)
Package version: docker-1.13.1-205.git7d71120.el7_9.x86_64
Go version: go1.10.3
Git commit: 7d71120/1.13.1
Built: Wed Mar 31 06:52:27 2021
OS/Arch: linux/amd64
Experimental: false

This is a supported docker version to be used with PAW.

Product:
Planning Analytics Workspace 63
Red Hat Linux 7
Issue:

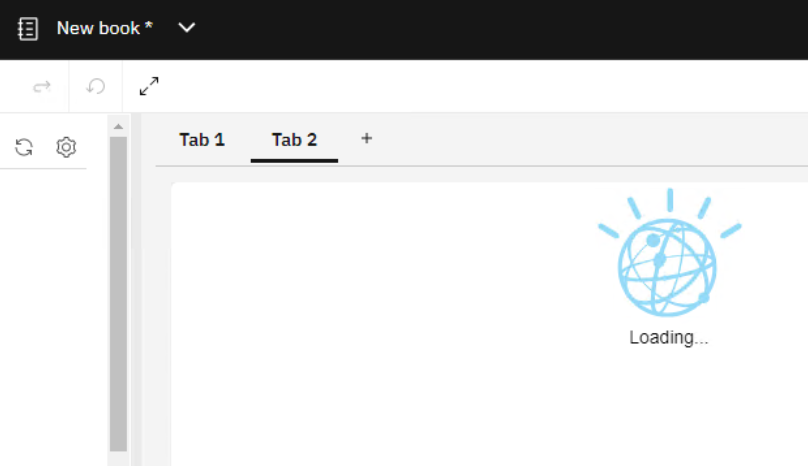
After you login to PAW with Internet Explorer, you get a stuck screen.

Solution:

Use Chrome instead of IE.

The IE browser that comes with Windows server 2019 is not using Chrome engine as default.
More information:

https://docs.microsoft.com/en-us/troubleshoot/browsers/disable-internet-explorer-windows

To troubleshoot docker containers on Linux you can use this commands:

To change to root user:
sudo -i
To find all error files in the log folder (go to log folder first):
find . -print | grep -i error
To list all containers:
sudo docker ps -a
To list only the ID number for containers:
sudo docker ps -q
To show the last lines of a log file:
tail error.log
To move into a running container:
docker exec -it pa-gateway /bin/bash
To check space:

df -h

To exit out from a container:
exit

https://phase2.github.io/devtools/common-tasks/ssh-into-a-container/

https://www.cyberciti.biz/faq/unix-command-to-find-a-file-in-a-directory-and-subdirectory/

https://www.ibm.com/support/pages/http-404-error-not-found-during-validation-admin-tool-whereas-tm1-application-server-seems-work-properly 

https://ss64.com/bash/

Product:
Planning Analytics 2.0.9.7
Planning Analytics Workspace 63
Microsoft Windows 2019 server

Issue:
In PAW, when you create a new book, and insert a Websheet from a TM1 application, you only get a blank box after a long time. This is in a new installation, where you are using the new TM1WEB service (IBM Planning Analytics Spreadsheet Services).

Solution:

You need to in IBM Planning Analytics Workspace Administration Tool ensure that the TM1 Application Server Gateway URI point to the new TM1WEB server and it correct port.

Change and save. Then restart the PAW from inside the status tab.

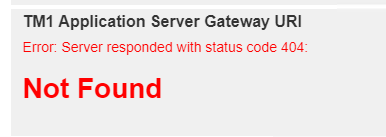
If you click validate you will still get the 404 error on this line, this is OK, as they validate try to find pmhub parts that is not in PAL at this later versions.

This value is also in the paw.env file, on your PAW linux server. You can edit direct in the file, too.

Change value export TM1ApplicationsLocation=”https://yourservername.domain.com:9511″
The file is in your /ibm/paw/config folder.

Stop PAW with command (from your /paw/scripts/ folder):

sudo ./paw.sh stop

Check if PAW is stopped with command:

sudo docker ps

Start PAW with command:

sudo ./paw.sh

Wait 10 min before you test to browse, to your paw installation in chrome.

More information:

https://www.ibm.com/docs/en/planning-analytics/2.0.0?topic=web-install-configure-tm1-microsoft-windows

https://www.ibm.com/support/pages/http-404-error-not-found-during-validation-admin-tool-whereas-tm1-application-server-seems-work-properly

https://www.ibm.com/docs/en/planning-analytics/2.0.0?topic=tpal-how-do-i-fix-my-planning-analytics-workspace-local-installation