Product:
Cognos Analytics 12.0.4
Microsoft Windows 2022 server

kit_version=12.0.4-2501300500
Manifest=casrv-manifest-12.0.4-2501300500-winx64h.json
Installer=analytics-installer-3.7.38-win.exe

Issue:

How setup CA12 only for CAM authenticate to be used with Cognos Controller?

Solution:

(This doc describe partly the steps you need to do – please read the IBM documentation for more information)

Install IIS with roles like, Web Server, Application Development, NET extensibility, ASP.NET 4.8 etc

Download and install URL Rewrite Module 2.1 https://www.iis.net/downloads/microsoft/url-rewrite

Download and install ARR 3.0 manually https://www.iis.net/downloads/microsoft/application-request-routing

Create a SQL server database for the content store, with a SQL login as DB-owner; if you are not upgrading a old CA database.

Download the CA12 from https://www.ibm.com/support/pages/downloading-ibm-cognos-analytics-1204

Whats new in CA12 is: https://lodestarsolutions.com/tag/ibm-cognos/

Setup CA on a single server: https://www.ibm.com/docs/en/cognos-analytics/12.0.0?topic=analytics-single-server-installation

If you do a upgrade, add this lines to the file preserve.txt in folder install_location/configuration/preserve.

#TM1 files
templates/ps/portal/variables_TM1.xml
templates/ps/portal/variables_plan.xml
templates/ps/portal/icon_active_application.gif
webcontent/planning.html
webcontent/PMHub.html
webcontent/tm1/web/tm1web.html

#CA files
templates/ps/system.xml
templates/ps/portal/system.xml
templates/ps/portal/variables_CCRWeb.xml

Run the analytics-installer-3.7.38-win.exe to install CA 12.0.4

Select language and click next

Click next

Mark “i accept the terms.. ” and click next

Ensure you install to correct drive and click next

Click Yes

Leave the 3 selected and click next

Click install

Click done

Copy the SQL driver sqljdbc42.jar to folder C:\Program Files\ibm\cognos\analytics\drivers

Start Cognos Configuration and change to FQDN (full qualified domain names) in this places for the server:


  • Environment
    • Gateway URI
    • External dispatcher URI
    • Internal dispatcher URI
    • Dispatcher URI for external applications
    • Content Manager URIs
  • Environment > Configuration Group
    • Group contact host
    • Member coordination host
  • Security > Cryptography > Cognos
    • Server common name
    • Subject Alternative Name > DNS names
    • Subject Alternative Name > IP addresses


Setup the SQL server database connection for Content Store:
Right Click Content Manager and select Delete. Confirm deletion.
Right Click Content Manager > New Resource > Database.
Set the Name; Content store.
Set the Type (Group); Microsoft SQL server database
Set the Database Server and Port number (1433).
Set the User ID and Password for the database.
Set the Database name.
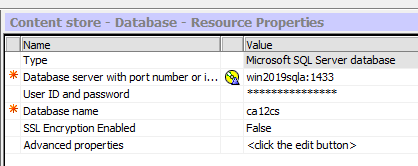
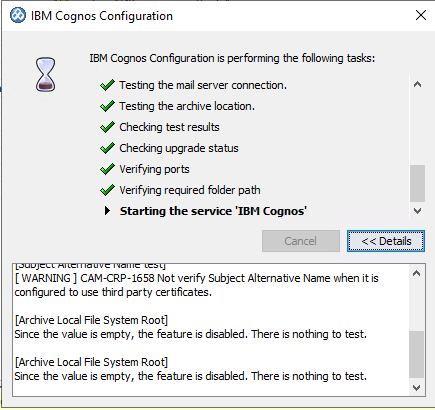
Save the configuration and start IBM Cognos service from Cognos Configuration.

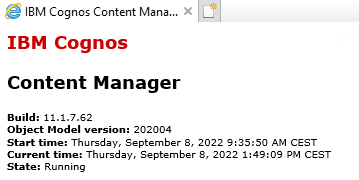
Browse to  http://yourservername:9300/p2pd/servlet  to see if it is up.

If it is a new installation, use the CA_IIS_Config script to create the needed values in IIS.

Open the C:\Program Files\ibm\cognos\analytics\cgi-bin\templates\IIS\CA_IIS_Config.bat in Notepad++

Edit the servername to FQDN
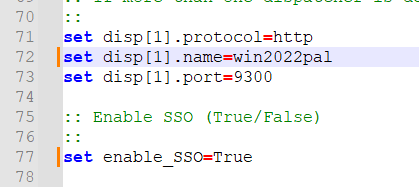
Change SSO to True, and save the file.

Run the CA_IIS_Config.bat script from a DOS prompt as administrator.
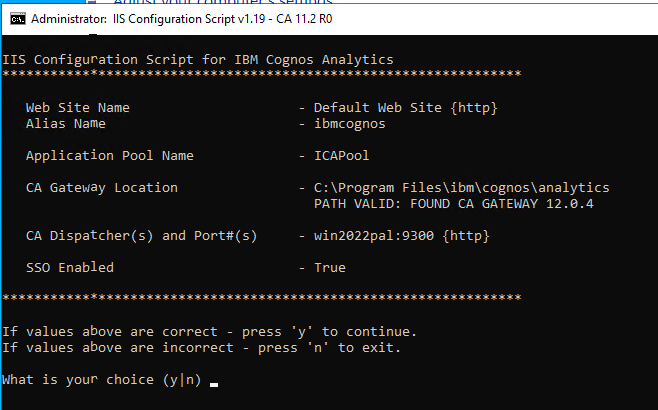
https://www.ibm.com/docs/en/cognos-analytics/12.0.0?topic=services-configuring-iis-in-cognos-analytics

Press Y, then check that the URL rewrite looks like they should.

(*) Always use FQDN (not NetBIOS name or IP address) values when configuring the relevant server name.
(*) Always use lowercase characters for all of your URLs (website addresses), for example Rewrite URLs.

Browse to http://yourservername/ibmcognos/  to check that it works.


Configure the Authentication Provider.
Right click Authentication Source > New Resource > Namespace.
Set the name. Name should be the same as the domain name.
Set the Type (Group), Active Directory is Default.
Set the Type, leave as blank, the default.

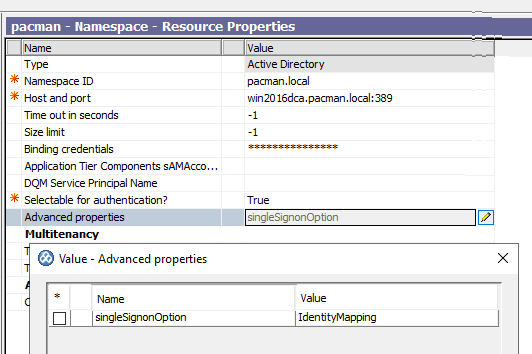
https://www.ibm.com/docs/en/cognos-analytics/12.0.x?topic=server-configuring-active-directory-namespace

In the Explorer window, under Security > Authentication, and select the Active Directory namespace.
Click in the Value column for Advanced properties and then click the edit icon.
In the Value – Advanced properties dialog box, click Add.
In the Name column, type singleSignonOption
In the Value column, type IdentityMapping.
Click OK.
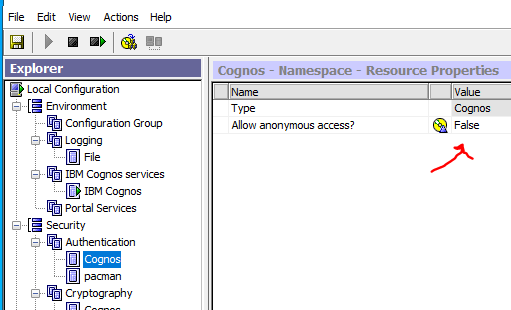
Before you get SSO to work, you need to change “allow anonymous access” to False, inside Cognos Configuration at Security – Authentication – Cognos.
Before you do more adjustments to CA, install the latest Cognos Analytics Fix Pack.

Get the latest fix pack https://www.ibm.com/support/pages/ibm%C2%AE-cognos-analytics-fix-lists

Entitled Bundled Customers use this link Cognos Analytics 12.0.4 IF2 to get access to download Cognos Analytics 12.0.4 Interim Fix 2.

Cognos Analytics Customers use the Fix Central link below.

Setup of Cognos Fix Pack, should be similar to this steps:

Stop Internet Information Services (IIS) Manager (the Default Website).
Stop all IBM Cognos services through the Services Manager if they are active.
Set all IBM Cognos windows service to manual.
Reboot Windows server.
Back up the content store database.
If your IBM Cognos environment is customized, back up the entire IBM Cognos location.
Go to the location where you downloaded the files.
Run the analytics-installer-3.7.38-win.exe file, to start install of fix pack.
Follow the directions in the installation wizard, installing in the same location as your existing IBM Cognos server components if already present.
Open IBM Cognos Configuration, save the configuration.
Set all IBM Cognos service to automatic. Except below service if they exist on the server:
IBM Cognos Controller Consolidation
IBM Cognos Controller Java Proxy
IBM Cognos Controller User Manager
IBM Cognos FAP Service
Start the Internet Information Services (IIS) Manager (the Default Website).
Reboot the server.
Check that the IBM Cognos service is running, before you try to browse to: http://yourservername/ibmcognos/


If you start with server hostnames and later change to FQDN in Cognos Configuration you get error like this:

ERROR com.ibm.bi.rest.RESTClient [Default Executor-thread-12] NA Certificate for <WIN2022PAL> doesn’t match any of the subject alternative names: [192.168.1.106, win2022pal.pacman.local]
javax.net.ssl.SSLPeerUnverifiedException:

You must use FQDN names from the beginning in the Cognos Configuration.
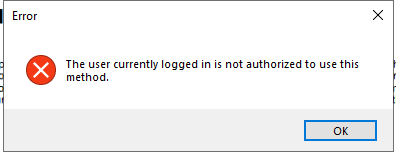
You must in CA create the two user roles, and add the users that should run Cognos Controller to them.

Go to Manage – People – Accounts, select Cognos namespace, and click on new role.
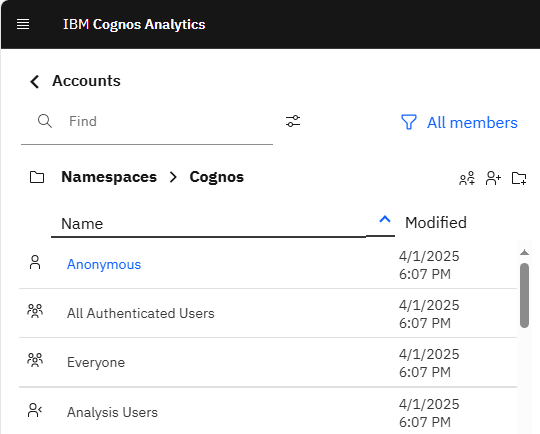
Enter the name Controller Administrators, and create one more role called Controller Users.

For Controller Users click on dots and select properties. Under Members add the users that should be running the Cognos Controller program.
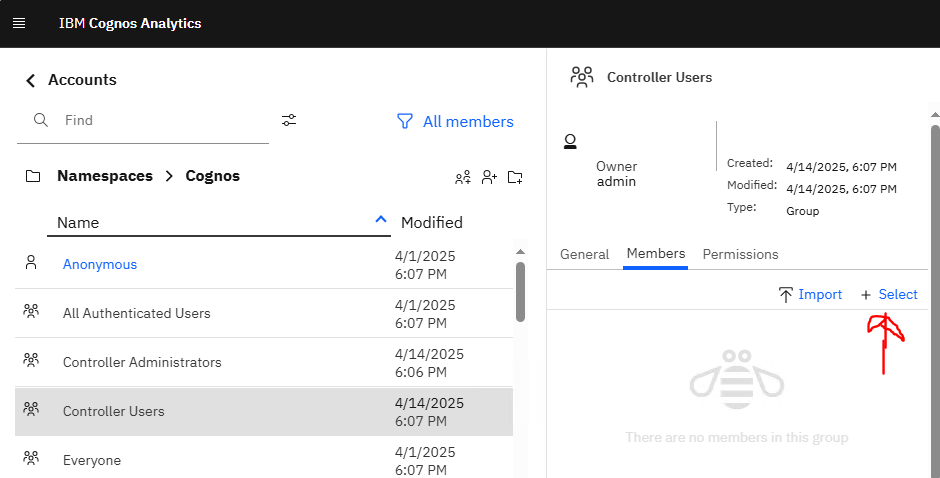
 

Cognos Controller need two roles called ‘Controller Users’ and ‘Controller Administrators’ in CA. It is considered best practice to ensure that all users in Controller are attached to the ‘Controller Users’ role and those defined within Controller as ‘Controller Administrators’ being to the role of the same name. Additionally add the ‘Controller Administrators’ role to the list of members in the ‘Controller Users’ role to ensure that you don’t have to add the administrative users to the ‘Controller Users’ role.

If you still do not get the Roles in CA for Cognos Controller to work (to give you SSO into cognos controller client), try to restore a old Cognos Content store that already contain this roles, so you get the correct role setup.

To add the Cognos Controller parts to IIS, after you have installed CA11.

  1. In the Internet Information Services (IIS) Manager, expand the node with your server name, and select Application Pools.
  2. Select DefaultAppPool and then from the Actions pane, select Advanced Settings.
  3. Set the .Net CLR Version to v.4.0.
  4. Set Enable 32-Bit Applications to False.
  5. Set Identity to LocalSystem.
  6. Set Idle Time-Out to 600 minutes.
  7. Click OK.
  8. Expand Sites and under your web site, create the following virtual directories as shown in the table, if they not already exist.
    Alias
    Location
    IBMCognos controller_install_location\webcontent or C:\Program Files\ibm\cognos\analytics\webcontent
    IBMCognos/controller controller_install_location\ccrvdir  (e.g. C:\Program Files\ibm\cognos\ccr_64\ccrvdir )
    IBMCognos/controllerbin controller_install_location\webcontent\ccr ( C:\Program Files\ibm\cognos\ccr_64\webcontent\ccr )
  9. Select the controller virtual directory.
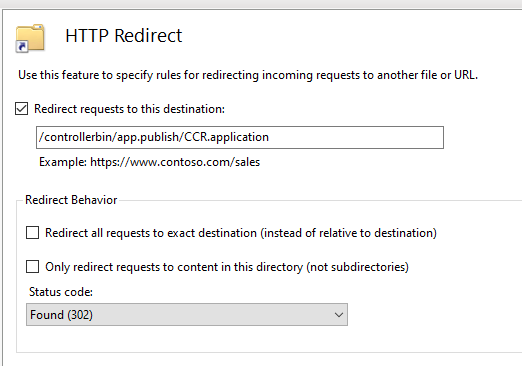
  10. Double click on HTTP redirect. 
  11. Select Redirect Requests to this destination and enter the following path:
    /controllerbin/app.publish/CCR.application

  12. Click Apply.
  13. Right-click your parent virtual directory (ibmcognos) and click Add Application.
    1. Set Alias to ControllerServer.
    2. Set Application pool to DefaultAppPool.
    3. In the PhysicalPath field, enter controller_install_location/ControllerProxyServer. (C:\Program Files\ibm\cognos\ccr_64\ControllerProxyServer)
    4. Click OK.
  14. Click Apply and click OK.

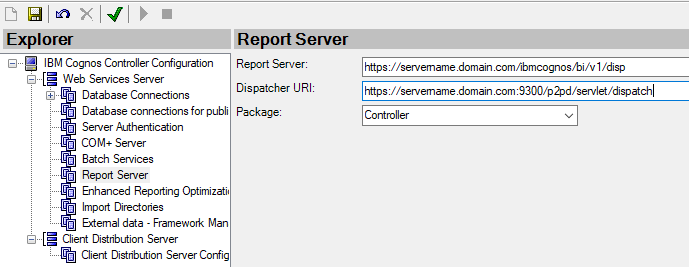
To make cognos controller talk to CA, you need to change in Cognos Controller configuration;

  • Start IBM Cognos® Controller Configuration using the Run as administrator option.
  • Under Web Services Server > Report Server point the URI to the addresses.

    Configure the following addresses:

    Server
    Value
    Report server URI for Cognos Analytics http://CA_server/bi/v1/disp
    Dispatcher URI for Cognos Analytics http://CA_Server:9300/p2pd/servlet/dispatch

Save and go to Server Authentication and change to CAM Authentication.
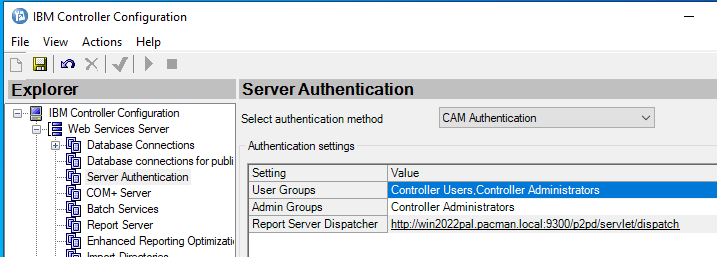
Save and go to Client Distribution Server Configuration – this need to be updated, the WSSurl is used by the client program.
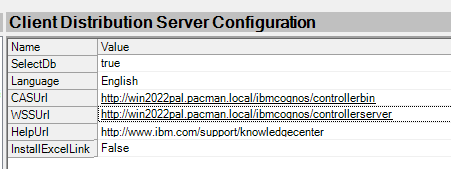
Enter the FQDN to the controller server and save.

Then to get Cognos Controller web to use Active Directory from CA, you need to do:

  • In the Cognos BI installation folder, <BI_installation_folder>/templates/ps/portal/, create a file with the name variables_CCRWeb.xml.
  • The content of the file variables_CCRWeb.xml must be as follows:
    <CRNenv c_cmd="http://{host_name}:{port_number}/#!/CamLogin">
       <cookies> 
          <param name="cam_passport"/>
       </cookies>
    </CRNenv>
  • Locate the file com.ibm.cognos.fcm.web.properties in the C:\Program Files\IBM\cognos\ccr_64\fcmweb\wlp\usr\servers\fcm.web folder.
  • Open the file com.ibm.cognos.fcm.web.properties and set the following properties:
    1. biUrl: the URL that the user must go to when CAM authentication is needed. The default location is http://servername:80/ibmcognos/bi/v1/disp.
    2. biDispatchEndpoint: the endpoint to which Controller Web connects to validate CAM users and CAM passports. The default location is
      http://servername:9300/p2pd/servlet/dispatch
      .
    3. loginMode: the authentication type. Set it to CAM

Save and reboot the server, to ensure that all works as it should.

(You must also do all the other settings that is for Cognos Controller Web, to make it work, above is only to get the SSO to use CA.)

https://www.ibm.com/docs/en/controller/11.1.0?topic=only-configuring-controller-web

More information:

https://www.ibm.com/docs/en/cognos-analytics/12.0.0?topic=gccs-suggested-settings-creating-content-store-in-microsoft-sql-server

https://www.ibm.com/support/pages/how-can-i-change-collation-controller-database

https://www.ibm.com/support/pages/node/559381

https://www.ibm.com/docs/en/controller/11.1.0?topic=web-cam-authentication

https://www.ibm.com/docs/en/cognos-analytics/12.0.0?topic=essbadscc-enabling-single-signon-between-active-directory-server-cognos-components-use-remote-user

https://www.ibm.com/docs/en/cognos-analytics/12.0.0?topic=gateway-configure-cognos-analytics-your-web-server

https://www.ibm.com/docs/en/cognos-analytics/12.0.x?topic=essbadscc-enabling-single-signon-between-active-directory-server-cognos-components-use-remote-user

https://www.ibm.com/support/pages/how-configure-sso-single-sign-controller-cognos-analytics

https://www.ibm.com/docs/en/controller/11.1.0?topic=web-cam-authentication

https://www.ibm.com/docs/en/controller/11.1.0?topic=only-configuring-controller-web
Product:

Cognos Analytics 11.1.7  kit_version=11.1.7-2304260612

Issue:

How apply a fix pack for CA 11.1.7?

Solution:

Download the fix pack from IBM. https://www.ibm.com/support/pages/node/6985631 


Make a backup of the content store by export it from inside Cognos Connection:

On the Cognos Analytics ‘Welcome’ dashboard, click the ‘Manage’ tab and select ‘Administration Console’.

Select the ‘Configuration’ tab and click ‘Content Administration’ on the left-hand side.

In the top right-hand side, click the icon ‘New Export’.

Specify a name for your new export (full backup contentstore) and click ‘Next’.

Click the ‘Select the entire Content Store’ radio button and select ‘Next’.

Choose the location where you want to store the deployment archive. Click ‘Next’.

Assign a password to your archive. The password must contain at least 8 characters. Re-enter your password for confirmation and then click ‘OK’.

Verify the details you have input before clicking ‘Next’.

Select ‘Save and run once’.

Specify a time when you want to run the export and click ‘Run’.

Click ‘OK’ to complete the export.


To save time, move content in folder D:\Program Files\ibm\cognos\analytics\deployment to d:\temp before the upgrade. Copy the few files you need back after the upgrade.

Backup the configuration in cognos configuration:

  1. Open Cognos Configuration.
  2. Click File > Export As.
  3. Select a location and enter a file name for the XML file.
  4. Click Save.

Make a backup of the following files to a d:\temp folder:
D:\Program Files\ibm\cognos\analytics\webcontent\planning.html
D:\Program Files\ibm\cognos\analytics\webcontent\pmhub.html
D:\Program Files\ibm\cognos\analytics\webcontent\web.config
D:\Program Files\ibm\cognos\analytics\webcontent\tm1\web\tm1web.html

D:\Program Files\ibm\cognos\analytics\webcontent\bi\planning.html
D:\Program Files\ibm\cognos\analytics\webcontent\bi\pmhub.html
D:\Program Files\ibm\cognos\analytics\webcontent\bi\web.config
D:\Program Files\ibm\cognos\analytics\webcontent\bi\tm1\web\tm1web.html

D:\Program Files\ibm\cognos\analytics\templates\ps\portal\variables_CCRWeb.xml
D:\Program Files\ibm\cognos\analytics\templates\ps\portal\variables_plan.xml
D:\Program Files\ibm\cognos\analytics\templates\ps\portal\variables_TM1.xml

D:\Program Files\ibm\cognos\analytics\configuration\cclWinSEHConfig.xml

Restore only the missing files after the installation.
Files to be preserved during an upgrade are listed in the D:\Program Files\ibm\cognos\analytics\configuration\preserve\.ca_base_preserve.txt file. Do not edit this file. Instead, edit the D:\Program Files\ibm\cognos\analytics\configuration\preserve\preserve.txt file if you want to remove or preserve certain files or directories when upgrading.

################################################################
#
# IBM Confidential
#
# IBM Cognos Products: Preserve Files by the Install
#
# (C) Copyright IBM Corp. 2017
#
# Edit this file (preserve.txt) to remove or preserve files or directories when upgrading. 
#
# 
# Instructions:
#
# - Edit preserve.txt before running an upgrade on an existing install.
# - Use '#' at the beginning of a line to insert a comment.
# - The keyword "exclude:" can be used to remove files inside a preserved directory (see examples below).
# - List directories or files relative to the installation root directory (see examples below).
#
#
# e.g.: To remove this file: <installdir>/media/samples.doc, add this line:
# exclude:media/samples.doc 
#
# e.g.: To preserve the file <installdir>/msgsdk/cm_ldkspec.xml, add this line:
# msgsdk/cm_ldkspec.xml
#
# e.g.: To preserve the contents of the folder: <installdir>/cps/sap/webapps, add this line
# cps/sap/webapps
#
# Note on order of precedence: Files to be excluded should be specified first (before the directories which contain them).
#
################################################################

# Specify files to exclude first


# Specify files or folders to preserve

If you have changed security or use certificates, then you need to also backup all the certificates store files.


Stop the Cognos Analytics Service and close down Cognos Configuration. Stop the Apache or IIS webserver services.

Launch the downloaded installation file (analytics-installer-2.2.27-win.exe) and follow the wizard.

Choose your Language and click Next.

Choose What you want to install – for an upgrade this will be IBM Cognos Analytics click Next.

Choose to Accept the license and click Next.

Choose the location. This must be the location of your Cognos Analytics instance that you would like to upgrade and also the shortcut folder name. Click Next.

Click Yes to confirm you are Installing in the same location and are overwriting a previous installation.

Click Install at the summary screen.

When complete click Done to complete the upgrade.

Open Cognos Configuration – you will be prompted that older versions of Configuration files were found and configuration files have been upgrade to the latest version. click OK and Save your configuration.

Repeat the steps for all servers in your distributed environment, before starting the Cognos Analytics Content Manager Services first and then the rest.

Check the file D:\Program Files\ibm\cognos\analytics\cmplst.txt to see what version is installed.


More Information:

https://www.ibm.com/support/pages/ibm-cognos-analytics-11x-fix-lists 

https://www.ibm.com/support/pages/how-export-entire-content-store-cognos-analytics-11 

https://pmsquare.com/analytics-blog/2022/6/8/how-to-find-your-cognos-version-build-and-common-name

https://www.ibm.com/docs/en/cognos-analytics/11.1.0?topic=servers-copying-cognos-analytics-certificate-another-server

https://www.ibm.com/support/pages/how-add-3rd-party-ca-allow-ssl-between-components-ibm-cognos-analytics-11

Product:

Cognos Analytics

Problem:

What are the tables for in CA11 database?

Solution:

This is a old list for Cognos 8, maybe it is still valid.

CMSYSPROPS This table has the Content Store Version.
CMOBJNAMES This table has the names of all the objects in the content store.
CMOBJPROPS1 Users, Roles \ Group Distribution list and contact information such as Email, phone number, Fax Given name etc are stored in this table
CMOBJPROPS2 Report scheduling information is stored. This table has fields like hour, day week etc
CMOBJPROPS3 Stores Screen Tip and Object description provided while creating the objects are stored here
CMOBJPROPS4 Stores the printer paper setting details like height and width of A3 , A4 , letter and 11X17 paper orientations
CMOBJPROPS6 Has the details of the all packages which were published using the FM.
CMOBJPROPS7 This table stores the XML of all reports and models. This is basically to maintain the metadata about the structure of the reports and models.
CMOBJPROPS10 Contact information is stored in this table. This table has columns like Contact Email and Contact.
CMOBJPROPS11 This table stores the data sources configuration details like connect string, the cube location etc.
CMOBJPROPS13 It stores the names of parameter passed to the range prompts
CMOBJPROPS14 Has details regarding the versions, creation time etc of the objects in the content store.
CMOBJPROPS16 This table provides the status of the multiple services of Cognos like LogService, MonitorService, ReportService, SystemService, JobService
CMOBJPROPS17 Stores performance details of each component like “query Studio, Analysis Studio, Event Studio” etc
CMOBJPROPS18 This table stores the drill path from the source to the final target report.
CMOBJPROPS20 Stores details regarding which are all the reports for which prompting has been enabled. And also has the details of which are the reports which has the default report options overridden.
CMOBJPROPS24 Stores the printer configuration details
CMOBJPROPS25 Stores the data regarding the objects deployed, like the deployed folder, the reports, the number of folders present in the deployment archive, etc
CMOBJPROPS26 This table stores the data about all the packages imported / exported in C8, with the properties selected during the process.
CMOBJPROPS27 Has the details regarding the data source created in the content store using Cubes.
CMOBJPROPS30 Stores the registration , service description etc details about portlets in this table
CMOBJPROPS31 Has the custom logging level for each of the Cognos services, CMID can be be linked to CMOBJNAMES for the names of each of the services
CMOBJPROPS32 Has the details of the stored procedures used as the query items in the FM model.
CMOBJPROPS33 Detail related to users, user groups user roles.
CMOBJPROPS34 Has the details regarding the drill through parameters of the drill through reports. The parameter assign values are present in coded format
CMOBJPROPS36 Has the list of all the Models published using framework manager
CMOBJPROPS37 This table has the details of the routing sets configured for server / load balancing for each package published in the content store
CMOBJPROPS38 Configuration details about number of items to retrieve in studios, for a package are saved under this table.
CMOBJPROPS39 Has values for properties of reports and views. PROPID can be linked to CMPROPERTIES for property names
CMOBJPROPS52 Contains the properties for the connections
CMOBJPROPS55 Has the URI for icons for each entry in Cognos Connection
CMLOCALES Has the locale ids associated with each language supported by Cognos 8


More Information:

https://www.envisn.com/envisn-cognos-blog/bid/43348/Demystify-Your-Cognos-Content-Store-Part-II 

https://www.cognoise.com/index.php?topic=28289.0

Below will list all reports

With CognosContent AS (
Select a.CMID, a.PCMID, b.NAME, b.Name as Parent, c.name as Content
,Cast(b.NAme as varchar(max)) as path
, 0 as level
from cmObjects a
inner join CMOBJNAMES b on a.CMID = b.CMID
inner join CMCLASSES c on a.CLASSID = c.CLASSID
Where b.ISDEFAULT = 1
and a.PCMID =0
and a.CMID = 2
UNION ALL
Select a.CMID, a.PCMID, b.NAME as parent, d.NAME, c.NAME
, d.path + '\' + CAST (b.Name as varchar(Max)) as path
, d.level + 1 as level
from cmObjects a
inner join CMOBJNAMES b on a.CMID = b.CMID
inner join CMCLASSES c on a.CLASSID = c.CLASSID
inner join CognosContent d on a.PCMID = d.CMID
Where b.ISDEFAULT = 1
)
Select NAME as ReportName, path, level, content from CognosContent
Where
Content = 'report' or Content = 'dashboard' or content = 'analysis'
order by path


Product:

Cognos Analytics 11
Microsoft Windows 2019 server
Microsoft SQL server

Issue:

How can i see in a report the schedules that are active in CA11?

Solution:

The information is in the CA11 Content Store database. You have to make a SQL query like this:

SELECT  [CMID]
,[TASKID]
,[STARTDATE]
,[ENDDATE]
,[ENDTYPE]
,[EVERYNPERIODS]
,[DAILYPERIOD]
,[MONTHLYABSDAY]
,[MONTHLYRELDAY]
,[MONTHLYRELWEEK]
,[TYPE]
,[YEARLYABSDAY]
,[YEARLYABSMONTH]
,[YEARLYRELDAY]
,[YEARLYRELMONTH]
,[YEARLYRELWEEK]
,[ACTIVE]
,[WEEKLYMONDAY]
,[WEEKLYTUESDAY]
,[WEEKLYWEDNESDAY]
,[WEEKLYTHURSDAY]
,[WEEKLYFRIDAY]
,[WEEKLYSATURDAY]
,[WEEKLYSUNDAY]
,[PRIORITY]
,[INTRARECURSTART]
,[INTRARECUREND]
,[INTRARECURINTERVAL]
FROM [dbo].[CMOBJPROPS2]
Where ACTIVE = 1


To list all objects name use:

select ob2.cmid,
c.name as className,
n.name as objectName
from [dbo].[CMOBJPROPS2] p
inner join CMOBJPROPS26 o on p.cmid=o.cmid
inner join CMOBJECTS ob on ob.cmid=o.cmid
inner join CMOBJECTS ob2 on ob.pcmid=ob2.cmid
inner join CMOBJNAMES n on n.cmid=ob2.cmid
inner join CMCLASSES c on ob2.classid=c.classid


More Information:

https://www.ibm.com/docs/en/cognos-analytics/11.1.0?topic=mobile-enable-disable-scheduling

https://community.ibm.com/community/user/businessanalytics/communities/community-home/digestviewer/viewthread?GroupId=3061&MessageKey=439d5b09-46a1-4fe1-988f-e468bb5c2254&CommunityKey=6b10df83-0b3c-4f92-8b1f-1fd80d0e7e58&tab=digestviewer 

Product:

Cognos Analytics 11.1.7

Microsoft Windows 2019 server

Issue.

How do i find the version of CA11 i have installed?

Solution:

Check the cmplst.txt file in folder D:\Program Files\ibm\cognos\analytics

The row Manifest=casrv-manifest is the closeset to find the version/build number you can compare to site at IBM.

Operating System Version: 10.0
Manifest=casrv-manifest-11.1.7-2101131319-winx64h.json
Installer=analytics-installer-2.0.20100517-win.exe

Search 11.1.7-2101131319 on the IBM page – if it is not lised, you have a interim fix pack between two other numbers.

Cognos Analytics 11.1.R7 FP3 11.1.7.3 11.1.7-2106251648 2.2.2
Cognos Analytics 11.1.R7 FP4 11.1.7.4 11.1.7-2111101256 2.2.11
Cognos Analytics 11.1.R7 Interim Fix 6 11.1.7.4 11.1.7-2112131555 2.2.11
Cognos Analytics 11.1.R7 Interim Fix 7 11.1.7.4 11.1.7-2112191704 2.2.11
Cognos Analytics 11.1.R7 Interim Fix 8 11.1.7.4 11.1.7-2201050500 2.2.11
Cognos Analytics 11.1.R7 Interim Fix 9 11.1.7.4 11.1.7-2204120500 2.2.15
Cognos Analytics 11.1.R7 FP5 11.1.7.5 11.1.7-2205311318 2.2.16
Cognos Analytics 11.1.R7 FP6 11.1.7.6 11.1.7-2210041400 2.2.22


More Information:

https://www.ibm.com/support/pages/how-determine-which-version-cognos-analytics-you-have-installed 

https://pmsquare.com/analytics-blog/2022/6/8/how-to-find-your-cognos-version-build-and-common-name

https://www.ibm.com/support/pages/node/6621349

Product:

Cognos Analytics 11.1.7

Microsoft Windows 2016 server

Issue:

Can not create new Planning Analytics data source connections inside CA11.

You have changed the security on the PAL installation, in case it worked before.

When you test the data connection in Cognos Analytics administration page, you get an error like this:

Dynamic Failed XTR-ERR-0005 A request to TM1 resulted in error: “[400] javax.net.ssl.SSLHandshakeException: com.ibm.jsse2.util.j: PKIX path building failed: com.ibm.security.cert.IBMCertPathBuilderException: unable to find valid certification path to requested target”.

Solution:

Add the TM1 default certificate to the CA11 certificate store in java.

Stop IBM cognos service

Go to D:\Program Files\ibm\cognos\analytics\ibm-jre\jre\bin and start Ikeyman.exe as administrator.

Click on open icon.

Select the cacerts file in folder D:\Program Files\ibm\cognos\analytics\ibm-jre\jre\lib\security

Set type as JKS

Click OK

Enter password: changeit

Select in Signer Certificates from the drop-down menu

Click on Add.

Select the ibmtm1.arm file (that you copied over from the Planning Analytics server)

Click OK.

Give it a name like TM1ServerCert.

Close IKEYMAN program.

Start Cognos service.

If you test the connection – the message should be similar to this:

Dynamic Succeeded XQE-DS-0015 TM1 Server Name: tm1ServerName: “11.8.01000.6”.


More information:

https://www.ibm.com/support/pages/xtr-err-0005-error-when-testing-ibm-planning-analytics-20x-datasource-ibm-cognos-analytics-1112

Product:

Cognos Analytics 11.1.7

Microsoft Windows 2016 server

Issue:

How setup custom certificate in CA11?

Solution:

Follow IBM recommendations, from here:

https://www.ibm.com/docs/en/cognos-analytics/11.1.0?topic=components-configuring-ssl-cognos-analytics

https://www.ibm.com/support/pages/steps-set-ssl-cognos-analytics-configuration

https://www.ibm.com/support/pages/how-add-3rd-party-ca-allow-ssl-between-components-ibm-cognos-analytics-11


When configuring IBM® Cognos® Analytics to use an external certificate authority (CA), you must start with a stopped system and an empty key store.

Export the Cognos Configuration as plain text first, by use Select File – Export as, on all CA11 servers. Save as backup.xml in configuration folder.

Procedure to clean the keystore

  1. Open IBM Cognos Configuration as an administrator. Ensure HTTP is used under Environment.
  2. In the Explorer window, under Security > Cryptography, click Cognos.
  3. Under Certificate Authority settings, click the Use third party CA property, and ensure that its Value is set to False.
  4. From the File menu, click Save to save the configuration.
  5. Close Cognos Configuration.
  6. Go to the Cognos Analytics installation directory, and delete all content from the install_location\configuration\certs directory.


On Microsoft Windows installations, you can run the tool with the -java:local command to use the JRE that is provided with the installation, as shown in the following example: ThirdPartyCertificateTool.bat -java:local
-c -d ...

The default password is NoPassWordSet.

Procedure to request a new cert

  1. From the install_location\bin directory, run the ThirdPartyCertificateTool.
  2. Type the following command to create the certificate signing request for the crypto key:

On Windows from inside a Administrator Command Prompt, type

ThirdPartyCertificateTool.bat -c -e -d "CN=EncryptCert,O=MyCompany,C=CA" 
-r encryptRequest.csr -p keystore_password -a RSA
  • The distinguished name (DN) value in the command ("CN=Servername,O=MyCompany,C=SE") uniquely identifies the Cognos Analytics installation.

    You can add more information with use of a command line like this:

    ThirdPartyCertificateTool.bat -c -e -p NoPassWordSet -a RSA -r "encryptRequest.csr" -d "CN=servername.domain.com,OU=Finance,O=MyCompany,L=Stockholm,C=SE" -H "servername.domain.com dnsalias.domain.com"

    The password that you enter for this key must be used again when you import the certificate, and again in IBM Cognos Configuration.

    You can ignore any warnings about logging.

    Backup your D:\Program Files\ibm\cognos\analytics\configuration folder to d:\temp
    (in case you start Cognos BI, you may need to go back to this settings before importing the certificates)
    Important: The certificates that are generated by your CA must be PEM (Base-64 encoded ASCII) format.

Results

The command generates the following CSR files:

  • The CAMKeystore file in the install_location\configuration\certs directory.
  • The encryptRequest.csr file in the install_location\bin directory.
After the CSR files are generated, perform the following steps:

  • Share the crypto key file encryptRequest.csr, or its contents, with the external CA. Using this key, the CA produces a crypto key certificate, a root certificate, and an intermediate certificate for the request, and sends them back to you.
  • If you get a P7B file, you need to convert it to PEM with OPENSSL. Use this command

openssl pkcs7 -print_certs -in certificate.p7b -out certificate.cer

  • File certificate.cer can be open in Notepad++ and copy out to 3 certificate, one for each function. A pem certificate should not start with a blank line.
  • Copy the certificates from the external CA to the Cognos Analytics installation directory, such as install_location\configuration\bin.


You must import the certificates from the external certificate authority (CA) into your IBM® Cognos® Analytics key store.

The import must be done on each computer where the following Cognos Analytics components are installed: Content Manager, the Application Tier Components, the gateway, and the client components such as Framework Manager, and other components if you use them.


Procedure to import the cer files

  1. Go to the location where you saved the certificate files from the CA authority, and do the following:
    1. Create a copy of the crypto certificate, and name it encryptCertificate.cer.
    2. Create a copy of the root CA certificate, and name it ca.cer. (cer or pem files work equal good).
  2. If the files are not already there, copy the encryptCertificate.cer, and ca.cer files to the install_location/bin directory.
  3. From install_location/bin directory, start the ThirdPartyCertificateTool command line tool (as shown below).
  4. Type the following command to import the CA root certificate into the Cognos Analytics trust store:

On Windows operating systems, type

ThirdPartyCertificateTool.bat -i -T -r ca.cer -p keystore_password
  • The command reads the ca.cer file and imports the contents into the CAMKeystore file in the certs directory using the specified password.
  • If you use intermediate CA certificates, import all the intermediate certificates (ICA) into the Cognos Analytics trust store by using the same commands as in step 4. Like ThirdPartyCertificateTool.bat -i -T -r issuing.pem -p NoPassWordSet
  • Import the server crypto certificate into the Cognos Analytics encryption key store by typing the following command:

On Windows operating systems, type

ThirdPartyCertificateTool.bat -i -e -r encryptCertificate.cer -p 
keystore_password -t ca.cer
  1. Important: Ensure that the keystore_password is the same password that you entered when you exported the encryption key in the previous task.

    If you have intermediate and root certificate, they need to be merge into the text file chain.cer, that is used instead of ca.cer in above command.

    See how here:

    https://www.ibm.com/support/pages/how-add-3rd-party-ca-allow-ssl-between-components-ibm-cognos-analytics-11

Results

The command reads the encryptCertificate.cer and ca.cer files in the install_location\bin directory and imports the certificates from both files into the CAMKeystore file in the install_location/configuration/certs directory using the specified password.

Ensure that the key store locations and passwords in IBM Cognos Configuration match the ones that you typed in the ThirdPartyCertificateTool tool.

Procedure to start CA with custom cert

  1. Open IBM Cognos Configuration as an administrator. Ensure HTTPS is used under Environment.
  2. In the Explorer window, under Security > Cryptography, click Cognos.
  3. Under Certificate Authority settings, click the Use third party CA property, and set its Value to True.
  4. For the Key store password property, enter the password that you used for the crypto key.
  5. Click File > Save to save the configuration.
  6. Restart your IBM Cognos services.


Test the IIS cert by browse to (or only browse to the Server name):

https://servername.domain.com/ibmcognos/controllerserver/ccrws.asmx

Test the Cognos BI cert by browse to (update with the port you use in Cognos Configuration):

https://servername.domain.com:9300/p2pd/servlet

If you have had the Cognos BI site running HTTP before, you must change in IIS webfarm to use the new HTTPS, and also update the port in use. Otherwise you will get 404 or 502 errors in Web browser.

Best is to clear the IIS configuration, and update the CA_IIS.Config.bat file with the new port number and rerun it. You should not need to delete the COGNOSCONTROLLERS folder, as long it uses a different application pool.

To remove IIS settings.

– Open IIS
– Click Application Pools
– Select the Cognos 11 App Pool and stop it
– Expand everything
– Select the ibmcognos -> sso application and remove it
– Select the ibmcognos application and remove it
– Click Application Pools, select the Cognos app pool, and delete it
– Close IIS

Open your file explorer
– Navigate to the Cognos gateway install directory
– Delete the following web.config files:

  • cgi-bin\web.config
  • webcontent\web.config
  • webcontent\bi\web.config

https://www.ibm.com/support/pages/node/301009

Edit the CA_IIS_Config.bat file with HTTPS and correct port

:: If more than one dispatcher is defined, a Server Farm will be created
::
set disp[1].protocol=https
set disp[1].name=servername
set disp[1].port=9300

:: Enable SSO (True/False)
::

Run the script again, to reconfigure the IIS setup.

You need also to add the certificate for your server to IIS Manager, simplest is if you get a PFX file with all information and import that to Windows server. Then you can in IIS manager bind it to your default web site.


More information:

https://www.ibm.com/support/pages/how-add-3rd-party-ca-allow-ssl-between-components-ibm-cognos-analytics-11

https://www.thebestcsharpprogrammerintheworld.com/2014/01/17/configuring-application-request-routing-arr-to-use-a-port-other-than-port-80/

Product:
Cognos Analytics 11.1.7
Cognos Controller 10.4.2
Microsoft Windows 2016 server

Issue:
How setup SSL(TLS1.2) with Cognos Analytics, when i only got a PFX file from my company?

Solution:

This is not the recommended way – you should use the IBM guides instead.

https://www.ibm.com/docs/en/cognos-analytics/11.1.0?topic=components-configuring-ssl-cognos-analytics

https://www.ibm.com/support/pages/how-configure-force-controller-use-tls-12

(This instructions will fail as the next time you start Cognos Configuration and click save, the CAMkeystore file is overwritten)


First, ensure Cognos Analytics is working with out issues. Check this log files and solve all errors before you start.
D:\Program Files\ibm\cognos\analytics\logs\p2pd_messages.log
D:\Program Files\ibm\cognos\analytics\logs\cognosserver.log
D:\Program Files\ibm\cognos\analytics\wlp\usr\servers\cognosserver\logs\messages.log

Second, always backup this folders – by copy them to a different folder like d:\temp
D:\Program Files\ibm\cognos\analytics\bin64\ssl
D:\Program Files\ibm\cognos\analytics\configuration\certs
D:\Program Files\ibm\cognos\analytics\ibm-jre\jre\lib\security

and for cognos controller backup this folders
D:\Program Files\ibm\IBM Cognos Controller Local Client\Integration\jre\lib\security
D:\Program Files\ibm\cognos\ccr_64\bin64\jre\8.0\lib\security

You should export a text file of the configuration in Cognos Configuration and create screen dumps of your setup in Cognos Controller Configuration, so you can apply them back in case something goes wrong. Use Select File – Export as.

Download OPENSSL to your windows laptop, with this program you can convert and check certificates. Download GIT for Windows to easy also get the OPENSSL tool. Download from https://git-scm.com/download/win
Run Git-2.37.3-64-bit.exe (with all defaults) to install GIT on you laptop.  Then you find openssl in folder: C:\Program Files\Git\mingw64\bin


IMPORTANT: Add a rule in the local windows defender firewall to allow inbound traffic on both port 80 and 443 on all cognos servers.

How install PFX in Windows (IIS)

Copy your PFX file to your server, place it in a folder like c:\cert
Right click on PFX file and select Install PFX

Select Local Machine and click Next

Click next on file to import.

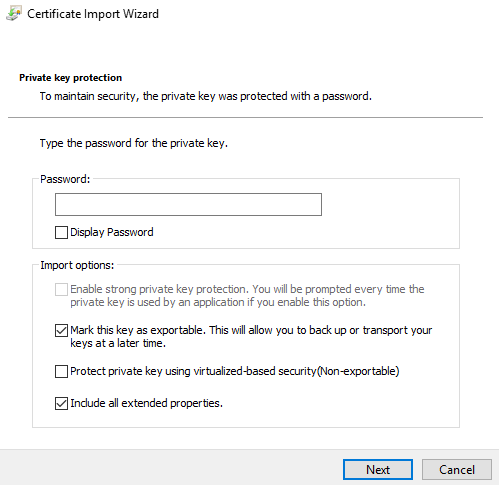
Enter the password you got with the PFX file and click Next.

Click next on Certificate store, and let it be automatically selected.

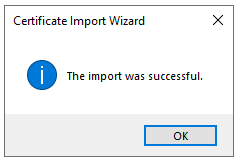
Click Finish.

Start IIS (Internet Information Services Manager)

Click on the servername (home) and click on Server Certificates, to view that you have valid certificates. Check the Expiration Date to know witch one you can use.

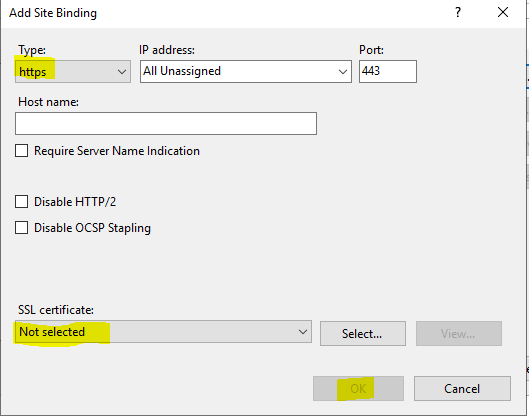
In IIS manager, expand Sites, and mark Default Web Site. Click on bindings link on the right side.

Click ADD button.

Select HTTPS as type.

Select your certificate from the drop-down list SSL certificate, and press OK.

Later, when it is working, remove the support for port 80 in the bindings dialog.

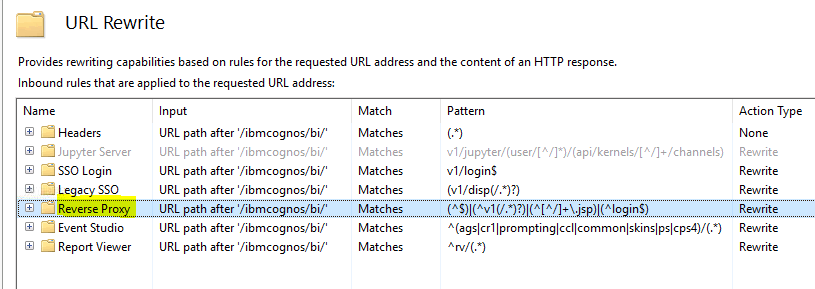
Go to default web site\ibmcognos\bi folder and click on URL Rewrite icon

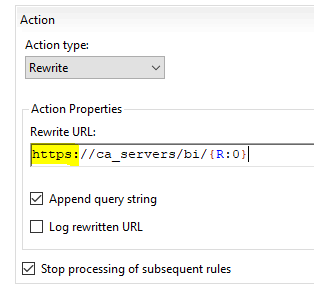
Double click on Reverse Proxy, to change it values.

Scroll down and edit the ReWrite URL to: https://ca_servers/bi/{R:0}

Click Apply on the right side.

Restart IIS.


If you have had the Cognos BI site running HTTP before, you must change in IIS webfarm to use the new HTTPS, and also update the port in use. Otherwise you will get 404 or 502 errors in Web browser.

Clear the IIS setup.  https://www.ibm.com/support/pages/node/301009

Update the CA_IIS_Config.bat file with HTTPS and correct port.

Run CA_IIS_Config.bat as a administrator in Command prompt.


How export the root and intermediate cer files from IIS

Go to server certificates, double click on your certificate.

Select Certificate Path tab, and select the middle certificate in the list, and click View Certificate button.

A new windows will open, in there go to the Details tab.

Select Subject row, and copy the CN line to the clipboard.

Click on the Copy to File button.

Click Next in the Certificate Export Wizard.

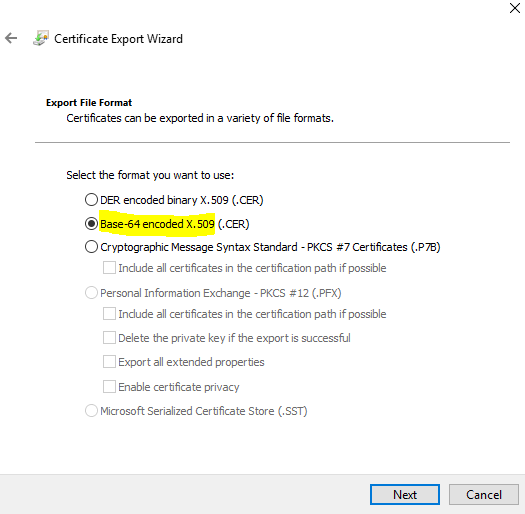
Mark Base-64 encoded X.509 and click next.

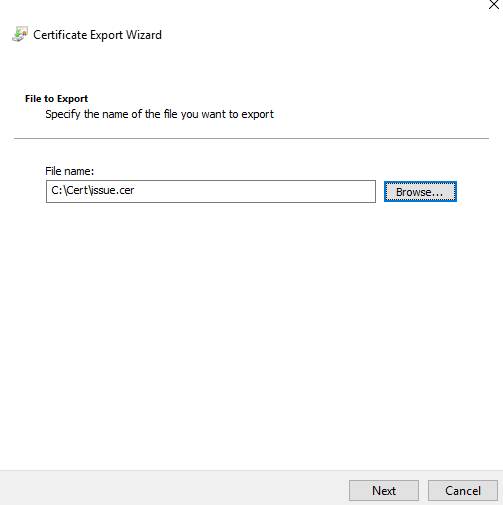
Enter a name and path, suggest use the CN name as name of the cer file. Click Next.

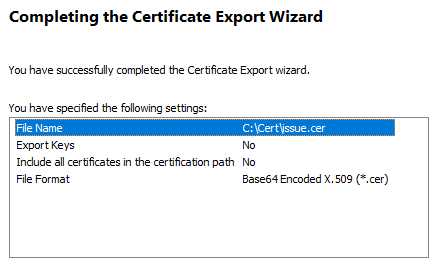
Click Finish.

Now, you need to repate this for the root certificate.

Click on Certificate path tab.

Click on top root cert and click on View Certificate button.

Go to Details tab and select Subject line.

Copy CN line to clipboard.

Click Copy to File button.

Click next in the Certification Export Wizard.

Mark Base-64 encoded X.509 and click Next.

Enter a file name like c:\cert\root.cer and click Next.

Click Finish to create the file.

Now you should have two cer files in your c:\cert folder.

You can test the certificate, by browse to your server at https://servername to see if you get errors in Internet Explorer.

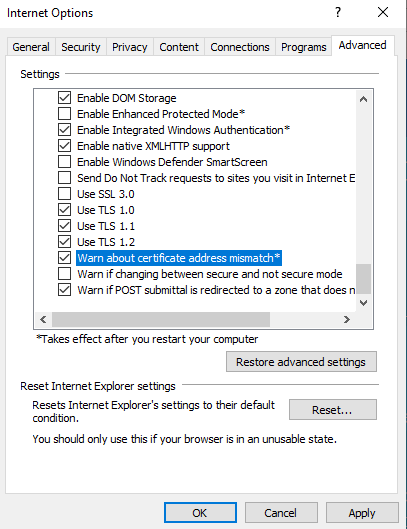
Under Internet Options – Advance – you can uncheck “warn about certificate address mismatch” to suppress error messages.

Update the CAMstore

Before you change the certificate store in Cognos, stop all IBM Cognos services and java process.

Go to folder D:\Program Files\ibm\cognos\analytics\ibm-jre\jre\bin

Right click on IKEYMAN.EXE and select “run as administator”.

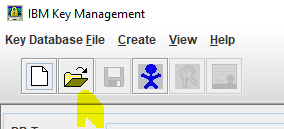
Click on the open icon.

Browse to D:\Program Files\ibm\cognos\analytics\configuration\certs folder and select CAMkeystore file.

Set Key database type to PKC$12 and press OK.

Enter the password: NoPassWordSet

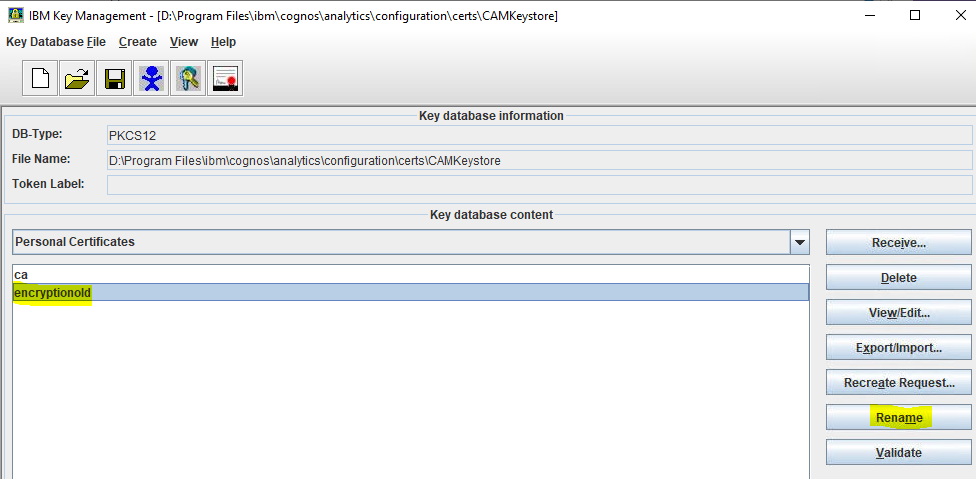
Mark encryption, and click rename, to change it to encryptionold.

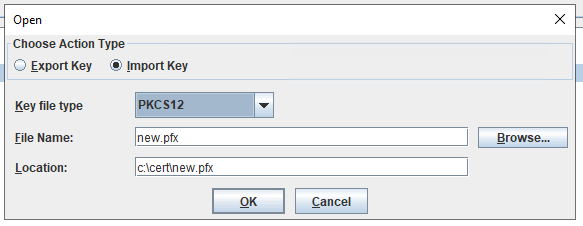
Click on Export/import button.

Browse to your PFX file.

Select type to be PKCS12 and press OK.

Enter the password you got with the PFX file.

Click OK on the question to change labels.

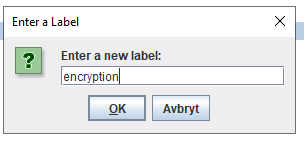
Mark the new line, and click rename button. Change the name to encryption.

Press OK.

Double click on encryption to check that the certificate is valid. Check the date and the DNS name is the same as your servername.

Select Signer Certificates in the drop down list.

Check that the root and issuing certificate for your company is in the list, if not then click on ADD button, and select the two cer files we created before and import them.

Exit IKEYMAN.  All changes in IKEYMAN are saved directly to your key store file. That is why you need to backup the key store file before you open IKEYMAN program.

Add root cert to java key store

Start IKEYMAN program with Run as Administrator

Click on Open icon.

Browse to D:\Program Files\ibm\cognos\analytics\ibm-jre\jre\lib\security and open cacerts as Type JKS.

Click OK and enter the password: changeit

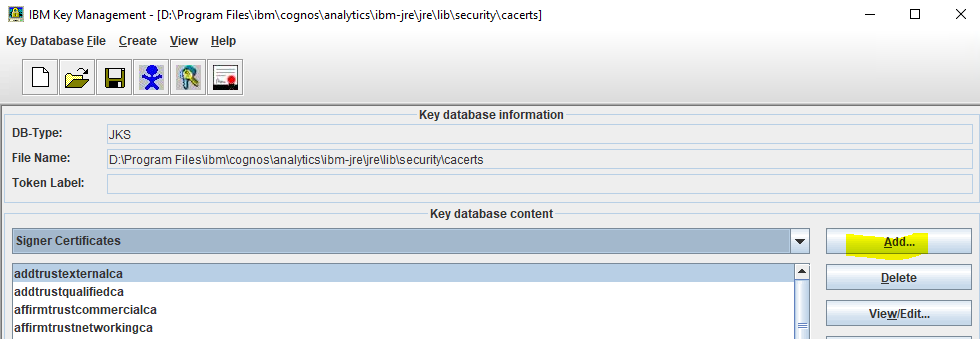
Click on ADD button.

Find your issue cer file and import it.

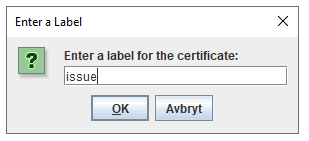
Enter a name that describe the certificate and press OK.

Click on ADD button again, and import the root cer file.

Select the cer file and press OK.

Enter it a name and press OK.

Close IKEYMAN program.

Change CA11 to use custom certificate

Start Cognos Configuration program as Administrator.

At Local configuration, click on Advance properties.

Add the value StandaloneCerificateAuthority = True

Click OK

Go to Environment and change all HTTP to HTTPS.

Update the port number 80 to 443.

Keep the port-number 9300 for the other rows. We will use SSL over the port 9300.

Gateway should be: https://servername.domain.com:443/ibmcognos/bi/v1/disp

Controller URI for gateway should be: https://servername.domain.com:443/ibmcognos/controllerServer

Content Manager URI should be: https://servername.domain.com:9300/p2pd/servlet

Go to Cryptography – Cognos

Change Use Third Party CA? to True.

Save the configuration (this will update some key store files for WebSphere Liberty Profile).

Start the IBM Cognos service from inside Cognos Configuration.  This take around 10 minutes.

There should be no errors, when starting Cognos Analytics.

To test the certificate inside Cognos Analytics, start a web browser and go to https://servername.domain.com:9300/p2pd/servlet

There should be no errors, and the padlock should be secure in the web browser.


Add the trusted ca root cert to java store

On the cognos controller client computer, start IKEYMAN from D:\Program Files\ibm\IBM Cognos Controller Local Client\Integration\jre\bin  folder.

Click on OPEN icon and go to D:\Program Files\ibm\IBM Cognos Controller Local Client\Integration\jre\lib\security folder

Select file cacerts mad key database type JKS. Click on OK.

Enter the password: changeit

Select Signer Certificates from the drop down list.

Click on ADD button, to add the root.cer and issuing.cer files you have created before from IIS.

After you have added both certs, exit IKEYMAN program.

Copy now the cacerts file to all cognos controller installations, and place the file in folder D:\Program Files\ibm\IBM Cognos Controller Local Client\Integration\jre\lib\security.

If you are using ccrRemoteServer in file D:\Program Files\ibm\cognos\ccr_64\ControllerProxyServer\web.config

<add key=”ccrRemoteServer” value=”https://servername.domain.com/ibmcognos/controllerserver” />

That need to be updated with https, and the server need to be restarted.


Update Cognos Controller to support TLS 1.2

Go to the folder: d:\Program Files\ibm\cognos\ccr_64\server\
Open CCRProxy.options in NOTEPAD++
Add the following lines (at the end):
-Dcom.ibm.jsse2.overrideDefaultTLS=true
-Dcom.ibm.jsse2.overrideDefaultProtocol=TLSv12

Save the file.

On the Cognos Controller server and Cognos Controller clients do this:
1. Open the registry editor, by clicking on ‘Start’ menu and typing:    REGEDIT
2. Navigate to the following path: [HKEY_LOCAL_MACHINE\SOFTWARE\Microsoft\.NETFramework\v4.0.30319]
3. Right-click on v4.0.30319 and select New –> DWORD (32-bit)
  • Set the name to: SchUseStrongCrypto
  • Set the value to 00000001


Go into Cognos Controller Configuration and update the Report Server dialog to use HTTPS instead of HTTP.

Report server should be: https://servername.domain.com/ibmcognos/bi/v1/disp

Dispatcher URI should be: https://servername.domain..com:9300/p2pd/servlet/dispatch

Important to also update the Cognos Controller Client Distribution Server Configuration. All should use HTTPS.

When you change cognos controller configuration to HTTPS, you must also stop and start the Batch service from inside controller configuration, to update all files correct.

WSSUrl should be: https://servername.domain.com/ibmcognos/controllerserver

Save the changes in Controller Configuration.

To test that the SSL is working on the server, from the cognos controller client start a web browser and browse to

https://myservername.mycompany.com/ibmcognos/controllerserver/ccrws.asmx

There should be no errors.


(Please do not use this instructions – as they will not work – when you change in Cognos Configuration, the certificate store is replaced with the cognos default certificate – and the system will break)

Use this instructions instead:

https://www.ibm.com/support/pages/how-add-3rd-party-ca-allow-ssl-between-components-ibm-cognos-analytics-11


More Information:

https://www.ibm.com/support/pages/how-configure-main-controller-client-ccrexe-use-https-ssl

https://www.ibm.com/support/pages/how-configure-force-controller-use-tls-12

https://www.sslshopper.com/ssl-converter.html

Product:

Cognos Analytics 11.1.7

Microsoft Windows 2019 server

Issue:

After restart of Windows server for a windows patch, the CA11 is not responding.

If you go to http://servername.domain.com:9300/p2pd/servlet you get a blank screen.

In log file D:\Program Files\ibm\cognos\analytics\logs\p2pd_messages.log you see error like this:

********************************************************************************
product = WebSphere Application Server 20.0.0.7 (wlp-1.0.42.cl200720200625-0300)
wlp.install.dir = D:/Program Files/ibm/cognos/analytics/wlp/
java.home = D:\Program Files\ibm\cognos\analytics\ibm-jre\jre
java.version = 1.8.0_301
java.runtime = Java(TM) SE Runtime Environment (8.0.6.35 – pwa6480sr6fp35-20210714_01(SR6 FP35))
os = Windows Server 2019 (10.0; amd64) (sv_SE)
********************************************************************************
[2022-08-18 20:43:41:231 CEST] 00000001 com.ibm.ws.kernel.launch.internal.FrameworkManager I CWWKE0002I: The kernel started after 3,435 seconds
[2022-08-18 20:43:41:481 CEST] 00000028 com.ibm.ws.kernel.feature.internal.FeatureManager I CWWKF0007I: Feature update started.
[2022-08-18 20:43:43:530 CEST] 00000028 com.ibm.ws.kernel.feature.internal.FeatureManager E CWWKF0003E: An exception was generated when installing or uninstalling bundle INSTALL file:/D:/Program%20Files/ibm/cognos/analytics/wlp/usr/extension/lib/logging-feature-log4j2.jar (resolved from: com.ibm.bi.logging.onlog4j2/[1.0.0,2.0.0)@file:/D:/Program%20Files/ibm/cognos/analytics/wlp/usr/extension/lib/logging-feature-log4j2.jar). Exception: java.lang.NullPointerException
at com.ibm.ws.kernel.feature.internal.Provisioner$2.installFeatureBundle(Provisioner.java:379)
at com.ibm.ws.kernel.feature.internal.Provisioner$2.handle(Provisioner.java:273)
at com.ibm.ws.kernel.feature.internal.BundleList.foreach(BundleList.java:612)
at com.ibm.ws.kernel.feature.internal.Provisioner.installBundles(Provisioner.java:251)
at com.ibm.ws.kernel.feature.internal.FeatureManager.updateFeatures(FeatureManager.java:1355)
at com.ibm.ws.kernel.feature.internal.FeatureManager.update(FeatureManager.java:736)
at com.ibm.ws.kernel.feature.internal.FeatureManager.processFeatureChanges(FeatureManager.java:844)
at com.ibm.ws.kernel.feature.internal.FeatureManager$1.run(FeatureManager.java:636)
at com.ibm.ws.threading.internal.ExecutorServiceImpl$RunnableWrapper.run(ExecutorServiceImpl.java:239)
at java.util.concurrent.ThreadPoolExecutor.runWorker(ThreadPoolExecutor.java:1160)
at java.util.concurrent.ThreadPoolExecutor$Worker.run(ThreadPoolExecutor.java:635)
at java.lang.Thread.run(Thread.java:825)…..


Solution:

Restart the IBM Cognos service again on all servers – start with the CA11 content manager first.

In case that does not help, stop the IBM Cognos service.

Erase the workarea content – that is under folder D:\Program Files\ibm\cognos\analytics\wlp\usr\servers\cognosserver\workarea

Start the IBM Cognos service.

This to clean out any “corruption” in cognos websphere applications files.


More Information:

https://www.ibm.com/support/pages/cfg-err-0106-ibm-cognos-configuration-did-not-receive-response-when-trying-start-ibm-cognos-service-caused-corruption-inside-workarea-folder

https://www.ibm.com/support/pages/cfg-err-0106-ibm-cognos-configuration-did-not-receive-response-ibm-cognos-service-time-allotted-2


Product:

Cognos Analytics 11.1.7

Microsoft Windows 2019 server

Issue:

What firewall ports should be open in windows firewall to make Cognos work?

Solution:

These are the ports that is used by Cognos products:

Cognos Analytics 11.1.7

80 for client access to cognos portal
443 for client access (https/ssl/tls)
9300 Cognos dispatcher
4300 Sync configuration between CA11 servers
5701 Sync CA11 servers to a group of CA11 servers
9301 CA11 uses this port at start
9362 Cognos log server
9080 WebSphere transport port
8172 IIS Server Farms port to check windows servers


Cognos Controller 10.4.2

80 for controller client access to controller server
443 for client access (https/ssl/tls)
9300 Contact to CA dispatcher
9080 Client to controller web
9082 Client to controller report service
9081 if installed on same server as CA11
3000 Controller web backend port


Planning Analytics 2.0.9.12

80 for client access to PAW
443 for client access (https/ssl/tls) to PAW
9300 Contact to CA dispatcher
9510 Client access to TM1WEB
9511 Tm1 app web (pmpsvc)
9012 PAA agent
5495 Tm1 architect contact with TM1 Admin service
5498 Tm1 architect contact with TM1 Admin service (ssl)
5895 TM1 Admin Server -> TM1 REST API (HTTP)
5898 TM1 Admin Server -> TM1 REST API (HTTPS)
12300-12400 TM1 instance port range
8888 Administration port for PAW
9513 Shutdown port


More Information:

https://www.ibm.com/docs/en/cognos-analytics/11.1.0?topic=install-review-default-port-settings

https://www.ibm.com/support/pages/apar/PI95933

https://www.ibm.com/support/pages/node/6257779

https://www.ibm.com/support/pages/controller-web-does-not-work-when-installed-same-server-cognos-analytics