Product:

Microsoft SQL Azure database

Issue:

A new created SQL native user [Kalle] can not see the tables in the database, but he can login to SSMS.

Solution:

Please do not use the role db_datareader or db_datawriter or their deny equivalents. They are for backwards compatibility only.

Remove the user from the role with below command, did not help.

EXEC sp_droprolemember 'db_datareader', 'Kalle'

You have to drop the user and create him again;

DROP USER Kalle

DROP LOGIN Kalle

Use Master

CREATE LOGIN Kalle WITH PASSWORD = 'advancedpasswordhere'

CREATE USER Kalle FOR LOGIN Kalle
-- to be able to login from SSMS you need to have the user in master database --

CREATE USER Kalle FOR LOGIN Kalle

-- gives the user Kalle access to see all tables in the DM schema --

GRANT SELECT ON SCHEMA::DM TO Kalle

This should give that the user only have read access to all tables and views that are part of the DM schema in the database.

To list members of built in roles use:

 SELECT DP1.name AS DatabaseRoleName, 
isnull (DP2.name, 'No members') AS DatabaseUserName 
FROM sys.database_role_members AS DRM 
RIGHT OUTER JOIN sys.database_principals AS DP1 
ON DRM.role_principal_id = DP1.principal_id 
LEFT OUTER JOIN sys.database_principals AS DP2 
ON DRM.member_principal_id = DP2.principal_id 
WHERE DP1.type = 'R'
ORDER BY DP1.name;

To list if any user have DENY rights use:

SELECT l.name as grantee_name, p.state_desc, p.permission_name, o.name
FROM sys.database_permissions AS p JOIN sys.database_principals AS l 
ON p.grantee_principal_id = l.principal_id
JOIN sys.sysobjects O 
ON p.major_id = O.id 
WHERE p.state_desc ='DENY'


More information:

https://learn.microsoft.com/en-us/sql/relational-databases/system-stored-procedures/sp-droprolemember-transact-sql?view=sql-server-ver16 

https://blog.sqlauthority.com/2017/03/02/sql-server-unable-see-tables-objects-ssms/ 

https://www.mssqltips.com/sqlservertip/2385/unable-to-see-a-sql-server-table/

Product:
Cognos Controller 10.4.2

Issue:

After a reboot of the TM1 server where the FAP service is running, the FAP does not connect to the TM1 services with error in D:\Program Files\ibm\cognos\ccr_64\Server\FAP\error.log file.

DEBUG [fap.service.schedule.ConnectionsPoller] [pool-5-thread-2], Starting connection poller for datamart ‘FAP’ with a 3600000 ms timeout.

ERROR [fap.service.schedule.Scheduler] [pool-5-thread-2], Could not find the TM1 server [tm1:FAP]

Suggested solution:

Change the FAP service to have “Automatic (Delayed Start)” in the windows services.

The Tm1 instance must be started before the FAP service is started.

More Information:

https://www.ibm.com/docs/en/cognos-controller/11.0.0?topic=administration-fap-web-configuration

https://www.ibm.com/support/pages/fap-connection-tm1-server-renewed

Product:

Microsoft AZURE file storage

Issue:

How upload a file to AZURE file storage?

Suggestion:

Download the AZURE STORAGE EXPLORER and install it.  https://learn.microsoft.com/en-us/azure/vs-azure-tools-storage-manage-with-storage-explorer?tabs=windows 

Connect to Azure with your account from inside Azure Storage Explorer.

Expand in the left to your file share.

Click on Upload icon on the right.

Find a example file and upload from the correct folder you want to upload files from.

Click upload and watch the program work.

When finish in lower right corner click on link : ‘Copy AzCopy Command to Clipboard’ next to the log message.

Paste this into NOTEPAD.

Edit the string, to be as you want it to be.

Download azcopy.exe to a folder like d:\script from https://learn.microsoft.com/en-us/azure/storage/common/storage-use-azcopy-v10 

Open a powershell command window.

Go to the d:\script folder.

Paste in your azcopy command from the notepad into powershell session, and it will copy the files you defined.


Maybe you can programatically change the powershell script for azcopy to use it from a schedule program.


More Information:

https://learn.microsoft.com/en-us/azure/active-directory/develop/howto-create-service-principal-portal 

https://www.51sec.org/2022/08/12/using-azcopy-to-migrate-local-files-to-azure-blob-storage/

https://learn.microsoft.com/en-us/azure/storage/common/storage-configure-connection-string 

https://www.sqlshack.com/getting-started-with-azure-storage-explorer/ 

https://learn.microsoft.com/en-us/azure/storage/blobs/quickstart-storage-explorer

https://youtu.be/owXHtmQLQNY

Product:

SQL AZURE server

Issue:

Can not connect to AZURE SQL server in SSMS.

Error like:

the server was not found – msg 110001

Solution:

You need a new DNS record to point to the server-name in azure (db.database.windows.net).

There are more than one DNS zone where you need to update DNS records for your resource (privatelink.database.windows.net).


If you get a different error that, the server is connected but refuse to allow your user, then try with some other login method like:

Azure Active Directory – integrated

Azure Active Directory with MFA

SQL Server authentication (native login)

The allowed login method change with from where you try to connect and how firewall/DNS is setup.


More information:

https://learn.microsoft.com/en-us/azure/private-link/private-endpoint-dns 

https://learn.microsoft.com/en-us/sql/relational-databases/errors-events/mssqlserver-11001-database-engine-error?view=sql-server-ver16

https://learn.microsoft.com/en-us/azure/azure-sql/database/troubleshoot-common-errors-issues?view=azuresql

https://learn.microsoft.com/en-us/azure/azure-sql/database/authentication-aad-overview?view=azuresql

https://learn.microsoft.com/en-us/azure/azure-sql/database/authentication-aad-configure?view=azuresql&tabs=azure-powershell 

Product:

Cognos Analytics 11.1.7  kit_version=11.1.7-2304260612

Issue:

How apply a fix pack for CA 11.1.7?

Solution:

Download the fix pack from IBM. https://www.ibm.com/support/pages/node/6985631 


Make a backup of the content store by export it from inside Cognos Connection:

On the Cognos Analytics ‘Welcome’ dashboard, click the ‘Manage’ tab and select ‘Administration Console’.

Select the ‘Configuration’ tab and click ‘Content Administration’ on the left-hand side.

In the top right-hand side, click the icon ‘New Export’.

Specify a name for your new export (full backup contentstore) and click ‘Next’.

Click the ‘Select the entire Content Store’ radio button and select ‘Next’.

Choose the location where you want to store the deployment archive. Click ‘Next’.

Assign a password to your archive. The password must contain at least 8 characters. Re-enter your password for confirmation and then click ‘OK’.

Verify the details you have input before clicking ‘Next’.

Select ‘Save and run once’.

Specify a time when you want to run the export and click ‘Run’.

Click ‘OK’ to complete the export.


To save time, move content in folder D:\Program Files\ibm\cognos\analytics\deployment to d:\temp before the upgrade. Copy the few files you need back after the upgrade.

Backup the configuration in cognos configuration:

  1. Open Cognos Configuration.
  2. Click File > Export As.
  3. Select a location and enter a file name for the XML file.
  4. Click Save.

Make a backup of the following files to a d:\temp folder:
D:\Program Files\ibm\cognos\analytics\webcontent\planning.html
D:\Program Files\ibm\cognos\analytics\webcontent\pmhub.html
D:\Program Files\ibm\cognos\analytics\webcontent\web.config
D:\Program Files\ibm\cognos\analytics\webcontent\tm1\web\tm1web.html

D:\Program Files\ibm\cognos\analytics\webcontent\bi\planning.html
D:\Program Files\ibm\cognos\analytics\webcontent\bi\pmhub.html
D:\Program Files\ibm\cognos\analytics\webcontent\bi\web.config
D:\Program Files\ibm\cognos\analytics\webcontent\bi\tm1\web\tm1web.html

D:\Program Files\ibm\cognos\analytics\templates\ps\portal\variables_CCRWeb.xml
D:\Program Files\ibm\cognos\analytics\templates\ps\portal\variables_plan.xml
D:\Program Files\ibm\cognos\analytics\templates\ps\portal\variables_TM1.xml

D:\Program Files\ibm\cognos\analytics\configuration\cclWinSEHConfig.xml

Restore only the missing files after the installation.
Files to be preserved during an upgrade are listed in the D:\Program Files\ibm\cognos\analytics\configuration\preserve\.ca_base_preserve.txt file. Do not edit this file. Instead, edit the D:\Program Files\ibm\cognos\analytics\configuration\preserve\preserve.txt file if you want to remove or preserve certain files or directories when upgrading.

################################################################
#
# IBM Confidential
#
# IBM Cognos Products: Preserve Files by the Install
#
# (C) Copyright IBM Corp. 2017
#
# Edit this file (preserve.txt) to remove or preserve files or directories when upgrading. 
#
# 
# Instructions:
#
# - Edit preserve.txt before running an upgrade on an existing install.
# - Use '#' at the beginning of a line to insert a comment.
# - The keyword "exclude:" can be used to remove files inside a preserved directory (see examples below).
# - List directories or files relative to the installation root directory (see examples below).
#
#
# e.g.: To remove this file: <installdir>/media/samples.doc, add this line:
# exclude:media/samples.doc 
#
# e.g.: To preserve the file <installdir>/msgsdk/cm_ldkspec.xml, add this line:
# msgsdk/cm_ldkspec.xml
#
# e.g.: To preserve the contents of the folder: <installdir>/cps/sap/webapps, add this line
# cps/sap/webapps
#
# Note on order of precedence: Files to be excluded should be specified first (before the directories which contain them).
#
################################################################

# Specify files to exclude first


# Specify files or folders to preserve

If you have changed security or use certificates, then you need to also backup all the certificates store files.


Stop the Cognos Analytics Service and close down Cognos Configuration. Stop the Apache or IIS webserver services.

Launch the downloaded installation file (analytics-installer-2.2.27-win.exe) and follow the wizard.

Choose your Language and click Next.

Choose What you want to install – for an upgrade this will be IBM Cognos Analytics click Next.

Choose to Accept the license and click Next.

Choose the location. This must be the location of your Cognos Analytics instance that you would like to upgrade and also the shortcut folder name. Click Next.

Click Yes to confirm you are Installing in the same location and are overwriting a previous installation.

Click Install at the summary screen.

When complete click Done to complete the upgrade.

Open Cognos Configuration – you will be prompted that older versions of Configuration files were found and configuration files have been upgrade to the latest version. click OK and Save your configuration.

Repeat the steps for all servers in your distributed environment, before starting the Cognos Analytics Content Manager Services first and then the rest.

Check the file D:\Program Files\ibm\cognos\analytics\cmplst.txt to see what version is installed.


More Information:

https://www.ibm.com/support/pages/ibm-cognos-analytics-11x-fix-lists 

https://www.ibm.com/support/pages/how-export-entire-content-store-cognos-analytics-11 

https://pmsquare.com/analytics-blog/2022/6/8/how-to-find-your-cognos-version-build-and-common-name

https://www.ibm.com/docs/en/cognos-analytics/11.1.0?topic=servers-copying-cognos-analytics-certificate-another-server

https://www.ibm.com/support/pages/how-add-3rd-party-ca-allow-ssl-between-components-ibm-cognos-analytics-11

Product:

Planning Analytics 2.0.9.17  TM1-AW64-ML-RTM-11.0.917.9-0
Microsoft Windows 2019 server

Issue:

How upgrade TM1 on a server?

Solution:

Follow IBM instructions and do a in-place upgrade.

https://www.ibm.com/docs/bg/planning-analytics/2.0.0?topic=configuration-upgrading-planning-analytics-local 

Please remember to take backup of the important files.

The samples database is overwritten, take a backup of this folder first:

D:\Program Files\ibm\cognos\tm1_64\samples\tm1

The preserve file list the files that are not replaced, take a backup of that tm1preserved.txt file in folder:

D:\Program Files\ibm\cognos\tm1web\configuration

Backup the tm1web_config.xml for TM1WEB from:

D:\Program Files\ibm\cognos\tm1web\webapps\tm1web\WEB-INF\configuration

Backup server.xml and jvm.options and bootstrap.properties files from folder:

D:\Program Files\ibm\cognos\tm1web\wlp\usr\servers\tm1web

Server.xml contain the port that tm1web will use for access by users.

Backup the configuration in cognos configuration:

  1. Open Cognos Configuration.
  2. Click File > Export As.
  3. Select a location and enter a file name for the XML file.
  4. Click Save.

Backup of your PAA Agent bootstrap.properties file in folder:

D:\Program Files\ibm\cognos\tm1_64\paa_agent\wlp\usr\servers\kate-agent

Export the TM1 applications as a backup – the data is saved in the TM1 data folder.

  1. Open the TM1 Cognos Applications portal.
  2. Click the Export Application icon under the Actions column.
  3. From the File Download dialog box, click Save.
  4. Navigate to the directory to where you want to save the export file.
  5. Click Save.

Save the Tm1p.ini client configuration file for Cognos TM1 Architect and Cognos TM1 Perspectives from:

  • C:\Users\%username%\AppData\Roaming\Applix\TM1
  • C:\ProgramData\Applix\TM1

Maybe uninstall Planning Analytics Performance modeler from the windows server before you install the upgrade of TM1, to ensure you have the latest version installed.


Later version of Planning Analytics recommend change in TM1S.CFG file:

If you plan to use Cognos TM1 Applications without Microsoft Excel installed on the web server where you are running Cognos TM1 Web, you will need to explicitly set the ExcelWebPublishEnabled parameter to True (T) in the tm1s.cfg configuration file for your TM1 servers. Earlier versions of Cognos TM1 Contributor did not require this parameter to be set.

If the action button in tm1 websheet are wrong after the upgrade:

  1. Open the Excel sheet that contains the Action Button.
  2. Right-click the button, then click Properties.
  3. Clear and re-select the Resize Button to Caption option.
  4. Click OK.
  5. Publish the websheet again.


More Information:

https://www.ibm.com/support/pages/ibm-planning-analytics-20-fix-lists 

https://www.ibm.com/docs/en/planning-analytics/2.0.0?topic=local-prerequisites-upgrading

https://exploringtm1.com/how-to-upgrade-planning-analytics-tm1/

https://www.ibm.com/support/pages/how-configure-tm1-application-web-connect-tm1-web-2092-ibm-planning-analytics-spreadsheet-services

https://www.pschwan.de/tm1-planning-analytics/ibm-tm1-planning-analytics-upgrade-per-skript

Product:

Microsoft SQL server

Issue:

How to import a txt file to a table inside SQL server?

Solution:

Download the file you want to import to your laptop or computer where SSMS is installed.

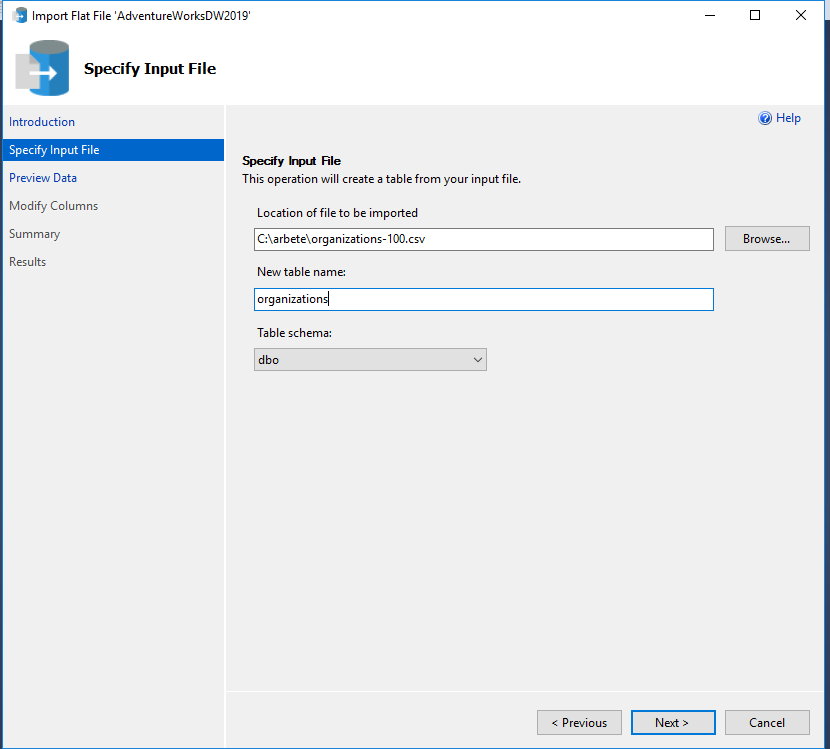
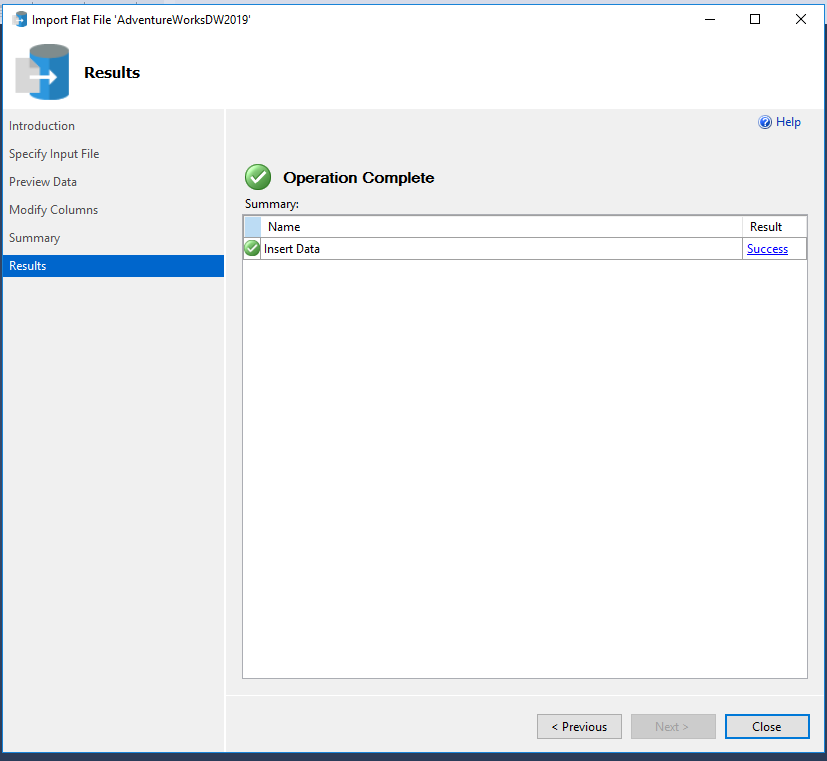
Right click on your database and select Tasks – Import Flat File.

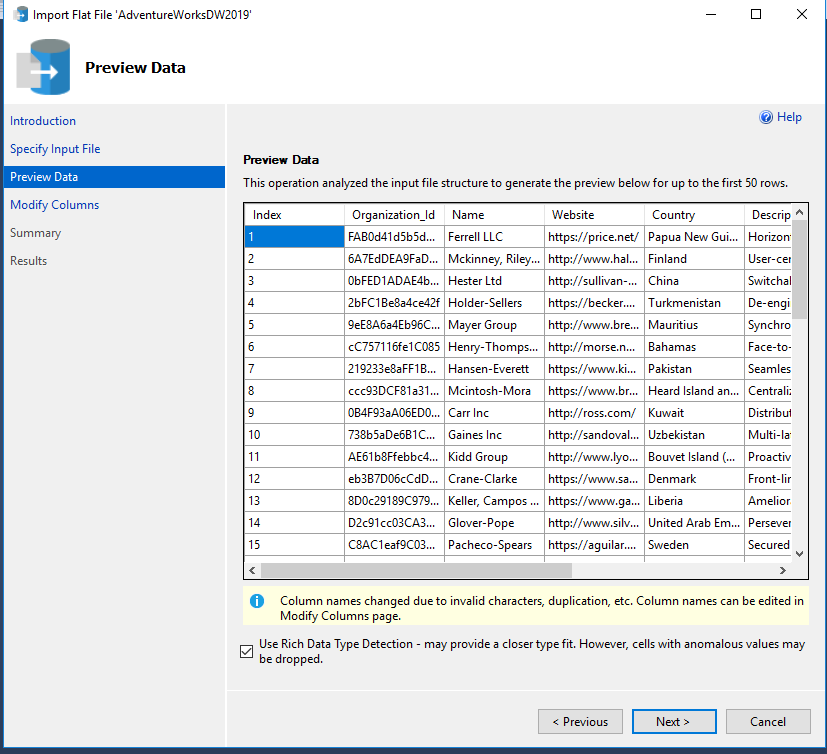
Select the csv file and enter the name of the new table


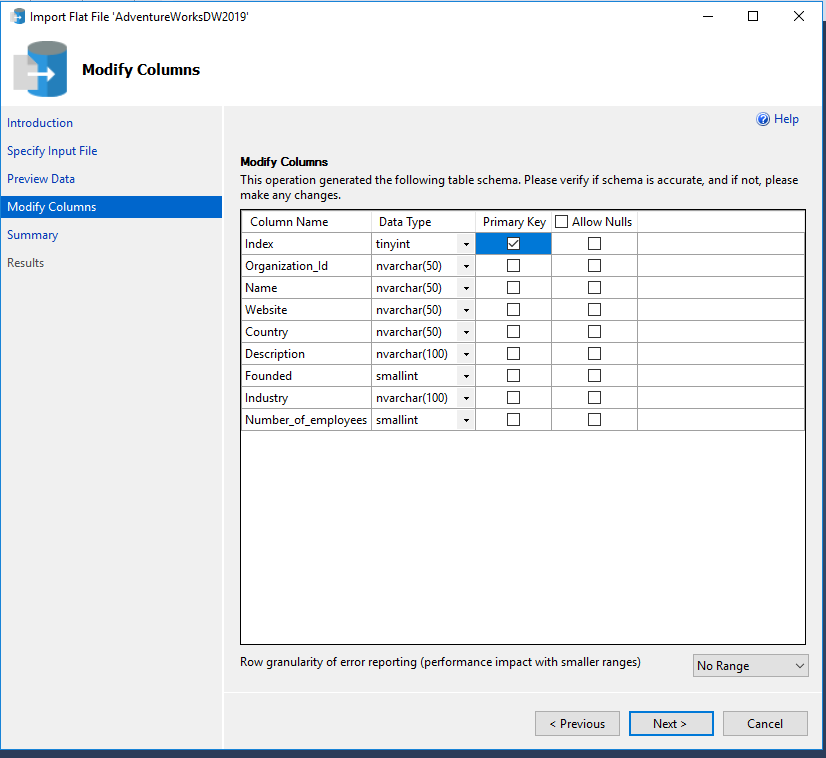
Set a primary key, and change any date formatted columns to string or correct date format.


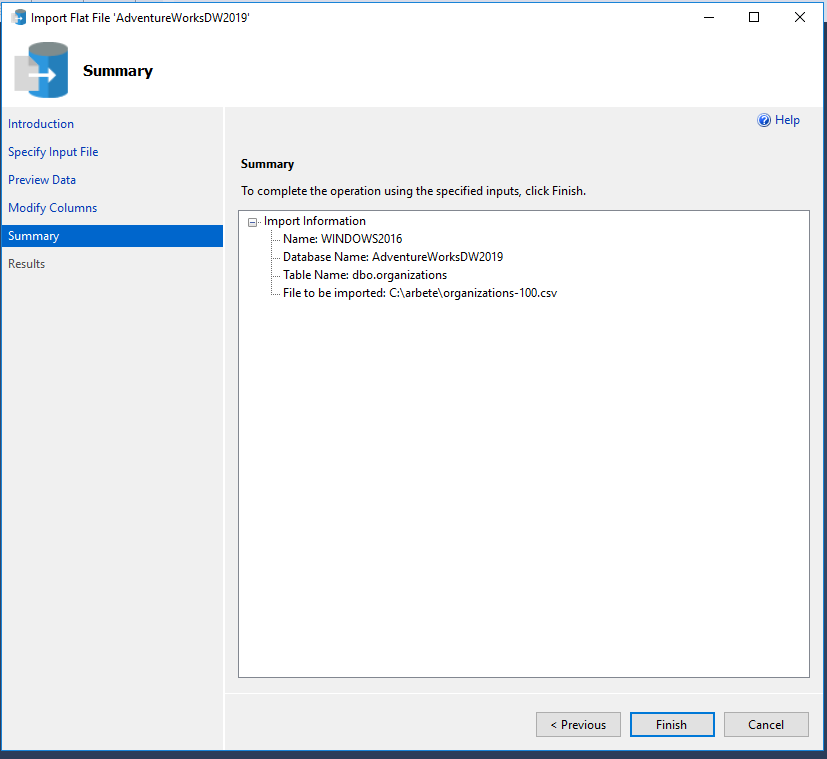
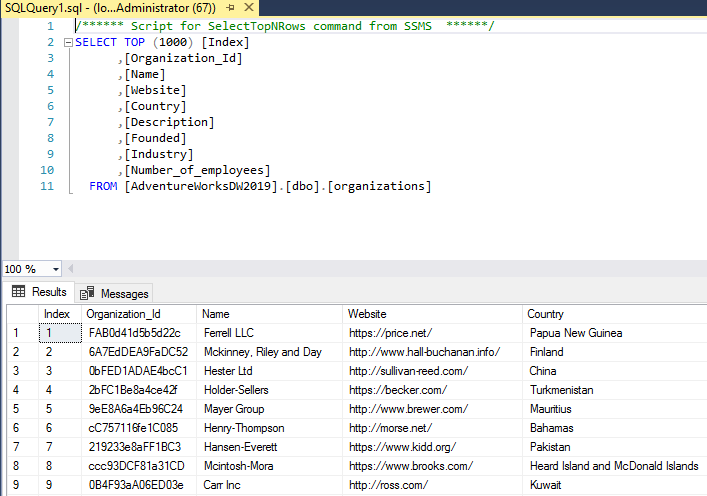
Then you can check the new table inside SSMS.

To use a small set in a new table, create a new table first:

CREATE TABLE [dbo].[Company](
[index] [int] NOT NULL,
[Name] [nvarchar](50) NULL,
[Country] [nvarchar](50) NULL,
[Employess] [int] NULL
) ON [PRIMARY]
GO

Then to copy the data over to that new table use:

INSERT INTO [AdventureWorksDW2019].[dbo].[Company] ([index], [name], [country], [employess] )
SELECT [index], [name] , [country] , [Number_of_employees]
FROM [AdventureWorksDW2019].[dbo].[organizations] 
-- [WHERE condition];


Use [  ] around columns names to ensure they are not misunderstood.

https://www.geeksforgeeks.org/how-to-use-reserved-words-as-column-names-in-sql/


More Information:

https://www.sqlshack.com/import-flat-file-sql-server-database-using-import-flat-file-wizard/

https://www.sqlservergeeks.com/sql-server-import-flat-file-using-ssms/

You can get sample data from this sites:

https://www.stats.govt.nz/large-datasets/csv-files-for-download/

https://people.sc.fsu.edu/~jburkardt/data/csv/csv.html

https://www.datablist.com/learn/csv/download-sample-csv-files

https://www.tutorialspoint.com/sql/sql-insert-query.htm

Product:

Microsoft SQL server

Issue:

What user is connected with what SQL login?

Solution:

Run this query’s:

SELECT A.name as userName, B.name as login 
FROM sys.sysusers A 
FULL OUTER JOIN sys.sql_logins B 
ON A.sid = B.sid


https://learn.microsoft.com/en-us/sql/relational-databases/system-compatibility-views/sys-sysusers-transact-sql?view=sql-server-ver16

select sp.name as login,
sp.type_desc as login_type,
sl.password_hash,
sp.create_date,
sp.modify_date,
case when sp.is_disabled = 1 then 'Disabled'
else 'Enabled' end as status
from sys.server_principals sp
left join sys.sql_logins sl
on sp.principal_id = sl.principal_id
where sp.type not in ('G', 'R')
order by sp.name;

https://dataedo.com/kb/query/sql-server/list-logins-on-server

SELECT *
FROM master.sys.sql_logins;

More SQL information:

https://www.w3schools.com/sql/sql_quickref.asp