Product:
Planning Analytics 2.0.3
TM1SERVER_APP_version=TM1SERVER_APP-AW64-ML-RTM-11.0.3.119-0
Cognos Analytics 11.0.9 kit_version=11.0.9.17121514
kit_name=IBM Cognos Analytics
Planning Analytics Workspace version 29
Microsoft Windows 2012 R2 Server
Problem:
How make SSO with Planning Analytics for Excel work?
Contact IBM Cognos Support to get the latest instructions on how to setup PAX.
Solution:
Setup of Content Store database in SQL server
See here how: https://www.ibm.com/support/knowledgecenter/en/SSEP7J_10.2.2/com.ibm.swg.ba.cognos.qrc_inst.10.2.2.doc/t_qrc_inst_sqlserver_createacontentstore.html
Setup of Cognos Analytics 11
See here how: http://cogknowhow.tm1.dk/archives/1056
Ensure that all servernames in Cognos Configuration uses FQDN, dvs servername.domain.com, this is a must for PAW setup.
The manual for CA11
http://www-01.ibm.com/support/docview.wss?uid=swg27047187
Setup of IIS and Cognos Analytics 11 Gateway
See here how: https://www.ibm.com/support/knowledgecenter/en/SSEP7J_11.0.0/com.ibm.swg.ba.cognos.inst_cr_winux.doc/t_gateway_iis.html
Check that SSO is working, to the Windows Active Directory, by surf to http://caservername.domain.com/ibmcognos/bi
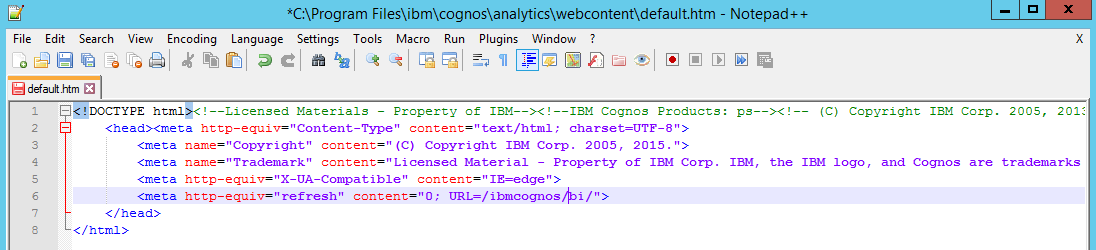
Check the .\webcontent\default.htm and .\webcontent\index.html files. Update the last line starting with <meta http-equiv=”refresh” as shown below, (where <alias name> is the alias used in the CA_IIS_config.bat script file). Add /ibmcognos/ in most cases.
Important that Windows Authentication is on the /ibmcognos/sso folder in IIS manager and that you may need to add Advance properties singleSignOnOption: IdentityMapping in Cognos Configuration for CA11 at security – authentication – namespace – active directory.
If Cognos Application Firewall is used, then you need to add the TM1 servers here also with port 9510.
Open Cognos Configuration for CA11. Go to Local Configuration – IBM Cognos Application Firewall. Click on Valid domains or hosts to add the PAservername to the list of approved domains.
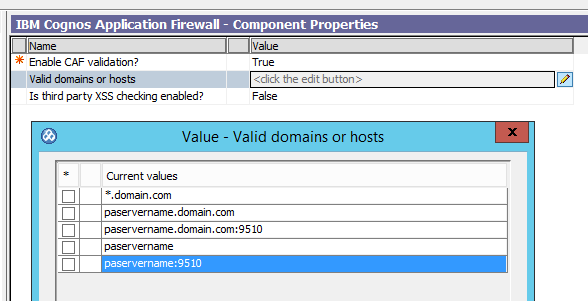
Click OK, save the new Configuration and restart the Cognos Analytics services. If above is not done, you get error DPR-ERR-2079 when you logout of TM1WEB.
Download of Planning Analytics 2.0.3
List of files
http://www-01.ibm.com/support/docview.wss?uid=swg24044001
| Parts and Platforms | Installation category | Part number |
| IBM Planning Analytics 2.0.3 Microsoft Windows Multilingual | Required | CNN7AML |
| IBM Planning Analytics Client 32-bit 2.0.3 Microsoft Windows Multilingual | Optional | CNN7BML |
| IBM Planning Analytics Client 64-bit 2.0.3 Microsoft Windows Multilingual | Optional | CNN7CML |
| IBM Planning Analytics Workspace 2.0.3 Multiplatform Multilingual | Optional | CNN7DML |
| IBM Planning Analytics Workspace 2.0.3 Microsoft Windows Server 2016 Multilingual | Optional | CNN7EML |
| IBM Cognos TM1 Package Connector for Business Intelligence 10.2.2 Microsoft Windows Multilingual | Optional | CN1Z7ML |
| IBM Cognos Analytics Server 11.0.7 Microsoft Windows Multilingual | Optional | CNK1EML |
| IBM Cognos Analytics Samples 11.0.7 Microsoft Windows Multilingual | Optional | CNK1XML |
| IBM Cognos Framework Manager 11.0.7 Microsoft Windows Multilingual | Optional | CNK1MML |
Download from here
http://www-01.ibm.com/support/docview.wss?uid=swg24044081
Setup of PA 2.0.3
https://www.ibm.com/support/knowledgecenter/SSD29G_2.0.0/com.ibm.swg.ba.cognos.tm1_inst.2.0.0.doc/tm1_inst.pdf
Check that Print Spooler Service is running in your Windows 2012 server.
Install NET Framework 4.6.1 (NDP461-KB3102436-x86-x64-AllOS-ENU.exe) in the Windows server, from here: https://support.microsoft.com/en-us/help/3102436/the–net-framework-4-6-1-offline-installer-for-windows
Install C++ 2010 x64 redistribution (vcredist_x64.exe).
Run the installation from the unziped file in D:\install\pa 2.0.3\tm1_winx64h_2.0.3.119_ml.tar\winx64h\issetup.exe
Go into Cognos Configuration for TM1 (PA2.0.3)
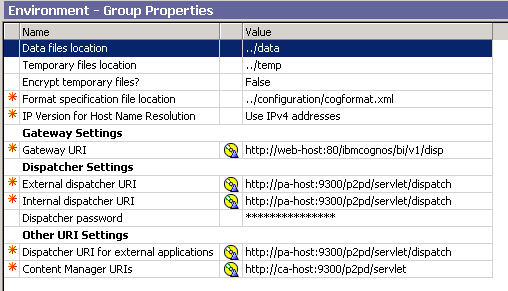
Under Environment point to the CA11 server.
Set gateway URI to be to the CA11 gateway like this http://caservername.domain.com:80/ibmcognos/bi/v1/disp
Set External Dispatcher URI to http://caservername.domain.com:9300/p2pd/servlet/dispatch
Set Content Manager URI to http://caservername.domain.com:9300/p2pd/servlet
At IBM Cognos TM1 you can tune your WebSphere Liberty Profile;
Set Ping timeout in seconds to a value like 480 seconds.
Set Maximum memory for Websphere Liberty Profile in MB to 4096, if TM1 Web or TM1 Application Web are getting unresponsive and Planning Analytics logs contain some errors java.lang.OutOfMemoryError.
At TM1 Applications leave the Maximum memory in MB at default 768.
Enter TM1 Application Server Gateway URI to http://paservername.domain.com:9510/pmpsvc and External server URI to http://paservername.domain.com:9510.
Consider to change Session timeout to a higher value.
Set TM1 Application Server Dispatcher URI to http://paservername.domain.com:9510/pmpsvc/dispatcher/servlet
At TM1 Clients change the Cognos Insight ping frequency (seconds) to a higher value like 90. See separate page about timeout values http://www-01.ibm.com/support/docview.wss?uid=swg22002419
Skip the Logging, Security, IBM Cognos Application Firewall – they have limited function in this version of PA2.
Start the SDATA and Proven_Techniques example TM1 instances.
We use Proven_Techniques to test SSO, because it have a short TM1S.CFG file, so it is easy to add fields.
Setup of SSO
http://www-01.ibm.com/support/docview.wss?uid=swg22000283
Open C:\Program Files\ibm\cognos\tm1_64\samples\tm1\Proven_Techniques\tm1s.cfg in notepad++.
Add the lines;
IntegratedSecurityMode=2
ServerCAMURI=http://caservername.domain.com:9300/p2pd/servlet/dispatch
ClientCAMURI=http://caservername.domain.com:80/ibmcognos/bi/v1/disp
Save the file and restart the TM1 instance Proven_Techniques.
Exit TM1 Architect.
Erase the tm1p.ini file from here C:\Users\%username%\AppData\Roaming\Applix\tm1 to allow it to get the new values.
Open C:\ProgramData\Applix\TM1\tm1p.ini in notepad and add the values AllowImportCAMClients = T
CognosGatewayURI = http://caservername.domain.com:80/ibmcognos/bi/v1/disp
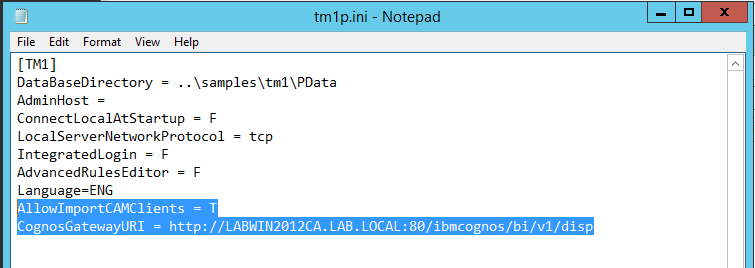
Save the file.
Add users
Start Tm1 Architect, double click on Proven_Techniques to login.
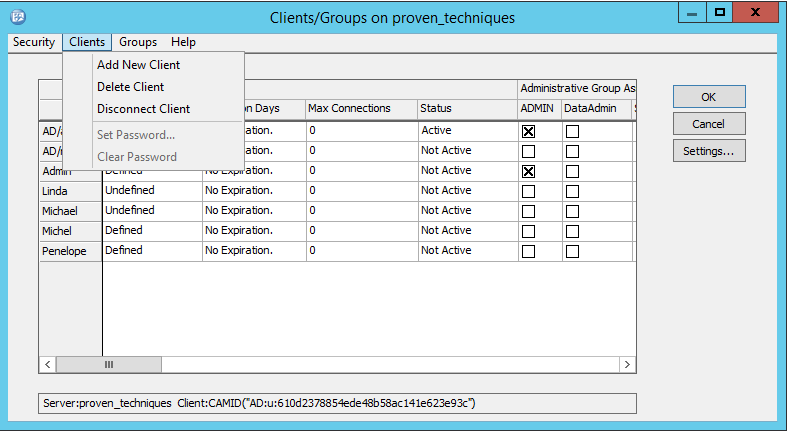
Enter ADMIN as user to login. Right click and select Security – Client/Groups. From menu Clients select Add New Client.
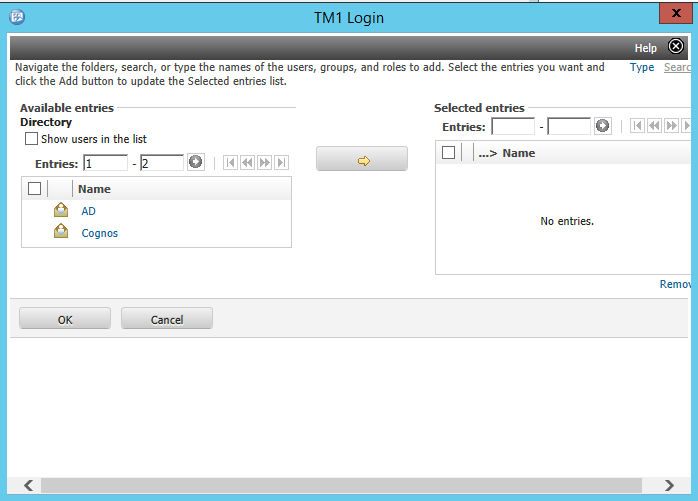
Click on your namespace name, in out example AD.
Click on TYPE in top right corner to enter the name of the user.
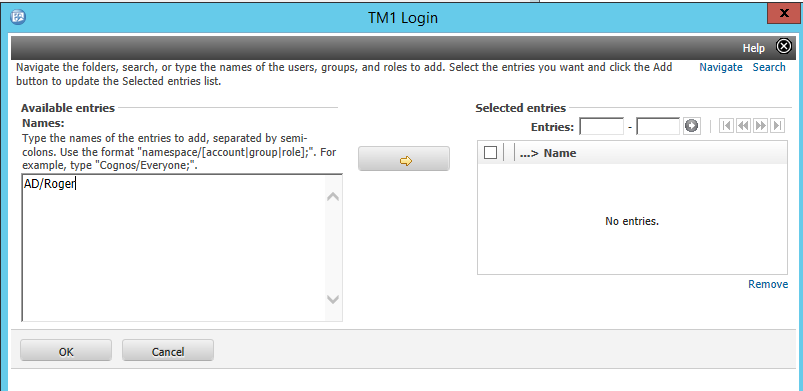
Enter the domainnamespace/username. Namespace name is the name you gave it in CA11 cognos configuration. Username most be the users name correct spelled as it is entered in Active Directory.
Click on yellow arrow to add the user, and click on OK.
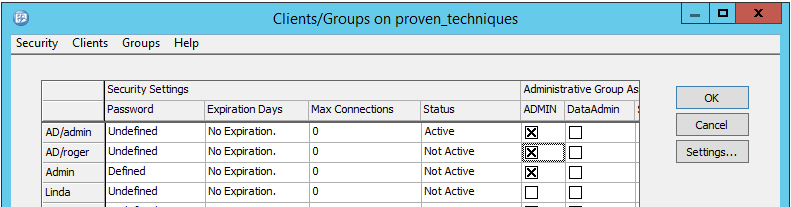
Mark the user to be ADMIN, so he can then add other users later.
Click OK and exit TM1 Architect. Now you turn TM1 application to security mode 5,and then this user can login and add additional users in TM1 architect.
Open C:\Program Files\ibm\cognos\tm1_64\samples\tm1\Proven_Techniques\tm1s.cfg in notepad++.
Change the line to 5
IntegratedSecurityMode=5
Save the file and restart the TM1 instance.
Unzip the file C:\Program Files\ibm\cognos\tm1_64\bi_interop\bi_interop.zip to a separate folder like c:\install
There should be two folders
templates
webcontent
Go and update this files with the PA server name and PAW server name;
C:\install\webcontent\planning.html
Update the following to point to the location of the planning service(s)
var planningServices = [“http://paservername.domain.com:9510″,”http://pawservername.domain.com”];
C:\install\webcontent\pmhub.html
Update the following to point to the location of the pmhub service(s)
var pmhubURLs = [“http://paservername:9510″,”http://paservername.domain.com:9510″,”http://pawservername.domain.com”];
C:\install\webcontent\tm1\web\tm1web.html
// Update the following to point to the location of the TM1Web service(s)
var tm1webServices = [“http://paservername.domain.com:8080”, “http://paservername.domain.com:9510”];
Save the files.
The files in C:\install\templates\ps\portal should not be changed.
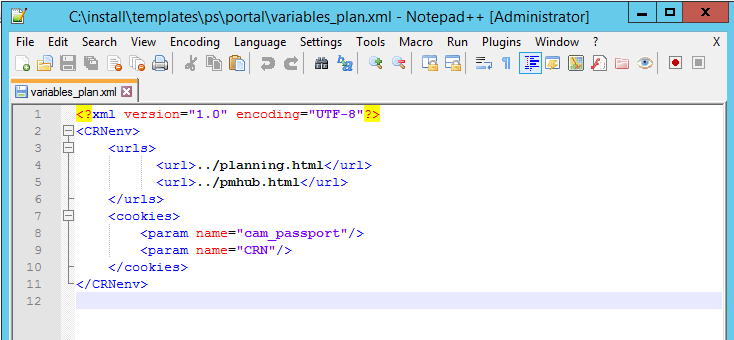
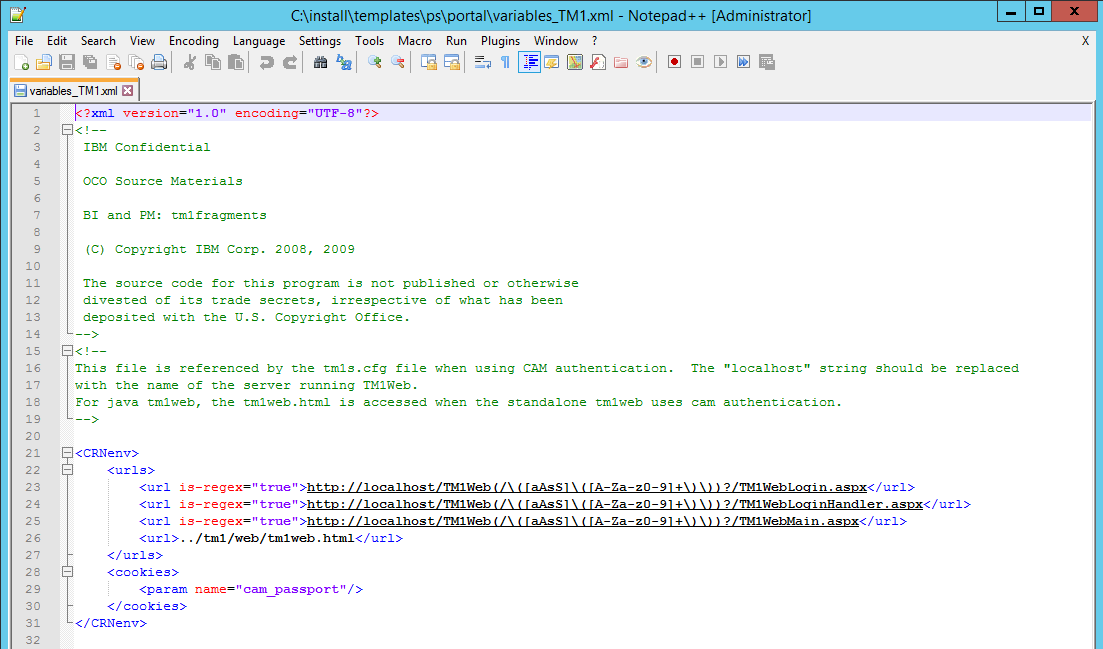
If variables_TM1.xml is not referenced in TM1S.CFG file, then it is most likely not used.
Copy the files and folders in C:\install\webcontent ontop the C:\Program Files\ibm\cognos\analytics\webcontent folder.
Go into C:\Program Files\ibm\cognos\analytics\webcontent\tm1\web\tm1web.html and see that it is the updated file.
Copy the files and folders in C:\install\templates to the C:\Program Files\ibm\cognos\analytics\templates folder.
Replace files as needed.
Copy the C:\Program Files\ibm\cognos\analytics\webcontent\tm1 folder to C:\Program Files\ibm\cognos\analytics\webcontent\bi folder. So you also got a TM1 folder under /webcontent/bi.
Copy the updated files planning.html, pmhub.html, default.htm and index.html from C:\Program Files\ibm\cognos\analytics\webcontent to folder C:\Program Files\ibm\cognos\analytics\webcontent\bi.
Restart IIS with iisreset from a CMD prompt.
Surf to http://paservername.domain.com:9510/tm1web to check that it works.
The first time you start TM1 Application portal, then it will connect to the PA and BI setup. You must surf to http://paservername.domain.com:9510/pmpsvc to set it up.
Enter the host name and the list of TM1 server names should be filled out. Select the proven_techniques from the list.
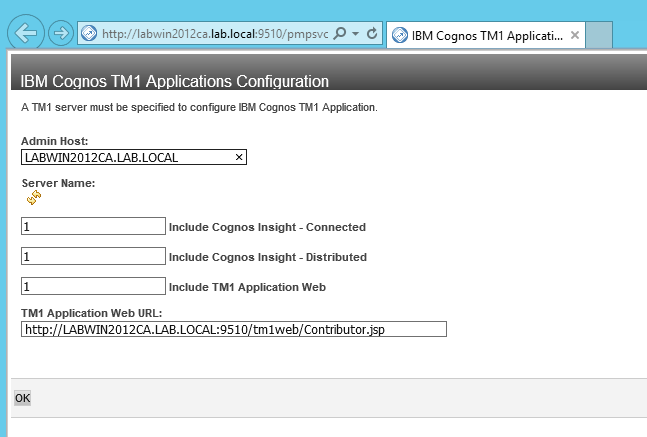
If it looks like above – please try a different version of web browser.
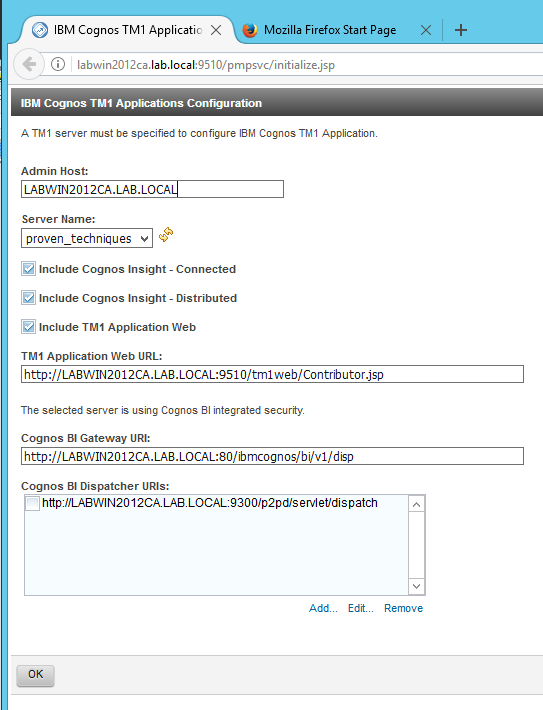
Above is the correct look, you get in FireFox.
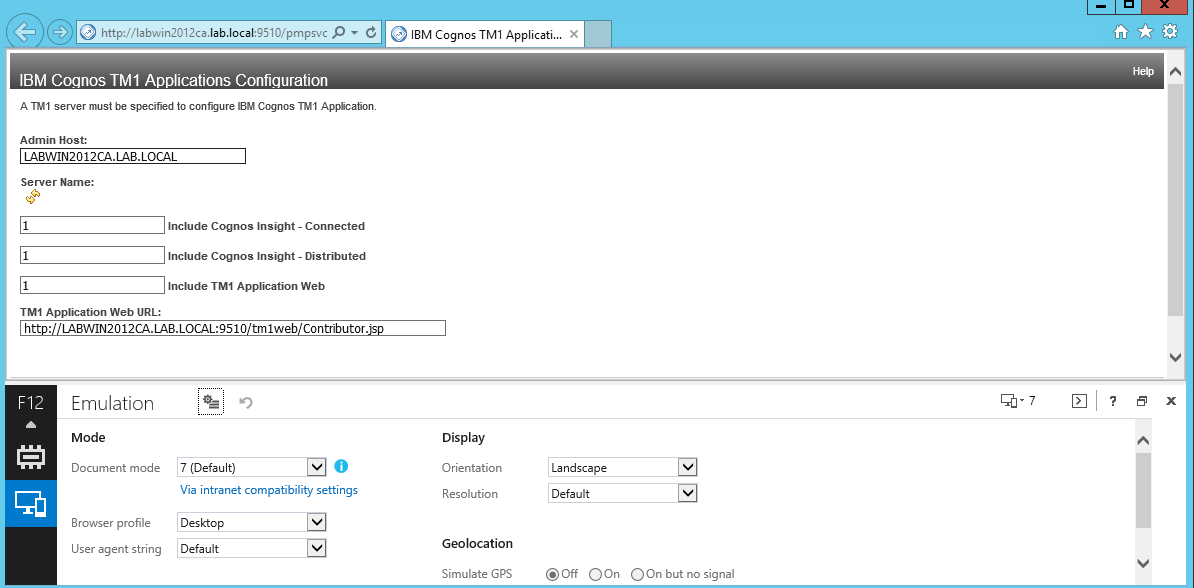
Press F12 inside Internet Explorer to find the Emulation in use.
Above you see it is using Document Mode 7. The blue text “via intranet compatibility settings” tell us that it is the compatibility settings in internet options on your computer that give the issue. Open it and clear all values out. 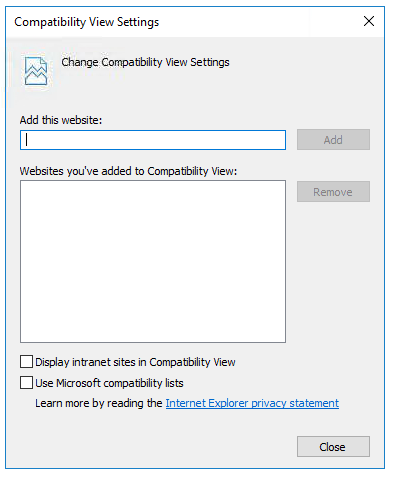 Test again.
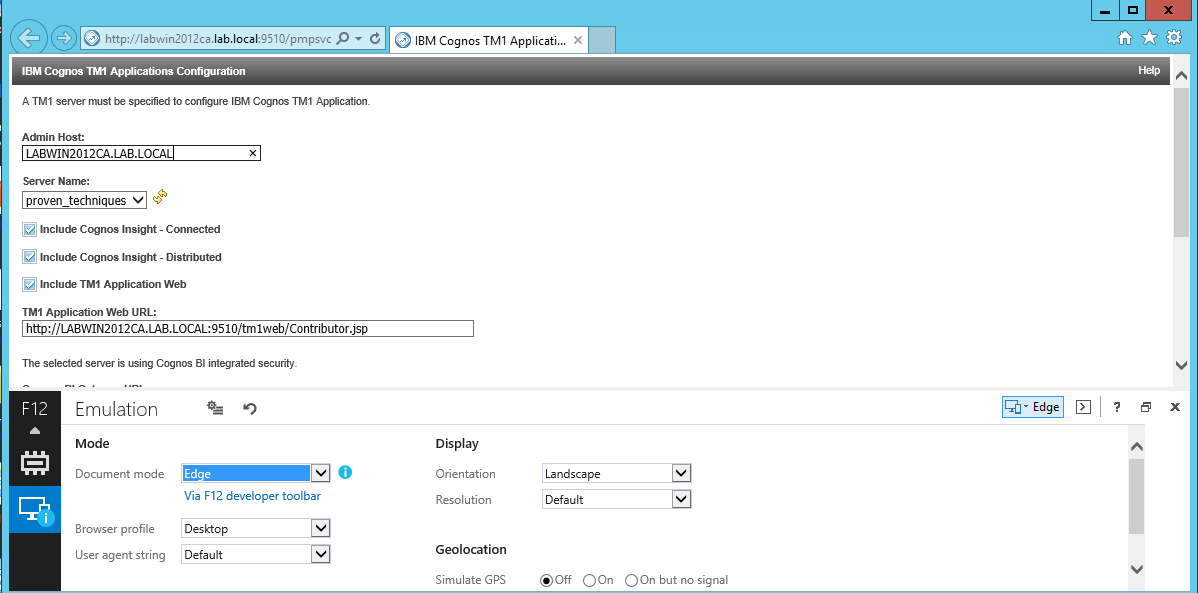
Change the mode to Edge and it may work for you.
Press OK to save the values to TM1 Application Portal.

When it is working it should look like above, if you are ADMIN in the Proven_Techniques application you should see all the icons to the right.
This configuration is stored in C:\Program Files\ibm\cognos\tm1_64\webapps\pmpsvc\WEB-INF\configuration\fpmsvc_config.xml.
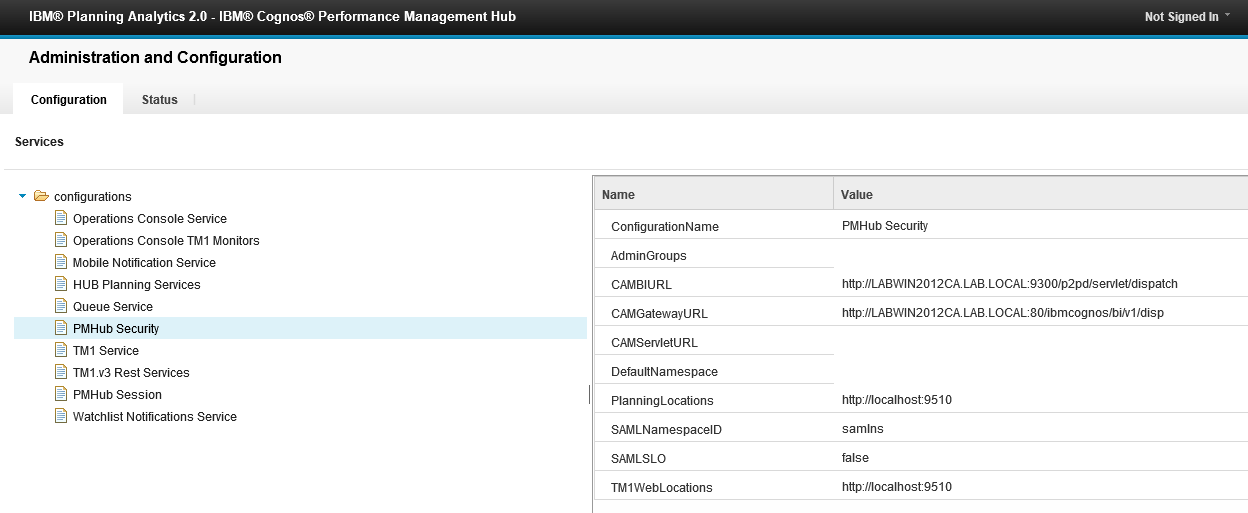
TM1 Operations Console is configured in a web interface. This UI presents multiple options of configuration, including the references to the Cognos Analytics environment.
Surf to http://paservername.domain.com:9510/pmhub/pm/admin
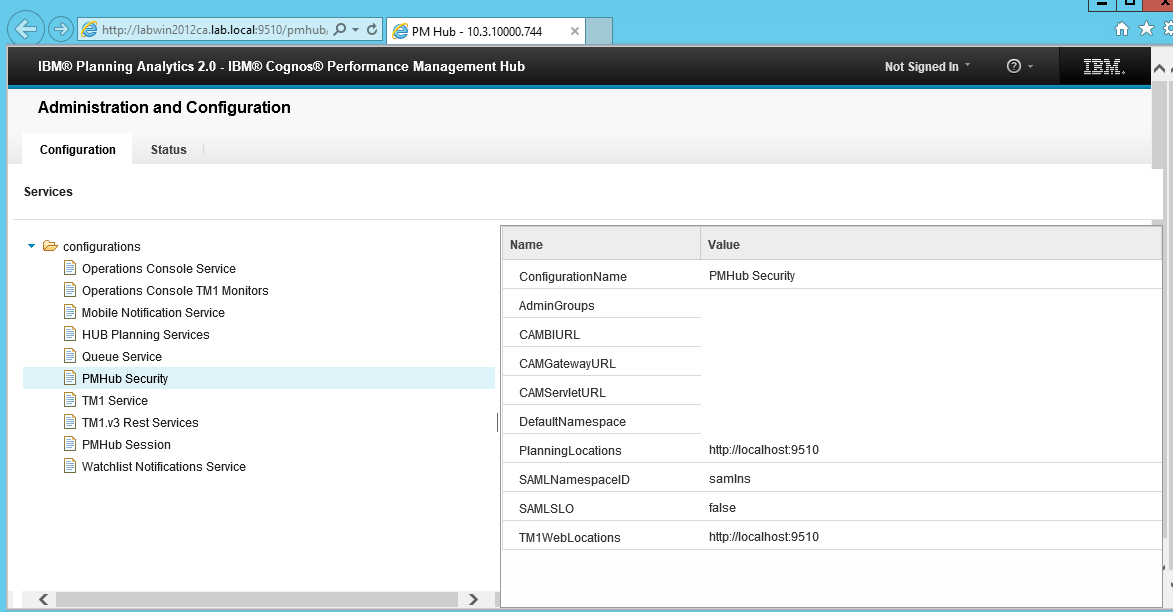
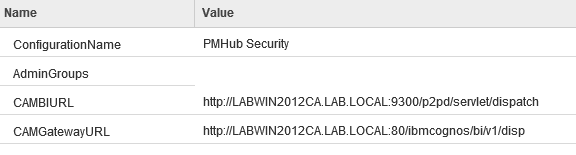
Expand configurations and select PMHub Security.
At CAMBIURL enter http://caservername.domain.com:9300/p2pd/servlet/dispatch
At CAMGatewayURL enter http://caservername.domain.com:/80/ibmcognos/bi/v1/disp
The values should save automatically in a few minutes.
Surf to http://paservername.domain.com:9510/pmhub/pm/opsconsole
to check that it works.
TM1 PMPSVC and PMHUB must be setup before you can get PAW to work.
You must setup PAW before PAX are setup.
Download of PAX from here
http://www-01.ibm.com/support/docview.wss?uid=swg27049597
(cor_win32_2.0.29.10_ml.tar.gz)
Installation of PAX
Install NET Framework 4.6.1 (NDP461-KB3102436-x86-x64-AllOS-ENU.exe) from here: https://support.microsoft.com/en-us/help/3102436/the–net-framework-4-6-1-offline-installer-for-windows
Check that Microsoft Office have the primary interop assemblies (PIAs) for Excel installed.
You can download the PIAredist.exe for Office 2010 from here https://www.microsoft.com/en-us/download/details.aspx?id=3508
In Office setup it is named NET Programmable support.
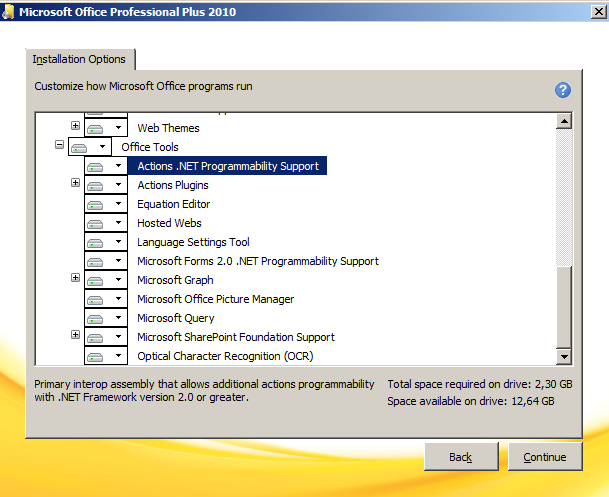
PIA – Primary Interop Assemblies (PIA) redistributable package for your version of Microsoft Outlook. The PIA is only needed if you have Outlook 2007 or 2010. PIA is not needed for Office 2013 or Office 365, it is part of the Office installation package as .NET Programmability Support for Office. In all version of Office you also need to make sure the .NET Programmability Support is installed (Control Panel – Program and Features – locate Microsoft Office installation, click on Change and Add/Remove features and expand Outlook, it is the first option you can check the box and install it)
Run the file D:\install\pa 2.0.3\pax\cor_win32_2.0.29.10_ml.tar\win32\issetup.exe
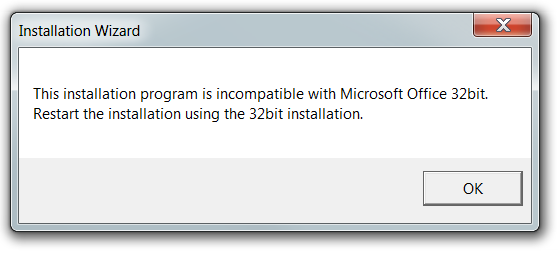
If your excel is 32 bit then you get this error if you select the wrong file. File cor_winx64h_2.0.29.10_ml.tar is for 64 bit excel.
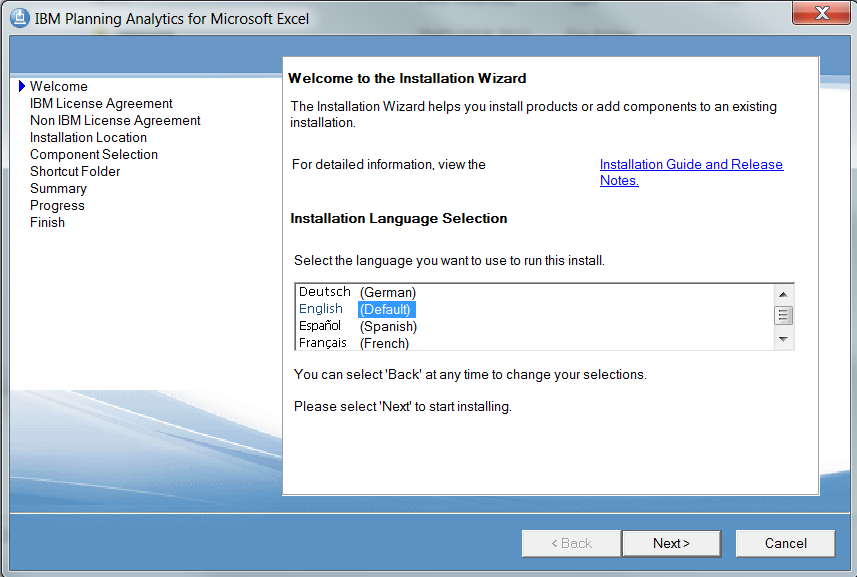
Click Next
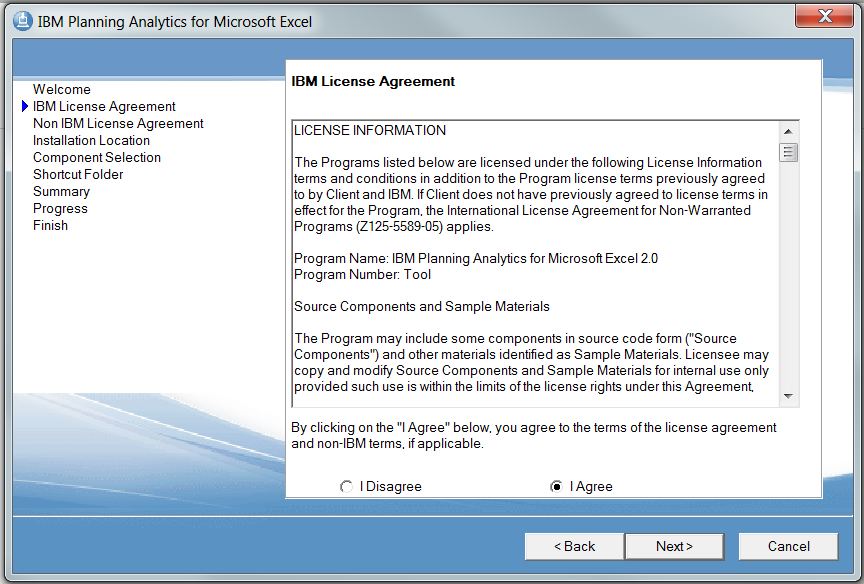
Select I Agree and click Next
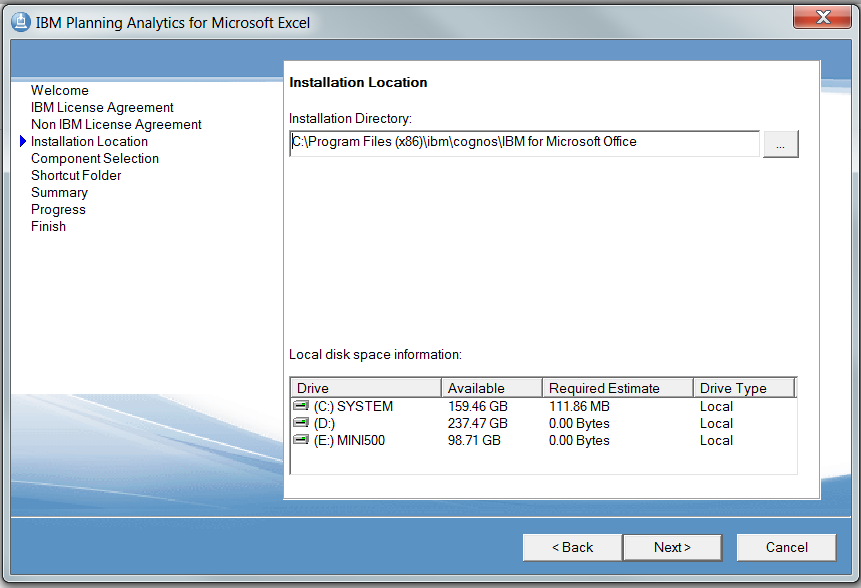
Click Next

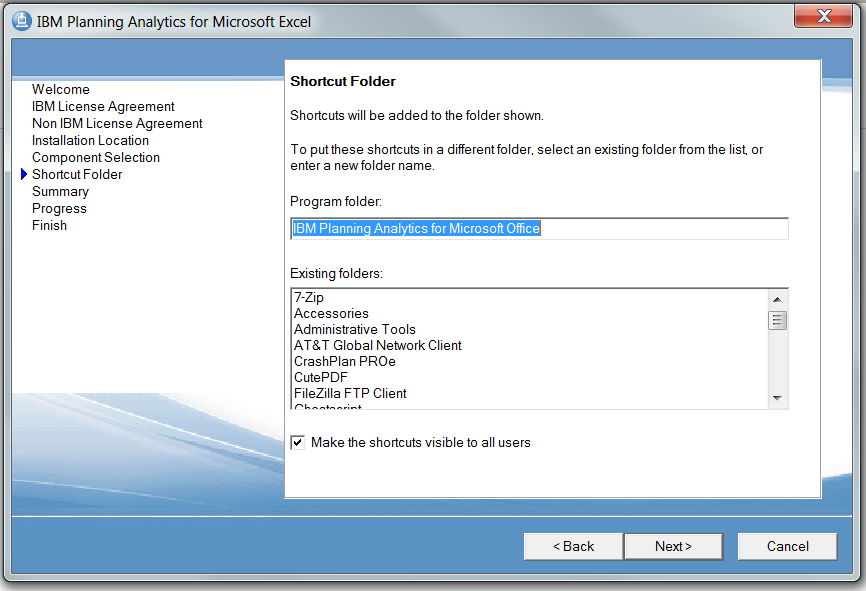
Click Next
Click Next
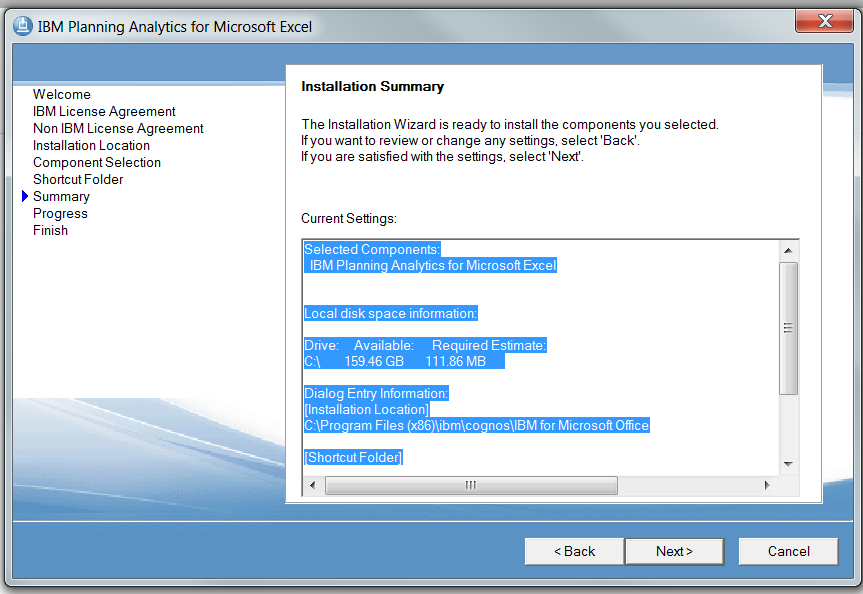
Click Next
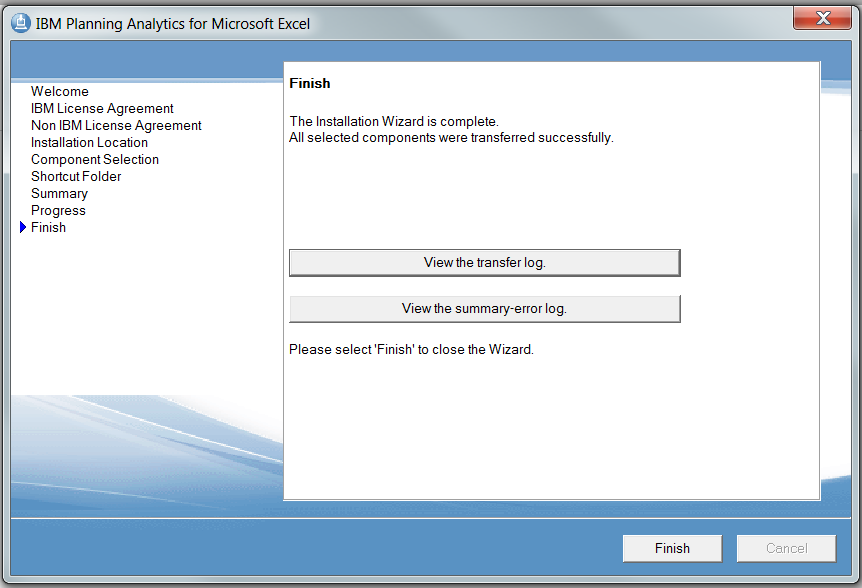
Click Finish.
Configure PAX
Start Microsoft Excel to configure IBM Planning Analytics
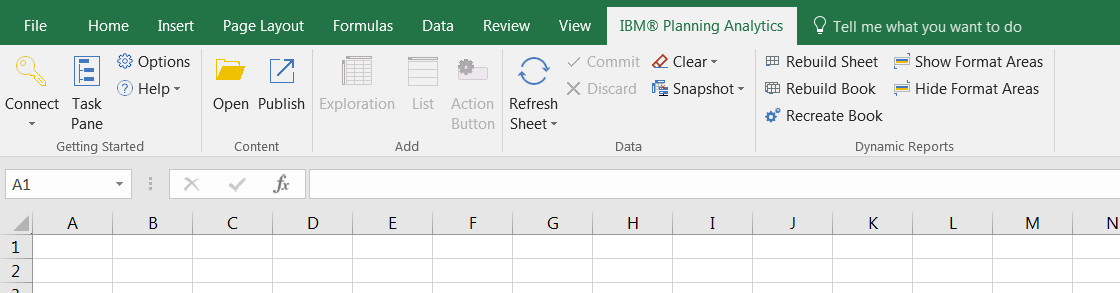
Select tab IBM Planning Analytics and click on Options
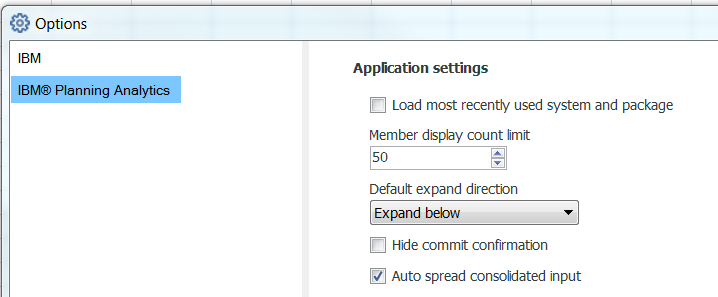
Click on IBM
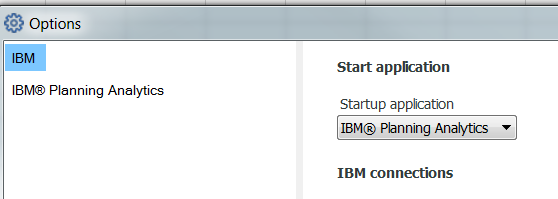
Select IBM Planning Analytics and click on ADD button
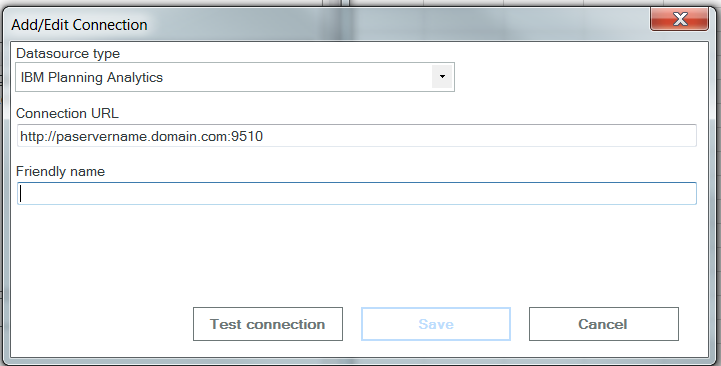
Enter your servername http://paservername.domain.com:9510 (this will make the SSO to work)
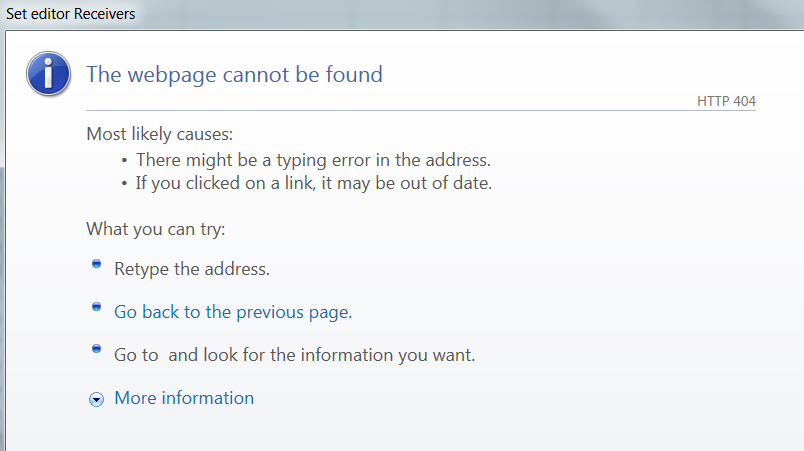
PAX should connect to the PAW (Planning Analytics Workspace) URL, like http://pawservername.domain.com:80/ to get the “set editor” to work.
Enter a friendly name, like PMPSVC Connect.
Click on Test Connection
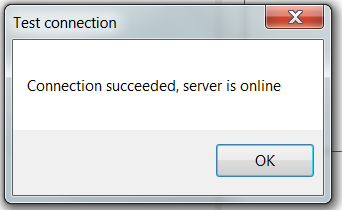
Click Save
If the test fails, check that servername is correct spelled, and check that Windows Firewall on the server does not block port 9510.
Click OK

Now you can in Excel click on Connect – Your Friendly name – proven_techniques to start working with that.
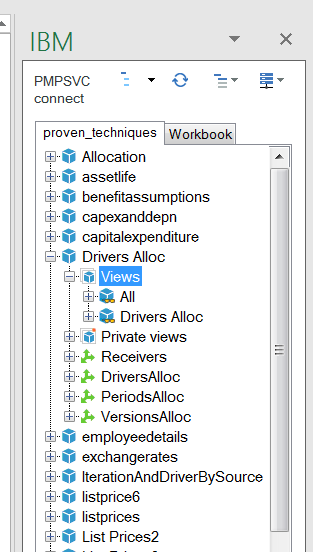
Now you can drag views from PA2 (TM1) into the spreadsheet.
How to use it http://www.element61.be/en/resource/ibm-planning-analytics-excel-pax
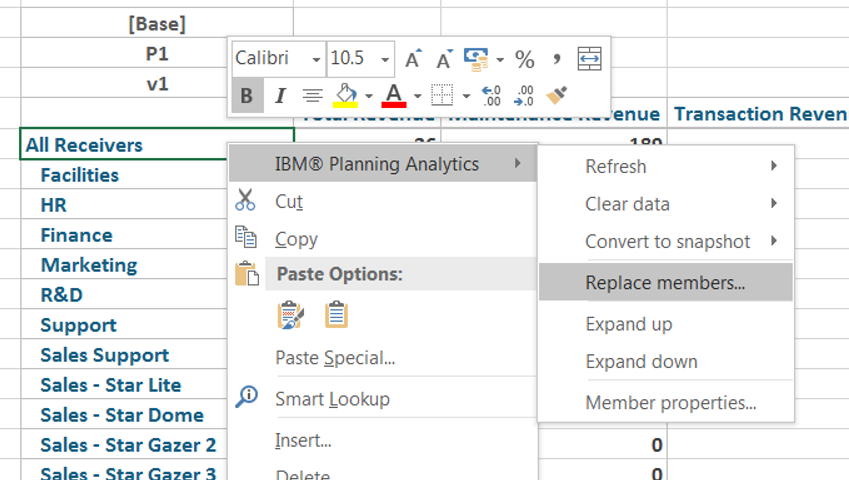
To get “Replace members” to work you need to install PAW.
If you use a TM1 instance that use securitymode=1 (like example SData) then “set editor” will work.
Above when you point PAX to the PA server and use a PA (TM1 instance) that uses SSO.
If you in PAX connect to PA (Tm1) server at address http://paservername.domain.com:9510/ or http://paservername.domain.com:9510/pmhub/pm then the settings inside pmhub security will tell pax where to go to authenticate.
if you in PAX connect to PAW like http://pawservername.domain.com then the setting in paw administration (http://pawservername.domain.com:8888) will point to the authentic provider.
Then the value in C:\Program Files\ibm\cognos\analytics\webcontent\pmhub.html and C:\Program Files\ibm\cognos\analytics\webcontent\tm1\web\tm1web.html, can also be important to make it work. Note that this files are also in folder C:\Program Files\ibm\cognos\analytics\webcontent\bi.
Setup of PAW
Ensure you use only FQDN to the servers.
First time you start PAW, you point it to a Native TM1 instance with security mode 2. Then you add your CAM users with TM1 Architect. Set this CAM users to be ADMIN in that instance, and they will be the first ADMIN in PAW. Switch that TM1 instance over to security mode 5. Change in IBM Planning Analytics Workspace Administration Tool from TM1 to CAM authentication mode. You must use security mode 1 first, before you can use PAW with security mode 5.
In IBM Planning Analytics Workspace Administration Tool, you should have this settings:
TM1 Admin Server URI: https://paservername.domain.com:5898
TM1 Application Server Gateway URI: http://paservername.domain.com:9510
Authentication Mode: CAM
IBM Cognos BI Gateway URI: http://caservername.domain.com:80/ibmcognos
if you use CA11 then you should set IBM Cognos BI Gateway URI: http://caservername.domain.com:80/ibmcognos/bi/v1/disp
IBM Cognos BI Dispatcher URI: http://caservername.domain.com:9300/p2pd/servlet/dispatch
if you use CA11 then you should set IBM Cognos BI Dispatcher URI: http://caservername.domain.com:9300/bi/v1/disp
IBM Cognos BI Authentication Namespace ID: AD (the same namespace id you have entered in Cognos Configuration for CA(BI)).
Click Validate and Update.
If above is correct set, then PAX should work pointing to http://pawservername.domain.com
Please note that above setup is for PAW version 29. Other versions of PAW may require other configuration.
See here how to set PAW up http://cogknowhow.tm1.dk/archives/1090
More Information:
https://www.ibm.com/communities/analytics/cognos-analytics-blog/cognosanalytics-and-planninganalytics-integration-walkthrough-part-3/
http://www-01.ibm.com/support/docview.wss?uid=swg22000283
http://www-01.ibm.com/support/docview.wss?uid=swg21958925
https://msdn.microsoft.com/en-us/library/kh3965hw.aspx
https://www.ibm.com/support/knowledgecenter/en/SSD29G_2.0.0/com.ibm.swg.ba.cognos.tm1_inst.2.0.0.doc/c_ig_cor_overview.html
#Cognos Analytics and #Planning Analytics Integration – Walkthrough – Part 2