Product:
Planning Analytics 2.0.3
Planning Analytics Workspace  (ipa_workspace_local_2.0.29.1080.2.zip)
Microsoft Windows 2016 server
Red Hat Linux server

Problem:
When inside PAW, and you try to expand a node of a TM1 instance, you get a error message.

Error:
Session can not be established for server proven_techniques 500 (internal server error) “code” “explorer” “refID” “message” .”Failed to get children for server cubes”. “cause”.”java.net.NoRouteToHostException: No route to host”.

paw39
Solution:
In one case this is because of DNS and routing problems in network. The PAW server and PA server have both two network cards, and can only communication on one of them.
You must in TM1S.CFG tell Tm1 instance what network card it should use.

Add the line
IPAddressV4=”10.200.30.40″
in TM1S.CFG and restart the TM1 instance.

Replace the ip number with the correct ip address of your Planning Analytics server.
Important that the IP address are inside ” double quotation mark.

Product:
Planning Analytics Workspace
Planning Analytics 2.0.3
Microsoft Windows 2016 Server

Problem:
When user surf to the PAW, they are not administrator and can not add other users.
Surf to http://pawservername.domain.com
Click on the user — and see there is not a option for Administration.
This is a new PAW setup with CAM authentications.

Solution:
The first users that you add in a TM1 instance as ADMIN will be admin in paw when you login to paw. Therefor you must add CAM users to a native TM1 instance first.

Open up a Tm1 application in Native mode. Like Proven_Techniques.
Open C:\Program Files\ibm\cognos\tm1_64\samples\tm1\Proven_Techniques\tm1s.cfg in notepad++.
Add the lines;
IntegratedSecurityMode=2
ServerCAMURI=http://caservername.domain.com:9300/p2pd/servlet/dispatch
ClientCAMURI=http://caservername.domain.com:80/ibmcognos/bi/v1/disp
Close TM1 architect.
Update the C:\Users\%username%\AppData\Roaming\Applix\tm1\tm1p.ini file with
AllowImportCAMClients = T
CognosGatewayURI = http://caservername.domain.com:80/ibmcognos/bi/v1/disp

Start PAW administration console and surf to http://pawservername.domain.com:8888
Setup like this (change to your servers name);
TM1 Admin Server URI: https://paservername.domain.com:5898
TM1 Application Server Gateway URI: http://paservername.domain.com:9510
Authentication Mode: TM1
TM1 Login Server URI: https://paservername.domain.com:5011
Click validate and update.

(This TM1 instance you point out with the HTTPport number is the instance that will define the first ADMIN in paw, even if you use security mode 5).

Start TM1 Architect and login to Proven_Techniques as Admin.
Go to Security – Client/Groups. From menu Clients select Add New Client.
Add your CAM user from your AD domain, that you want to be ADMIN in paw.
Mark the user to be ADMIN in TM1 Architect. Click OK.
Exit Tm1 Architect.

Open C:\Program Files\ibm\cognos\tm1_64\samples\tm1\Proven_Techniques\tm1s.cfg in notepad++.
Change; IntegratedSecurityMode=5
Save the file and restart the TM1 instance.
Now TM1 instance is using CAM authentication.

Update PAW admin console by surf to http://pawservername.domain.com:8888
TM1 Admin Server URI: https://paservername.domain.com:5898
TM1 Application Server Gateway URI: http://paservername.domain.com:9510
Change to Authentication Mode: CAM
Set IBM Cognos BI Gateway URI: http://caservername.domain.com:80/ibmcognos
Set IBM Cognos BI Dispatcher URI: http://caservername.domain.com:9300/p2pd/servlet/dispatch
Set IBM Cognos BI Authentication Namespace ID: AD
Click Validate and update.
Click on status tab – wait until CPU usage is below 1%.

Surf to http://pawservername.domain.com
Login as the CAM user you have given ADMIN rights in Proven_Techniques.
This user should now have a ADMINISTRATOR option under its name.

The list will only show name for people who have already try to login.

More Information:
https://www.ibm.com/support/knowledgecenter/en/SSD29G_2.0.0/com.ibm.swg.ba.cognos.tm1_prism_gs.2.0.0.doc/c_paw_administration_top_level.html

Product:
Planning Analytics 2.0.3 (Tm1)
Cognos Analytics 11.0.9 (Cognos BI)
Microsoft Windows 2012 R2 Server

Issue:
When a user is added to a AD group, that then is added to Cognos group, and the Cognos Group is added in the TM1 application as a group. And that group is given access to cubes and dimensions inside TM1. When user login to TM1WEB, he can not see the cubes.
If you look inside TM1 Architect, there is no X for him under the Cognos\group. So Cognos have not understand that he belongs to a AD group.

Solution:
IBM Cognos service run as local system in Windows server.
The Active Directory is setup to allow user to login but not to see other users details, like groups.

ad1

You need to at Namespace – Resource Properties – Binding credentials enter the name and password of a user that have the rights to READ the Active Directory and see what groups a user belongs to.

ad2

When you right click on namespace in cognos configuration and select test, you will first validate the user and there after try to get a list of the groups the user belongs to.

ad3

You need the binding credentials if AD is not configured to allow anonymous bind.

ad4

In TM1 you can add the Cognos group or the AD group direct into TM1 Architect under security – client/groups. Click on Groups and Add New Group. Click on your namespace and search for the group you want to add. When it is added it will look similar, as in the picture above.
If a user is successful to login and belongs to a group, there will be a X under that group for that user. User AD/roger can we see belongs to the Cognos group “TM1 users”.

ad5

Then you have to, inside your TM1 application, give the groups the access they need to the different cubes and dimensions.

More Information:
https://www.ibm.com/support/knowledgecenter/SSEP7J_10.2.2/com.ibm.swg.ba.cognos.inst_cr_winux.10.2.2.doc/t_inst_activedirectoryserver_process.html

https://www.ibm.com/support/knowledgecenter/en/SS9RXT_10.2.2/com.ibm.swg.ba.cognos.tm1_dg_dvlpr.10.2.2.doc/c_controllingaccesstotm1objects_n60007.html

https://www.ibm.com/support/knowledgecenter/en/SS9RXT_10.3.0/com.ibm.swg.ba.cognos.prfmdl_ug.10.3.0.doc/c_prfmdl_setting_up_security.html

Product:
Cognos Analytics 11.0.9
Microsoft Windows 2012 R2 Server

Issue:
Does Cognos BI send a mail when you click on TEST of notifications i Cognos Configuration?

Solution:
Yes, cognos configuration test mail function, will send a mail to the default sender with the default sender as sender.
If you enter a valid mail address at the company as the default sender, and click test, that person will have a mail.

Under Data Access – Notifications set it up like this:
SMTP mail server: smtpserver.company.com:25
Account and password: (can be blank if the SMTP server allow resend of anonymous mail)
Default sender: roger@company.com (use the mail address to a person at the company)
SSL Encryption Enabled: False

More information:
http://www-01.ibm.com/support/docview.wss?uid=swg21445621
http://www-01.ibm.com/support/docview.wss?uid=swg21339824

Product
Planning Analytics 2.0.5
Microsoft Windows 2012 R2 Server

Problem
How to avoid the time out for users of TM1?

Solution

CA11 (Cognos BI) should have the lowest time out, e.g. 3600 seconds as default. This gives
CA Session timeout  < PAW Session Time-Out , should then have SessionTimeout= 60m and ProxyTimeoutSeconds=900 (15 min)
< TM1 Web in \tm1_64\webapps\tm1web\WEB-INF\web.xml at <session-timeout>70</session-timeout> & TM1 Web Applications timeout in Cognos Configuration > TM1 Applications set to 70 for Session timeout (default is 60 min).
< TM1 Database timeouts (tm1s.cfg settings IdleConnectionTimeOutSeconds= 4800, and a Rest-API connection HttpSessionTimeout= 80.)
< IIS timeout settings on the Windows server for CA gateway.

(below text copied from the web)

IIS server:
HTTP Response Headers at the ibmcognos/samples/images level – set common headers to Expire Web Content to After 5 days.
At the Default Web Site – Limits – set Connection time-out (in seconds): to 900.

to1

At Application Pools – ICAPool – Advanced Settings, change Idle Time-out (minutes) to 90.

TM1 SERVER IDLE:
Default: 900 seconds ( 15 minutes )
Location: tm1s.cfg
Setting: IdleConnectionTimeOutSeconds=900
https://www.ibm.com/support/knowledgecenter/en/SSD29G_2.0.0/com.ibm.swg.ba.cognos.tm1_inst.2.0.0.doc/c_idleconnectiontimeoutseconds_tm1.html

TM1 SERVER REST/HTTP:
Default: 20 minutes
Location: tm1s.cfg
Setting: HTTPSessionTimeoutMinutes=20
https://www.ibm.com/support/knowledgecenter/en/SSD29G_2.0.0/com.ibm.swg.ba.cognos.tm1_inst.2.0.0.doc/c_httpsessiontimeoutminutes.html

CAM SECURITY:
Default: 3600 seconds ( 60 minutes )
Location: Cognos Configuration > Security > Authentication
Setting: Inactivity timeout in seconds
https://www.ibm.com/support/knowledgecenter/en/SSEP7J_10.2.0/com.ibm.swg.ba.cognos.ig_mob.10.2.0.doc/t_mig_sec_st_cam.html

TM1 WEB (version 10.2.x):
Default: 20 minutes
Location: D:\Program Files\ibm\cognos\tm1_64\webapps\tm1web\WEB-INF\web.xml
Setting: <session-timeout>20</session-timeout>
https://www.ibm.com/support/knowledgecenter/en/SSD29G_2.0.0/com.ibm.swg.ba.cognos.tm1_prism_gs.2.0.0.doc/t_paw_troubleshooting_web_timeout.html

TM1 WEB (2.0.5 and earlier):Default: 20 minutes
Location: \tm1_64\webapps\tm1web\WEB-INF\web.xml
Setting <session-timeout>20</session-timeout>Setting the TM1 Web session timeout

TM1 WEB (2.0.6 and later):Default: 20 minutes
Location: \tm1_64\webapps\tm1web\WEB-INF\configuration\tm1web_config.xml
Setting <add key="HttpSessionTimeout" value="60" />Setting the TM1 Web session timeout

PMPSVC:
Default: 60 minutes
Location: Cognos Configuration > TM1 Applications
Setting: Session timeout (min)
( this setting updates the \tm1_64\webapps\pmpsvc\WEB-INF\configuration\fpmsvc_config.xml session-timeout )
https://www.ibm.com/support/knowledgecenter/en/SSD29G_2.0.0/com.ibm.swg.ba.cognos.tm1_inst.2.0.0.doc/t_tm1_inst_contrib_c8security_session_timeout_vals.html

PMHUB / PLANNING ANALYTICS FOR EXCEL:
Default: 3600 seconds ( 60 minutes )
Location: http://localhost:9510/pmhub/pm/admin , Configurations > PMHub Session
Setting: MaxInactivityTimeout

PAW (later versions only) on Windows:
Default: 120 seconds, how long paw waits for response on back end systems like tm1 instances.
Location: d:\ibm\paw\config\paw.ps1
Setting: $env:ProxyTimeoutSeconds=”900″

$env:SessionTimeout The amount of time a Planning Analytics Workspace login session can go unused before it is no longer valid. Specify a positive integer followed by a unit of time, which can be hours (h), minutes (m), or seconds (s). For example, specify 30 seconds as 30s. Default is 60 minutes.

Session timeout in TM1 portal
The TM1 Application Web session-timeout can be adjusted in the following file:
D:\Program Files\ibm\cognos\tm1_64\webapps\pmpsvc\WEB-INF\web.xml
Scroll to the bottom of this file and modify the session-timeout to the minutes you desire:
<session-config>
<|– Default to 5 minute session timeouts –>
<session-timeout>5</session-timeout>
</session-config>
Save the files and restart the IBM TM1 Application Server Service.
Session timeout in Cognos Analytics

1. Launch Cognos Configuration and navigate to “Local configuration -> Security -> Authentication”

2. Modify the “Inactivity timeout in seconds” from the default 3600 to your desired time (for example 7200 = 2 hours”).

3. Save the configuration and restart the Cognos service for the changes to take effect

Note:

  • Most web server timeout settings will come into effect long before the 1 hour time limit, but in the even that no such timeouts exist, this setting acts as a backup.
  • Furthermore, if the web server hosts other sites that do not have such a timeout, the Cognos portal can be secured by setting this to a shorted time frame so that only Cognos users are affected
  • The Cognos timeout is set to a value that is less than the timeout set on in-built portal. Make sure you set the value of “Inactivity timeout in seconds” in Cognos configuration to a value which is greater than the Inactivity timeout of your in-house portal.

Error
Unable to successfully log in to TM1Web: Session timed out. Please login again…
Problem(Abstract)
Whenever a user logs into TM1Web the session immediately (falsely) times out.
Cause
The web server has an underscore in the machine name.

More information:

https://www.ironsidegroup.com/2011/06/27/session-timeout-101/

http://www-01.ibm.com/support/docview.wss?uid=swg22002419

3 Ways to Optimize Cognos Timeout Settings


Product:
Planning Analytics 2.0.3
TM1SERVER_APP_version=TM1SERVER_APP-AW64-ML-RTM-11.0.3.119-0
Cognos Analytics 11.0.9 kit_version=11.0.9.17121514
kit_name=IBM Cognos Analytics
Planning Analytics Workspace version 29
Microsoft Windows 2012 R2 Server

Problem:
How make SSO with Planning Analytics for Excel work?

Contact IBM Cognos Support to get the latest instructions on how to setup PAX.

https://www.ibm.com/support/knowledgecenter/en/SSD29G_2.0.0/com.ibm.swg.ba.cognos.tm1_inst.2.0.0.doc/t_tm1_inst_pax_cam.html

Solution:
Setup of Content Store database in SQL server
See here how: https://www.ibm.com/support/knowledgecenter/en/SSEP7J_10.2.2/com.ibm.swg.ba.cognos.qrc_inst.10.2.2.doc/t_qrc_inst_sqlserver_createacontentstore.html

Setup of Cognos Analytics 11
See here how: http://cogknowhow.tm1.dk/archives/1056
Ensure that all servernames in Cognos Configuration uses FQDN, dvs servername.domain.com, this is a must for PAW setup.

The manual for CA11
http://www-01.ibm.com/support/docview.wss?uid=swg27047187

Setup of IIS and Cognos Analytics 11 Gateway
See here how: https://www.ibm.com/support/knowledgecenter/en/SSEP7J_11.0.0/com.ibm.swg.ba.cognos.inst_cr_winux.doc/t_gateway_iis.html

Check that SSO is working, to the Windows Active Directory, by surf to http://caservername.domain.com/ibmcognos/bi

Check the .\webcontent\default.htm and .\webcontent\index.html files. Update the last line starting with <meta http-equiv=”refresh” as shown below, (where <alias name> is the alias used in the CA_IIS_config.bat script file). Add /ibmcognos/ in most cases.

pax3

Important that Windows Authentication is on the /ibmcognos/sso folder in IIS manager and that you may need to add Advance properties singleSignOnOption: IdentityMapping in Cognos Configuration for CA11 at security – authentication – namespace – active directory.

If Cognos Application Firewall is used, then you need to add the TM1 servers here also with port 9510.
Open Cognos Configuration for CA11. Go to Local Configuration – IBM Cognos Application Firewall. Click on Valid domains or hosts to add the PAservername to the list of approved domains.
pax10
Click OK, save the new Configuration and restart the Cognos Analytics services. If above is not done, you get error DPR-ERR-2079 when you logout of TM1WEB.

Download of Planning Analytics 2.0.3
List of files
http://www-01.ibm.com/support/docview.wss?uid=swg24044001

Parts and Platforms Installation category Part number
IBM Planning Analytics 2.0.3 Microsoft Windows Multilingual Required CNN7AML
IBM Planning Analytics Client 32-bit 2.0.3 Microsoft Windows Multilingual Optional CNN7BML
IBM Planning Analytics Client 64-bit 2.0.3 Microsoft Windows Multilingual Optional CNN7CML
IBM Planning Analytics Workspace 2.0.3 Multiplatform Multilingual Optional CNN7DML
IBM Planning Analytics Workspace 2.0.3 Microsoft Windows Server 2016 Multilingual Optional CNN7EML
IBM Cognos TM1 Package Connector for Business Intelligence 10.2.2 Microsoft Windows Multilingual Optional CN1Z7ML
IBM Cognos Analytics Server 11.0.7 Microsoft Windows Multilingual Optional CNK1EML
IBM Cognos Analytics Samples 11.0.7 Microsoft Windows Multilingual Optional CNK1XML
IBM Cognos Framework Manager 11.0.7 Microsoft Windows Multilingual Optional CNK1MML

Download from here
http://www-01.ibm.com/support/docview.wss?uid=swg24044081

Setup of PA 2.0.3
https://www.ibm.com/support/knowledgecenter/SSD29G_2.0.0/com.ibm.swg.ba.cognos.tm1_inst.2.0.0.doc/tm1_inst.pdf

Check that Print Spooler Service is running in your Windows 2012 server.
Install NET Framework 4.6.1 (NDP461-KB3102436-x86-x64-AllOS-ENU.exe) in the Windows server, from here: https://support.microsoft.com/en-us/help/3102436/the–net-framework-4-6-1-offline-installer-for-windows
Install C++ 2010 x64 redistribution (vcredist_x64.exe).

Run the installation from the unziped file in D:\install\pa 2.0.3\tm1_winx64h_2.0.3.119_ml.tar\winx64h\issetup.exe

Go into Cognos Configuration for TM1 (PA2.0.3)
pax1
Under Environment point to the CA11 server.
Set gateway URI to be to the CA11 gateway like this http://caservername.domain.com:80/ibmcognos/bi/v1/disp
Set External Dispatcher URI to http://caservername.domain.com:9300/p2pd/servlet/dispatch
Set Content Manager URI to http://caservername.domain.com:9300/p2pd/servlet

At IBM Cognos TM1 you can tune your WebSphere Liberty Profile;
Set Ping timeout in seconds to a value like 480 seconds.
Set Maximum memory for Websphere Liberty Profile in MB to 4096, if TM1 Web or TM1 Application Web are getting unresponsive and Planning Analytics logs contain some errors java.lang.OutOfMemoryError.

At TM1 Applications leave the Maximum memory in MB at default 768.
Enter TM1 Application Server Gateway URI to http://paservername.domain.com:9510/pmpsvc and External server URI to http://paservername.domain.com:9510.
Consider to change Session timeout to a higher value.
Set TM1 Application Server Dispatcher URI to http://paservername.domain.com:9510/pmpsvc/dispatcher/servlet

At TM1 Clients change the Cognos Insight ping frequency (seconds) to a higher value like 90. See separate page about timeout values http://www-01.ibm.com/support/docview.wss?uid=swg22002419
Skip the Logging, Security, IBM Cognos Application Firewall – they have limited function in this version of PA2.

Start the SDATA and Proven_Techniques example TM1 instances.
We use Proven_Techniques to test SSO, because it have a short TM1S.CFG file, so it is easy to add fields.

Setup of SSO
http://www-01.ibm.com/support/docview.wss?uid=swg22000283

Open C:\Program Files\ibm\cognos\tm1_64\samples\tm1\Proven_Techniques\tm1s.cfg in notepad++.
Add the lines;
IntegratedSecurityMode=2
ServerCAMURI=http://caservername.domain.com:9300/p2pd/servlet/dispatch
ClientCAMURI=http://caservername.domain.com:80/ibmcognos/bi/v1/disp
Save the file and restart the TM1 instance Proven_Techniques.

Exit TM1 Architect.
Erase the tm1p.ini file from here C:\Users\%username%\AppData\Roaming\Applix\tm1 to allow it to get the new values.
Open C:\ProgramData\Applix\TM1\tm1p.ini in notepad and add the values AllowImportCAMClients = T
CognosGatewayURI = http://caservername.domain.com:80/ibmcognos/bi/v1/disp
PAX2
Save the file.

Add users
Start Tm1 Architect, double click on Proven_Techniques to login.
Enter ADMIN as user to login. Right click and select Security – Client/Groups. From menu Clients select Add New Client.
pax4
Click on your namespace name, in out example AD.
pax5
Click on TYPE in top right corner to enter the name of the user.
pax6
Enter the domainnamespace/username. Namespace name is the name you gave it in CA11 cognos configuration. Username most be the users name correct spelled as it is entered in Active Directory.
Click on yellow arrow to add the user, and click on OK.
pax7
Mark the user to be ADMIN, so he can then add other users later.
Click OK and exit TM1 Architect. Now you turn TM1 application to security mode 5,and then this user can login and add additional users in TM1 architect.

Open C:\Program Files\ibm\cognos\tm1_64\samples\tm1\Proven_Techniques\tm1s.cfg in notepad++.
Change the line to 5
IntegratedSecurityMode=5
Save the file and restart the TM1 instance.

Unzip the file C:\Program Files\ibm\cognos\tm1_64\bi_interop\bi_interop.zip to a separate folder like c:\install
There should be two folders
templates
webcontent
Go and update this files with the PA server name and PAW server name;
C:\install\webcontent\planning.html
Update the following to point to the location of the planning service(s)
var planningServices = [“http://paservername.domain.com:9510″,”http://pawservername.domain.com”];
C:\install\webcontent\pmhub.html
Update the following to point to the location of the pmhub service(s)
var pmhubURLs = [“http://paservername:9510″,”http://paservername.domain.com:9510″,”http://pawservername.domain.com”];
C:\install\webcontent\tm1\web\tm1web.html
// Update the following to point to the location of the TM1Web service(s)
var tm1webServices = [“http://paservername.domain.com:8080”, “http://paservername.domain.com:9510”];
Save the files.

The files in C:\install\templates\ps\portal should not be changed.
pax8
pax9
If variables_TM1.xml is not referenced in TM1S.CFG file, then it is most likely not used.

Copy the files and folders in C:\install\webcontent ontop the C:\Program Files\ibm\cognos\analytics\webcontent folder.
Go into C:\Program Files\ibm\cognos\analytics\webcontent\tm1\web\tm1web.html and see that it is the updated file.
Copy the files and folders in C:\install\templates to the C:\Program Files\ibm\cognos\analytics\templates folder.
Replace files as needed.

Copy the C:\Program Files\ibm\cognos\analytics\webcontent\tm1 folder to C:\Program Files\ibm\cognos\analytics\webcontent\bi folder. So you also got a TM1 folder under /webcontent/bi.

Copy the updated files planning.html, pmhub.html, default.htm and index.html from C:\Program Files\ibm\cognos\analytics\webcontent to folder C:\Program Files\ibm\cognos\analytics\webcontent\bi.

Restart IIS with iisreset from a CMD prompt.
Surf to http://paservername.domain.com:9510/tm1web to check that it works.

The first time you start TM1 Application portal, then it will connect to the PA and BI setup. You must surf to http://paservername.domain.com:9510/pmpsvc to set it up.
Enter the host name and the list of TM1 server names should be filled out. Select the proven_techniques from the list.
pax11error
If it looks like above – please try a different version of web browser.
pax11firefox
Above is the correct look, you get in FireFox.
pax12
Press F12 inside Internet Explorer to find the Emulation in use.
Above you see it is using Document Mode 7. The blue text “via intranet compatibility settings” tell us that it is the compatibility settings in internet options on your computer that give the issue. Open it and clear all values out. pax36Test again.
pax13
Change the mode to Edge and it may work for you.
Press OK to save the values to TM1 Application Portal.
pax14
When it is working it should look like above, if you are ADMIN in the Proven_Techniques application you should see all the icons to the right.
This configuration is stored in C:\Program Files\ibm\cognos\tm1_64\webapps\pmpsvc\WEB-INF\configuration\fpmsvc_config.xml.

TM1 Operations Console is configured in a web interface. This UI presents multiple options of configuration, including the references to the Cognos Analytics environment.
Surf to http://paservername.domain.com:9510/pmhub/pm/admin
pax15
Expand configurations and select PMHub Security.
At CAMBIURL enter http://caservername.domain.com:9300/p2pd/servlet/dispatch
At CAMGatewayURL enter http://caservername.domain.com:/80/ibmcognos/bi/v1/disp
The values should save automatically in a few minutes.
pax16
Surf to http://paservername.domain.com:9510/pmhub/pm/opsconsole
to check that it works.

TM1 PMPSVC and PMHUB must be setup before you can get PAW to work.

You must setup PAW before PAX are setup.

Download of PAX from here
http://www-01.ibm.com/support/docview.wss?uid=swg27049597
(cor_win32_2.0.29.10_ml.tar.gz)
Installation of PAX
Install NET Framework 4.6.1 (NDP461-KB3102436-x86-x64-AllOS-ENU.exe) from here: https://support.microsoft.com/en-us/help/3102436/the–net-framework-4-6-1-offline-installer-for-windows

Check that Microsoft Office have the primary interop assemblies (PIAs) for Excel installed.
You can download the PIAredist.exe for Office 2010 from here https://www.microsoft.com/en-us/download/details.aspx?id=3508
In Office setup it is named NET Programmable support.
pax17
PIA – Primary Interop Assemblies (PIA) redistributable package for your version of Microsoft Outlook. The PIA is only needed if you have Outlook 2007 or 2010. PIA is not needed for Office 2013 or Office 365, it is part of the Office installation package as .NET Programmability Support for Office. In all version of Office you also need to make sure the .NET Programmability Support is installed (Control Panel – Program and Features – locate Microsoft Office installation, click on Change and Add/Remove features and expand Outlook, it is the first option you can check the box and install it)

Run the file D:\install\pa 2.0.3\pax\cor_win32_2.0.29.10_ml.tar\win32\issetup.exe
pax18
If your excel is 32 bit then you get this error if you select the wrong file. File cor_winx64h_2.0.29.10_ml.tar is for 64 bit excel.
pax19
Click Next
pax20
Select I Agree and click Next
pax21
Click Next
pax22
Click Next
pax23
Click Next
pax24
Click Next
pax25
Click Finish.

Configure PAX
Start Microsoft Excel to configure IBM Planning Analytics
pax26
Select tab IBM Planning Analytics and click on Options
pax27
Click on IBM
pax28
Select IBM Planning Analytics and click on ADD button
pax29
Enter your servername http://paservername.domain.com:9510   (this will make the SSO to work)

PAX should connect to the PAW (Planning Analytics Workspace) URL, like http://pawservername.domain.com:80/ to get the “set editor” to work.

Enter a friendly name, like PMPSVC Connect.
Click on Test Connection
pax30
Click Save
If the test fails, check that servername is correct spelled, and check that Windows Firewall on the server does not block port 9510.
Click OK
pax31
Now you can in Excel click on Connect – Your Friendly name – proven_techniques to start working with that.
pax32
Now you can drag views from PA2 (TM1) into the spreadsheet.

How to use it http://www.element61.be/en/resource/ibm-planning-analytics-excel-pax
pax33
To get “Replace members” to work you need to install PAW.

If you use a TM1 instance that use securitymode=1 (like example SData) then “set editor” will work.
pax34
Above when you point PAX to the PA server and use a PA (TM1 instance) that uses SSO.

If you in PAX connect to PA (Tm1) server at address http://paservername.domain.com:9510/ or http://paservername.domain.com:9510/pmhub/pm then the settings inside pmhub security will tell pax where to go to authenticate.

pax35

if you in PAX connect to PAW like http://pawservername.domain.com then the setting in paw administration (http://pawservername.domain.com:8888) will point to the authentic provider.

Then the value in C:\Program Files\ibm\cognos\analytics\webcontent\pmhub.html and C:\Program Files\ibm\cognos\analytics\webcontent\tm1\web\tm1web.html, can also be important to make it work.  Note that this files are also in folder C:\Program Files\ibm\cognos\analytics\webcontent\bi.


Setup of PAW
Ensure you use only FQDN to the servers.

First time you start PAW, you point it to a Native TM1 instance with security mode 2. Then you add your CAM users with TM1 Architect. Set this CAM users to be ADMIN in that instance, and they will be the first ADMIN in PAW. Switch that TM1 instance over to security mode 5. Change in IBM Planning Analytics Workspace Administration Tool from TM1 to CAM authentication mode. You must use security mode 1 first, before you can use PAW with security mode 5.

In IBM Planning Analytics Workspace Administration Tool, you should have this settings:

TM1 Admin Server URI: https://paservername.domain.com:5898

TM1 Application Server Gateway URI: http://paservername.domain.com:9510

Authentication Mode: CAM

IBM Cognos BI Gateway URI: http://caservername.domain.com:80/ibmcognos
if you use CA11 then you should set IBM Cognos BI Gateway URI: http://caservername.domain.com:80/ibmcognos/bi/v1/disp

IBM Cognos BI Dispatcher URI: http://caservername.domain.com:9300/p2pd/servlet/dispatch
if you use CA11 then you should set IBM Cognos BI Dispatcher URI: http://caservername.domain.com:9300/bi/v1/disp

IBM Cognos BI Authentication Namespace ID: AD (the same namespace id you have entered in Cognos Configuration for CA(BI)).

Click Validate and Update.

If above is correct set, then PAX should work pointing to http://pawservername.domain.com

Please note that above setup is for PAW version 29. Other versions of PAW may require other configuration.

See here how to set PAW up http://cogknowhow.tm1.dk/archives/1090

More Information:

https://www.ibm.com/communities/analytics/cognos-analytics-blog/cognosanalytics-and-planninganalytics-integration-walkthrough-part-3/
http://www-01.ibm.com/support/docview.wss?uid=swg22000283
http://www-01.ibm.com/support/docview.wss?uid=swg21958925
https://msdn.microsoft.com/en-us/library/kh3965hw.aspx
https://www.ibm.com/support/knowledgecenter/en/SSD29G_2.0.0/com.ibm.swg.ba.cognos.tm1_inst.2.0.0.doc/c_ig_cor_overview.html

#Cognos Analytics and #Planning Analytics Integration – Walkthrough – Part 2

Product:
Cognos BI 10.2.2 fix pack 7
Microsoft Windows 2012 R2 Server

Problem:
When user in IE surf to Cognos Connection to login they get a AAA-SYS-0001 error.

Error Message:
AAA-SYS-0001 : An internal error occurred.
java.lang.RuntimeException: A visa already exists for this namespace.java.lang.RuntimeException: A visa already exists for this namespace.
at com.ibm.cognos.camaaa.internal.auth.PassportImpl.add(PassportImpl.java:102)
at com.ibm.cognos.camaaa.internal.auth.handler.CreateApplicationLogonSession.handleMessage(CreateApplicationLogonSession.java:252)
at com.ibm.cognos.camaaa.internal.common.handler.HandlerWrapper.handleMessage(HandlerWrapper.java:172)
at com.ibm.cognos.camaaa.internal.auth.handler.AuthHandlerChain.invokeHandlersForward(AuthHandlerChain.java:79)…

Suggested Solution:
Inside Internet Explorer, clear the cache and try again.
Press CTRL+SHIFT+DELETE to bring up the “delete browsing history” dialog.
Press Delete.
Restart Internet Explorer and try again.

Product:
Cognos BI 10.2.2 fix pack 7
Microsoft Windows 2012 R2 Server

Problem:
Slow or no login at all to a new namespace in Cognos Connection. The user surf to http://servername/cognos8 and then waits.
The other namespace setup in Cognos BI works fine.

Troubleshoot:
Instead of set the domain name in Cognos Configuration Namespace Host and port, try with the IP to the closest Microsoft Windows Domain Controller in that domain. Change to 10.0.0.78:389 if your Domain Controller uses that IP address.

You can test a change in namespace host without saving Cognos Configuration, if you right click the namespace name (under authentication in left panel) and select test, Cognos will do a authentication test to that DC on the lower IP layer and not use the Cognos dispatcher or Cognos Gateway.
When the dialog comes up for username and password, enter the user name as DOMAIN\username.
The details will show that Cognos first checks that the user exist, and there after ask for a list of all AD groups that user belongs to.
If this test take long time, the login for the Cognos user at the Cognos Gateway (iis) will take at least the same time or more.

Close Cognos Configuration without save, and your test values is gone, and your are back to the previous setup in Cognos.

The result from a test in Cognos Configuration;
[‘AD’]
User account properties:
defaultName: roger
userName: roger
givenName: roger
surname:
email:
businessPhone:
mobilePhone:
homePhone:
faxPhone:
pagerPhone:
postalAddress:

Group membership:
Domain Users

Tenant ID:
No associated tenant ID.

Tenant bounding set:
No associated tenant bounding set.

To see if you have network contact with your DC, start a PowerShell prompt on your Content Manager server.
Enter this command: tnc  -computername  domaincontrollerservername.domain.com  -port  389

The result should be like this:
ComputerName : domaincontrollerservername
RemoteAddress : 10.0.0.78
RemotePort : 389
InterfaceAlias : Ethernet0
SourceAddress : 192.168.254.11
PingSucceeded : True
PingReplyDetails (RTT) : 4 ms
TcpTestSucceeded : True

If you get a PingSucceeded : False
then you should ask your NETWORK team to check routers and firewalls and ACL tables between the networks.

You can download a network monitor to get more information on what goes on;
Network Monitor
https://technet.microsoft.com/en-us/library/cc938655.aspx

Active Directory Explorer (AD Explorer)
https://docs.microsoft.com/en-us/sysinternals/downloads/adexplorer

Cognos Content Manager will bind to the DC schema to obtain the list of all “known” DC’s based on the AD Structure.

More information:
UDP Port 88 for Kerberos authentication
UDP and TCP Port 135 for domain controllers-to-domain controller and client to domain controller operations.
TCP Port 139 and UDP 138 for File Replication Service between domain controllers.
UDP Port 389 for LDAP to handle normal queries from client computers to the domain controllers.
TCP and UDP Port 445 for File Replication Service
TCP and UDP Port 464 for Kerberos Password Change
TCP Port 3268 and 3269 for Global Catalog from client to domain controller.
TCP and UDP Port 53 for DNS from client to domain controller and domain controller to domain controller.
http://support.microsoft.com/kb/832017#4

https://docs.microsoft.com/en-us/previous-versions/windows/it-pro/windows-server-2008-R2-and-2008/dd772723(v=ws.10)

Product:
Cognos Tm1 10.2.2 Fix pack 7 (10.2.5270.108)
Microsoft Windows 2008 R2 server

Issue:
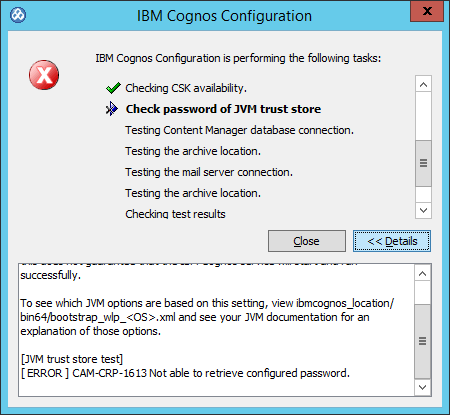
When click save in TM1 Cognos Configuration you get a error message that you can not save, but can save in plain text.
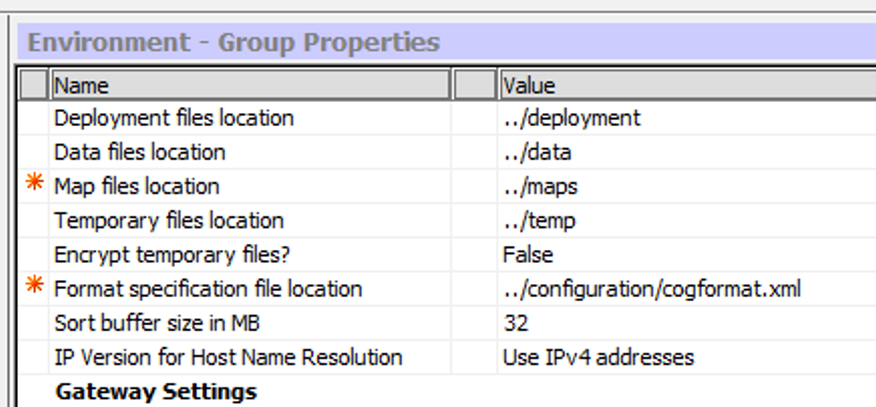
The Cognos TM1 Application Web is using the value Environment – group properties – Gateway uri as default values in http://localhost:9510/pmpsvc setup.
If localhost is used in Cognos Configuration, the BI services (if it exist) on the local server is used as key for the creation of the crypto files.

Error details:
[Cryptography]
[ ERROR ] CAM-CRP-1132 An error occurred while attempting to request a certificate from the Certificate Authority service. Unable to connect to the Certificate Authority service. Ensure that the Content Manager computer is configured and that the IBM Cognos services on it are currently running. The HTTP result code ‘500’ was returned from the server.

but first you may get
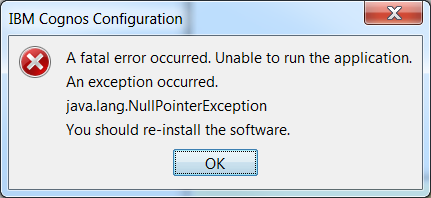
:java.lang.nullpointerexception
when you try to save Cognos Configuration.

Possible workaround:
In Cognos Configuration, select Local Configuration, click the and then click Add.

Type StandaloneCertificateAuthority in the Name box.
Type True in the Value box.
Click OK.

This will make the TM1 cognos configuration not use the BI values to create the crypto keys.

Check also that you have not installed a fix pack over a TM1 installation that uses custom key certs.
Check that you have access to the Cognos BI server by in IE surf to http://cognosbiservername:80/ibmcognos/cgi-bin/cognosisapi.dll
Check that the Cognos Controller FAP or Cognos TM1 admin services is stopped when you update Cognos Configuration.
Check that you do not have doublets of the Cognos TM1 admin services.

More information:
http://www-01.ibm.com/support/docview.wss?uid=swg21655725&myns=swgimgmt&mynp=OCSS9RXT&mync=R
http://www-01.ibm.com/support/docview.wss?uid=swg21902547
https://www.ibm.com/support/knowledgecenter/en/SS9RXT_10.2.2/com.ibm.swg.ba.cognos.tm1_inst.10.2.2.3.doc/t_config_tm1_cont.html

Product:
Cognos Analytics 11.0.8
Microsoft Windows 2012 R2 Server
Issue:
New installation of Cognos Analytics 11, but when you surf to the http://servername/ibmcognos you get a error like “Error Message: 403.6 – Forbidden” or “This page can’t be displayed”.
You have tried to reinstall Cognos Analytics gateway server parts, that did not help.
If you surf direct to the dispatcher at http://IBM_Cognos_Analytics_server_host_name:9300/bi/v1/disp it works fine.

Please note that CA11 needs to use http://servername/ibmcognos/bi/ and not http://servername/IBMCOGNOS/bi with capital letters, that may not work.

If you get a blank page – click inside it and wait some more.

Solution:
The IIS setup have somehow become corrupt. Redo the IIS setup.
Inside IIS manager – mark cgi-bin and select delete.
Mark SSO under IBMCOGNOS and select delete.
Mark IBMCOGNOS (and COGNOS8 if it exist) and select delete.
Exit IIS manager and stop iis.
Erase web.config files from folders like c:\program files\ibm\cognos\analytics\webcontent\web.config file and c:\program files\ibm\cognos\analytics\webcontent\bi\.

If you run more than one IBM® Cognos® Analytics instances of the same product, on one computer, you must create a separate application pool for each instance and then associate the aliases for that gateway instance to each application pool.

Go into control panel – administrative tools – server manager. Select the local server.
In the Add Roles and Features Wizard, click Role-based or feature-based installation, and click Next.
Select Web Server (IIS), ensure that Common HTTP Features is selected including WebDAV Publishing, Performance Static Content Compression, Under Security select Request Filtering and Windows Authentication, and click Next until you get to the Role Services section of the wizard.
Expand Application Development.
Select CGI and ISAPI Extensions, ISAPI filters and click Next.
Select IIS Management Console, IIS Management Scripts and Tools, Management Service.
Features as NET framework 4.6 and ASP.NET 4.6 should be selected.
Click Install.

Download the IIS add ons needed for Cognos Reverse proxy. Install them in below order;
https://blogs.technet.microsoft.com/erezs_iis_blog/2013/11/27/installing-arr-manually-without-webpi/
1. Stop IIS first by typing net stop was /y and net stop wmsvc /y on an elevated command-line window

2. Download and install the Web Farm Framework module. It is currently available in version 1.1

3. Download and install the External cache module. It is currently available in version 1.0

4. Download and install the URL Rewrite module. It is currently available in version 2.0

5. Download and install ARR itself. It is currently available in version 3.0

6. Start the IIS services back by enter IISRESET (or, simply reboot your server).

Download the Cognos script to configure IIS. (CA_IIS_Config_v1.09(11.02.17).zip)
http://www-01.ibm.com/support/docview.wss?uid=swg22000097
1. Download the CA_IIS_config.zip file to your Cognos Analytics Gateway Server.
2. Extract the CA_IIS_config.bat file to a folder.
3. Open CA_IIS_config.bat in a text editor like Notepad++. https://notepad-plus-plus.org/download/v7.5.3.html
4. The variables, that are to be modified, are located at the top of the file. Edit the BAT file in Notepad++ before you run it.
Run the BAT file as a local administrator.

Then you need to Adjust request size limits.  Go into IIS Manager.

Select the bi directory under the ibmcognos application created earlier.
Double-click Request Filtering.
Click Edit Feature Settings… from the right-hand panel.
Set Maximum URL length (bytes) to 8192.
Set Maximum query string (bytes) to 8192.
Click OK.  (The Cognos Script have already change the values for /bi/ folder)

Configure IIS to allow to pass through the custom 441 errors that are used for recoverable exceptions from CAM. Otherwise, IIS can block these errors, and the customer sees the “Invalid Logon Response” error when trying to log on.

Click the ibmcognos virtual directory.
In the Home view, Management section, double-click Configuration Editor.
In the Section drop-down list, expand system.webServer, and select httpErrors.
Set the existingResponse property to PassThrough. It may already be set correct by the Cognos script.
Apply the configuration change.

If you configured the SSO application in previous steps, enable Windows Authentication.

Select the SSO application folder in IIS manager. For Microsoft Edge browser, select the ibmcognos application folder.
Double-click Authentication. Disable Anonymous Authentication, and enable Windows Authentication.

If you do not want to use Kerberos, at the namespace, add Advance properties singleSignOnOption: IdentityMapping

Cognos Analytics should now be available at: http://iis-host/ibmcognos.

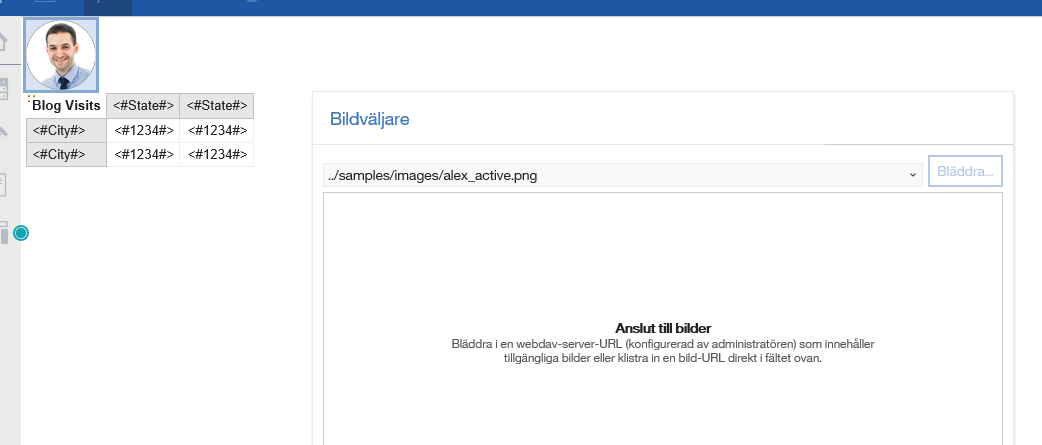
WebDav setup

Note: webdav is not working in 11.0.8 – update to a later version of CA 11.
http://www-01.ibm.com/support/docview.wss?uid=swg1PI90123

Under Connections, expand your web server, Sites, and select your website. For example, select Default Web Site.
Double-click WebDAV Authoring.
Click Enable WebDAV.
Click WebDAV Settings.
If you have anonymous access enabled, select True for Allow Anonymous Property Queries, and click Apply.
Select the directory or virtual directory /ibmcognos/bi/samples/images/ to which you want to allow WebDAV access.
Double-click WebDAV Authoring.
Click Add Authoring Rule, and add the appropriate rules for your environment. Like Allow access to: All Content, User: All users, Access: Read.

For example, if you installed the samples and you want to use the default path, under the ibmcognos virtual directory, expand bi/samples, and select images, and add an authoring rule for the image files in that folder.
In Windows Explorer right-click the directory or virtual directory you added authoring rules to, in above it can be /cognos/analytics/webcontent/bi/samples/images, and click Properties.
Click Security tab, and add the appropriate permissions. For example,  add permissions for the anonymous user access.
You may need to setup webdav for other images folders on the IIS gateway server if they are used in the reports.

http://www-01.ibm.com/support/docview.wss?uid=swg22002398&aid=1

Best is to keep all pictures in the same folder /ibmcognos/bi/samples/images/ on all the Cognos BI servers.

Change the Gateway URI in IBM Cognos Configuration to match the new IIS configuration, i.e. http(s)://web-host:80/ibmcognos/bi/v1/disp
Access the Gateway through http(s)://web-host:80/ibmcognos/bi/

Create a redirect file and place in the C:\inetpub\wwwroot as default.htm
<html>
<head>
<title>Cognos Connection</title>
<meta http-equiv=”refresh” content=”0 ;url=http://cognosserver.domain.com/ibmcognos”>
</head>
</html>


More information:
https://www.ibm.com/support/knowledgecenter/en/SSEP7J_11.0.0/com.ibm.swg.ba.cognos.inst_cr_winux.doc/t_gateway_iis.html
https://www.ibm.com/support/knowledgecenter/SSEP7J_11.0.0/com.ibm.swg.ba.cognos.inst_cr_winux.doc/t_enablewebdavoniis.html
https://www.ibm.com/support/knowledgecenter/en/SSEP7J_11.0.0/com.ibm.swg.ba.cognos.inst_cr_winux.doc/c_inst_crit_config.html

Samples Landing Page