Product:
Cognos Analytics 11.0.13
Microsoft Windows 2012 server

Problem:
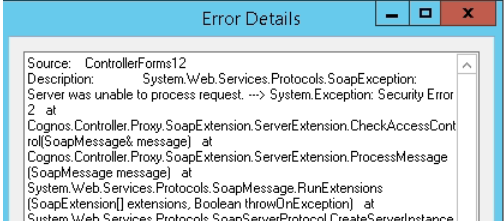
Problem to login in Cognos Controller after TLS 1.2 demand on the CA11 server is implemented.

Error:
The underlying connection was closed: An unexpected error occurred on a send.
at System.Web.Services.Protocols.WebClientProtocol.GetWebResponse(WebRequest request)
at System.Web.Services.Protocols.HttpWebClientProtocol.GetWebResponse(WebRequest request)
at System.Web.Services.Protocols.SoapHttpClientProtocol.Invoke(String methodName, Object[] parameters)
at Cognos.Controller.ControllerSoapHttpClientProtocol.Invoke(String methodname, Object[] parameters)
at Cognos.Controller.Proxy.Light.WSLight.CheckServerConnection(String sGuid, String sUser)
at Cognos.Controller.Direct.ServerInfoD.CheckServerConnection()
at CCR.AppContext.CheckConnectionToServer()

Solution:
On cognos controller client computer
start a command prompt as administrator
Run below commands (to update the registry)

REG ADD HKLM\SOFTWARE\Microsoft\.NETFramework\v4.0.30319 /v SchUseStrongCrypto /t REG_DWORD /d 1

REG ADD HKLM\SOFTWARE\WOW6432Node\Microsoft\.NETFramework\v4.0.30319 /v SchUseStrongCrypto /t REG_DWORD /d 1

More Information:
https://www.ibm.com/support/pages/how-configure-force-controller-use-tls-12
https://www.ibm.com/support/pages/error-occurred-while-trying-object-reference-not-set-repnetgetuserinfo-error-launching-controller-client-caused-tls-1011-disabled-ca-server

Product:
Cognos Controller 10.4.2
Cognos Analytics 11.0.13
Microsoft Windows 2012 server

Problem:
On a CA installation where the IIS web server is using HTTPS for IBMCOGNOS.
How update the certificate on the IIS server when it expire after some years.

Suggested Solution:
Get a new certificate from the company’s internal Certificate Authority.
You get a pfx file and a cer.pem file.
You also get a password to the pfx file – save it in notepad.
Save them in a separate folder on the server (c:\temp\cert)

Go to the IIS Manager
Select the server name in the tree
Click on Server Certificates icon

Click on Import link at the right
Click on … to find the pfx file.
Enter the password and press OK

Click on Default web site
Click on Bindings

Select HTTPS
Click Edit

Click on drop down and select the new cert
Click OK

Start your Cognos Controller client and check that you can login.

You may also need to update the CACERTS file in the cognos controller client installation to get the Java menus to work (like maintain – jobs – define).

Export the certificate from IIS with use of IE:
Surf to your IBMCOGNOS site with https
Click on the lock icon in IE toolbar and click “View certificates”
Click on Details tab

Click Copy to file button

Click next

Select Base-64 encoded X.509 and click next

Enter path and name and click next

Click finish
Repeat above for the Root certificate and any intermediate certificates.

You must first view the certificate before you export it from the details tab.

Import the cert with the IKEYMAN:
If you have Cognos Analytic on the same server as you have installed Cognos Controller client, you can use it to import the cer files to the cacert file.
Before change the cacerts file make a backup of the file to other folder.

Go to C:\Program Files\ibm\cognos\analytics\jre\bin
Right click ikeyman.exe and select run as administrator

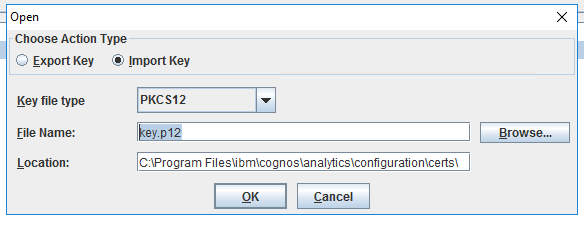
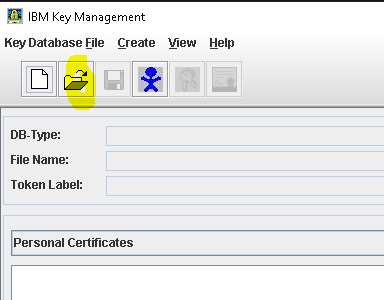
click open and select your cacerts file in folder C:\Program Files\ibm\IBM Cognos Controller Local Client\Integration\jre\lib\security

Click ok

Enter password changeit
Click ok

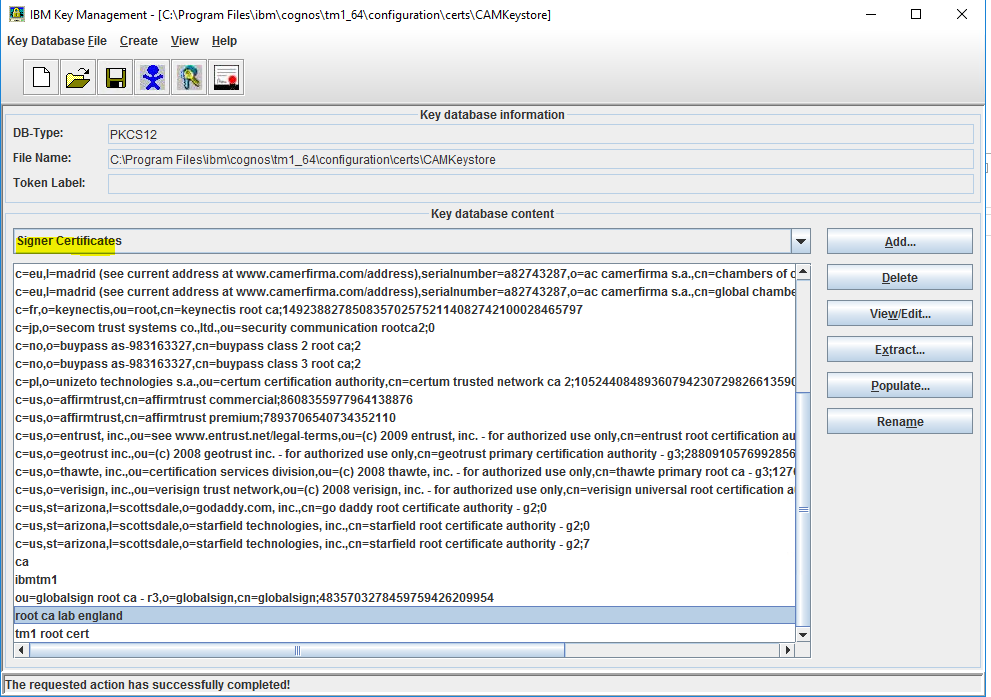
Click drop down list and select Signer Certificates

Click on Add button

Click on browse and select your cer file.
Click OK

Enter a name e.g. Cognos

Repeat the ADD steps for Root and other company needed certificates.

Changes are save direct, so only select exit to end the program.

The update cacerts file can be made part of any Cognos Controller client installation package the company uses (so not every user need to do this) .

Or import the cert with the command line, if you do not have CA11 on the server:
“C:\Program Files\ibm\IBM Cognos Controller Local Client\Integration\jre\bin\keytool” -import -alias CognosController -file “C:\temp\cert\CognosController.cer” -keystore “C:\Program Files\ibm\IBM Cognos Controller Local Client\Integration\jre\lib\security\cacerts”

You should manage with only have the Company Root certificate and any intermediated in the file;

“C:\Program Files\ibm\IBM Cognos Controller Local Client\Integration\jre\bin\keytool” -import -alias root1 -file “C:\temp\cert\root1.cer” -keystore “C:\Program Files\ibm\IBM Cognos Controller Local Client\Integration\jre\lib\security\cacerts”

“C:\Program Files\ibm\IBM Cognos Controller Local Client\Integration\jre\bin\keytool” -import -alias intermediated2 -file “C:\temp\cert\intermediated2.cer” -keystore “C:\Program Files\ibm\IBM Cognos Controller Local Client\Integration\jre\lib\security\cacerts”

More Information:
To add certificates to the Trusted Root Certification Authorities store for a local computer

Click Start, click Start Search, type mmc, and then press ENTER.

On the File menu, click Add/Remove Snap-in.

Under Available snap-ins, click Certificates,and then click Add.

Under This snap-in will always manage certificates for, click Computer account, and then click Next.

Click Local computer, and click Finish.

If you have no more snap-ins to add to the console, click OK.

In the console tree, double-click Certificates.

Right-click the Trusted Root Certification Authorities store.

Click Import to import the certificates and follow the steps in the Certificate Import Wizard.

https://docs.microsoft.com/en-us/previous-versions/windows/it-pro/windows-server-2008-R2-and-2008/cc754841(v=ws.11)?redirectedfrom=MSDN#BKMK_addlocal

https://www.ibm.com/support/pages/node/372873

https://www.ibm.com/support/pages/node/563063

https://www.ibm.com/support/pages/how-configure-controller-web-use-ssl-https

https://en.wikipedia.org/wiki/Root_certificate
https://www.thesslstore.com/blog/root-certificates-intermediate/
https://comodosslstore.com/resources/what-is-a-root-ca-certificate-and-how-do-i-download-it/

Product:
Cognos Controller 10.4.2
Cognos Analytics 11.0.13
Microsoft Windows 2012 server

Problem:
When run a standard report you get a error inside Cognos Controller only on a new database.

Error:
RQP-DEF-0177 An error occurred while performing operation
‘sqlPrepareWithOptions’ status=’-56′.
UDA-SQL-0115 inapproproeate SQL request
UDA-SQL-0564
invalid column name ‘lookupwebgrpename’

Possible Solution:
That you have setup the data source manually in Cognos Connection and are missing information.

1 Click Manage and go to the IBM Cognos Analytics Administration Console
2 Click on the Configuration Tab
3 Click on data source name and then on more… icon
4 Click Set properties
5 Click on Connection Tab
6 Click the pencil icon for Edit the connection string
7 Check that the sever name to database is correct.
8 If database name is missing – enter the correct database name.


9 Click OK
10 Click OK
11 Click Test the connection icon, far to the right.
12 Click Test
13 Click Close
14 Click Close
15 Click OK
16 Click OK

More information:
https://www.ibm.com/support/pages/error-rqp-def-0177-sqlpreparewithoptions-status-56-when-running-some-standard-reports
https://www.ibm.com/support/pages/error-rqp-def-0326-user-defined-sql-not-permitted-user-who-has-identity-when-running-controller-standard-reports
https://www.ibm.com/support/pages/how-manually-create-cognos-data-source-use-controller-standard-reports

Product:
Cognos Analytics 11.1.3
Planning Analytics Tm1 Perspective

Problem:
After adding more namespaces in Cognos Analytics to be able to select from two domains (active directory) the user of TM1 Perspective get a blank drop down page in the CA11 login.
Only a few users are affected, user with different version of Microsoft Excel got it working.

Suggested Solution:
On the client computer or on the citrix server where TM1 Perspective Excel plug in is installed and used, take a backup of the users windows registry.

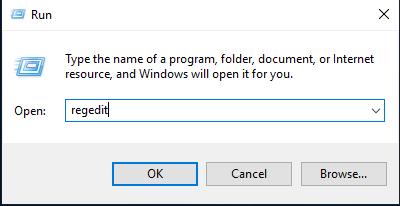
Enter REGEDIT in the START search field.
From inside REGEDIT expand HKEY_LOCAL_MACHINE\SOFTWARE\Microsoft\Internet Explorer\MAIN\FeatureControl and right click and select export;

Save the file, and repeat the backup for the other branches listed below.

Then apply this values in REGEDIT to solve the issue.

[HKEY_LOCAL_MACHINE\SOFTWARE\Microsoft\Internet Explorer\MAIN\FeatureControl\FEATURE_BROWSER_EMULATION]
“Excel.exe”=dword:00002af8
[HKEY_LOCAL_MACHINE\SOFTWARE\Wow6432Node\Microsoft\InternetExplorer\MAIN\FeatureControl\FEATURE_BROWSER_EMULATION]
“Excel.exe”=dword:00002af8
[HKEY_LOCAL_MACHINE\SOFTWARE\Microsoft\Internet Explorer\MAIN\FeatureControl\FEATURE_USE_WINDOWEDSELECTCONTROL]
“Excel.exe”=dword:00000000
[HKEY_LOCAL_MACHINE\SOFTWARE\Wow6432Node\Microsoft\InternetExplorer\MAIN\FeatureControl\FEATURE_USE_WINDOWEDSELECTCONTROL]
“Excel.exe”=dword:00000000

More Information:
https://www.ibm.com/support/pages/namespace-drop-down-appears-blank-cognos-analyticscognos-bi-login-page-while-attempting-login-planning-analytics-cam-authenticated-server-perspectives
https://www.ibm.com/support/pages/custom-sign-view-could-not-be-found

Product:
Planning Analytics 2.0.91
Linux Centos

Problem:
How install PA to Linux server?
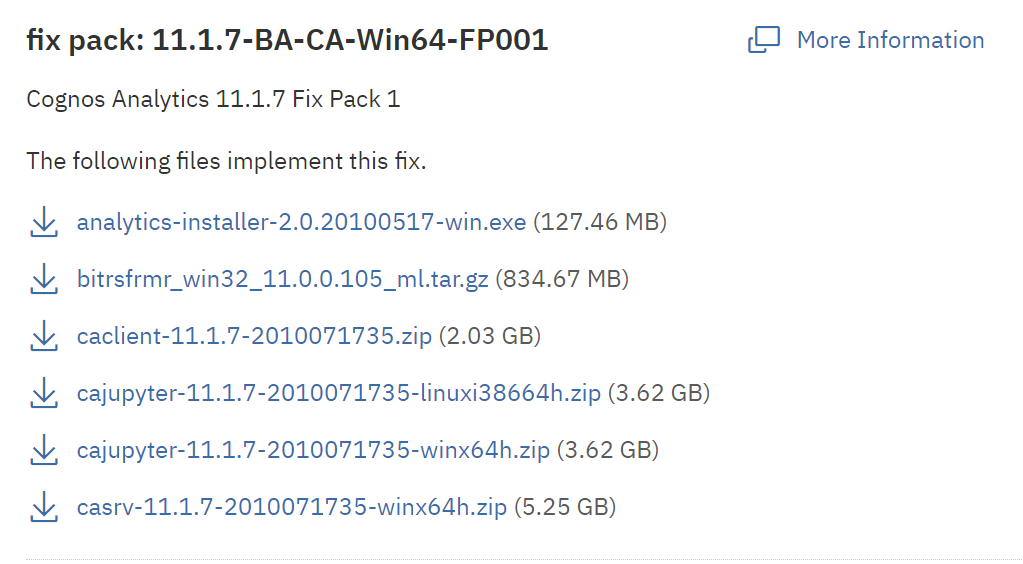
Download latest version from IBM;
https://www.ibm.com/support/pages/ibm-planning-analytics-20-fix-lists

Linux commands:
https://ss64.com/bash/

Solution:
Install the Linux distribution with a GUI.
https://getfedora.org/workstation/download/
https://wiki.centos.org/Download

Setup a static IP address on Linux, so it is easy to connect to it with PUTTY and WINSCP.
https://winscp.net/eng/index.php

(Test this steps in you lab first, they may differ because of your flavor of Linux)

Install simple editor:
yum install nano

Install X11 windows system (if needed) on linux:
yum install xorg-x11-server-Xorg xorg-x11-xauth xorg-x11-apps -y
https://www.osradar.com/configure-x11-forwarding-in-centos-rhel-6-7-8-and-fedora-28-29/
In /etc/ssh/sshd_config file set X11Forwarding=yes
Restart the SSH service with command:
systemctl restart sshd

To use X11 you must install Xming on your Windows laptop:
https://sourceforge.net/projects/xming/

Open file C:\Program Files (x86)\Xming\X0.hosts in notepad++
add the IP address of the linux system you want to work with

Restart the Xming program on your Windows laptop.

Install C++ libraries:
yum -y install libstdc++ libstdc++.i686 motif libXm.so.4 libXtst

Create a installations folder:
mkdir -p /data/installationsmedia

Copy the file tm1_linuxi38664h_2.0.91.41_ml.tar.gz to the linux server with WINSCP.

Change to root user:
su –

Go to the folder where media are:
cd /data/installationsmedia

Unzip the file:
tar -xf tm1_linuxi38664h_2.0.91.41_ml.tar.gz

Go to the linuxi38664h folder:
cd linuxi38664hprof

Check that you have execute permissions on the files:
ls -al

Run the installation:
./issetup


Click next for the installation.

select production if it is a production server.


All components are selected above.
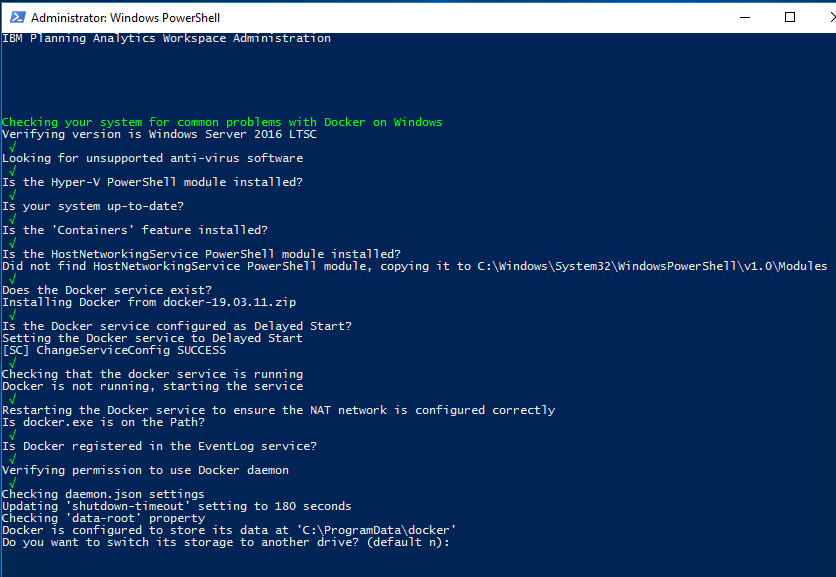
Create a user:
groupadd cognosusers
useradd cognos -g cognosusers -m
passwd cognos

Install java:
Download from here https://developer.ibm.com/javasdk/downloads/sdk8/
Copy file ibm-java-x86_64-jre-8.0-6.10.bin to linux server.
Go to folder where the media is. Copy to data folder with command:
cp ibm-java-x86_64-jre-8.0-6.10.bin /data/
Go to data folder:
cd /data
Change to be able to execute:
chmod 777 ibm-java-x86_64-jre-8.0-6.10.bin
Run install of java with command:
./ibm-java-x86_64-jre-8.0-6.10.bin

Click OK to English as language

Select “i accept..” and click Next

Click Next
Click Next

Click Install

Click Done

Create environment values (only if they are needed):
JAVA_HOME /opt/ibm/java-x86_64-80/jre
LD_LIBRARY_PATH /opt/ibm/cognos/tm1_64/webapps/pmpsvc/WEB-INF/bin64/

Do not edit the /etc/bashrc file, instead create a custom.sh shell script in folder /etc/profile.d/ to make custom changes to your environment for all users

Go to folder /etc/profile.d/ and create a new cognos.sh file to store your variables.

export JAVA_HOME=/opt/ibm/java-x86_64-80/jre
export LD_LIBRARY_PATH=”/opt/ibm/cognos/tm1_64/webapps/pmpsvc/WEB-INF/bin64:$LD_LIBRARY_PATH”
export PATH=”$PATH:/opt/ibm/cognos/tm1_64/bin64″
export DISPLAY=’192.168.1.11:0.0′

You must set the IP of the windows laptop you run Xming on to the export DISPLAY command.

Enter . ./cognos.sh to activate the settings above. In some Linux installations you do not need above values – as they are already configured, then it can be enough to only type JAVA_HOME=/opt/ibm/java-x86_64-80/jre before your command.

Enter env to check the variables values.

Change the file block value:
sysctl -w vm.max_map_count=‭1310600‬

Create a folder for the tm1 applications (tm1 do not work well with long paths):
mkdir -p /data/pa

Change users to have access to the folders:
chmod -R 777  /data/pa
chmod -R 777  /opt/ibm/cognos

Change owner to the cognos account:
chown –R  cognos:cognosusers /data/pa/
chown –R  cognos:cognosusers /opt/ibm/cognos/


To start Cognos Configuration:
LD_LIBRARY_PATH=/opt/ibm/cognos/tm1_64/webapps/pmpsvc/WEB-INF/bin64/ JAVA_HOME=/opt/ibm/java-x86_64-80/jre /opt/ibm/cognos/tm1_64/bin64/cogconfig.sh

Set the memory for the TM1WEB to higher number if TM1WEB is used.

Use only FQDN instead of localhost in TM1 Application.

Only to be sure add the company domain and all tm1 servers to the valid domain list for the Cognos Application Firewall.

Do all configuration and press save icon.

Start the service to see that they do not give errors.

Stop the service in cognos configuration and exit cognos configuration.

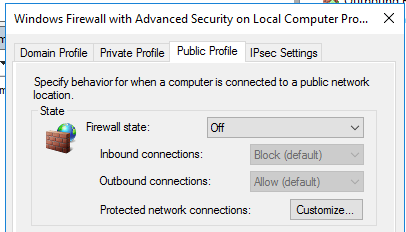
Open ports in firewall for TM1 on linux:

firewall-cmd --zone=public --add-port=5495/tcp --permanent 
firewall-cmd --zone=public --add-port=5498/tcp --permanent 
firewall-cmd --zone=public --add-port=12345/tcp --permanent 
firewall-cmd --zone=public --add-port=53333/tcp --permanent
firewall-cmd --zone=public --add-port=5895/tcp --permanent
firewall-cmd --zone=public --add-port=5898/tcp --permanent
firewall-cmd --zone=public --add-port=9510/tcp --permanent
firewall-cmd --reload
firewall-cmd --list-ports

(you may need to open more ports in the Linux firewall for your TM1 applications)

Update the values for TM1WEB if used, in file (nano /opt/ibm/cognos/tm1_64/webapps/tm1web/web-inf/configuration/tm1web_config.xml)

<!– CubeViewerRowPageSize: Number of rows to fetch in a page of cubeviewer –>
<add key=”CubeViewerRowPageSize” value=”200” />

<!– CubeViewerColumnPageSize: Number of columns to fetch in a page of cubeviewer –>
<add key=”CubeViewerColumnPageSize” value=”100” />

Use the scripts to start and stop the PA services.


Create unit service files with the configuration to prepare for systemd services, like the tm1 admin service.
nano /usr/lib/systemd/system/tm1adminsrv.service

That have this content:
[Unit]
Description=Cognos TM1 – tm1 admin server.service
After=network.target auditd.service
Documentation=https://www.ibm.com

[Service]
Type=forking
Environment=”LD_LIBRARY_PATH=/opt/ibm/cognos/tm1_64/bin64:/usr/lib:/lib:$LD_LIBRARY_PATH”
Environment=”JAVA_HOME=/opt/ibm/java-x86_64-80/jre”
Environment=”TM1_PATH=/opt/ibm/cognos/tm1_64/bin64″
ExecStart=/opt/ibm/cognos/tm1_64/bin64/startup_tm1admsrv.sh
ExecStop=kill `ps -e | grep “tm1admsrv.exe” | awk ‘{print $1}’`

# the user must have full access to the folders
User=cognos
WorkingDirectory=/opt/ibm/cognos/tm1_64

# Kill root process
KillMode=process

# Wait up to 30 seconds for service to start/stop
TimeoutStartSec=120
TimeoutStopSec=60

# Remove process, file, thread limits
#
LimitNPROC=infinity
LimitNOFILE=infinity
TasksMax=infinity

# Restart on non-successful exits.
Restart=on-failure

# Don’t restart if we’ve restarted more than 3 times in 2 minutes.
StartLimitInterval=120
StartLimitBurst=3

[Install]
WantedBy=multi-user.target


To start the service enter (use this first to test and ensure your unit file works):

systemctl start tm1adminsrv.service

To make the service start after a reboot of linux enter:

systemctl enable tm1adminsrv.service

After unit files are created you can stop/start the tm1 services with these commands:

  • Start service: systemctl start [Name of Service]
  • Stop service: systemctl stop [Name of Service]
  • Restart service: systemctl restart [Name of Service]
  • Status of service: systemctl status [Name of Service]

Create the file for TM1 Application web
nano /usr/lib/systemd/system/tm1app.service

That have this content:
[Unit]
Description=Cognos TM1 – Application server
After=network.target auditd.service
Documentation=https://www.ibm.com

[Service]
Type=forking
Environment=”JAVA_HOME=/opt/ibm/java-x86_64-80/jre”
# we use the script to start and stop
ExecStart=/opt/ibm/cognos/tm1_64/bin64/startwlp.sh
ExecStop=/opt/ibm/cognos/tm1_64/bin64/stopwlp.sh
User=cognos
WorkingDirectory=/opt/ibm/cognos/tm1_64/bin64

# Kill root process
# KillMode=process

# Wait up to 30 seconds for service to start/stop
TimeoutStartSec=120
TimeoutStopSec=60

# Remove process, file, thread limits
LimitNPROC=infinity
LimitNOFILE=infinity
TasksMax=infinity

# Restart on non-successful exits.
# Restart=on-failure

# Don’t restart if we’ve restarted more than 3 times in 2 minutes.
# StartLimitInterval=120
# StartLimitBurst=3

[Install]
WantedBy=multi-user.target


Create the file for TM1 planning sample (update for your TM1 instance)
nano /usr/lib/systemd/system/tm1plansamp.service

That have this content:
[Unit]
Description=Cognos TM1 – Planning Sample
After=network.target auditd.service tm1adminsrv.service
Documentation=https://www.ibm.com

[Service]
Type=forking
Environment=”LD_LIBRARY_PATH=/opt/ibm/cognos/tm1_64/bin64:/usr/lib:/lib:$LD_LIBRARY_PATH”
Environment=”JAVA_HOME=/opt/ibm/java-x86_64-80/jre”
Environment=”TM1_PATH=/opt/ibm/cognos/tm1_64/bin64″
# the case of the letters in path is important
ExecStart=/opt/ibm/cognos/tm1_64/bin64/tm1s.exe -w -z /opt/ibm/cognos/tm1_64/samples/tm1/PlanSamp
ExecStop=kill -s INT `ps -ef | grep “tm1s.exe -w -z /opt/ibm/cognos/tm1_64/samples/tm1/PlanSamp” | grep -v grep | awk ‘{print $2}’`
# must be root to be able to kill this process
User=root
WorkingDirectory=/opt/ibm/cognos/tm1_64/bin64

# Kill root process
KillMode=process

# Wait up to 30 seconds for service to start/stop
TimeoutStartSec=120
TimeoutStopSec=60

# Remove process, file, thread limits
LimitNPROC=infinity
LimitNOFILE=infinity
TasksMax=infinity

# Restart on non-successful exits.
Restart=on-failure

# Don’t restart if we’ve restarted more than 3 times in 2 minutes.
StartLimitInterval=120
StartLimitBurst=3

[Install]
WantedBy=multi-user.target

You need to test the start and stop a few times to get the commands correct.


Check in TM1 architect that you can reach the TM1 instance from your laptop.

If you edit the unit file, you must run this command to reload the file:
systemctl daemon-reload

To list running TM1 instance on Linux, enter this command:
ps -ef  | grep “tm1s.exe”

To check the service running use this command:
systemctl  list-units  –type=service

To remove failed service enter this command:

systemctl reset-failed

If the TM1 instance is run with systemd, as above, then you must in each TM1s.cfg file have this value:

RunningInBackground=F

More information:
https://www.ibm.com/support/pages/how-install-cognos-analytics-1111-rhel-76-0
https://www.ibm.com/support/knowledgecenter/SSD29G_2.0.0/com.ibm.swg.ba.cognos.tm1_inst.2.0.0.doc/t_tm1_instunixlinux.html
https://developer.ibm.com/technologies/linux/tutorials/l-lpic1-106-1/

http://www.geo.mtu.edu/geoschem/docs/putty_install.html
https://cc.jlab.org/windows/X11onWindows

https://www.digitalocean.com/community/tutorials/understanding-systemd-units-and-unit-files

https://www.ibm.com/support/pages/how-manage-your-tm1-application-server-java-memory

https://www.cyberciti.biz/faq/how-to-check-open-ports-in-linux-using-the-cli/

https://www.thegeekdiary.com/how-to-open-a-ports-in-centos-rhel-7/

https://www.ibm.com/support/knowledgecenter/SSD29G_2.0.0/com.ibm.swg.ba.cognos.tm1_inst.2.0.0.doc/c_inst_troubleshooting_timeouts.html

https://access.redhat.com/documentation/en-us/red_hat_enterprise_linux/8/html/configuring_basic_system_settings/managing-services-with-systemd_configuring-basic-system-settings

https://www.freedesktop.org/wiki/Software/systemd/NetworkTarget/

https://www.cyberciti.biz/tips/understanding-linux-unix-umask-value-usage.html

AWK tutorial: find and kill process use awk

Note that use of ODBC drivers on Linux demand a expensive license. Recommend to only use csv files to transfer data to and from TM1 on Linux.

Example on PA https://www.youtube.com/watch?v=x-VQ0Nr-Pg0

Product:
Planning Analytics 2.0.9
Planning Analytics Workspace 53

Problem:
When run the installation of the PAA agent you get the error: ERROR: PAA Agent not found at the PA installation directory passed as input

Solution:
Enter the path to tm1 folder in quotation mark.
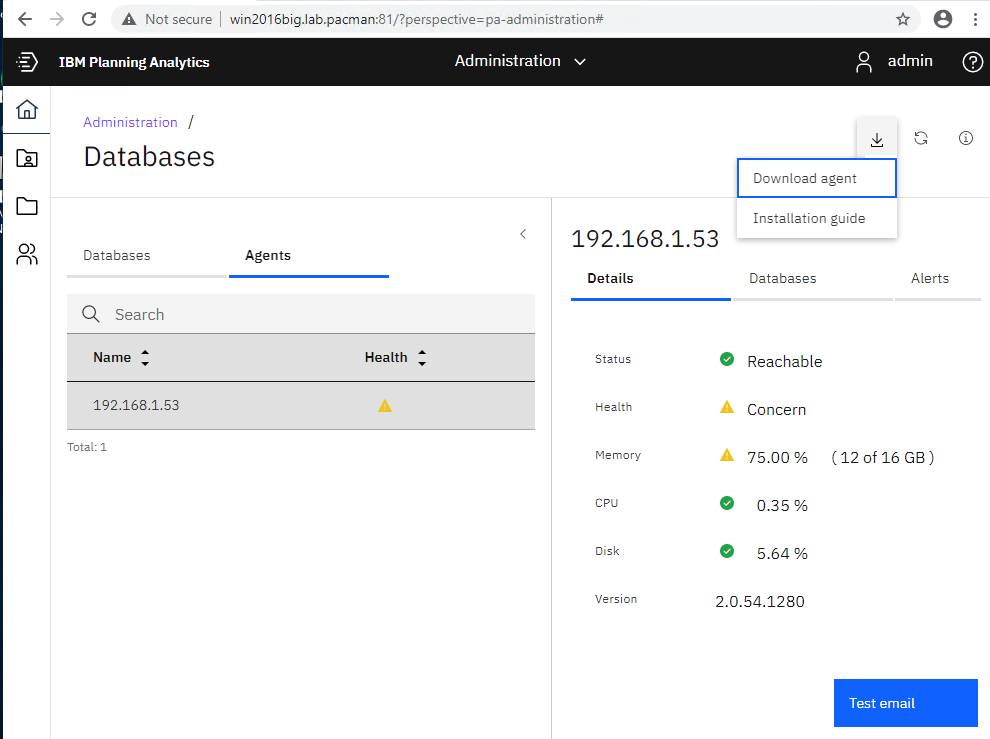
Download the zip file from the Planning Analytics Workspace Administrator database page.
Unzip the file to a empty folder.
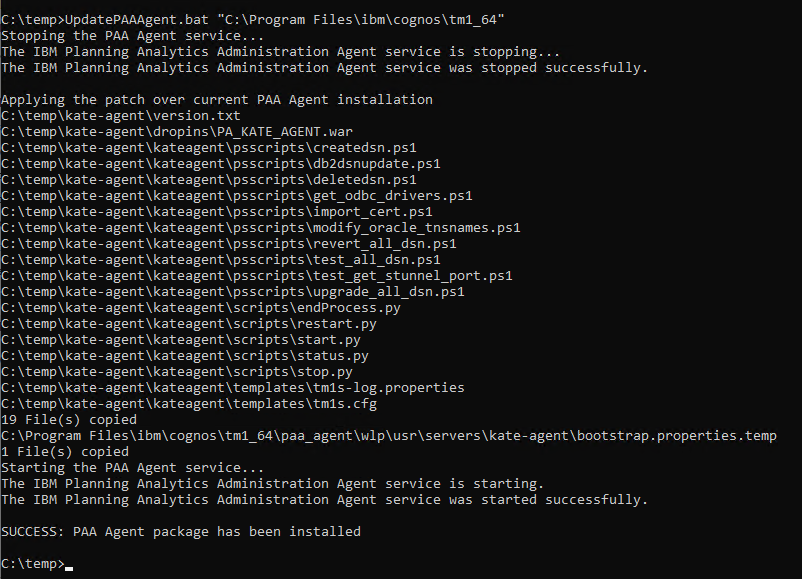
Start CMD as administrator.
Enter updatePAAagent.bat “d:\program files\ibm\cognos\tm1_64”

More information:
https://www.ibm.com/support/knowledgecenter/SSD29G_2.0.0/com.ibm.swg.ba.cognos.tm1_prism_gs.2.0.0.doc/t_paw_download_paa_agent.html

Product:
Planning Analytics 2.0.9 tm1 application web
Microsoft Windows 2016 server
Microsoft Edge Version 83.0.478.58 (Official build) (64-bit)

Problem:
Can not copy and paste between planning analytics application web and excel.
First time you get a error message:

Solution:
For chrome or IE edge install the tm1 plugin from here
https://chrome.google.com/webstore/detail/ibm-cognos-tm1-web-clipbo/pfcpjkoiknombhfcjnjihpafmkhmdcjb

Start new Edge and surf to https://chrome.google.com/webstore/detail/ibm-cognos-tm1-web-clipbo/pfcpjkoiknombhfcjnjihpafmkhmdcjb

Click on the “add to chrome”

Click Add extension

Then it should work to copy and paste between Tm1 app web and excel.

More information:
https://www.ibm.com/support/pages/plugins-mozilla-firefox-and-google-chrome-web-browsers-are-available-use-copy-and-paste-tm1-web

https://www.howtogeek.com/120743/how-to-install-extensions-from-outside-the-chrome-web-store

Product:
Planning Analytics 2.0.9
Microsoft Windows 2016 server

Problem:
After upgrade of Planning Analytics you get a error when you start Performance Modeler.
CCLMsg: system text=’Argument value is null’

Solution:
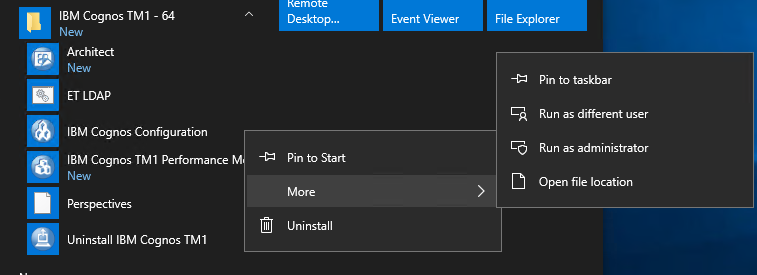
On your computer, uninstall Performance Modelere from Control Panel\Programs\Programs and Features.

Then install it again manual, from folder D:\Program Files\ibm\cognos\tm1_64\webapps\pmpsvc\rcp_installs\PerformanceModeler64.msi

To make the installation be for all users, run it with this cmd command as administrator
msiexec /i “d:\install\pm\PerformanceModeler64.msi” /L*V “d:\install\mypm.log” TARGETDIR=”d:\Program Files\pm” ALLUSERS=1

More Information:
https://www.ibm.com/support/pages/error-opening-elist-item-webclient-cclmsg-system-textargument-value-null

Product:
Cognos Controller 10.3.1
Microsoft Windows 2016

Problem:
User is stuck inside Excel when using the buttons for the controller add-in.

Solution:
Close excel and cognos controller clients.
Login to Cognos Controller as the user with the problem.


Click “Maintain / User / Personal Defaults > tab Layout (2)”
Untick the box ‘Save Window Size’
Click Save
Logoff from Controller, and re-launch the Controller client.

Go to Company – data entry – and try again.

More Information:
https://www.ibm.com/support/pages/controller-hangs-freezes-crashes-when-click-intercompany-details-button-inside-data-entry-company-journals-caused-save-window-size-setting
https://www.ibm.com/support/pages/troubleshooting-errors-user-xyz-already-logged-database-and-no-licence-available-moment
https://www.ibm.com/support/pages/user-xyz-already-logged-database-triggered-closing-excel-wrong-time-earlier-solved-using-exceleagerload

Product:
Cognos Analytics 11.1.6
Microsoft Windows 2016 server

Problem:
How do I put the company name on the CA start page?

Solution:
Logon to your Cognos Analytics server and go to folder C:\Program Files\ibm\cognos\analytics\samples\themes. Unzip SampleTheme.zip in a new folder.

Open spec.json file in notepad++

Change the company name to your name and save the file.

You need to change the logo png files to your company logo with a picture software. Go to the images folder.

You must keep the size the same of the original png file.

The logo_large.png are 364 x 200 pixels.
The logo_small.png are 54 x 30 pixels.
Open your company png file in Windows Paint, and select change size. Enter the new format.

Save as large.png
Change the format again to small, and save that picture as small.png
Copy the two png files to your sample images folder.

Remove the old logo_large.png and logo_small.png files.
Rename your files to logo_large.png and logo_small.png respectively.

Rename the folder to your company name, in our example PAC.

Open spec.json again in notepad++

Change the name to your company name, in our example PAC.
Save the file.

Go to the folder above, e.g. samples.

Zip your new folder to a zip file.
Login to Cognos Analytics as a administrator.

Click on Manage and Customization.

Under Themes, click on upload team icon.
Find your new file and select it.

When it is loaded into Cognos Analytics select it and click apply.

You need to logout and in again to have the new team shown.


If you want to change more, like the background picture and text, you can do this https://quebit.com/askquebit/IBM/creating-and-setting-a-default-welcome-page-for-cognos-analytics-11-0-4/

Upload the Samples_for_Install deployment archive. (To ensure you have all demo reports)
Use Manage > Administration console to open IBM Cognos Administration.
On the Configuration tab, click Content Administration.
On the toolbar, click the New Import button.
Select Samples_for_Install in the first step of the New Import wizard and complete the remaining steps of the wizard.

Find the SampleWelcome.zip file in folder C:\Program Files\ibm\cognos\analytics\samples\extensions
Extract the zip file in a separate folder. Change the name of the folder to Welcome.

Open spec.json file in notepad++

Search and replace Sample_Welcome with Welcome.

Replace the titles to your company name.
Save the file.
Go into the image folder.

Change logo_large.png to your logo in format 374×200 pixels.
Change welcome_background.jpg to a picture of your office in size 1920×1280 pixels.
You can find free pictures at https://pixabay.com/
You can resize a picture at https://www8.lunapic.com/editor/
Go to the C:\Program Files\ibm\cognos\analytics\samples\extensions\Welcome\js\views folder and update the SampleWelcomeView HTML file with correct path.

You may remark or update the other text in HTML file for you company information.

On line 10 set <!–  …..  –> to remove the video link in the example file.

save the file.


Go up one folder, and zip the welcome folder to welcome.zip file.

Login to Cognos Analytics as administrator.
Click on Manage.
Click on Customization.
Click on Extensions.

Click the upload icon.
Find your zip file in C:\Program Files\ibm\cognos\analytics\samples\extensions folder.
Open it and see the extension load.

You need to change the home page to make it be visible.

Go to Manage-Customization-Views-home and select the new view PAC.
Click Apply.
Log out and in again.

The selection of Themes control the text in the top blue banner.
The selection of view, tell what extension will be used at the main canvas (perspective).

You can preview at http://servername.domain.com/ibmcognos/bi/?perspective=sampleWelcome

You can set that users that belong to a cognos group, will see a specific view.

Go to Manage – Accounts – Cognos – Analytics Explorers – Customization – Home page Default – PAC.
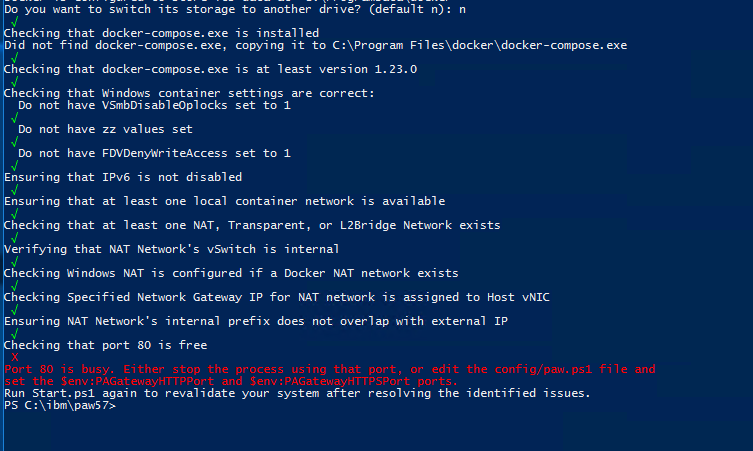
Click Apply.

More information:
https://www.ibm.com/support/knowledgecenter/SSEP7J_11.1.0/com.ibm.swg.ba.cognos.ag_manage.doc/t_ag_manage_cust_home.html

http://queryvision.com/kb/supporting-portal-pages-portal-tabs-ibm-cognos-analytics-11-x/
https://www.ibm.com/support/pages/node/553135
https://www.ibm.com/support/pages/how-users-default-home-page-changed

https://quebit.com/askquebit/IBM/creating-and-setting-a-default-welcome-page-for-cognos-analytics-11-0-4/