Product:
Cognos Analytics 11.1.7
Microsoft Windows 2016 Server
Problem:
After upgrade to CA 11.1.7 in a Multi server solution the event studio events are not running all the time, and also you get other errors in cogserver.log file.
Error:
CNC-ASV-0048 Error building report template: {0} CNC-ASV-0048 Error building report template: PRS-REQ-0760 The operation “/” “” “xts.run” is invalid.
javax.net.ssl.SSLPeerUnverifiedException: Certificate for <servername> doesn’t match any of the subject alternative names:…
CNC-SDS-0222 An error occurred while trying to send a message in message manager
Suggested Solution:
Upgrade your installation to the latest Fix Pack of CA11.1.7
https://www.ibm.com/support/pages/ibm-cognos-analytics-11x-fix-lists
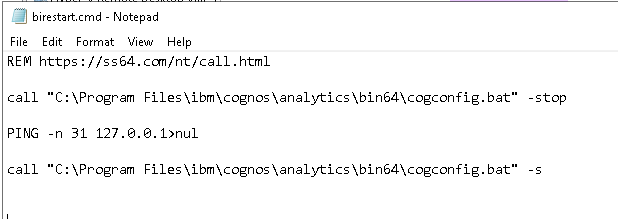
If you restart the IBM Cognos windows service by some script, change the script to instead use the Cognos Configuration program to do the restart. Create a CMD file with this content:
REM https://ss64.com/nt/call.html
call “C:\Program Files\ibm\cognos\analytics\bin64\cogconfig.bat” -stop
PING -n 31 127.0.0.1>nul
call “C:\Program Files\ibm\cognos\analytics\bin64\cogconfig.bat” -s
Name the file c:\scripts\birestart.cmd and put your schedule software to use that, instead of the NET STOP command, as stopping Cognos BI from windows may corrupt some temp files.
CA 11.1.7 demands that all server names are in FQDN format.
Stop the Cognos BI service on Windows from Cognos Configuration.
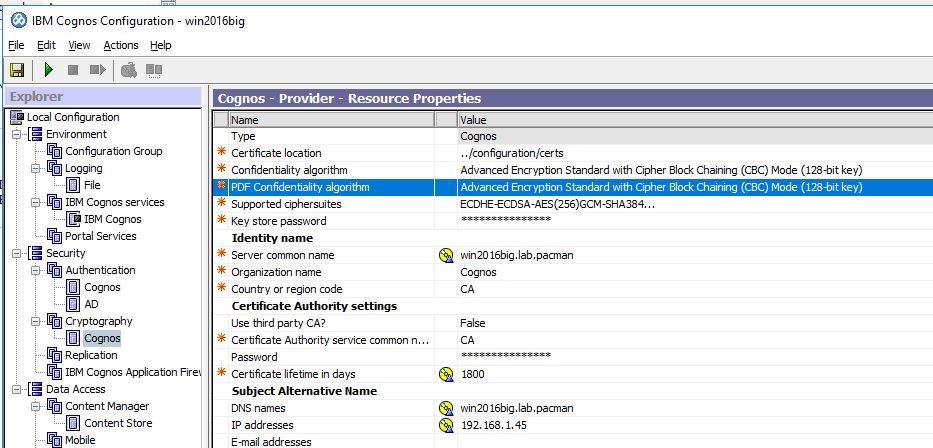
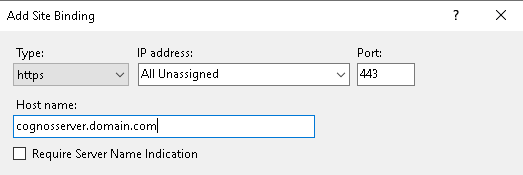
Update all the server name in Cognos Configuration to be FQDN and lowercase. Also ensure the Server Common Name, under Security – Cryptography -Cognos, is the FQDN server name.
Environment
Gateway URI
External dispatcher URI
Internal dispatcher URI
Dispatcher URI for external applications
Content Manager URIs
Environment > Configuration Group
Group contact host
Member coordination host
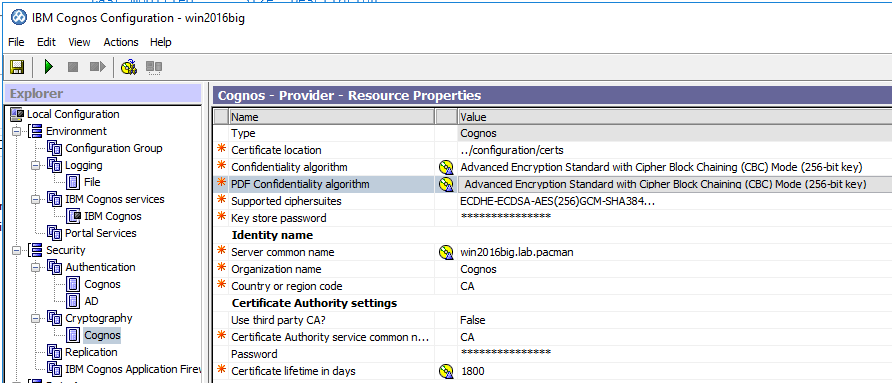
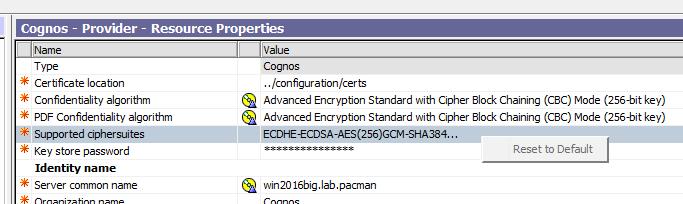
Security > Cryptography > Cognos
Server common name
Subject Alternative Name > DNS names
Subject Alternative Name > IP addresses
Note: You must at DNS names enter both the FQDN and HOSTNAME to make the logging to work.
Check that the windows firewall does not block the port used by cognos – particular ports 9300, 9362, 4300, 5701, 9301. They need to be open between Cognos servers.
https://www.ibm.com/support/knowledgecenter/SSEP7J_11.1.0/com.ibm.swg.ba.cognos.inst_cr_winux.doc/c_reviewthedefaultsettings.html
Before start of the Cognos from Cognos Configuration, clean out some folders to ensure there are no old settings around.
Backup and then remove the analytics/configuration/data/flipper folder
(You need a backup of flipper folder, like file flipper\config\global\configuration0.properties, as it will erase your new cognos advance settings, or you need to manually add the values back.)
Backup and then remove the analytics/configuration/data/discovery folder
Backup and then remove the analytics/wlp/usr/servers/cognosserver/workarea folder
Backup and then remove the analytics/wlp/usr/servers/dataset-service/workarea folder
Backup and then remove the analytics/javasharedresources folder
Backup and then remove the analytics/temp folder
Backup and then remove the analytics/logs folder
Backup and then remove the analytics/data folder
You can check the setup of Configuration Group by browse in IE to the server first on
http://caservername.domain.com:9300/bi/v1/disp
and login, then change the URL in IE, and browse to http://caservername.domain.com:9300/bi/v1/flipper/diag
This json file can be saved.
If you have old reports that fails, please try to upgrade the reports to the latest version.
- Open IBM Cognos Administration.
- On the Configuration tab, click Content Administration.
- Click the arrow on the new content maintenance button
 on the toolbar, and then click New Report Upgrade
- Type a name for the upgrade task and, if you want, a description and screen tip. Click Next.
- Select the packages and locations for the report specification you want to upgrade. Click Next.
If you upgrade report specifications by folder, all reports in the folder will be upgraded.
- Choose one of the following:
- Save and run once opens the run with options page.
- Save and schedule opens the scheduling tool.
- Save only allows you to save the upgrade so that you can run it at a later time.
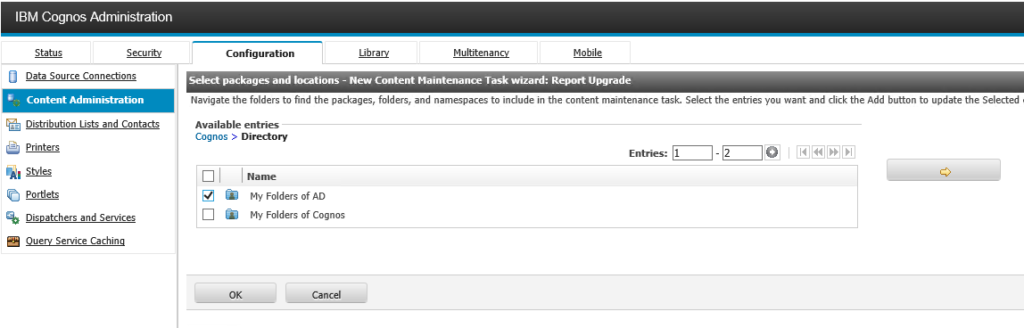
Give time to upgrade all reports and all templates in your Cognos solution. To upgrade users my folders, select Directory – My Folder of AD (your namespace).
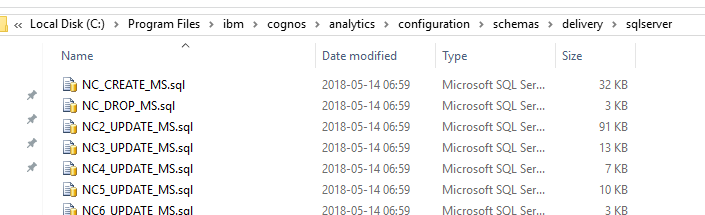
If schedule or events are not working, try dropping the NC* tables with this script:
1. Stop the Cognos Service
2. Take a physical backup of the Content Store or Notification database
3. Select the appropriate folder for your content store or notification database type ,like C:\Program Files\ibm\cognos\analytics\configuration\schemas\delivery\sqlserver for SQL.
4. Run NC_DROP_MS.sql against the content store or notification database in Microsoft SQL Management Studio.
4. Restart Cognos Services.
Should dropping the NC* tables not resolve the issue, then restore the content or notification store from the last backup version.
CA 11.1.x have made changes to the IIS setup for URL rewrite, manually change IIS settings to the new values or use the script in folder: C:\Program Files\ibm\cognos\analytics\cgi-bin\templates\IIS
https://www.ibm.com/support/pages/automate-configuration-microsofts-internet-information-service-support-ibm-cognos-analytics
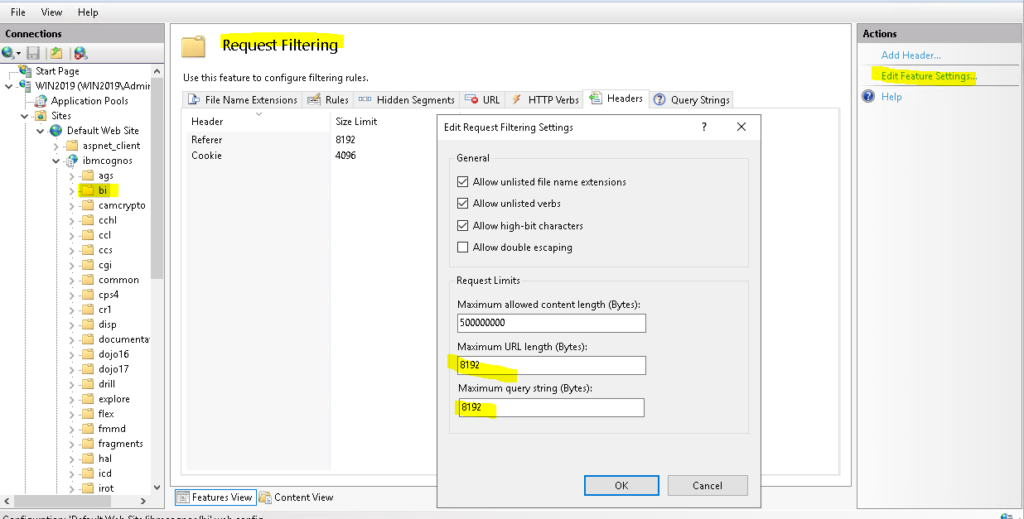
Check the rules under ibmcognos and bi folder in IIS manager. Compare yours to the latest webpage https://www.ibm.com/support/knowledgecenter/SSEP7J_11.1.0/com.ibm.swg.ba.cognos.inst_cr_winux.doc/t_gateway_iis.html
- Name is Event Studio.
- Pattern is ^(ags|cr1|prompting|ccl|common|skins|ps|cps4)/(.*)
- Open the Conditions section.
- Change the Logical Grouping to Match Any
- Click Add.
- Condition input is {HTTP_REFERER}
- Check if input string is Matches the Pattern
- Pattern is v1/disp
- Check Ignore case.
- Click Add
- Condition input is {HTTP_REFERER}
- Check if input string is Matches the Pattern
- Pattern is (ags|cr1|prompting|ccl|common|skins|ps|cps4)/(.*)\.css
- Check Ignore case.
- Action type is Rewrite
- Rewrite URL is /ibmcognos/{R:0}
- Check Stop processing of subsequent rules.
- Click Apply and Back to Rules.
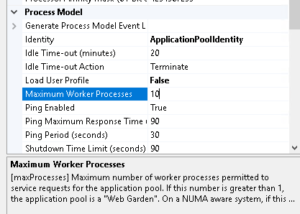
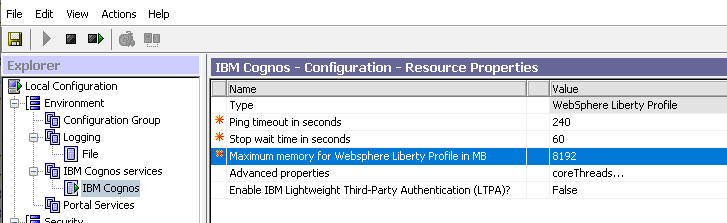
In IIS Manager on the Application Pool for Cognos (ICApool) change to 10 for Maximum Worker Processes, if you have many users in Cognos.
If nothing helps – contact Cognos Support.
More information:
https://www.ibm.com/support/knowledgecenter/SSEP7J_11.1.0/com.ibm.swg.ba.cognos.inst_cr_winux.doc/c_reviewthedefaultsettings.html
https://www.ibm.com/support/pages/cognos-analytics-1117-interim-fix-2
https://www.ibm.com/support/knowledgecenter/SSEP7J_11.1.0/com.ibm.swg.ba.cognos.ca_new.doc/ca_new.pdf
https://www.ibm.com/support/knowledgecenter/SSEP7J_11.1.0/com.ibm.swg.ba.cognos.ug_cra.doc/c_asg_bulk_cleanup.html
https://www.ibm.com/support/knowledgecenter/SSEP7J_11.1.0/com.ibm.swg.ba.cognos.inst_cr_winux.doc/t_gateway_iis.html
https://www.ibm.com/support/knowledgecenter/SSEP7J_11.1.0/com.ibm.swg.ba.cognos.inst_cr_winux.doc/t_inst_upgradingrepspecs.html
https://ss64.com/nt/call.html
https://www.computerhope.com/call.htm
https://www.ibm.com/support/pages/troubleshoot-ssl-gateway-iis
https://www.ibm.com/support/knowledgecenter/SSEP7J_11.1.0/com.ibm.swg.ba.cognos.inst_cr_winux.doc/t_increaseforhighendload.html


 .
.