Product:
Cognos Analytics 11.1.7
kit_version=11.1.7-2106251648
CAMAAAWA_version=11.1.7-21
CM_version=11.1.7-54
Microsoft Windows 2016 server
Issue:
How do i install CA11 on my Windows server?
Solution:
Follow the IBM documentation. Here is only a list of things to think about.
https://www.ibm.com/docs/en/cognos-analytics/11.1.0?topic=1117-release-fp3-june-2021
Download the software from IBM
https://www.ibm.com/support/pages/ibm-cognos-analytics-1117-fix-pack-3
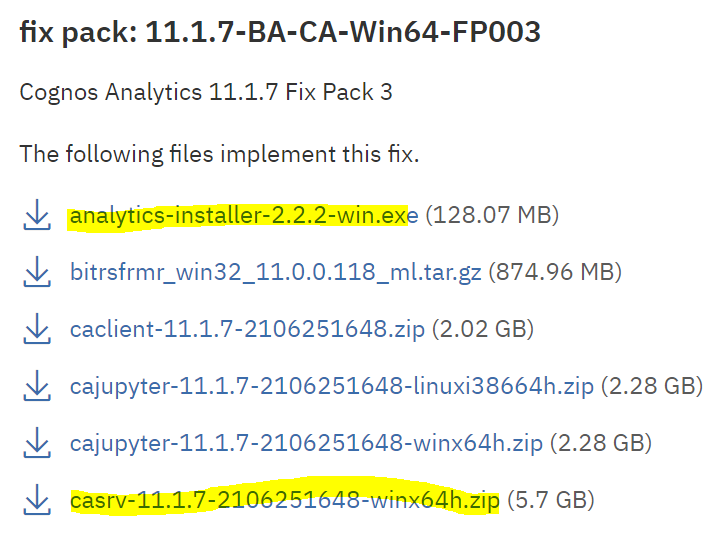
You need at least the analytics-installer-2.2.2-win.exe and casrv-11.1.7-2106251648-winx64h.zip.
Check this before installation on your new windows server:
| Check that you have remote access to all your Cognos servers | |
| Install SQL 2012 native client for ODBC support to SQL databases | |
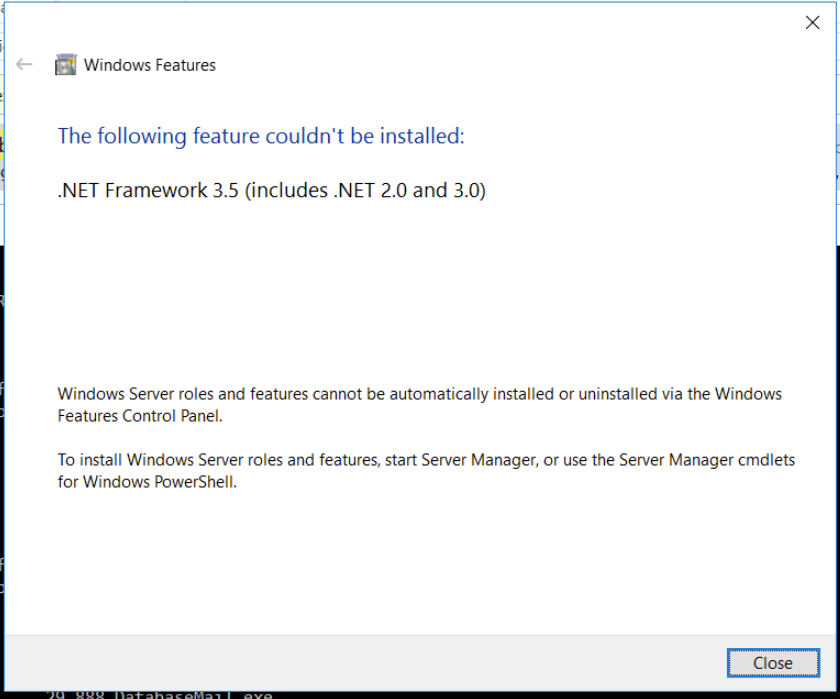
| Install NET Framework 4.7.2 | |
| Turn DEP off in Windows control panel | |
| Set Power Options to HIGH Performance in Windows control panel | |
| Turn off IEESC (internet explorer enhanced security configuration) | |
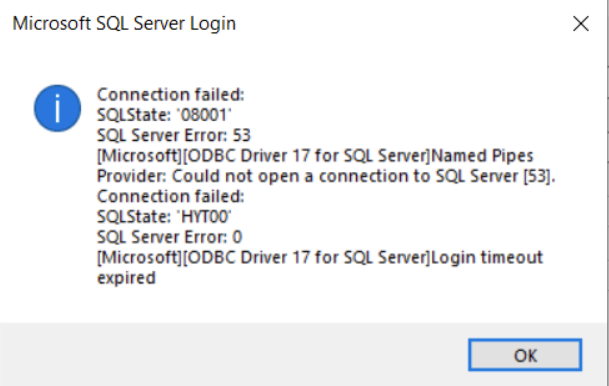
| Check what port your SQL server will use, for access to Content Store and Audit database. | |
| Exclude cognos folders from anti-virus software scanning | |
| Open firewall ports 80, 443 to end users | |
| Open firewall ports 80, 443, 9300, 9362, 4300, 5701, 9301 between servers. | |
| Open firewall ports 1433 for SQL, 25 for Mail, 389 for Active Directory. | |
| Install 7zip and Notepad++ to edit xml files on the server. |
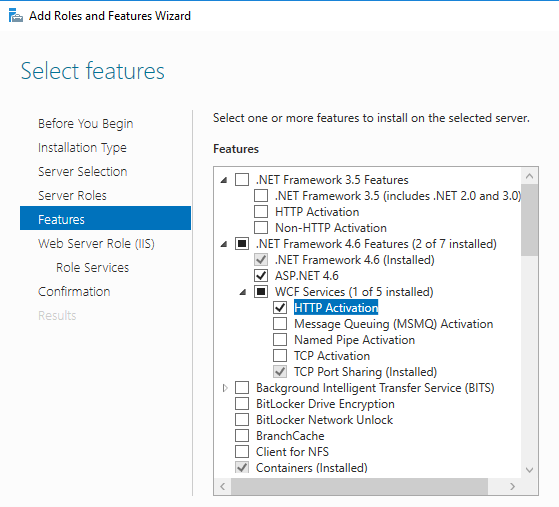
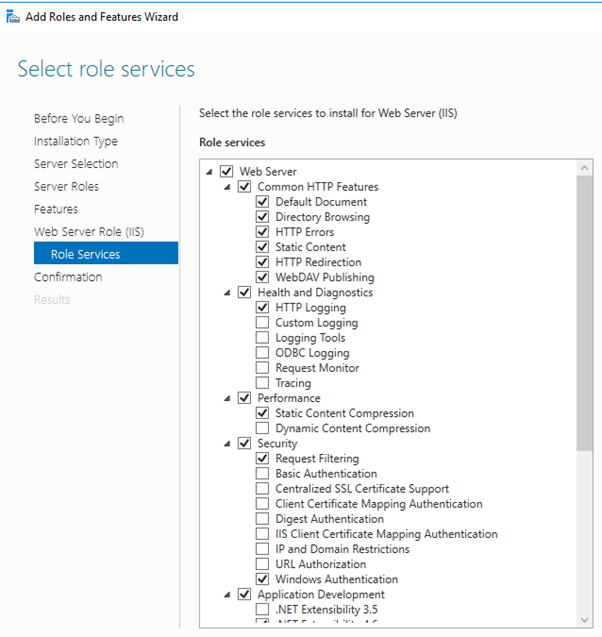
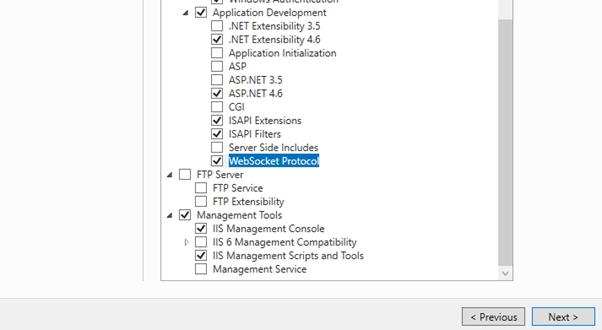
| Install IIS on the Windows Server 2016 select Web Server IIS, ASP.NET 4.6, HTTP Activation, TCP Port Sharing, HTTP Redirection, WebDav Publishing, ISAPI Extensions, Websocket, Windows Authentication, IIS Management Scripts and Tools. |
| Update regedit HKEY_LOCAL_MACHINE\SOFTWARE\Microsoft\InetStp\MajorVersion to 9 (only if needed) |
| Install https://www.iis.net/downloads/microsoft/application-request-routing or
rewrite_amd64_en-US.msi http://download.microsoft.com/download/5/7/0/57065640-4665-4980-a2f1-4d5940b577b0/webfarm_v1.1_amd64_en_us.msi |
| Run the installation of Cognos Analytics manually
https://www.ibm.com/docs/en/SSEP7J_11.1.0/com.ibm.swg.ba.cognos.inst_cr_winux.doc/inst_cr_winux.pdf |
| Get the CA_IIS_Config.bat script from folder D:\Program Files\ibm\cognos\analytics\cgi-bin\templates\IIS and copy it to its own folder, e.g. d:\install |
| Run the installation of the Cognos Analytics developer programs (framework manager) |
| Update the IIS script with the server name, and run the script CA_IIS_Config.bat |
| Copy file sqljdbc42.jar into folder d:\program files\ibm\cognos\analytics\drivers |
| Setup a Notification database in SQL, if you have many users in cognos and many scheduled jobs https://www.ibm.com/docs/en/cognos-analytics/11.1.0?topic=performance-bulk-cleanup-nc-tables |
| Setup a Content Store and Audit database in your SQL server |
| Configure Cognos Analytics with FQDN, leave Websphere memory at 8182 |
| Install the CA samples https://revelwood.com/installing-samples-cognos-analytics/
https://www.ibm.com/docs/en/cognos-analytics/11.1.0?topic=samples-downloading-configuring-extended |
| Setup WebDav in IIS
https://www-01.ibm.com/support/docview.wss?uid=swg22002398&aid=1 |
| Stop creation of dump files, open the cclWinSEHConfig.xml file from the install_location\configuration folder. Set “CCL_HWE_ABORT” value=”0″ |
| Setup the audit database source and copy the D:\Program Files\ibm\cognos\analytics\samples\Audit_samples\IBM_Cognos_Audit.zip file to D:\Program Files\ibm\cognos\analytics\deployment folder. Import the audit samples. |
| Create a company logo in cognos https://quebit.com/askquebit/IBM/creating-and-setting-a-default-theme-for-cognos-analytics-11-0-4/ The tags can be different for the different versions. |
| Tune logging to “Basic” in cognos connection |
| Activate SSO in Cognos Configuration by adding the advanced property Name : singleSignonOption Value: IdentityMapping https://www.ibm.com/support/pages/how-configure-sso-single-sign-controller-cognos-analytics |
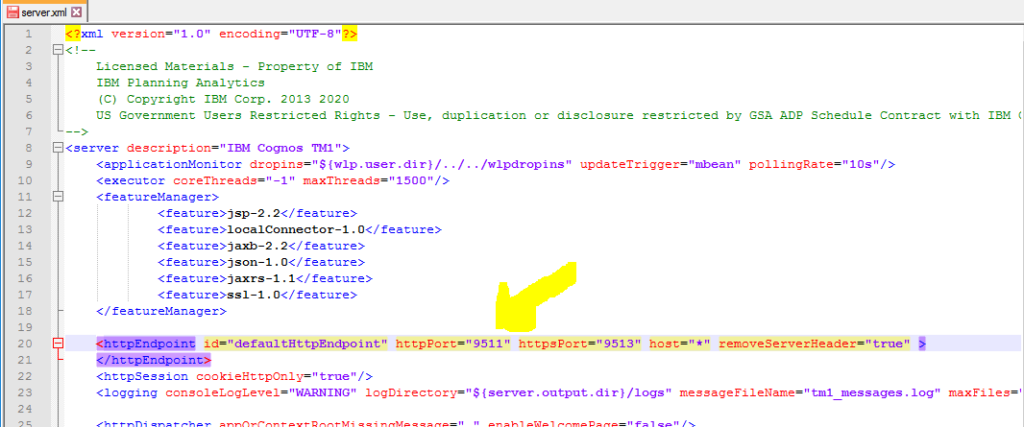
| Set CAF to exclude *.domain.com and tm1webserver:9510 and tm1webserver:9511 |
| If you also have Cognos Controller then change Security – Authentication in CA11, Inactivity timeout in seconds to 36000 |
| Update Windows TCP windows settings by import below reg values:
Windows Registry Editor Version 5.00 [HKEY_LOCAL_MACHINE\SYSTEM\CurrentControlSet\Services\Tcpip\Parameters] “MaxUserPort”=dword:0000fffe “TcpTimedWaitDelay”=dword:00000032 |
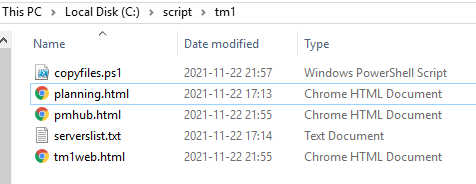
| To get login to Planning Analytics with Cognos BI (CAM) you need to change a few files, as below:
Update tm1web.html with tm1web servername and port, like this var tm1webServices = ["http://tm1servername.domain.com:9510","http://tm1webservername.domain.com:9511"]; Copy tm1web.html to locations; D:\Program Files\ibm\cognos\analytics\webcontent\bi\tm1\web D:\Program Files\ibm\cognos\analytics\webcontent\tm1\web |
Update pmhub.html with also paw servername and port, like this
var pmhubURLs = ["http://tm1servername.domain.com:9510","http://tm1webservername.domain.com:9511","http://pawservername.domain.com"]; Copy pmhub.html to locations; D:\Program Files\ibm\cognos\analytics\webcontent\bi Update planning.html with also tm1servername and port, like this var planningServices = ["http://tm1servername.domain.com:9510","http://tm1webservername.domain.com:9511"]; Copy planning.html to same folders as pmhub.html listed above. |
The content manager will look in folder D:\Program Files\ibm\cognos\analytics\webcontent for this files, but the Cognos Gateway will look in folder D:\Program Files\ibm\cognos\analytics\webcontent\bi for above files.
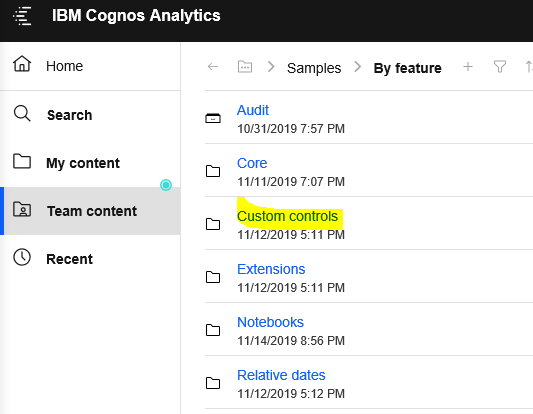
To prevent scriptable report error when running sample custom control reports
you need to change the sample reports as below (they are written to only work on port 9300).
The global Sales Report is a sample showing how to use a javascript file with a custom control. These are authored to work ‘out of the box’ via dispatcher but not via a gateway.
To use with a gateway you need to edit the custom control in the report to point to the correct path.
1. Open the ‘Global Sales’ report in Edit mode.
2. select the custom control which is the thin blue box underneath the Prompts and view the properties.
3. In properties under General choose the ‘Module Path’ property and click the ellipsis.
4. By default this path is set to ‘/bi/samples/js/HideShowFilterPanel.js’
5. Please add your gateway to the front of this path so it reads something like:’/ibmcognos/bi/samples/js/HideShowFilterPanel.js’ (where ibmcognos is the name of your gateway virtual directory)
6. Save and re-execute the report.
Setup of jupyter notebook is not covered here, you have to follow the IBM documentation.
More information:
https://www.ibm.com/support/pages/ibm-cognos-analytics-premises-111x-supported-software-environments
https://www.ibm.com/docs/en/cognos-analytics/11.0.0?topic=configuring-upgrade-cognos-analytics
https://www.ibm.com/docs/en/cognos-analytics/11.1.0?topic=samples-cognos-analytics
https://www.ibm.com/docs/en/cognos-analytics/11.1.0?topic=administration-tuning-server-performance