Product:
Cognos Controller 10.4.2
Microsoft Windows Server

Problem:
When a user start Cognos Controller Client on Citrix server a second time they get a error:
System.Unauthorized Access Exception: Access to the path c:\cognos\ccr\ccr.config is denied at System.IO…Error.WinIOError( Int32 errorCode, String maybeFullPath )

Suggested Solution:
Disable the use of FSLogix.  https://docs.microsoft.com/en-us/fslogix/overview
Cognos Controller update the ccr.config file during start of client, and also when the user change personal parameters inside the Cognos Controller client.
Each user of Cognos Controller need there own ccr.config file. If the file is not there, this error can show up.
They are normally in folder c:\users\%username%\appdata\roaming\cognos\ccr
and are created during login from the default file in folder c:\program files\ibm\ibm cognos controller local client\ccr.exe.config

https://help.nerdio.net/hc/en-us/articles/360036890651-FSLogix-How-It-Works-What-Can-Go-Wrong-How-To-Troubleshoot-

The understanding of the orchestration of FSlogix with profiles will make logical sense when you look at the pieces and parts that FSLogix puts together.

  • FSLogix apps is an installer that is loaded on WVDSH00 and is part of every deployment done with WVDSH00
  • Registry entry is configured on WVDSH00 to enable FSLogix and point the profile storage to \\FS01\Profiles\%username%
  • There is another registry entry that excludes DESKTOP, DOCUMENTS and FAVORITES folders from FSLogix profile because those are redirected to \\FS01\USERS\%username% folder. This registry entry points at an XML file that tells FSLogix to exclude those folders. This file is \\FS01\Profiles\redirections.xml

More Information:
https://www.ibm.com/support/pages/troubleshooting-cognos-controller-link-not-installed-or-excel-link-not-installed-errors

App-V is not officially supported by IBM. But the following tips helped package/deploy the Controller client successfully:

    • (1) Re-package the Cognos Controller client *without* capturing (saving) the following folder (inside the App-V package):

%APPDATA%\Cognos

(2) To avoid an ‘Excel Link is not installed’, configure the setting ‘local interaction’ to ‘FALSE’ (within the OSD file for the main Cognos controller application).

https://www.ibm.com/support/pages/error-systemxml-root-element-missing-inside-multiple-menus-controller-solved-avoiding-use-softgrid-microsoft-application-virtualization

The Controller client reads from and writes to a configuration file called ‘ccr.config’.

  • This is located here: %APPDATA%\Cognos\CCR\ccr.config
  • By default, this is: C:\Users\%USERNAME%\AppData\Roaming\Cognos\CCR\ccr.config

if the I.T. department have modified the value for %APPDATA% (for example redirected user’s profiles to be stored on a remote network file share) then this means that ccr.config reads/writes are slower.

  • In some environments, these are so slow that Controller aborts trying to read/write to that location, and falls back to a default local location (C:\Cognos\ccr\)
  • However, only one person at a time can use that location, therefore errors will occur (when trying to read the configuration file) if a different user tries to read that file.

https://www.ibm.com/support/pages/intermittent-access-path-ccognosccrccrconfig-denied-and-http-status-404-not-found-errors

https://www.ibm.com/support/pages/how-install-controller-local-client

https://www.ibm.com/support/pages/node/130597

Use the “CacheDir” parameter to cause the Controller local client to move the storage location of the ‘cache files’ (*.DSS and *.DSD) into subfolders of the CacheDir.

Example:

For example, if “CACHEDIR” is configured to be the value “D:\Controller\Cache” then these files will created/stored inside folders such as:

D:\Controller\Cache\Windows_Username1\Cognos\CCR
D:\Controller\Cache\Windows_Username2\Cognos\CCR
etc.

NOTE: The configuration file (CCR.CONFIG) is unaffected by this parameter, and will stay inside the default location (%APPDATA%\Cognos\ccr)

IMPORTANT:

Do NOT modify the location of the “Cache Dir” to either (a) a mapped network drive or (b) a network UNC path.
Doing this will seriously affect the performance/speed of Controller, and also the stability (may create error messages).

Logon to client PC using the *same* Windows user that launches/runs Controller
Create a folder which will be used to store the cache files (for example: D:\Controller\Cache).

IMPORTANT:

Do not choose a network drive letter (or UNC path).
Instead, you MUST choose a location which is on one of the client device’s local hard drives.
This does not need to be its C: drive, although it must be a local hard drive
For example, you could choose: D:\Controller\Cache

3. Launch Windows Explorer
4. Open the folder where Controller is installed.

For example, by default this is here: C:\Program Files\ibm\IBM Cognos Controller Local Client

5. Open the file “CCR.exe.config” inside Notepad
6. Search for the entry similar to the following:

<add key=”CacheDir” value=””/>

7. Modify this entry appropriately, for example similar to the following:

<add key=”CacheDir” value=”D:\Controller\Cache” />

8. Save and test

You will notice that, after launching Controller, now all the cache files are created inside the following folder: D:\Controller\Cache\<Windows_Username>\Cognos\CCR

Product:
Cognos Analytics 11.1.7
Microsoft Windows 2016 server

Problem:
There are 3 jave.exe on the Cognos Analytics server, what are they for?

Solution:
Java.exe (with most memory usage is Query Service, if you use Dynamic Cubes) command line c:\program files\ibm\cognos\analytics\ibm-jre\jre\bin\java.exe
Java.exe (with command line ..\ibm-jre\jre/bin/java.exe is the Content Manager and WLP service for the cognos portal) it have -Xgcpolicy:gencon
Java.exe (with least memory usage is the exploration engine in CA11) command line c:\program files\ibm\cognos\analytics\ibm-jre\jre\bin\java.exe” -Xms1024m -Xmx8192m -XX:MaxDirectMemorySize=512m

The 3 java.exe process for exploration in CA11 is part of the query service and is configured with advanced parameters in cognos connection;
https://www.ibm.com/support/knowledgecenter/en/SSEP7J_11.1.0/com.ibm.swg.ba.cognos.ug_cra.doc/t_ca_query_coprocessing.html

  1. From Manage > Administration console, open Cognos Administration.
  2. On the Configuration tab, click Dispatchers and Services, and click your dispatcher name.
  3. In the list of services, locate the Query service, and click its properties icon Set properties.
  4. On the Settings tab, under Category, select Environment.
  5. Next to Advanced settings, click Edit.
  6. Select the Override the settings acquired from the parent entry check box.
  7. Type or copy the parameter names and their values, from the Cognos documentation.
  8. Click OK.
  9. Restart the Query service.

The Java.exe for Query Service memory usage is also controlled from cognos connection.

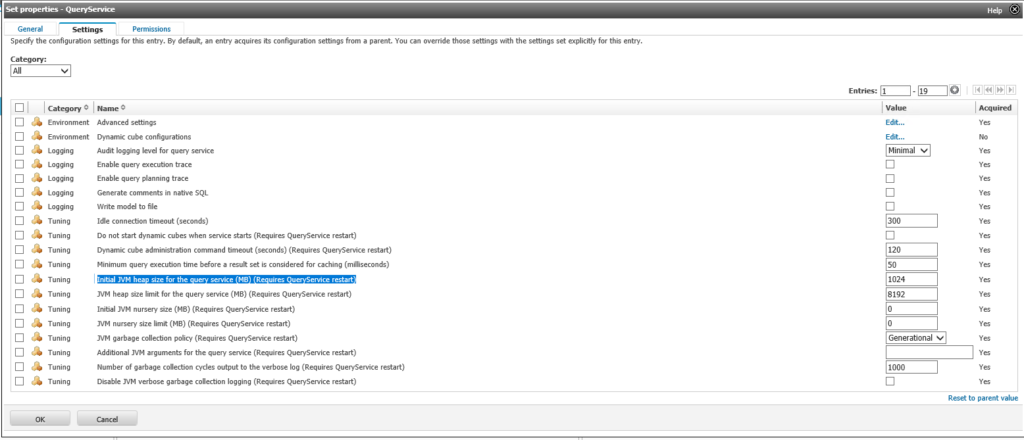
JVM heap size limit for the query service: Specifies the maximum size, in MB, of the JVM heap.

JVM garbage collection policy: Specifies the garbage collection policy used by the JVM.

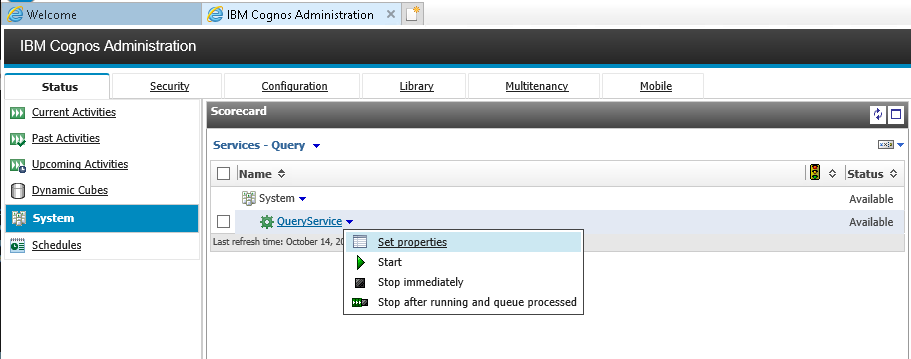
Go to Cognos Administration page, and click on System in the left.
Click the arrow at All servers and select Services – Query.
Now you only see the QueryService for each server. Click on arrow and select Set properties.
Change the Initial JVM heap size for the query service to a unique value like 2048, then after a restart it is easier to tell the jave.exe apart from each other.

The Java.exe for content manager and WLP is setup from inside Cognos Configuration.
If you have the RAM in the server, it can be increased to 24576 MB.  The start up time of Cognos will be longer, when the WLP use more memory.

  1. Start IBM Cognos Configuration.
  2. In the Explorer window, expand Environment > IBM Cognos services, and then click IBM Cognos.
  3. In the Properties window, change the value for Maximum memory in MB.
    • To reduce the startup time, memory footprint, and resources that are used, use the default setting of 8192.
    • This value can be adjusted based on available system resources.
  4. From the File menu, click Save.

https://www.ibm.com/support/knowledgecenter/SSEP7J_11.1.0/com.ibm.swg.ba.cognos.inst_cr_winux.doc/t_cnfg_enable_srv.html

More information:
https://www.ibm.com/support/knowledgecenter/SSEP7J_11.1.0/com.ibm.swg.ba.cognos.inst_cr_winux.doc/c_installs_verify_ram.html

https://www.cognoise.com/index.php?topic=36704.0

Product:
Cognos Analytics 11 CP4D
Linux

Problem:
How report on a DB2 database?

Suggested Solution:
Depending on what data source you are going to connect to – the way may be different.
https://www.ibm.com/support/producthub/icpdata/docs/content/SSQNUZ_current/cpd/access/data-sources.html

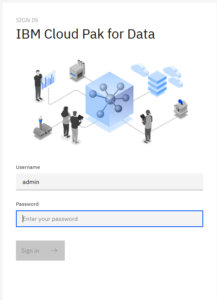
Login to Cloud pak for data to setup the data source (this is only for Cognos Content Store called BLUEDB).


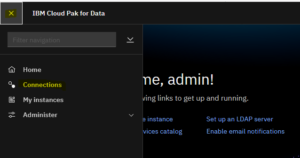
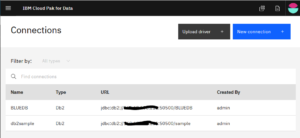
Click on menu icon to get to the connections

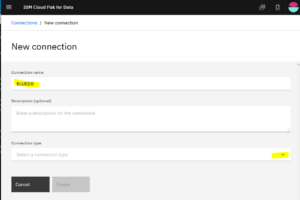
Click on new connection

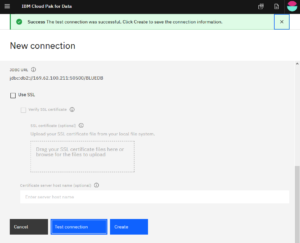
Enter a name for the connection and click on the drop down menu to select type of data source. When you select DB2, you get other fields to complete.

Enter the IP address of the database server host.
Enter the port for the DB2 database, default is 50000 – but this you need to change when you setup your DB2 server, to something else like 50500.
Enter the name of the database.
Enter the name of the user to access the database (can be DB2 default user db2inst1) and enter the password.
Scroll down and click on Test connection.

Click on Create.

You have now a data source in CP4D.

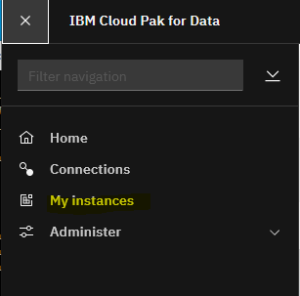
Click on menu and select My instances – to see what applications are running.

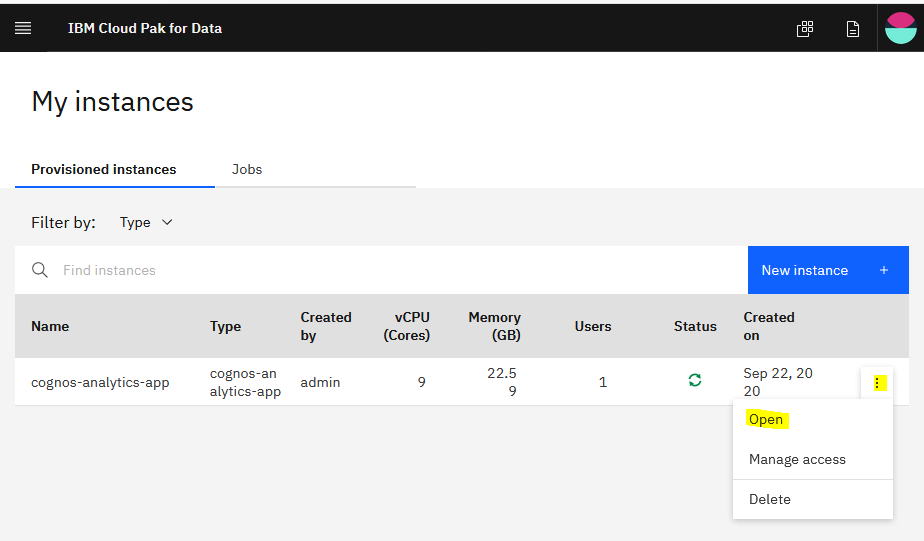
Click on the dots to open the menu on the right side of your application, and click on open to go to Cognos Analytics.

If security is setup correct, you should be logged in automatically.

To setup a data source for CA11, you can use the same as you done in CA11 on Windows. Described below;

Setup in Cognos Analytics 11

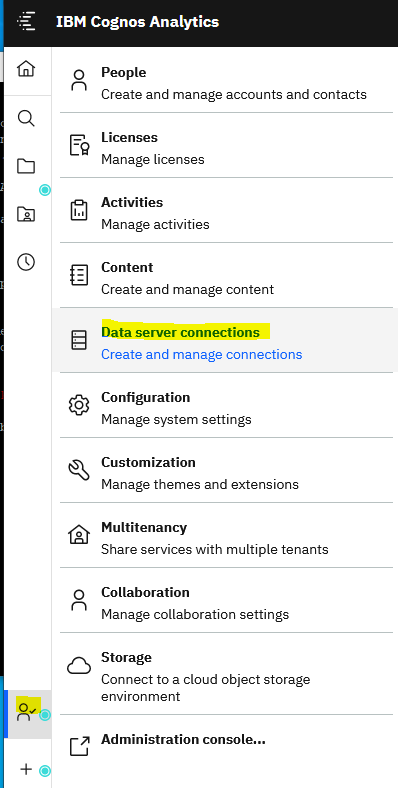
Click on Manage icon in lower left corner and select Data Server Connections

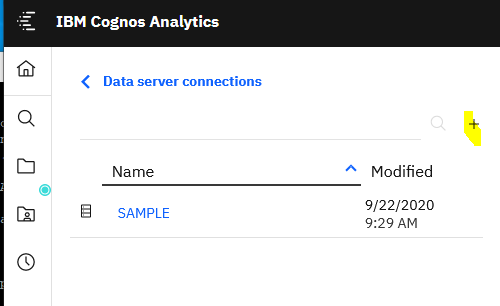
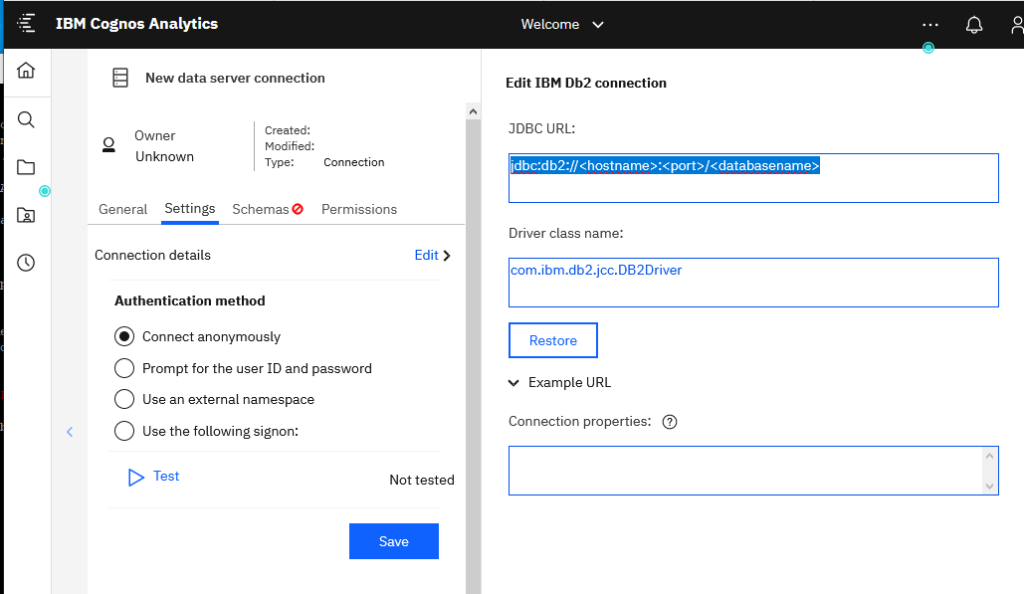
Click on + to create a new data connection, the dialog will expand to the right.

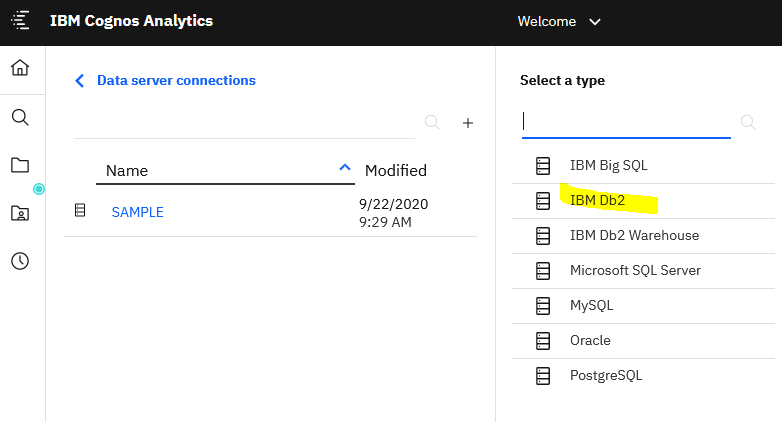
Select DB2 in this case

First enter the jdbc:db2://192.168.1.15:50500/SAMPLE2 to your database.
Scroll down and click close
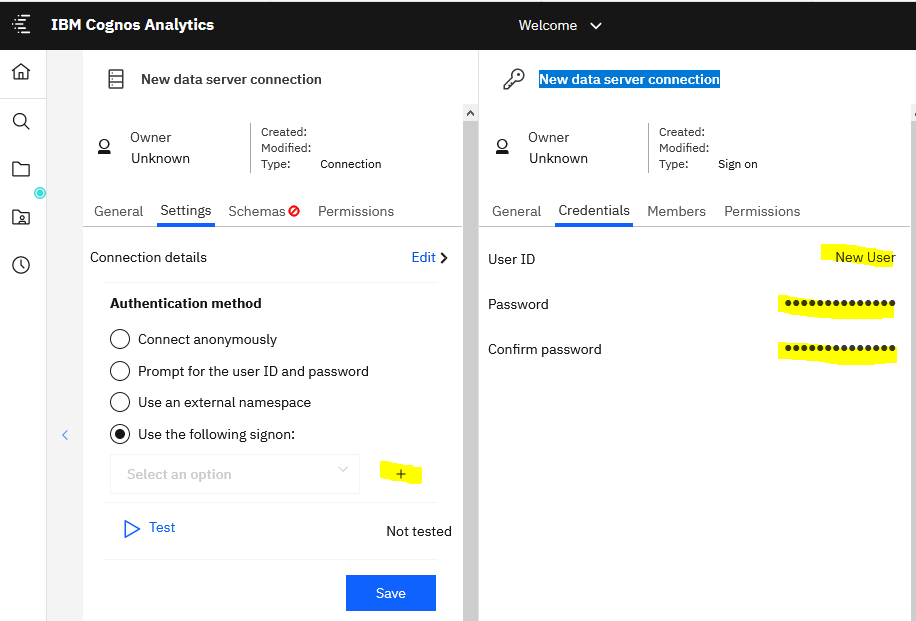
Select Use the following signon

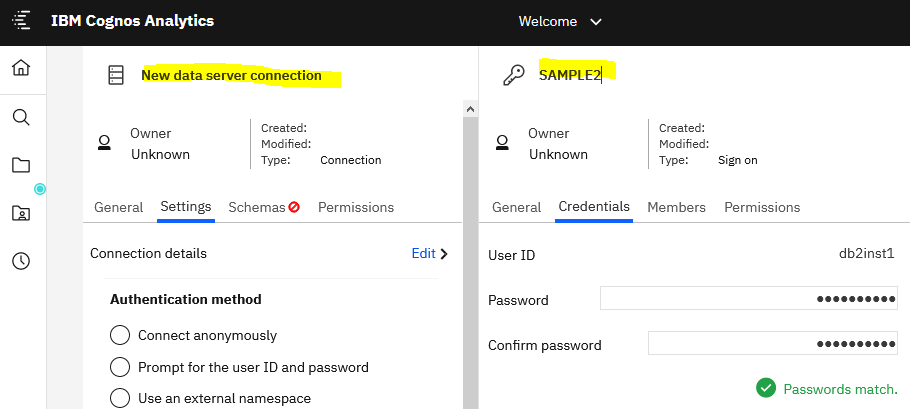
Click on ? to create a new signon, enter the user and password that will connect to the DB2 database.
Change the name for the connection to SAMPLE2.

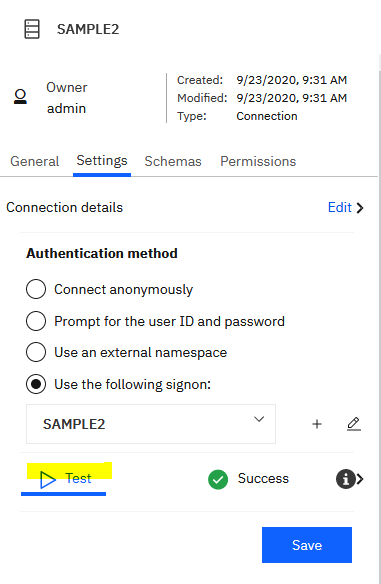
Change the name of the connection and click save.

Click on Test and after success, click on schemas tab.

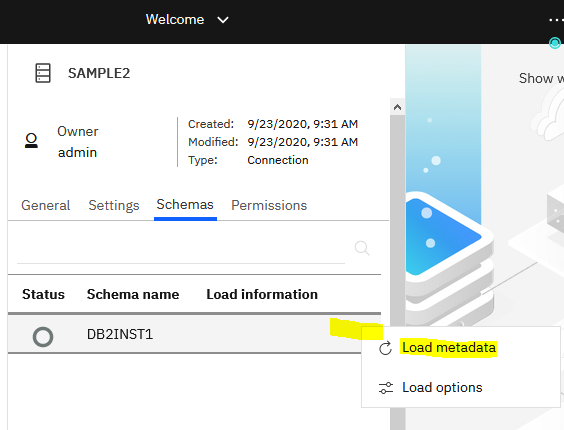
Click on dots to show the options, and click on Load metadata.

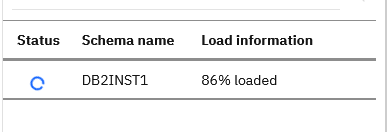
Wait for the metadata to load.

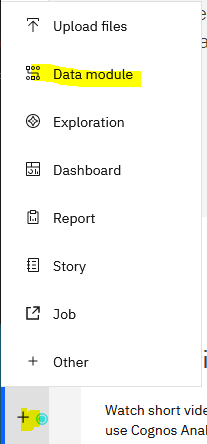
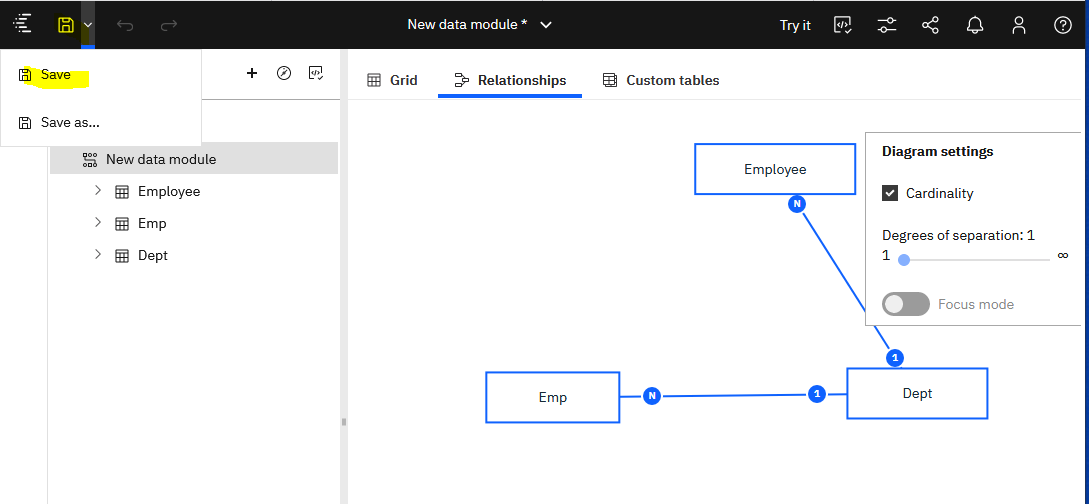
Click on new icon and select Data module.

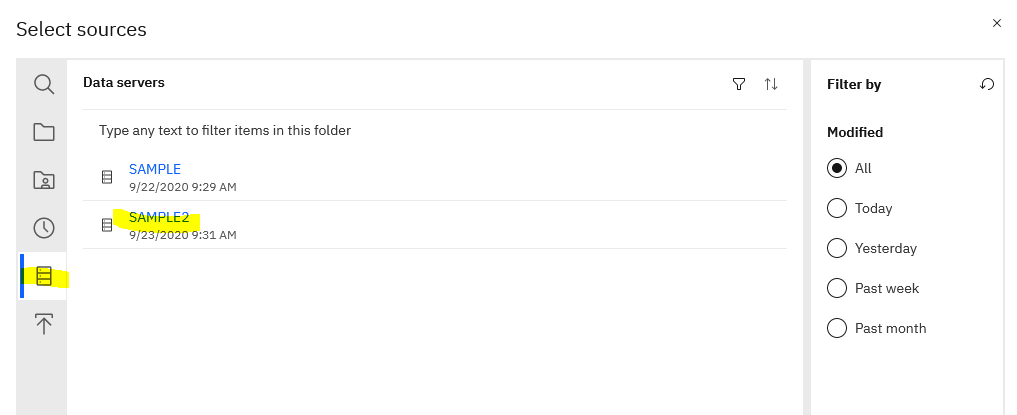
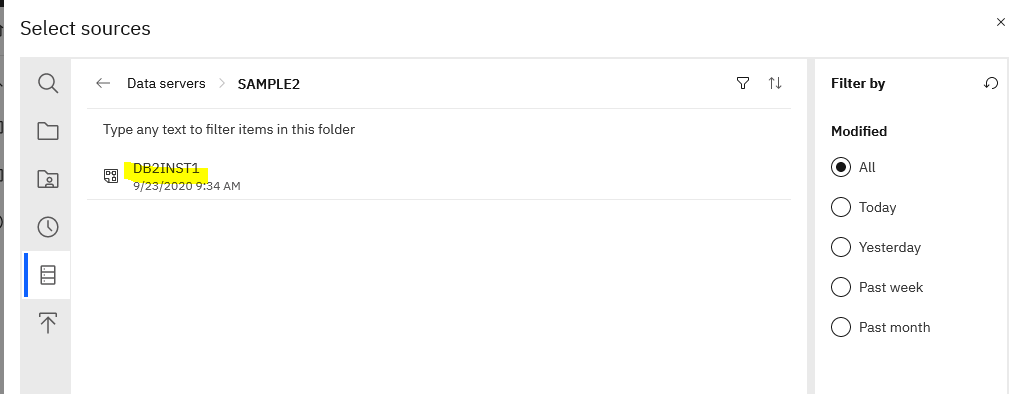
Click on the data icon and select your data source from the list. New dialog opens automatic.

Click on the schema to work with and click OK.

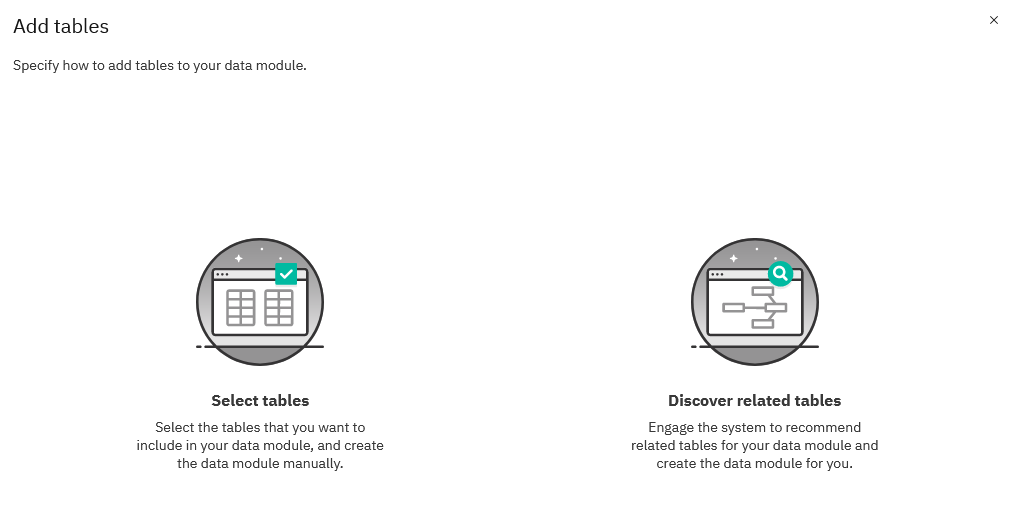
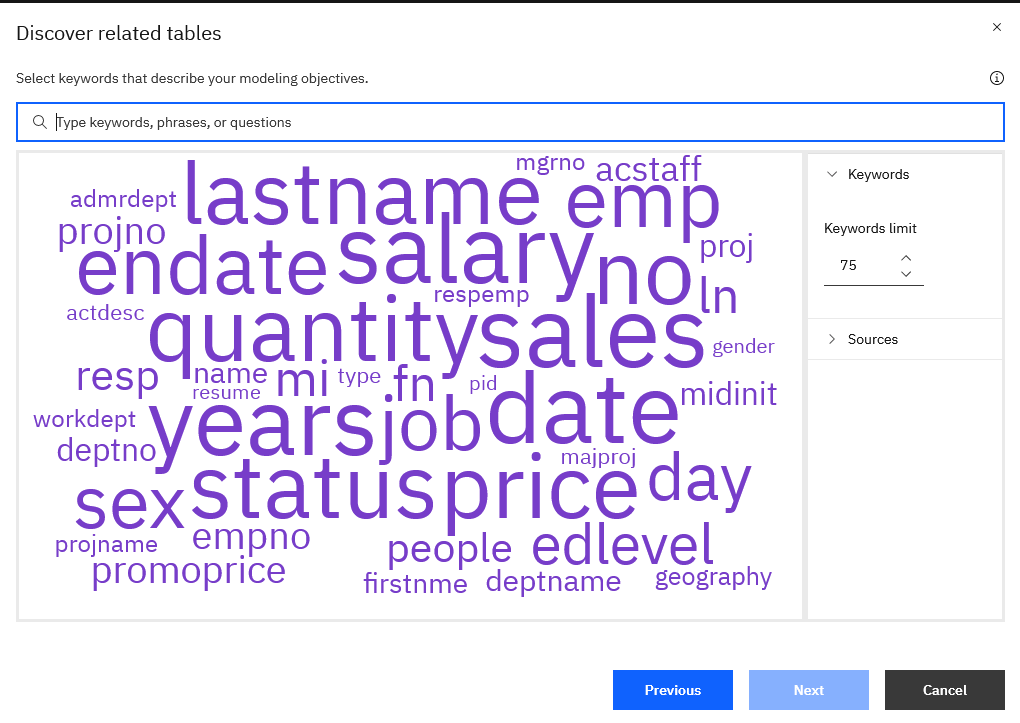
Click on Discover related tables and click Next

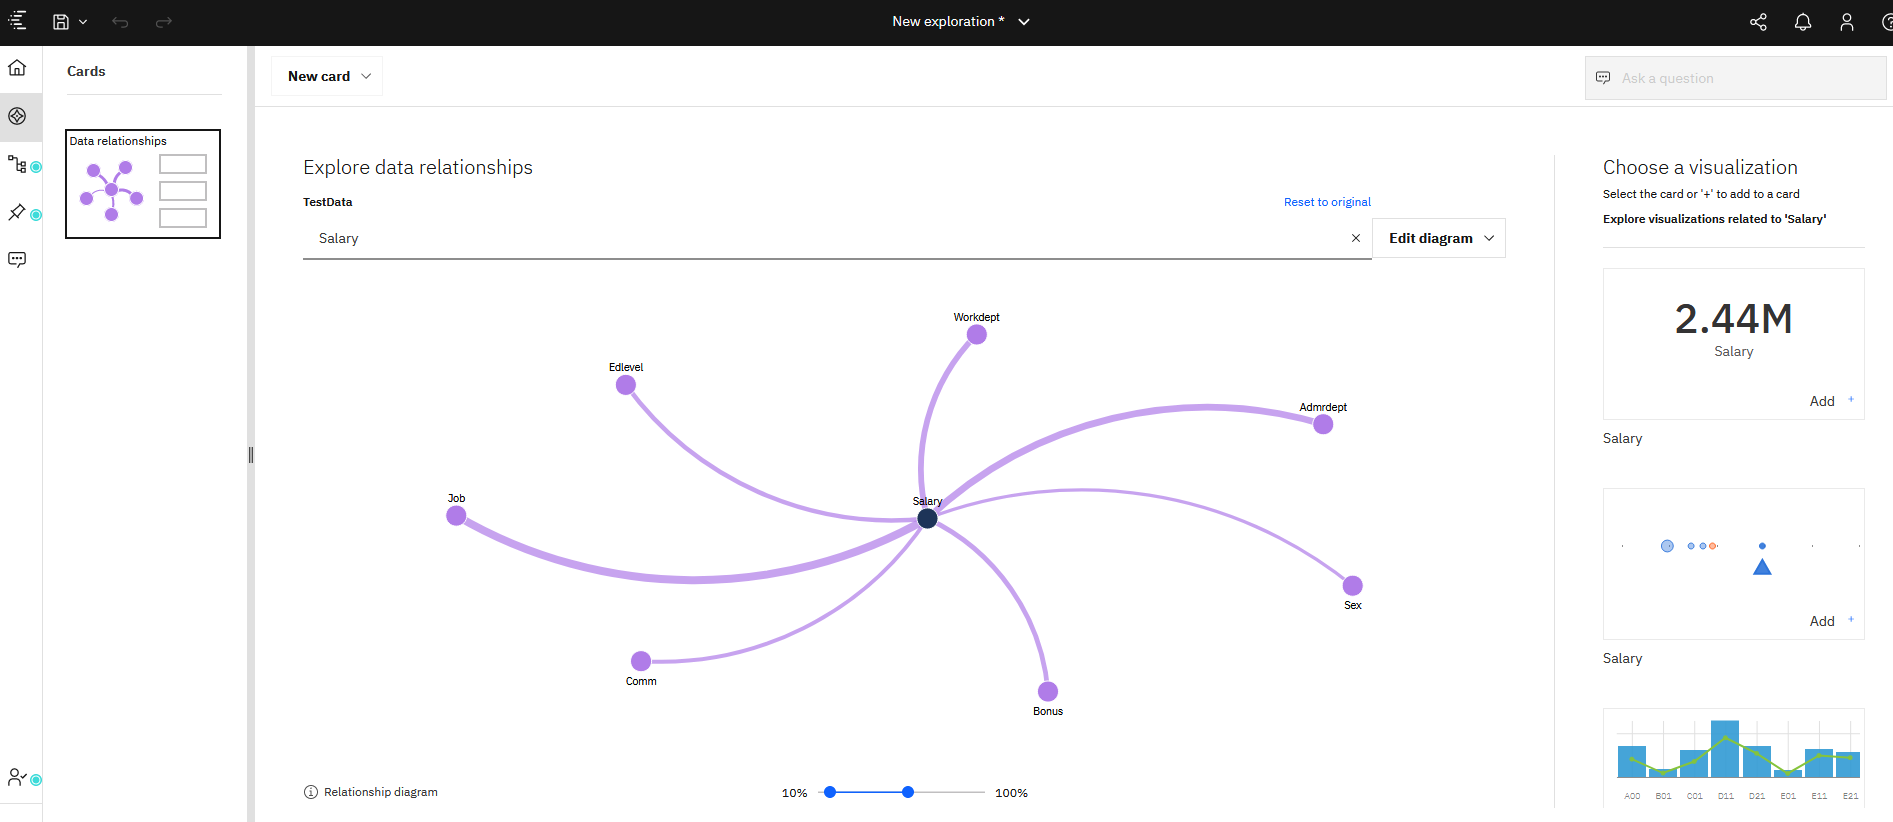
Cognos Analytics will show in word diagram the most popular fields. Select 3 of them and click next.


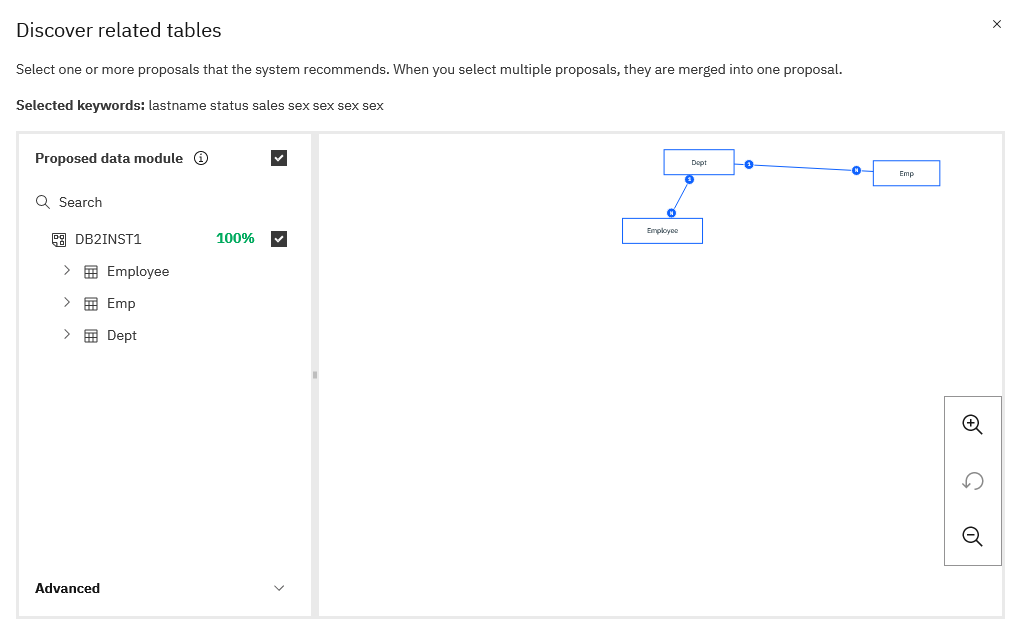
Table relations is shown, click OK.

Click on save icon in top left corner.
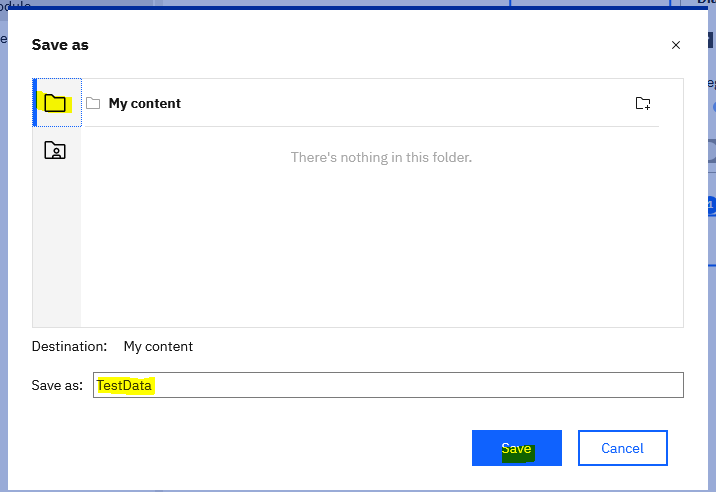
Select to save as.

Click on my content or the folder where you want it to be saved.
Enter a name for the data module.
Click on save.

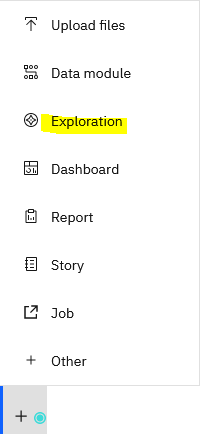
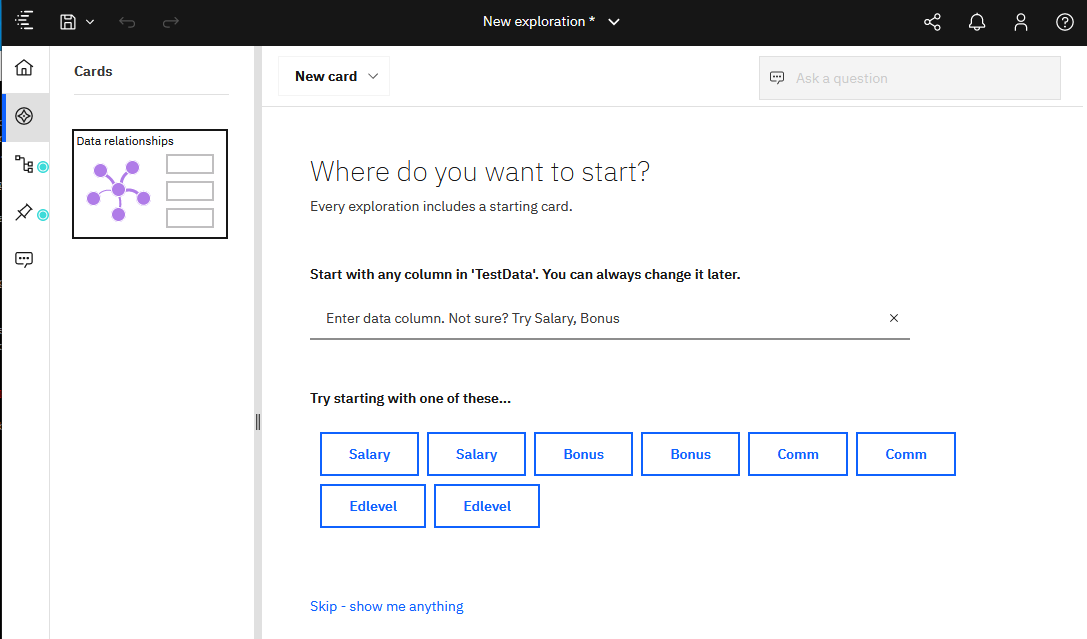
Click on new icon and exploration.

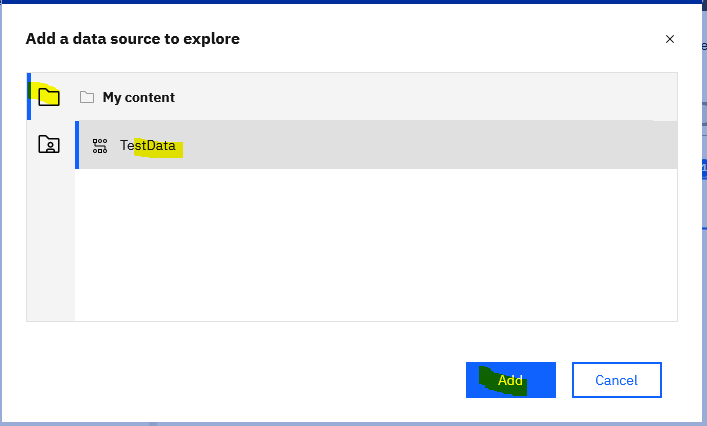
Select the folder, select the data module and click add.

Enter a table name or click on the boxes to select the data you want to find out about.

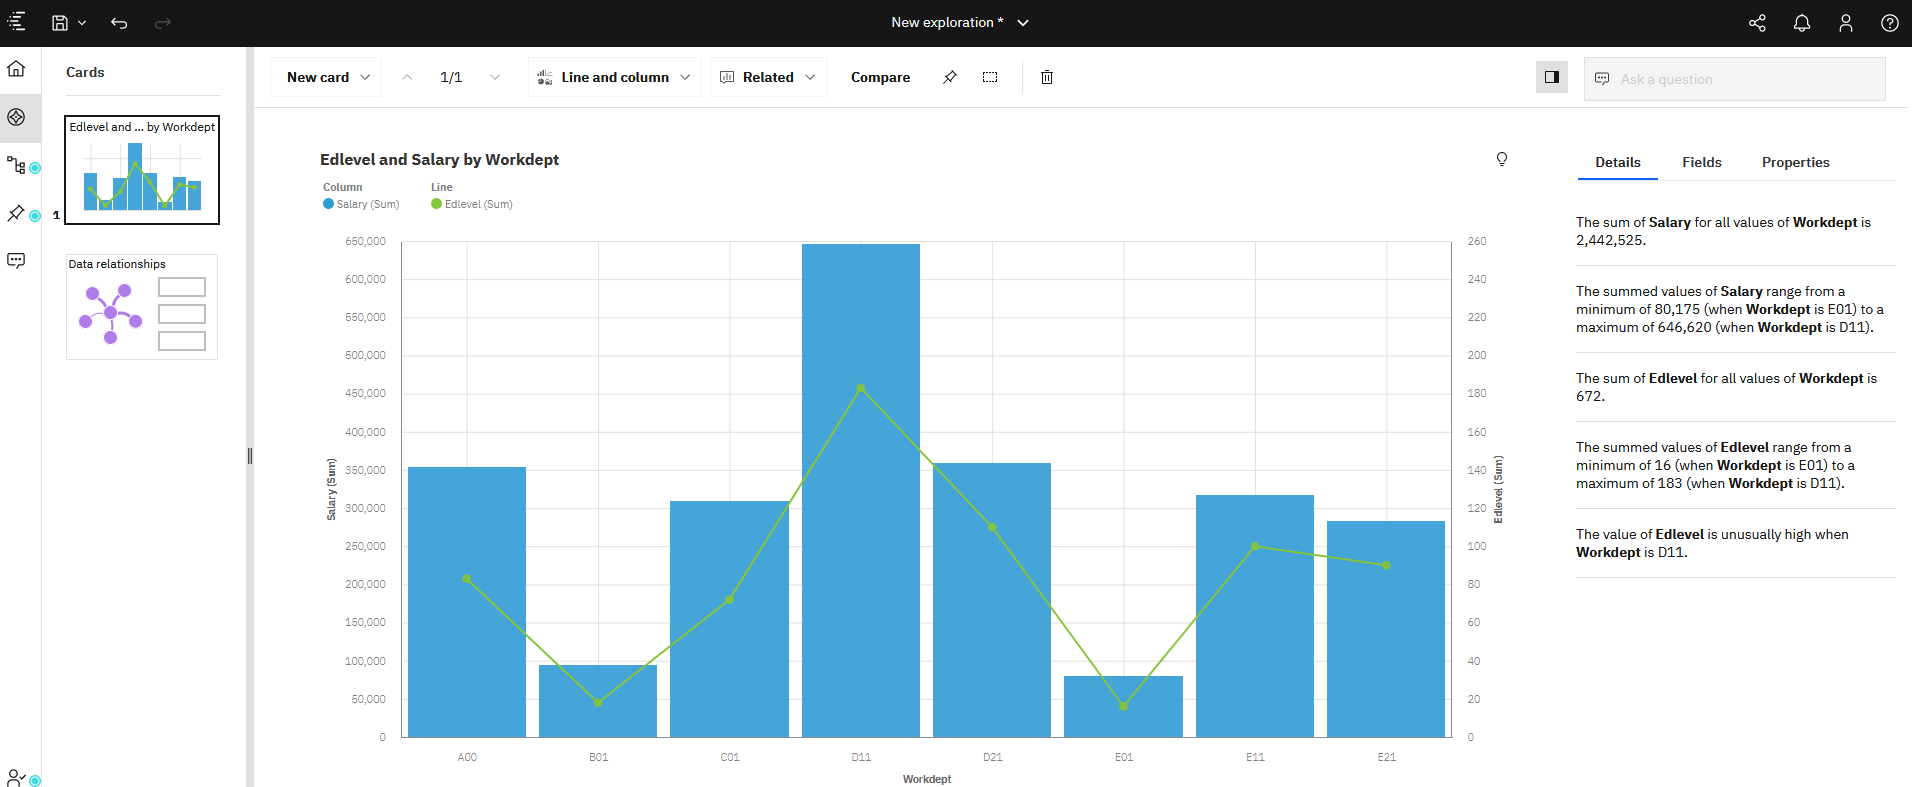
Select one of the charts on the right, if they fit your question.

When you are satisfied with your chart, click save icon to store the report in the folders inside Cognos Analytics.

More information:
https://www.youtube.com/watch?v=XkOkje0tXgI
https://www.youtube.com/watch?v=0NtellENB88
https://www.youtube.com/channel/UCS3gkkTTvLOc9HTUJSNeOxg
https://www.ibm.com/cloud/garage/dte/tutorial/ibm-cognos-analytics-1113-getting-started-exploration-0/
https://www.ibm.com/support/producthub/icpdata/docs/content/SSQNUZ_current/wsj/manage-data/conn-cognos.html

Product:
Cognos Analytics 11.1.6 Product_version=11.1 R6
Microsoft Windows 2016

Problem:
Error when start cognos from cognos configuration like this;
[Check NIST 131A conformance]
[ WARNING ] CAM-CRP-1632 The selected PDF Confidentiality algorithm is not permitted by the NIST SP 800-131A standard. You must change the selected algorithm to a stronger algorithm such as ‘AES-256’. Note that you may need to install the JRE’s unlimited jurisdiction policy files to enable all of the supported algorithms

Solution:


Open first Cognos Configuration and check that it says 128 at Cryptography > Cognos > field “PDF Confidentiality Algorithm – Advanced encryption standard with Cipher Block Chaining (CBC) mode 128 bit key”. Stop cognos service and close Cognos Configuration.
Backup the files in folder C:\Program Files\ibm\cognos\analytics\ibm-jre\jre\lib\security\ to c:\temp\security


Download the new policy zip file from https://public.dhe.ibm.com/ibmdl/export/pub/systems/cloud/runtimes/java/security/jce_policy/
Unzip the file in a new folder (c:\install), creating folder C:\install\unrestricted.


Copy the two new files (US_export_policy.jar and local_policy.jar)to folder C:\Program Files\ibm\cognos\analytics\ibm-jre\jre\lib\security\policy\unlimited


Open Cognos Configuration and go to Cryptography > Cognos. Change PDF Confidentiality Algorithm and Confidentiality Algorithm to Advanced encryption standard with Cipher Block Chaining (CBC) mode 256 bit key.

Right-click on supported ciphersuites and select “Reset to Default”.

Save the configuration and start the Cognos service.


More information:
https://www.ibm.com/support/pages/check-nist-131a-conformance-warning-while-starting-cognos-services

Product:
Cognos Controller 10.3
Microsoft Windows 2012 R2 server

Problem:
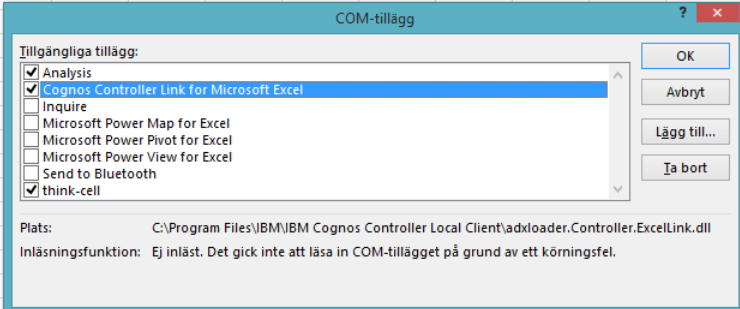
One user does not get the Cognos Controller menu to work inside Microsoft Excel 365.
When user try to add the COM add in there is a error like COM import fail.

Solution:
Close Excel and Close Cognos Controller Client.
Enter REGEDIT on run command on start menu on users laptop.
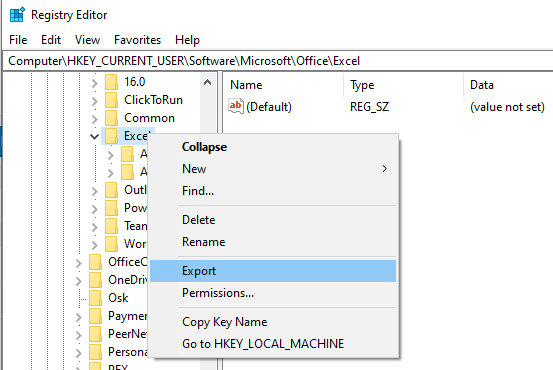
Inside [HKEY_CURRENT_USER\Software\Microsoft\Office\Excel]
Right click on Excel branch and select export

Save the file as regbackup.reg in a location you can find (d:\temp)
The delete the rows below addins, that is for Cognos Controller.
[HKEY_CURRENT_USER\Software\Microsoft\Office\Excel\Addins]

Start Cognos Controller client on your laptop and login in.
Click on the icon for excel inside Cognos Controller client.
This should start the Excel program locally, and also install the Controller link to excel again. This take time, as the start of Excel is slow. When excel is fully started, check that the controller menu work.

More information
https://www.ibm.com/support/pages/controller-excel-link-microsoft-excel-addin-was-disabled-when-opening-data-entry-form
https://www.ibm.com/support/pages/troubleshooting-failed-register-excellink-addin-add-method-addins-class-failed-error-when-using-excel-link
https://www.ibm.com/support/pages/troubleshooting-controller-excel-link-com-add-disappears-each-time-excel-closed-relaunched

Product:
Cognos Controller 10.4.2
Microsoft SQL 2019 database

Problem:
When from inside Microsoft SQL Management Studio do a restore on top of a existing database (ControllerTest) from a backup of a other database (ControllerProd) you get an error.

Restore of database “ControllerTest” failed.
Additional information:
System.Data.SQLClient.SQLError: Exclusive access could not be obtained because the database is in use.

Solution:
On the Cognos Controller server, stop the IBM Cognos Controller Batch Service. When that is stopped, then normally there should not be any sessions from the Cognos Controller server to the Database server – as long there is no person inside Cognos Controller Client working.

More information:
https://www.ibm.com/support/pages/how-backup-and-restore-db2-databases-use-cognos-controller
https://www.ibm.com/support/pages/how-migrate-upgrade-upsize-existing-database-new-later-version-controller

To check if there are missing SQL logins inside the restored controller database run below command from Query window in Microsoft SQL Management studio for that particular database.
EXEC sp_change_users_login ‘Report’;

If the SQL login for controller is listed, run below command to connect it.
EXEC sp_change_users_login ‘Auto_Fix’, ‘cognos’;

http://dbadiaries.com/using-sp_change_users_login-to-fix-sql-server-orphaned-users

Product:
Cognos Controller 10.4.2
Microsoft Windows 2016 server
Microsoft SQL 2019 database

Problem:
When try to connect to the database with the DBCONV tool you get a error. The data connection test inside Controller Configuration worked fine.
ERROR: com.microsoft.sqlserver.jdbc.SQLServerException:
Login failed for user ‘cognos’.
ClientConnectionId:ca120094-…

Solution:
The SQL login has a period in the password. Please use only Letters and numbers in the password used for Cognos Controller.

Go into Microsoft SQL Management studio.
Select the SQL login used for the controller database.
Change the password to a simpler one.
Update the password in Controller Configuration.
Test and save again.
Click on the icon to convert the database.
Click on connect.
Click on upgrade.

More information:
https://www.ibm.com/support/pages/how-migrate-upgrade-upsize-existing-database-new-later-version-controller

Product:
Cognos Analytics 11.1.7
Microsoft Windows 2019 server

Problem:
Error when using Event Studio in a multi server installation of CA 11.1.7 .

Error:
CAM-CRP-1655 Member coordination host in Configuration Group is not configured properly

Solution:
Ensure that Server Common Name is the FQDN of the server and not the word CAMUSER, as it was in old version of Cognos.

From Cognos Analytics 11.1.7 you must use Fully Qualified Domain Names for the following Cognos Configuration fields, even when you do not use SSL.

Environment
Gateway URI
External dispatcher URI
Internal dispatcher URI
Dispatcher URI for external applications
Content Manager URIs
Environment > Configuration Group
Group contact host
Member coordination host
Security > Cryptography > Cognos
Server common name
Subject Alternative Name > DNS names
Subject Alternative Name > IP addresses

More information:
https://blogs.perficient.com/2020/07/31/whats-new-in-cognos-analytics-11-1-7

https://www.ibm.com/support/knowledgecenter/en/SSEP7J_11.1.0/com.ibm.swg.ba.cognos.inst_cr_winux.doc/t_configuresslforcognos8.html

Product:
Planning Analytics 2.0.9
Planning Analytics Workspace 54
Microsoft Windows 2016 server

Problem:
Sum up on a hierarchy?

Suggested solution:
Turn on hierarchy (virtual dimensions) by adding EnableNewHierarchyCreation=T to the TM1 applications tm1s.cfg file.
Ensure that you have free memory on the server before you turn this one.

Login to paw and open a new book.
Right click on the dimension, and select edit dimension. Click on attributes icon.
Right click on the attribute you want to create a hierarchy for.

The new hierarchy is shown as a dimension.

There are 3 first hierarchy created at first time, the one with same name is for backward compatibility, your new one, and levels. If you delete a member from a hierarchy – it is only removed from that virtual dimension. To delete a leaf member, you should delete it from the leaves hierarchy. Then data and all existing of that member is removed from all hierarchy’s.

Start PAX and connect to your TM1 application.
Right click on the cube that contain the data you want to see, and select Exploration.

Expand the dimension to see the new hierarchy. Drag the hierarchy to the rows area. Now you got the report summarized on the Plants.

Convert the report to a quick report.


Create a excel report the way you want and reference the result on the quick report sheet. Publish the report to TM1WEB.

Hierarchy can only be used in Explorations and Quick Reports. If you add members to the leaves, you have to recreate the dimension with a TI script to get the new members added.

More information:
https://code.cubewise.com/blog/mastering-hierarchies-in-ibm-tm1-and-planning-analytics
https://exploringtm1.com/creating-virtual-dimensions-in-tm1-planning-analytics/

Product:
Planning Analytics 2.0.9
Planning Analytics Workspace 54
Microsoft Windows 2016 server

Problem:
How sum up values from a group of accounts, in an Excel report?

Suggested solution:
Create a hidden dynamic report with the given subset in the TM1RPTROW and a sum underneath, then refer the sum.

Mark out the accounts that you want to sum with some text in the attribute, like here in planning samples, we set AccountCatagory to text “coffee”.

Go to Planning Analytics Workspace (PAW) and open a new book.
Expand the Dimensions, and for your “plan_chart_of_accounts” right click and select Edit dimension.
Click on icon for Member attribute mode in top right corner of the view.
Scroll to the column you want to edit, in out example AccountCatagory.
Enter the word “coffee” on the rows you want selected.
Updates are save direct to the dimension (tm1 database).

Go to Planning Analytics for Excel (PAX) and connect to your planning sample.
Expand the views on the right side and import a view that contain the columns you want.

On the view, right click and select dynamic report on new sheet.
Click on “Show Format Areas”.
In cell B11 insert the MDX formula:

‘{FILTER(TM1SUBSETALL([plan_chart_of_accounts].[plan_chart_of_accounts]) , (INSTR(1 , [plan_chart_of_accounts].[plan_chart_of_accounts].CURRENTMEMBER.PROPERTIES(“AccountCategory”) , “coffee” , 1) >= 1))}

In cell B21 update the TM1RPTROW to have a reference to the MDX formula last:

=@TM1RPTROW($B$12,”Planning Sample CAM:plan_chart_of_accounts”,,,”AccountName”,FALSE,B$11)

Above B$11 will give that the TM1RPTROW use the MDX formula to select accounts.
Then you need to sum up this values to a single cell.


Open the drop down of areas and mark the tm1rptdatarng line and press ctrl+c to copy the value.
Go to cell C19 and enter a SUM formula with INDEX:

=SUM(INDEX(TM1RPTDATARNG48625521,0,3))

Replace the TM1RPTDATARNG48625521 with your unique area name.
This should give that this always sum up the values in column 3 (ly actual) to this cell.

Now create a new sheet in the excel workbook.
Insert the dynamic report you want, and on the last line enter a reference to above cell.

=Sheet2!C19


This will update this cell with the value from the other sheet.


You need to refresh the book for the numbers to be updated.

You can hide the second sheet in the excel workbook, then the report is only one page.

There is better ways to solve this – check out the links below.

More information:
https://cubewise.com/blog/tm1-attributes-things-to-be-aware/
https://docs.microsoft.com/en-us/analysis-services/multidimensional-models/mdx/mdx-member-properties-intrinsic-member-properties?view=asallproducts-allversions&viewFallbackFrom=sql-server-ver15
https://www.tm1forum.com/viewtopic.php?t=13759
https://www.bihints.com/creating_dynamic_subsets_in_applix_tm1_with_mdx_a_primer
https://docs.microsoft.com/en-us/sql/mdx/iif-mdx?view=sql-server-ver15
https://docs.microsoft.com/en-us/sql/mdx/instr-mdx?view=sql-server-ver15
https://www.tm1forum.com/viewtopic.php?t=14731
https://www.contextures.com/xlFunctions01.html
https://exceljet.net/formula/sum-range-with-index