Product:
Planning Analytics Workspace 74
Microsoft Windows 2019 Server

Issue:

Can not expand proven_techniques in databases under modeling tools in Planning Analytics Workspace.

Other TM1 instance work.

Possible solution:

The TM1 instance HTTPportnumber is not open in the firewall.

PAW uses REST API, HTTPportnumber, to communicate with the TM1 instances.

Change to a port you now the firewall let trough, by edit the tm1s.cfg file.

PortNumber=12301
HTTPPortNumber=12302
AdminHost=

Save the TM1S.CFG file and try again.

PAW have access to the TM1 Admin service, therefor the TM1 instance is listed in the tree.

More information:

https://ibm.github.io/planninganalyticsapi/#introduction

https://www.ibm.com/docs/en/planning-analytics/2.0.0?topic=cloud-tm1-rest-api

Product:

Cognos Controller Web 10.4.2

Microsoft Windows 2019 server

Issue:

Controller Web does not work.

When you check the log file in folder D:\Program\ibm\cognos\ccr_64\fcmweb\wlp\usr\servers\fcm.web\logs you see text like

2022-04-11 15:47:15 | | ERROR | [com.ibm.cognos.fcm.wmc.ccrws.DefaultCcrClientFactoryInitializer] CCR WS API not initialized yet [error=2 counts of InaccessibleWSDLException.
]. Retrying in 1000 ms…

Solution:

Go to folder D:\Program\ibm\cognos\ccr_64\fcmweb\wlp\usr\servers\fcm.web

Open file com.ibm.cognos.fcm.web.properties in notepad++

Ensure that the ccrwsUrl=http://servername.domain.com/ibmcognos/controllerserver/ccrws.asmx points to the correct server.

More Information:

https://www.ibm.com/support/pages/how-install-controller-web

Product:

Planning Analytics Workspace 74

Microsoft Windows 2019 server

Issue:

How move user from on PAW installation to a other PAW installation?

Suggested solution:

Browse to the from PAW server and login as administrator.

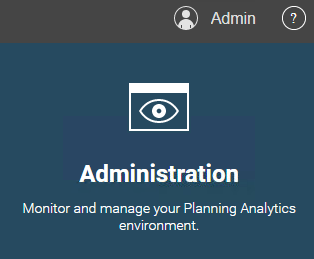
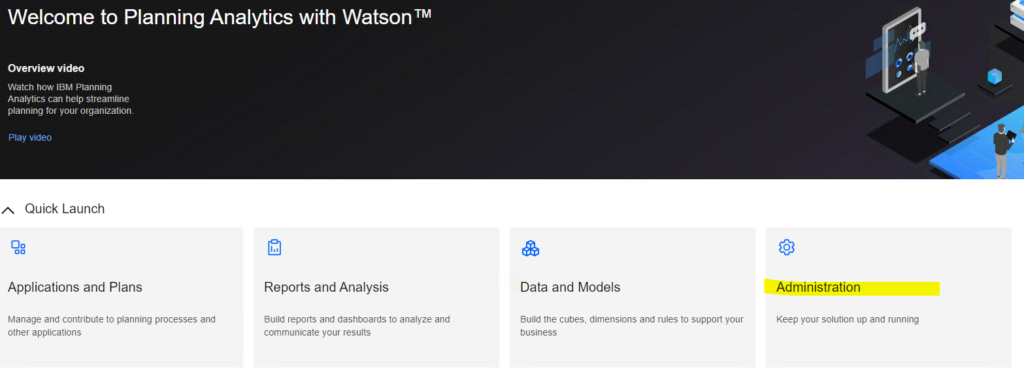
Click on Administration icon.

Click on Users tab.

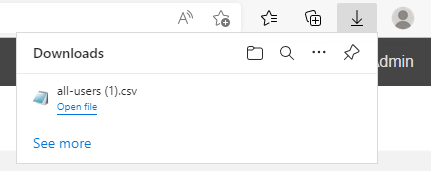
Click on Export Users.  (this will export all users to a csv file)

The file will be in you download folder, on your computer.

Close the web browser and logout from the old PAW server.

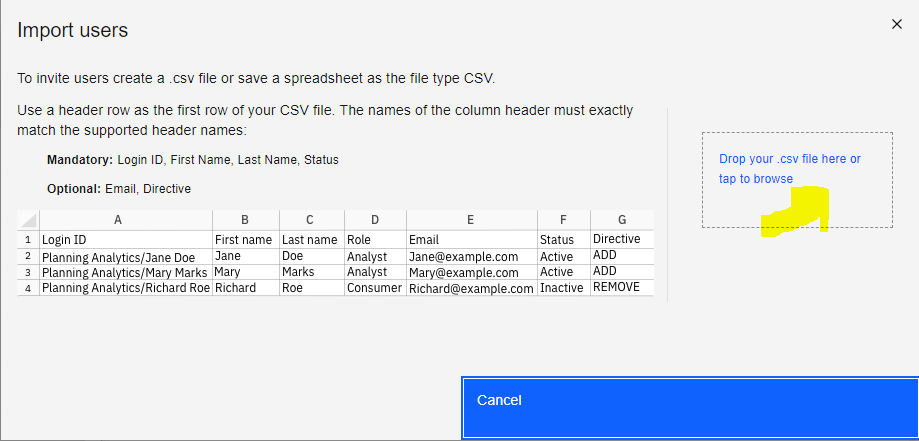
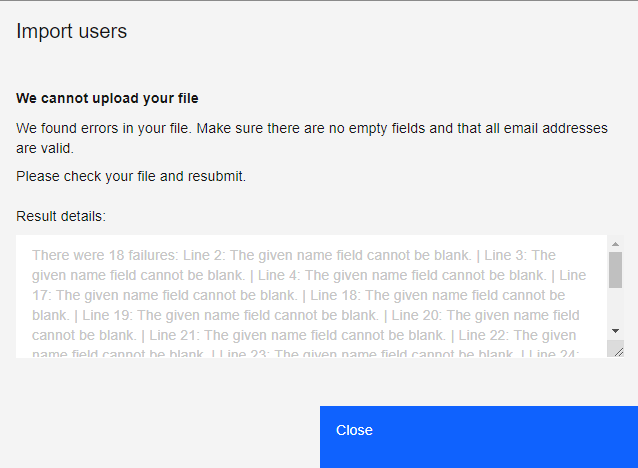
Open the all-users.csv file in notepad++ and add names to all blank columns. There is not allowed to be blank columns in the csv file when loading it up to the PAW.

Start the web browser and go to the new PAW, where the users should be inserted.

Login as administrator.

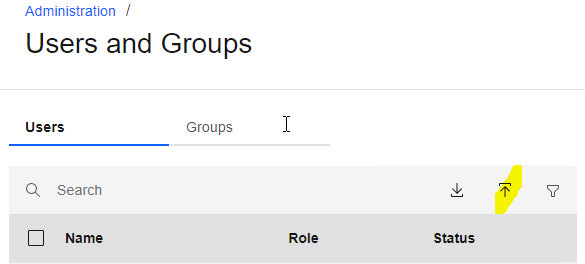
Click on Administration icon.

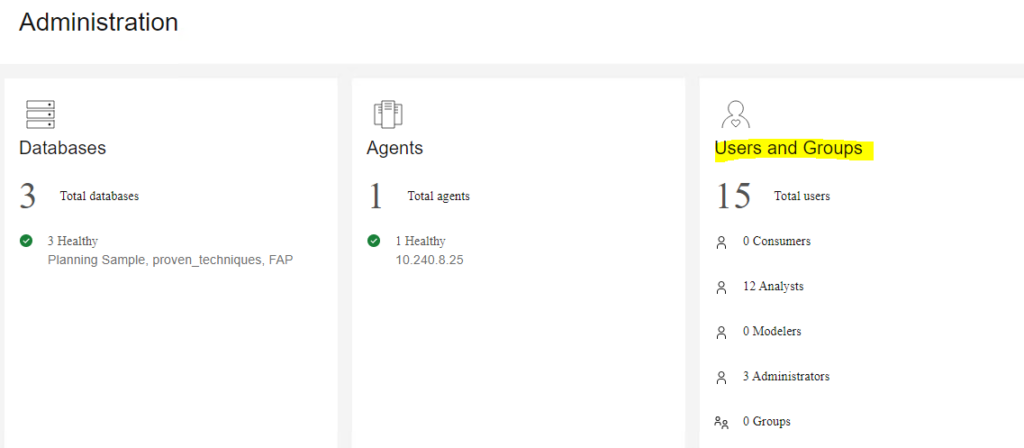
Click on Users and Groups.

Click on upload users from csv file icon.

Drag the all-users.csv file to the drop zone.

Done, if you not have blank columns, then you get a error.

But the rows with correct information is loaded to PAW.


More Information:

https://www.ibm.com/docs/en/planning-analytics/2.0.0?topic=users-add-local-only

Product:

Cognos Analytics 11.1.7

Microsoft Windows 2019 server

Issue:

What firewall ports should be open in windows firewall to make Cognos work?

Solution:

These are the ports that is used by Cognos products:

Cognos Analytics 11.1.7

80 for client access to cognos portal
443 for client access (https/ssl/tls)
9300 Cognos dispatcher
4300 Sync configuration between CA11 servers
5701 Sync CA11 servers to a group of CA11 servers
9301 CA11 uses this port at start
9362 Cognos log server
9080 WebSphere transport port
8172 IIS Server Farms port to check windows servers


Cognos Controller 10.4.2

80 for controller client access to controller server
443 for client access (https/ssl/tls)
9300 Contact to CA dispatcher
9080 Client to controller web
9082 Client to controller report service
9081 if installed on same server as CA11
3000 Controller web backend port


Planning Analytics 2.0.9.12

80 for client access to PAW
443 for client access (https/ssl/tls) to PAW
9300 Contact to CA dispatcher
9510 Client access to TM1WEB
9511 Tm1 app web (pmpsvc)
9012 PAA agent
5495 Tm1 architect contact with TM1 Admin service
5498 Tm1 architect contact with TM1 Admin service (ssl)
5895 TM1 Admin Server -> TM1 REST API (HTTP)
5898 TM1 Admin Server -> TM1 REST API (HTTPS)
12300-12400 TM1 instance port range
8888 Administration port for PAW
9513 Shutdown port


More Information:

https://www.ibm.com/docs/en/cognos-analytics/11.1.0?topic=install-review-default-port-settings

https://www.ibm.com/support/pages/apar/PI95933

https://www.ibm.com/support/pages/node/6257779

https://www.ibm.com/support/pages/controller-web-does-not-work-when-installed-same-server-cognos-analytics

Product:

Cognos Analytics 11.1.7

Microsoft Windows 2019 server

Issue:

After new installation, when you browse to http://servername/ibmcognos you get an error.

If you browse to http://servername:9300/bi/v1/disp, then CA11 works fine.

When it do not work, you see in the URL: http://localhost/ibmcognos/bi/bi

Error message:

The webpage cannot be found

Solution:

You have run the CA_IIS_Config.bat file first, without installing requestrouter_amd64.msi or rewrite_amd64_en-US.msi. The Rewrite module need to be installed first.

CA_IIS_Config.bat file is found in folder D:\Program\ibm\cognos\analytics\cgi-bin\templates\IIS

Download the needed files, this is a new version for Windows 2019, from here:

https://www.iis.net/downloads/microsoft/url-rewrite

https://www.microsoft.com/en-us/download/details.aspx?id=47333

Install them on the Microsoft Windows 2019 server.

You should have in control panel – “Program and Features”;

IIS URL Rewrite Module 2 version 7.2.1993

Microsoft Application Request Routing 3.0 version 3.0.05311

Then run the CA_IIS_Config.bat file, again from a command prompt.

Check in Internet Information Services (IIS) Manager that the URL rewrite exists.

(if rule SSO login is disabled – you do not have SSO with Cognos Analytics).

More Information:

https://www.ibm.com/support/pages/website-declined-show-webpage-error-http-403-forbidden-means-internet-explorer-when-launching-ca-iis-gateway-httpservernameibmcognos-caused-not-installing-application-request-routing-url-rewrite

https://www.ibm.com/docs/en/cognos-analytics/11.1.0?topic=analytics-configuring-server-components

Product:

Planning Analytics Workspace 74

Microsoft Windows 2019 server

Issue:

When starting docker first time after installation with command start-service docker you get an error.

Error message in windows event log:

fatal: unable to configure the Docker daemon with file C:\ProgramData\docker\config\daemon.json: invalid character ‘P’ in string escape code

Solution:

Open the daemon.json file in notepad++

Ensure the path for data-root is using double backslash \\

Save the file.

Start docker with command: start-service docker

More information:

https://docs.docker.com/config/daemon/

https://www.mirantis.com/blog/getting-started-with-mirantis-container-runtime-on-windows-server/

https://www.ibm.com/support/pages/troubleshooting-planning-analytics-workspace-related-docker-issues

Product:

Cognos Analytics 11.1.7

Microsoft Windows 2019 server

Issue:

After upgrade of CA11 to a new version, the Dynamic Cubes does not load or work. When you test a JDBC connection in cognos portal you get a error.

Error message:

DPR-ERR-2072 Unable to load balance a request with absolute affinity, most likely due to a failure to connect to the remote dispatcher. See the remote dispatcher detailed logs for more information. Check the health status of the installed system by using the dispatcher diagnostics URIs

Solution:

If you upgrade from 11.1.6 to 11.1.7 and you have before applied the log4j patch, then the upgrade will remove the jar file and replace the bootstrap_wlp_winx64.xml file.  But the file xqe.config.custom.xml will still be around. In this file there is a pointer to the log4jSafeAgent2021.jar file.

Stop Cognos Analytics services.

Remove or restore the original xqe.config.custom.xml file.

Start Cognos Analytics services.


More information:

If you before the upgrade have done this (listed below), then you can run into above issue.

The IBM Cognos Analytics team have developed a “no-upgrade” option for our “On Prem” (local installation) customers.

The single version of the patch is applicable to IBM Cognos Analytics versions 11.0.6 to 11.0.13 FP4, 11.1.x and 11.2.x.

The log4jSafeAgent file that is provided for Cognos Analytics modifies the class byte code at the Java startup time. It removes the vulnerable JNDI lookup, and enforces the StrSubstitutor recursion limit without altering the installed product.

It effectively rewrites the “org/apache/logging/log4j/core/lookup/JndiLookup” class to remove its content during IBM Cognos Analytics start up.

To get the patch and detailed instructions, click this link: log4jSafeAgent

Bundle Customers can use the following link: log4jSafeAgent Bundled

https://www.ibm.com/support/pages/node/6538720

In the install_location\configuration directory, edit the xqe.config.custom.xml file. Note: The xqe.config.custom.xml file might not exist and needs to be created. Should changes be made to the xqe.config.xml file (ibm.com)

In the xqe.config.custom.xml file, specify the javaagent parameter with a reference to the log4jSafeAgent2021.jar file. For IBM JRE, add the javaagent as follows:

-javaagent:../webapps/p2pd/WEB-INF/lib/log4jSafeAgent2021.jar”


https://www.ibm.com/support/pages/best-practices-using-jdbc-drivers-cognos-analytics-11x

Product:

Microsoft SQL server 2016

Microsoft Windows 2012 server

Issue:

How add read access to all tables in all databases on one server to a user?

Solution:

Add a AD user as a login to the SQL server in SSMS. https://www.guru99.com/sql-server-create-user.html

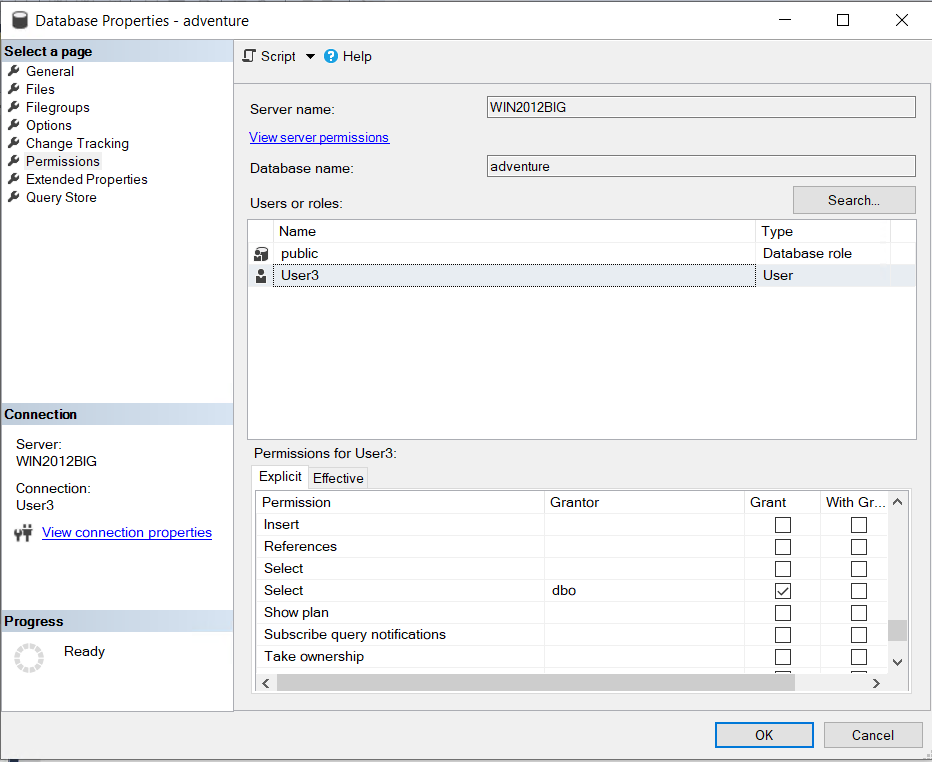
In our example we use User3, but you change it to your login-name.

EXEC sp_MSforeachdb ' Use ?; Create user User3 for login User3; Grant select on database :: ? to User3 '

In the string after the sp_MSforeachdb  command, the character ? is replaced by each database.

Use ?, this will move focus to this database, and execute the command after to this database.

Create user User3 for login User3, adds the user name to the database and connect it with the login user.

If the user3 already is in the database, then above will not work.  Then run the command again without the Create user… part.

Grant select on database :: ? to User3, will give this user READ access to all object in the database. Even new tables and views.

The grant select on a database, will give that user full read access to the database tables and views.

More information:

https://www.mssqltips.com/sqlservertip/6702/sql-server-windows-authentication-with-users-and-groups/

https://www.mssqltips.com/sqlservertip/1414/run-same-command-on-all-sql-server-databases-without-cursors/

https://www.techonthenet.com/sql_server/users/create_user.php

https://www.tutorialsteacher.com/sqlserver/grant-permissions-to-user

https://www.mssqltips.com/sqlservertip/2201/making-a-more-reliable-and-flexible-spmsforeachdb/

https://www.mssqltips.com/sqlservertip/1414/run-same-command-on-all-sql-server-databases-without-cursors/

https://www.mssqltips.com/sqlservertip/1476/how-to-read-log-file-in-sql-server-using-tsql/

https://dba.stackexchange.com/questions/117759/granting-select-access-to-all-tables-within-a-specific-database-in-ms-sql

To grant SELECT permissions on the whole database use this:

USE <MY_DATABASE>
GRANT SELECT ON DATABASE :: <MY_DATABASE> TO <MY_USER>

where

  • <MY_USER> is user
  • <MY_DATABASE> is database name

Granting permissions on schema doesn’t help, simple reason: if new schemas occur the user will not have permissions.

Granting permissions on all objects doesn’t for the same reason, the user will not have permissions on new objects created after GRANT event.

Product:
Microsoft SQL Server 2016

Microsoft Windows 2012

Issue:
How read the SQL agent jobs logs without being a sysadmin?

Solution:

Add the user to a AD group and add the AD group as a login in the SQL server. In our example we will instead use SQL login User3.

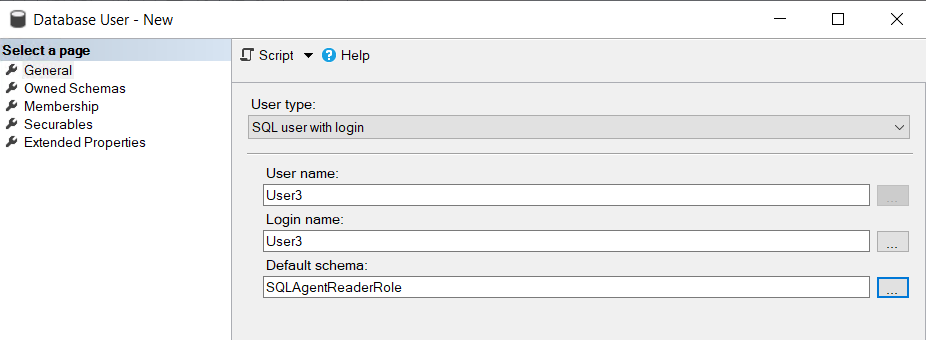
In SSMS go to Security – Logins – New Login.  https://www.guru99.com/sql-server-create-user.html  Create your login in SQL.

Go to your MSDB database under – Databases – System Databases – msdb – Security – Users – New User.
Add your User3 there to the msdb database.

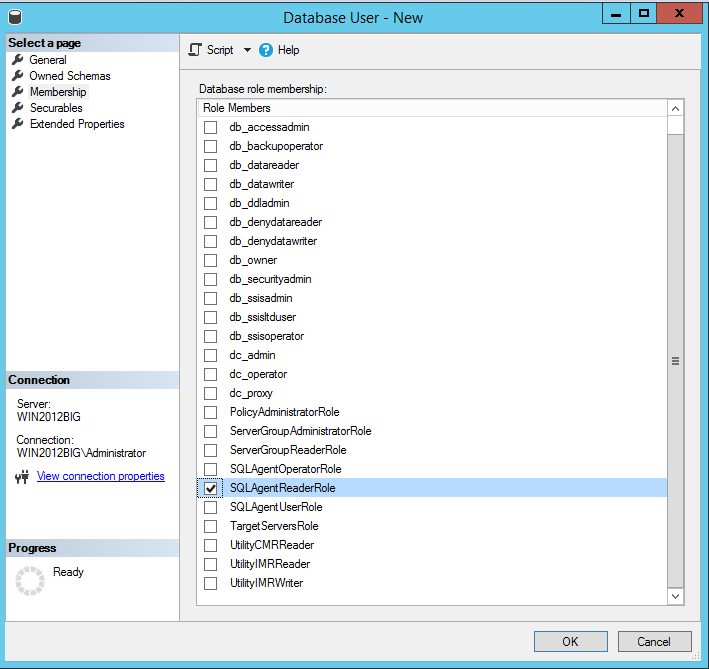
Expand Membership and select SQLAgentReaderRole, then click OK.

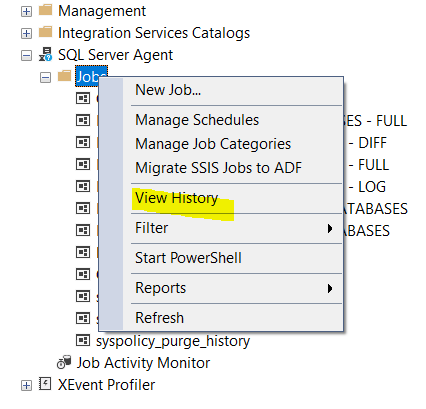
Then that user can in SSMS see SQL Server Agent, and View History and properties of a SQL Agent Job.

With SQL script:

USE [msdb]
exec sp_addrolemember 'SQLAgentReaderRole', 'DomainName\GroupName'


https://zarez.net/?p=36

More Information:

https://docs.microsoft.com/en-us/sql/ssms/agent/sql-server-agent-fixed-database-roles?redirectedfrom=MSDN&view=sql-server-ver15

https://www.techonthenet.com/sql_server/users/create_login.php

https://www.tutorialsteacher.com/sqlserver/grant-permissions-to-user

https://www.vb-net.com/Sql/Index.htm

https://www.tutorialsteacher.com/sqlserver/indexes

Product:

Microsoft Windows

git version 2.33.1.windows.1

Issue:
What is a good order of command to work with GIT?

Suggestion:

Install GIT on your computer from here https://git-scm.com/download/win

https://git-scm.com/book/en/v2/Getting-Started-Installing-Git

Create a folder, where you will work with git, in our example we use C:\kurser\git-demo-example

To setup a repository, you can follow this steps: https://towardsdatascience.com/an-easy-beginners-guide-to-git-2d5a99682a4c

When you are inside your git folder, you can start using GIT from tools like GIT BASH or SOURCETREE. https://www.sourcetreeapp.com/enterprise          https://gitforwindows.org/

Git commands are case sensitive, and git commands is always lowercase. git used to that.

If you work with Azure DevOps as master source, the git function can depend on how Azure DevOps is setup.

We guess you have already clone your repo, so you can start to work.

git status  (to check you are in correct folder and branch, mostly main at start)

git pull  (to download the latest changes to the project from the remote master)

git checkout -b  “Feature/1234”  (to create a branch and start working on the files)

Work with your file in Notepad++ or Visual Studio, and save your work in the folder you have for git.

git add .  (to add all changed files to the git source control)

git commit -m “This is a updated file”   (to save the changes to your branch, add a online comment about the files)

git checkout master (switch to your local main branch to update it with any new remote changes)

git pull  (download the latest changes done by others to your main branch)

git checkout “Feature/1234”  (go back to your local branch, you been working in)

git merge master (get the files from master into your branch, any conflicts have to be solved in Visual Studio locally)

You may have to change the word master to main in your version of GIT, also remember that the branch-name is case sensitive.

git push origin “Feature/1234”   (to push your changes up to the remote git server)

Then you have to go to your remote git (or Azure DevOps) in your web browser and complete the pull there.

This picture will look different for what kind of remote repo you use. Above is from https://github.com

Click on Compare & pull request button
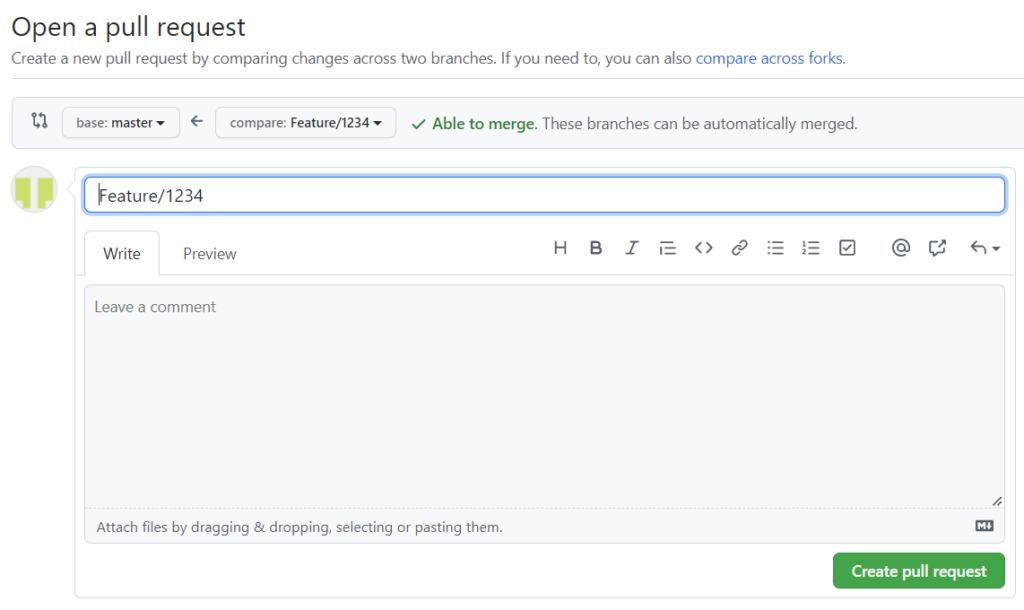
Enter some descriptive text and click on Create pull request button.
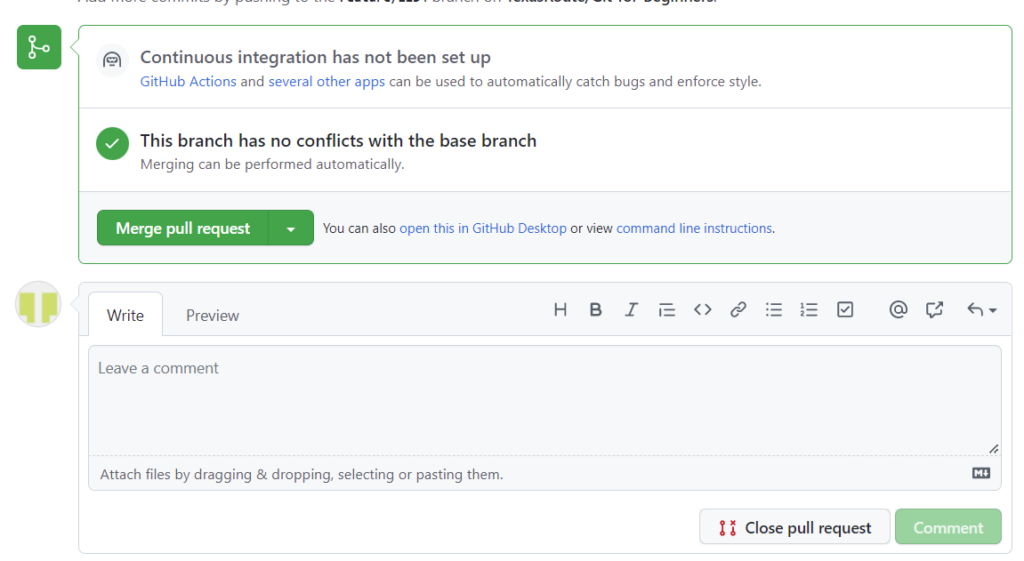
As we are lucky, no conflicts, you can press Merge pull request. Good practice is to leave explaining comments about what the code change is about.

Click on Confirm merge button.

Recommendation is to Delete the branch, so it is not laying around.

Then you are good to go – and start over from top with your next change.

git log –oneline   (enter to see the steps you have done)

Download and install WinMerge, to have a tool to compare files. https://winmerge.org/downloads/

Download and use Visual Studio Code https://code.visualstudio.com/download to solve conflicts.

git reflog  (to see more detail’s of what you done)

If I accidental delete files in my local folder for the git project, i can reset my state to the one before with command:

git reset  –hard origin

This will only work if i have not committed and push the change up to remote repo.


More Information:

https://education.github.com/git-cheat-sheet-education.pdf

https://towardsdatascience.com/an-easy-beginners-guide-to-git-2d5a99682a4c

https://rogerdudler.github.io/git-guide/

https://rogerdudler.github.io/git-guide/files/git_cheat_sheet.pdf

https://www.atlassian.com/git/tutorials/git-bash

https://docs.microsoft.com/en-us/azure/devops/repos/git/pull-requests?view=azure-devops&tabs=browser

https://www.stanleyulili.com/git/how-to-install-git-bash-on-windows/

https://www.freecodecamp.org/news/practical-git-and-git-workflows/

https://docs.microsoft.com/en-us/visualstudio/subscriptions/download-software

https://visualstudio.microsoft.com/vs/older-downloads/

https://visualstudio.microsoft.com/free-developer-offers/

https://github.com/microsoft/vscode

https://medium.com/@deprov447/a-simple-git-guide-8854d5c3ae12

https://git-scm.com/docs/gittutorial

https://www.edureka.co/blog/git-commands-with-example/