After new installation, when you browse to http://servername/ibmcognos you get an error.
If you browse to http://servername:9300/bi/v1/disp, then CA11 works fine.
When it do not work, you see in the URL: http://localhost/ibmcognos/bi/bi
Error message:
The webpage cannot be found
Solution:
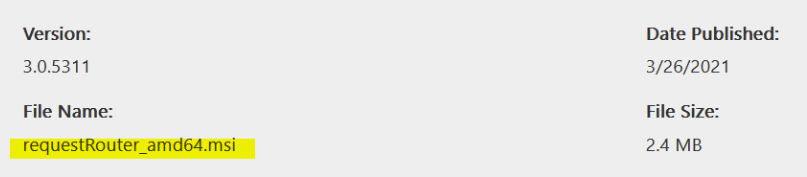
You have run the CA_IIS_Config.bat file first, without installing requestrouter_amd64.msi or rewrite_amd64_en-US.msi. The Rewrite module need to be installed first.
CA_IIS_Config.bat file is found in folder D:\Program\ibm\cognos\analytics\cgi-bin\templates\IIS
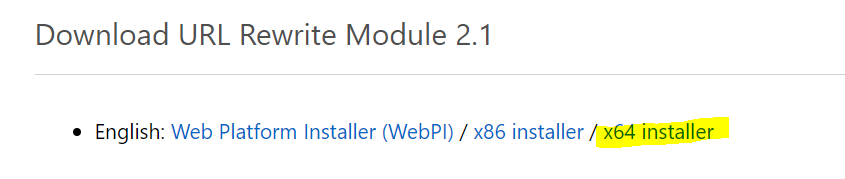
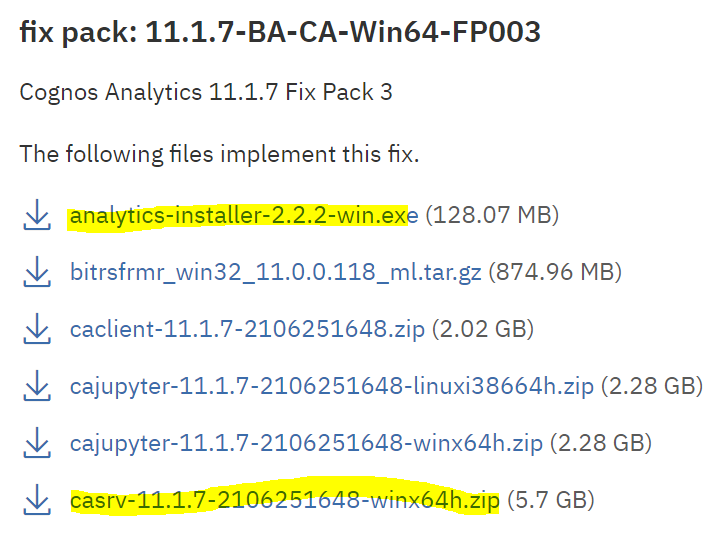
Download the needed files, this is a new version for Windows 2019, from here:
by Roger·Comments Off on DPR-ERR-2072 Unable to load balance
Product:
Cognos Analytics 11.1.7
Microsoft Windows 2019 server
Issue:
After upgrade of CA11 to a new version, the Dynamic Cubes does not load or work. When you test a JDBC connection in cognos portal you get a error.
Error message:
DPR-ERR-2072 Unable to load balance a request with absolute affinity, most likely due to a failure to connect to the remote dispatcher. See the remote dispatcher detailed logs for more information. Check the health status of the installed system by using the dispatcher diagnostics URIs
Solution:
If you upgrade from 11.1.6 to 11.1.7 and you have before applied the log4j patch, then the upgrade will remove the jar file and replace the bootstrap_wlp_winx64.xml file. But the file xqe.config.custom.xml will still be around. In this file there is a pointer to the log4jSafeAgent2021.jar file.
Stop Cognos Analytics services.
Remove or restore the original xqe.config.custom.xml file.
Start Cognos Analytics services.
More information:
If you before the upgrade have done this (listed below), then you can run into above issue.
The IBM Cognos Analytics team have developed a “no-upgrade” option for our “On Prem” (local installation) customers.
The single version of the patch is applicable to IBM Cognos Analytics versions 11.0.6 to 11.0.13 FP4, 11.1.x and 11.2.x.
The log4jSafeAgent file that is provided for Cognos Analytics modifies the class byte code at the Java startup time. It removes the vulnerable JNDI lookup, and enforces the StrSubstitutor recursion limit without altering the installed product.
It effectively rewrites the “org/apache/logging/log4j/core/lookup/JndiLookup” class to remove its content during IBM Cognos Analytics start up.
To get the patch and detailed instructions, click this link: log4jSafeAgent
In the xqe.config.custom.xml file, specify the javaagent parameter with a reference to the log4jSafeAgent2021.jar file. For IBM JRE, add the javaagent as follows:
Create a text file, where you list the files to clean on this server e.g. c:\fix\filetofix.txt
Create a new powershell file, jarupdate.ps1, with this content:
# set location of 7z program
$7zip = "C:\Program Files\7-Zip\7z.exe"
# run the script on the source machine
# get files from list to clean
$file2fix= Get-Content -Path "c:\fix\filetofix.txt"
foreach ($thefile in $file2fix)
{
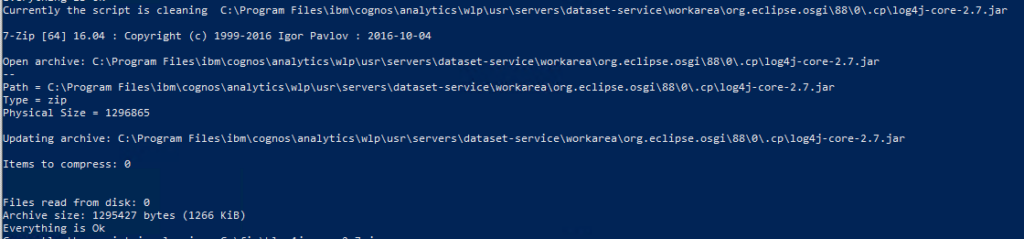
Write-Host "Currently the script is cleaning " $thefile
& $7zip d "$($thefile)" "org/apache/logging/log4j/core/lookup/JndiLookup.class"
}
Get approval to do the update on the Cognos server.
Stop all IBM Cognos services.
Check that no JAVA process is still around.
Start POWERSHELL as administrator
Go to you c:\fix folder
Enter command: .\jarupdate.ps1
The output will be similar to this;
Reboot the server.
Test that Cognos still works.
Repeat on all effected servers.
If you have checked the size of the jar file before clean, you should see a difference after clean.
By sending a specially crafted code string, an attacker could exploit this vulnerability to load arbitrary Java code on the server and take complete control of the system. The attacker must get the Cognos Logger software to process a string to the log file, that active the function JNDI to contact LDAP server xxxx and download information, that in real can be java code, and execute it. Gives the possibility to install Trojans and other software, but he need to trick cognos to send the information to the logger.
Things you can do:
Ensure that the Cognos servers do not have contact with Internet, so any application on the server can reach out and download other software.
Creating a default-deny firewall rule will prevent servers from creating unapproved connections and can help reduce your risk of a compromise.
Ensure that only the people and computers that need it, have access to your cognos servers.
You can use tools, to see if you have the vulnerability;
Log4j is a tool to create log files, used by WebSphere and maybe Cognos software.
Check version of WebSphere with this command:
Above is from CA11.1.x CM_version=11.1.7-41.
In a CMD prompt, go to the java bin folder (path depends on version of Cognos Analytics)
Enter command C:\Program Files\ibm\cognos\analytics\wlp\bin\productinfo version
CA11 uses WebSphere Liberty Server, where the version number is the year it was released. WebSphere Application Server (WAS) latest version is 9, that should correspond to WLP 20.
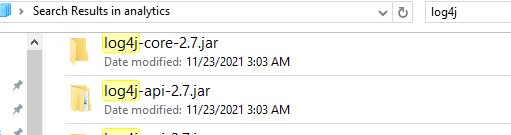
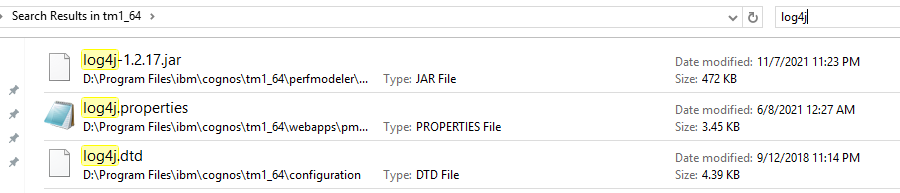
You can search your cognos folder, to see if you have Log4j files that can contain this issue.
You will find it in several folders, but it is only the top one \bin that is the default. The others are cached versions in folders like C:\Program Files\ibm\cognos\analytics\wlp\usr\servers\cognosserver\workarea\org.eclipse.osgi\61\data\cache\com.ibm.ws.app.manager_157\.cache\WEB-INF\lib
Log4j-core and Log4j-api can contain this issue. Above picture from CA11, we see that we use version 2.7 of Log4j program. That is old, so the LOG4J_FORMAT_MSG_NO_LOOKUPS parameter will not work.
“the mitigation is to remove the JndiLookup class from the classpath, with command: zip -q -d log4j-core-*.jar org/apache/logging/log4j/core/lookup/JndiLookup.class. ”
Stop the IBM Cognos service.
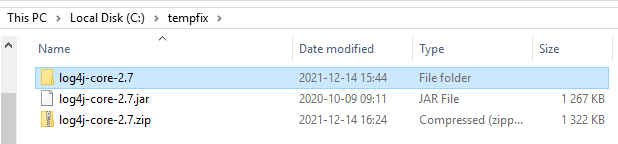
Copy the log4j-core-2.7.jar file to a new folder e.g. c:\tempfix
Unzip the jar file.
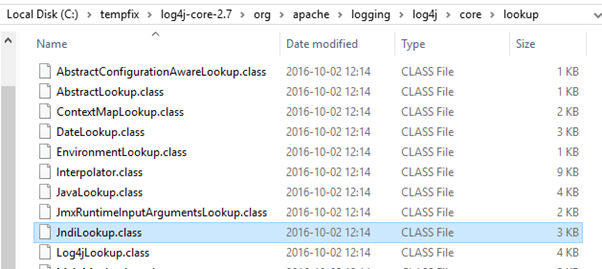
Go down in the unzipped folder structure to C:\tempfix\log4j-core-2.7\org\apache\logging\log4j\core\lookup folder
Remove the file JndiLookup.class
Go back to your top folder, and zip it again.
Rename your log4j-core-2.7.jar to log4j-core-2.7.org.jar ( to keep a backup ).
Rename your log4j-core-2.7.zip file to log4j-core-2.7.jar.
Copy the new log4j-core-2.7.jar file to your C:\Program Files\ibm\cognos\analytics\bin folder.
Start IBM Cognos.
Check that you can login and run reports.
The Log4j is used to create the cognosserver.log files, so carefully check that the log files work as expected.
Copy the following files to the <VM_Manager_Tool_home_dir>/lib/ directory.
log4j-api-2.15.0.jar
log4j-core-2.15.0.jar
Stop the VM Manager Tool by using the -stop switch of the <VM_Manager_Tool_home_dir>/vmman.sh|bat script. For more information, see: VM Manager Tool command-line options.
Remove the following JAR files from the <VM_Manager_Tool_home_dir>/lib/ directory.
log4j-api-2.13.3.jar
log4j-core-2.13.3.jar
Depending on your operating system, modify one of the following files.
LINUX: In the <VM_Manager_Tool_home_dir>/vmman.sh file, find the following lines:
VMM_CLASS_PATH=$VMM_CLASS_PATH:$VMM_LOCAL_LIB/log4j-api-2.13.3.jar
VMM_CLASS_PATH=$VMM_CLASS_PATH:$VMM_LOCAL_LIB/log4j-core-2.13.3.jarChange them to:
VMM_CLASS_PATH=$VMM_CLASS_PATH:$VMM_LOCAL_LIB/log4j-api-2.15.0.jar
VMM_CLASS_PATH=$VMM_CLASS_PATH:$VMM_LOCAL_LIB/log4j-core-2.15.0.jar
WINDOWS: In the <VM_Manager_Tool_home_dir>/vmman.bat file, find the following lines:
SET VMM_CLASS_PATH=%VMM_CLASS_PATH%;%VMM_LOCAL_LIB%/log4j-api-2.13.3.jar
SET VMM_CLASS_PATH=%VMM_CLASS_PATH%;%VMM_LOCAL_LIB%/log4j-core-2.13.3.jarChange them to:
SET VMM_CLASS_PATH=%VMM_CLASS_PATH%;%VMM_LOCAL_LIB%/log4j-api-2.15.0.jar
SET VMM_CLASS_PATH=%VMM_CLASS_PATH%;%VMM_LOCAL_LIB%/log4j-core-2.15.0.jar
Start the VM Manager Tool by using -run switch of the <VM_Manager_Tool_home_dir>/vmman.sh|bat script. For more information, see: VM Manager Tool command-line options.
Workaround 2. Mitigate the issue on the current version of the Log4j library included in VM Manager Tool in versions 9.2.21.0 – 9.2.25.0 by the configuration change
Depending on your operating system, run one of the following:
LINUX: In the <VM_Manager_Tool_home_dir>/vmman.sh file, find the following line. It might not contain all the parameters starting with -D string, for example, it might not contain the -Dsun.net.http.allowRestrictedHeaders=true substring.VMM_PROPERTIES_DEFS=”-Dhttps.protocols=TLSv1.2,TLSv1.1,TLSv1 -Dcom.ibm.jsse2.disableSSLv3=false -Dcom.ibm.tools.attach.enable=no -Dsun.net.http.allowRestrictedHeaders=true”Add the following text at the end of the found line, just before the double quotation mark that ends this line.“ -Dlog4j2.formatMsgNoLookups=true” (including the space character at the beginning of the text)For example:
VMM_PROPERTIES_DEFS=”-Dhttps.protocols=TLSv1.2,TLSv1.1,TLSv1 -Dcom.ibm.jsse2.disableSSLv3=false -Dcom.ibm.tools.attach.enable=no -Dsun.net.http.allowRestrictedHeaders=true -Dlog4j2.formatMsgNoLookups=true“
WINDOWS: In the <VM_Manager_Tool_home_dir>/vmman.bat file, add the following entry as the last line of the ####### PROPERTIES DEFINITONS ####### section:SET VMM_PROPERTIES_DEFS=%VMM_PROPERTIES_DEFS% -Dlog4j2.formatMsgNoLookups=true
Stop the VM Manager Tool by using the -stop switch of the <VM_Manager_Tool_home_dir>/vmman.sh|bat script. For more information, see: VM Manager Tool command-line options.
Start the VM Manager Tool by using the -run switch of the <VM_Manager_Tool_home_dir>/vmman.sh|bat script. For more information, see: VM Manager Tool command-line options.
IBM X-Force also has provided an analysis of the Log4j vulnerability, which can be found on the IBM Security Intelligence blog.
You have to decide how you will handle this possible threat in your organization.
This is only a list of information, on the subject.
You should check your logs from your antivirus / firewall software, if you are already compromise.
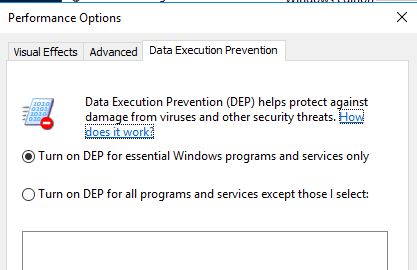
Set Power Options to HIGH Performance in Windows control panel
Turn off IEESC (internet explorer enhanced security configuration)
Check what port your SQL server will use, for access to Content Store and Audit database.
Exclude cognos folders from anti-virus software scanning
Open firewall ports 80, 443 to end users
Open firewall ports 80, 443, 9300, 9362, 4300, 5701, 9301 between servers.
Open firewall ports 1433 for SQL, 25 for Mail, 389 for Active Directory.
Install 7zip and Notepad++ to edit xml files on the server.
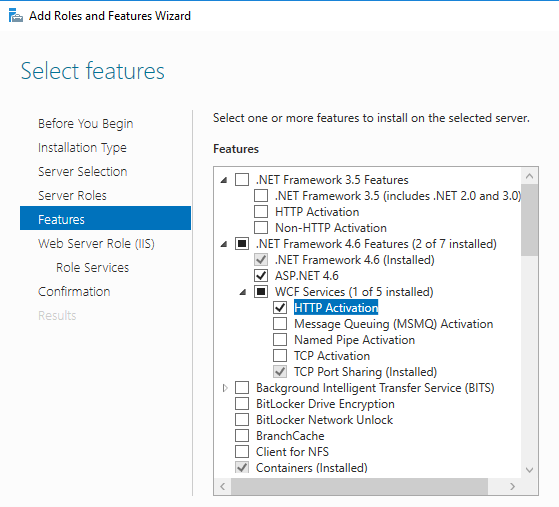
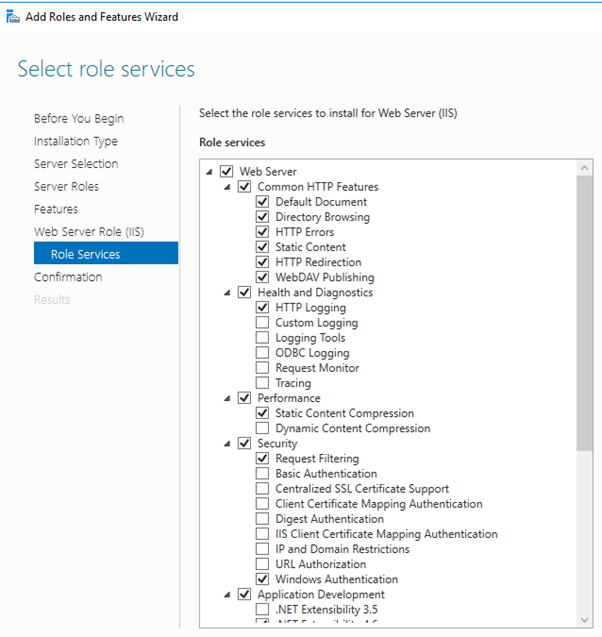
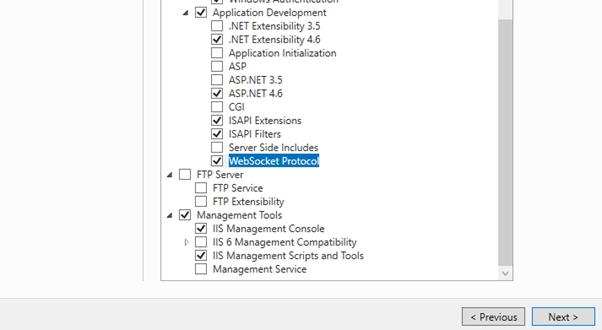
Install IIS on the Windows Server 2016 select Web Server IIS, ASP.NET 4.6, HTTP Activation, TCP Port Sharing, HTTP Redirection, WebDav Publishing, ISAPI Extensions, Websocket, Windows Authentication, IIS Management Scripts and Tools.
Update regedit HKEY_LOCAL_MACHINE\SOFTWARE\Microsoft\InetStp\MajorVersion to 9 (only if needed)
Get the CA_IIS_Config.bat script from folder D:\Program Files\ibm\cognos\analytics\cgi-bin\templates\IIS and copy it to its own folder, e.g. d:\install
Stop creation of dump files, open the cclWinSEHConfig.xml file from the install_location\configuration folder. Set “CCL_HWE_ABORT” value=”0″
Setup the audit database source and copy the D:\Program Files\ibm\cognos\analytics\samples\Audit_samples\IBM_Cognos_Audit.zip file to D:\Program Files\ibm\cognos\analytics\deployment folder. Import the audit samples.
Update planning.html with also tm1servername and port, like this
var planningServices = ["http://tm1servername.domain.com:9510","http://tm1webservername.domain.com:9511"];
Copy planning.html to same folders as pmhub.html listed above.
The content manager will look in folder D:\Program Files\ibm\cognos\analytics\webcontent for this files, but the Cognos Gateway will look in folder D:\Program Files\ibm\cognos\analytics\webcontent\bi for above files.
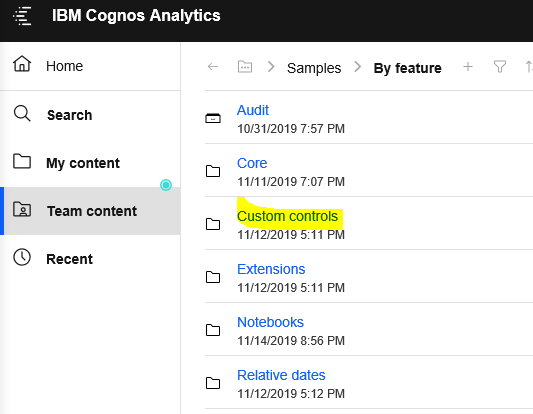
To prevent scriptable report error when running sample custom control reports
you need to change the sample reports as below (they are written to only work on port 9300).
The global Sales Report is a sample showing how to use a javascript file with a custom control. These are authored to work ‘out of the box’ via dispatcher but not via a gateway.
To use with a gateway you need to edit the custom control in the report to point to the correct path.
1. Open the ‘Global Sales’ report in Edit mode.
2. select the custom control which is the thin blue box underneath the Prompts and view the properties.
3. In properties under General choose the ‘Module Path’ property and click the ellipsis.
4. By default this path is set to ‘/bi/samples/js/HideShowFilterPanel.js’
5. Please add your gateway to the front of this path so it reads something like:’/ibmcognos/bi/samples/js/HideShowFilterPanel.js’ (where ibmcognos is the name of your gateway virtual directory)
6. Save and re-execute the report.
Setup of jupyter notebook is not covered here, you have to follow the IBM documentation.
Product:
Cognos Analytics 11.1.4
Microsoft Windows 2019 server
Issue:
How request and use external certificate for CA11 internal communication, e.g. port 9300?
If both internal and external connections use HTTPS, then you can use port 9300 for HTTPS. Otherwise you need to set a separate port number for the HTTPS services, suggestion 9334 or 9443.
Solution:
The IKEYMAN tool allows you to include more fields for your certificate request. This instruction is hard to find, so a copy is provided here.
You need to do the steps on all your CA11 servers, but you start with the Content Manager server first.
1. Ensure that all IBM Cognos component services in the environment are shut down. Close any IBM Cognos Configuration that is open.
2. Copy the complete <cognos>\configuration directory to a safe place and name it configuration_original. At any point, this backup configuration directory can be restored to bring the state of the cryptographic keys for this component back to the original state.
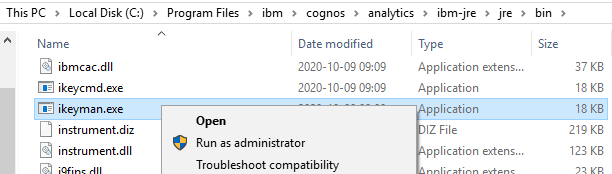
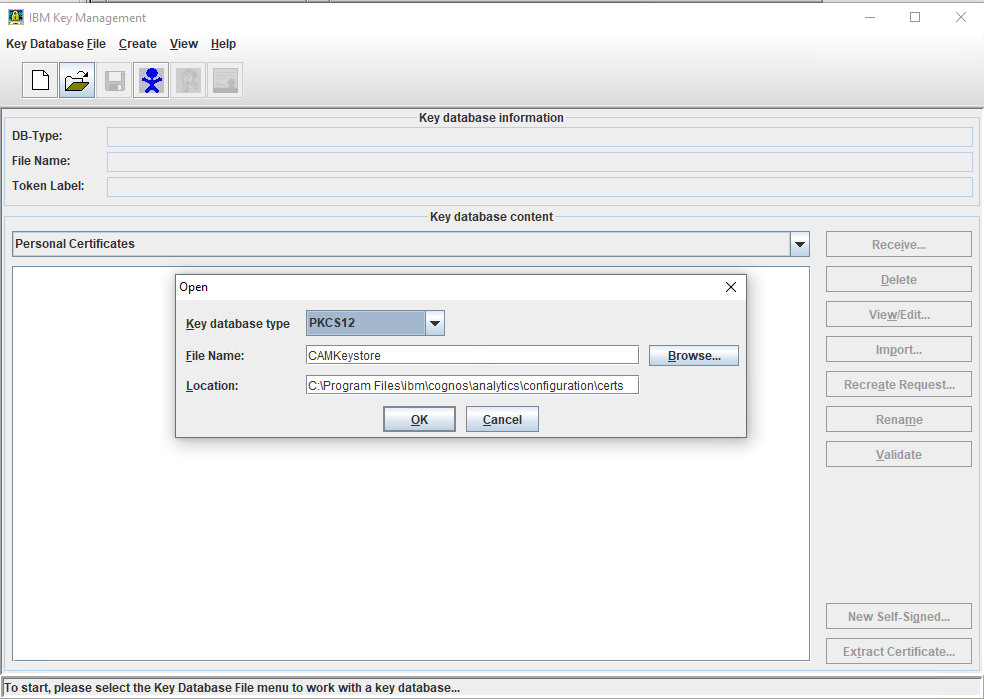
3. Run iKeyman.exe as administrator (or ./ikeyman for linux/unix users) from C:\Program Files\ibm\cognos\analytics\ibm-jre\jre\bin (for IBM Cognos 11.1.X+). For IBM Cognos 11.0.13 and lower versions, the path is <cognos>\jre\bin.
4. Click the folder with the curved arrow icon at the top of the window. In the open dialog panel, select PCKS12 as the Key Database Type, then browse to the <cognos>\configuration\certs directory and select CAMKeystore. Click OK. The default password is NoPassWordSet.
Generating a Certificate Signing Request (CSR):
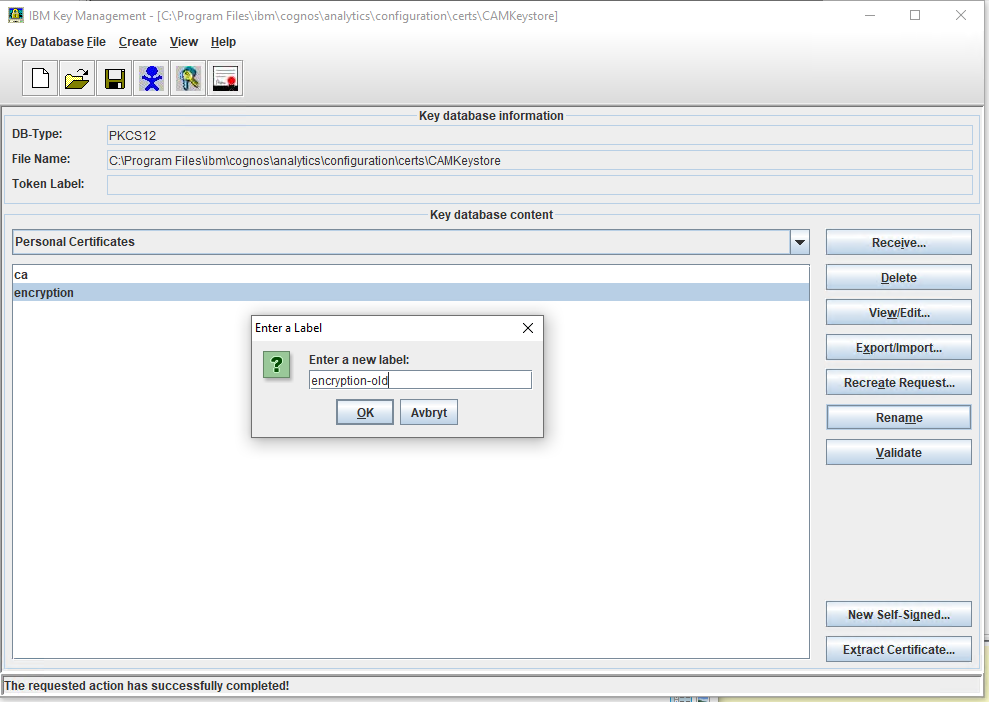
5. Once the CAMKeystore loads, there are two certificates under the Personal Certificates drop down: ca and encryption.
6. Select the encryption certificate and rename it to encryption_old.
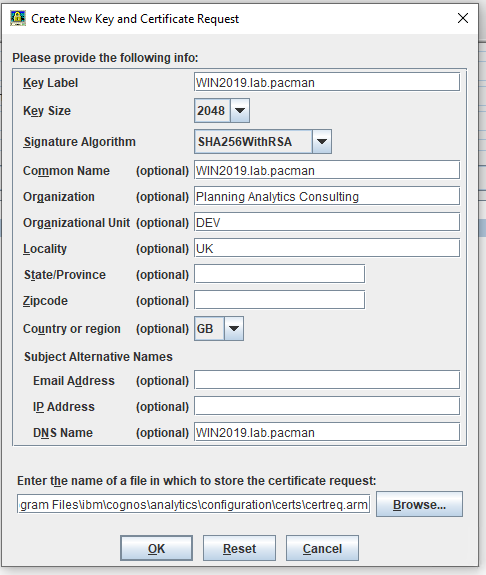
7. Select Create at the top of the iKeyman window, then click New Certificate Request. Make sure that Key Label is called “encryption“. The recommended Key Size is 2048 and the recommended Signature Algorithm is SHA256WithRSA.
The rest of the details can be completed as necessary. Multiple DNS names separated by a comma or a space can be used as well.
8. The CSR is called certreq.arm and it is located in <cognos>\configuration\certs. Give the certreq.arm to the certificate authority to generate the signed certificates.
9. Take another backup of the <cognos>\configuration directory and store it in a safe place. Name it “configuration_with_CSR“.
10. If the certificate authority returns two or three separate certificate files (root, intermediate (optional), and server certificates), in iKeyman, ensure that the Personal Certificates dropdown is set, then select Receive. Select only the server certificate.
If there is a dialog box that mentions that the CA (root certificate) is missing, click OK, and the encryption certificate is highlighted in yellow or the encryption certificate will be listed alongside the ca and encryption_old certificate.
Change the Personal Certificates drop down to Signer Certificates, then select Add and import the root certificate and intermediate certificate if the certificate authority returned one. The labels can be named root and intermediate.
If the certificate authority returns one file containing the certificates (.pem or .p12), click Receive or Add in either the Personal or Signer Certificates drop down, and select “Import all” at the prompt. All of the certificates are placed in their correct section.
11. Open Cognos Configuration. Under Environment, change these URIs to https:
Gateway URI
Dispatcher URIs for gateway
Controller URI for gateway
External and Internal dispatcher URI
Dispatcher URI for external applications
Content Manager URI
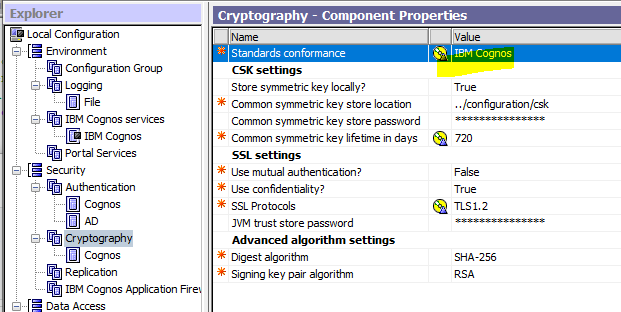
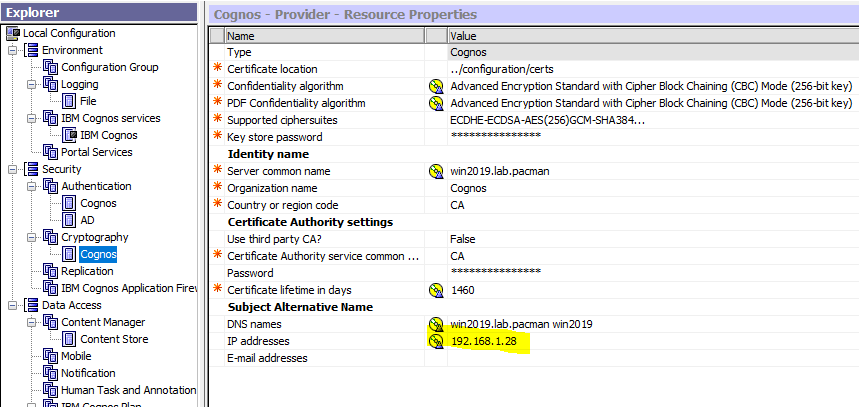
12. Under Cryptography > Cognos, switch “Use third-party CA?” to True.
Also, change the following to match the values used for the CSR in step 7:
Server common name (CN)
Organization name (O)
Country or region code (C)
Change the DNS Names field under Subject Alternative Name to match the DNS name(s) that were used during the generation of the CSR in Step 7.
13. Save the configuration and start the IBM Cognos services.
Important Note: During this process, IBM Cognos Configuration cannot be opened and the IBM Cognos Services cannot be started until these steps are completed. If the certificate authority takes some time to send the signed certificates, consider using the Third-Party Certificate Tool method instead.
by Roger·Comments Off on Cognos JAVA is only restarting
Product:
Cognos Analytics 11.1.7
Microsoft Windows 2016 server
Microsoft SQL server
Issue:
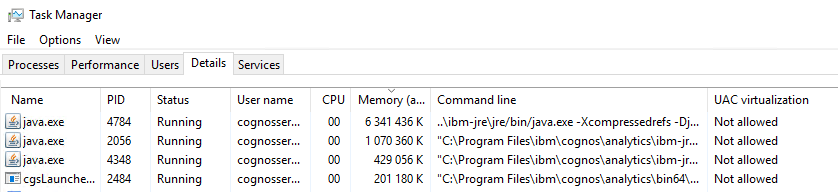
New installation of CA11. At start the IBM cognos service take long time to start. But the JAVA.EXE spins up to 6 GB ram and then crash and start over.
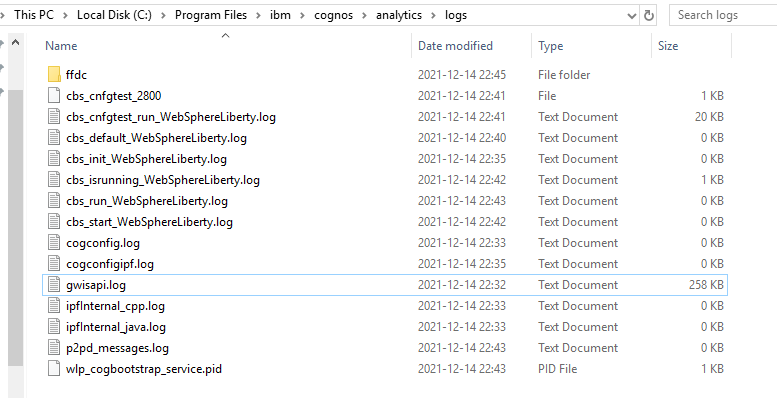
Errors like this are found log cbs_run_WebSphereLiberty.log:
Fri Aug 27 11:28:08 2021 INFO t[e20] CBSBootstrapService attempt to load config from “D:\Program Files\ibm\cognos\analytics\.\bin64\./bootstrap_wlp_winx64.xml”
Fri Aug 27 11:28:11 2021 ERROR t[e20] CBSSocketCommand failed to connect, CAM error: <errorDetail><errorCode>-12</errorCode><errorMessage>CAM-CRP-0026 The underlying socket: ‘10.123.123.65:9300’ returned an error.</errorMessage><errorStack><errorCode>10061</errorCode><errorMessage>Could not connect the socket, errno: 0x274d(10061)</errorMessage>
Error found in windows event log:
Faulting application name: cogbootstrapservice.exe, version: 11.1.5.2, time stamp: 0x5daf2515
Faulting module name: ntdll.dll, version: 10.0.14393.4530, time stamp: 0x60e33cac
Thu Aug 26 20:59:12 2021 WARN t[1908] CBSSockSendAction did not detect success string in response.
Thu Aug 26 21:00:14 2021 ERROR t[1908] PingChildProcess ping loop: process “wlp” is not active, so restarting it.
Thu Aug 26 21:00:52 2021 ERROR t[1908] CBSSocketCommand failed to connect, CAM error: <errorDetail><errorCode>-12</errorCode><errorMessage>CAM-CRP-0026 The underlying socket: ‘172.10.10.123:9300’ returned an error.</errorMessage><errorStack><errorCode>10061</errorCode><errorMessage>Could not connect the socket, errno: 0x274d(10061)
Error in Cognos Configuration at start:
[ ERROR ] CFG-ERR-0106 IBM Cognos Configuration did not receive a response from the IBM Cognos service in the time allotted.
Check that IBM Cognos service is available and properly configured.
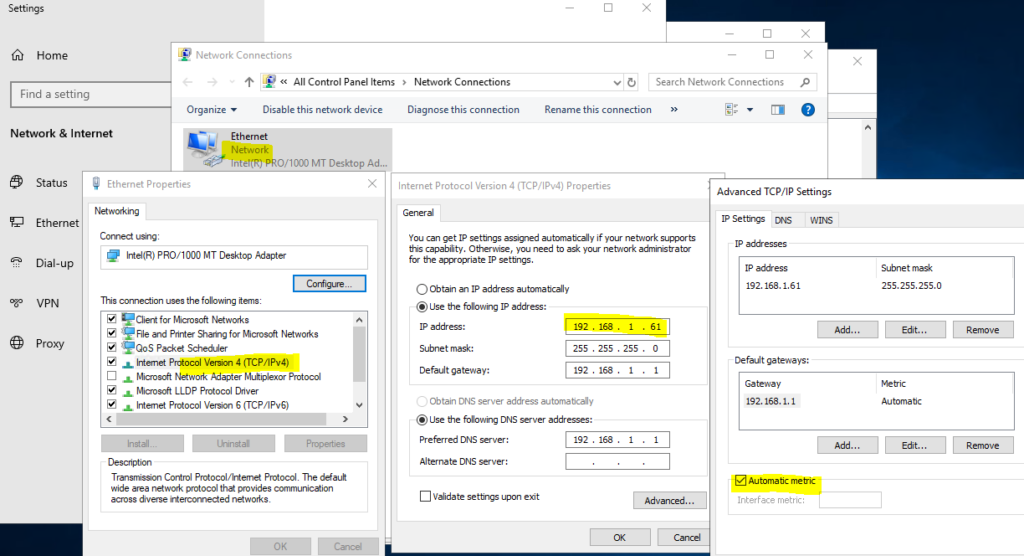
Check that the if the server have two network cards, they are correct configured.
Check that the IP address and interface metric is not the same as other cards on the server.
Test to change to IBM cognos instead of NIST SP 800-131A.
Check that the IP addresses in cognos configuration is then one of your server.
Check for ports in use with DOS command: netstat -a | find “9300”
Export the configuration, and recreate the crypto keys; like this
1. Stop the running of your service in Cognos Configuration.
2. On the Content Manager computer, click ‘File > Export As’.
3. Choose ‘Yes’ at the prompt and save the file. For example, name it ‘backup.xml’ which will be stored in the c11\configuration folder.
4. Close Cognos Configuration.
5. On the Content Manager computer
5.1 Create a backup of the following files before moving them to a different, secure location (as during the cryptographic keys regeneration process they will be re-created):
The files are:
· c11/configuration/cogstartup.xml
· c11/configuration/caSerial
· c11/configuration/certs/CAMCrypto.status
· c11/configuration/certs/CAMKeystore
· c11/configuration/certs/CAMKeystore.lock
· c11/temp/cam/freshness
5.2 Create a backup of the following directories before moving it to a different, secure location (as during the cryptographic keys regeneration process they will be re-created). Alternatively you can also rename the directories.
The directory is
· c11/configuration/csk
6. In the c11\configuration folder, rename ‘backup.xml’ to ‘cogstartup.xml’.
7. Open Cognos Configuration, save the configuration and start the services.
by Roger·Comments Off on Bad Request – Request Too Long
Product:
Cognos Analytics 11.1.7
Microsoft Windows 2016 server
Issue:
Only one user get a error when running a report in CA11, after he have logged in with SSO, if he do not use SSO with IIS, and instead enter name and password at Cognos dialog, then the report works.
A check of the users – showed he belongs to a lot of domain groups.
net user donaldduck /DOMAIN > c:\temp\userlist.txt
Error message:
HTTP Error 400. The size of the request headers is too long.
Solution:
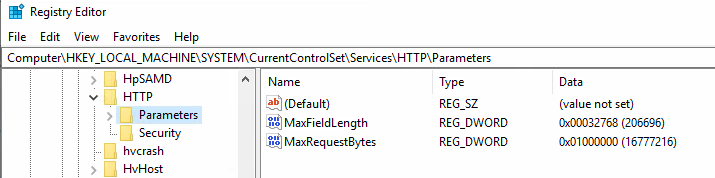
Increase the allowed header size on the Cognos Gateway server
Windows Registry Editor Version 5.00[HKEY_LOCAL_MACHINE\SYSTEM\CurrentControlSet\Services\HTTP\Parameters]"MaxFieldLength"=dword:00032768"MaxRequestBytes"=dword:01000000
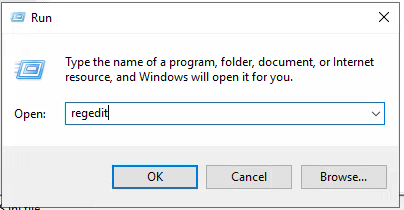
Login to the server, and start REGEDIT program.
Expand to [HKEY_LOCAL_MACHINE\SYSTEM\CurrentControlSet\Services\HTTP\Parameters]
Add the DWORD values.
You must restart the Windows server, for the registry changes to take affect.
You may also need to update the TCPIP values:
Windows Registry Editor Version 5.00

[HKEY_LOCAL_MACHINE\SYSTEM\CurrentControlSet\Services\Tcpip\Parameters]
"MaxUserPort"=dword:0000fffe
"TcpTimedWaitDelay"=dword:00000032
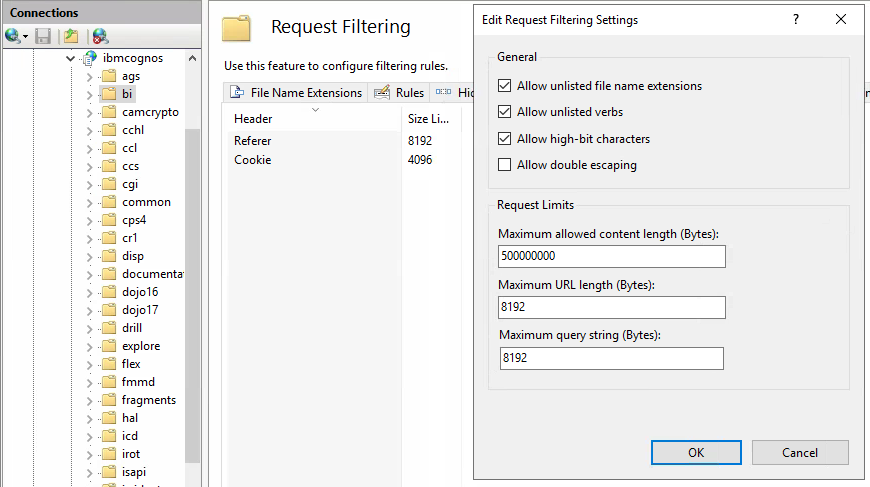
or change the IIS \ibmcognos\bi folders Request Filtering to a higher value, to get the report to work.
Although each web server software has some limitations, there is a difference whether there’s a limit for the HTTP request line plus header fields or for each header field.
5.5.x/6.0.x: 49152 Bytes (for the request line plus header fields)
7.0.x: 8190 Bytes (for the request line plus header fields)
So to conclude: To be accepted by all web servers above, a request’s request line plus header fields should not exceed 8190 Bytes. This is also the limit for each header fields (effectively even less).
You can edit tomcat/conf/server.xml’s HTTP/1.1 Connector entry, and add a maxHttpHeaderSize=”65536″ to increase from the default maximum of 8K or so, to 64K
but when run, it fails, check of log file (D:\Program Files\ibm\cognos\analytics\logs\c11AuditExtension.log) show a error message:
Violation of PRIMARY KEY constraint ‘PK_AE_CA_SEC_MEM’. Cannot insert duplicate key in object ‘dbo.AE_SECURITY_MEMBERS’
Solution:
The issue can be that you reach max.items limit, and get above error in the log file.
Stop the Cognos BI service.
Go to folder D:\Program Files\ibm\cognos\analytics\wlpdropins\AuditExt.war\WEB-INF\classes
Open c11AuditExtension.properties in Notepad++
Change this lines:
false — will not save the report xml in the audit database.
option.ca.include.specifications: A Content Audit option that determines if the audit should record the specification XML of any reports/queries/analyses that it finds. Possible values are true and false. The default value is true. If this parameter is set to false, less database space will be used.
0
option.ca.max.duration: A Content Audit option that limits the maximum length of time, in seconds, that the audit should be run for. If this time is exceeded, the audit is terminated and recorded as a failure. If it is set to a value of zero, no time limit will be applied. The default value is 1800 (30 minutes).
0
option.aa.max.duration: An Account Audit option that limits the maximum length of time, in seconds, that the audit should be run for. If this time is exceeded, the audit is terminated and recorded as a failure. If it is set to a value of zero, no time limit will be applied. The default value is 1800 (30 minutes).
0
option.aa.max.items: An Account Audit option that limits the maximum number of items that will be processed by the audit. If the number is exceeded, the audit is terminated and recorded as a failure. If it is set to a value of zero, no limit will be applied. The default value is 10000.
0
option.ra.max.duration: A Role Audit option that limits the maximum length of time, in seconds, that the audit should be run for. If this time is exceeded, the audit is terminated and recorded as a failure. If it is set to a value of zero, no time limit will be applied. The default value is 1800 (30 minutes).
0
option.ra.max.items: A Role Audit option that limits the maximum number of items that will be processed by the audit. If the number is exceeded, the audit is terminated and recorded as a failure. If it is set to a value of zero, no limit will be applied. The default value is 30000.
false — will not check my folders
option.aa.include.content: An Account Audit option that determines if the audit should process the content of users’ My Folders. If set, this will cause a mini-Content Audit to be run for each user’s content where it exists. Possible values are true and false. The default value is true.
Save the file.
Start IBM Cognos windows service.
Browse to http://servername.domain.com:9300/AuditExt/ to run the “collection event” again.
After you have loaded the Audit Extension report package (AuditExt_deployment_c11_20181003), you can can run a report called “Audit Run Report” to see if the collection of audit data was successful.
Of course you need to create a data source called “audit_extension” to your database where you store the audit data.
Under the teams folder – Cognos Audit Extension – Role Audit – Capabilites available to Users report, can be the one that give you a detail view of the license possibility for each user. You need to test your way forward.