Product:
Cognos Controller 10.4.2
Microsoft Windows 2016 server

Problem:
How install FAP client on Citrix server for several different environments?

Solution:
First you must have SQL client installed on the server, as the FAP client talks direct with the SQL database that have the Cognos Controller database and the specific FAP database.
Download sqlncli64.msi and install it.
https://www.microsoft.com/en-us/download/details.aspx?id=50402
Then go to your Cognos Controller server where you have installed FAP,
Copy following files from folder C:\Program Files\ibm\cognos\ccr_64\webcontent\ccr
C1.Win.C1FlexGrid.4.dll
ctrl_ug_fapug_contextlinks.csv
FAPClient.exe
FAPClient.exe.config

Place this files in a separate folder on the citrix server like c:\ibm\fap.

Right-click on FAPClient.exe and create a shortcut to the public desktop for the users.
To be able to pre-populate the login, so the user do not need to write server name every time.

You update the FAPClient.exe.config file with the default values all user should get.

Best is if you copy the FAPClient.exe to a duplicate file called FAPClientQ.exe and then do the same with file FAPclient.exe.config file so you also have a FAPClientQ.exe.config file.
Repeate so you have a set for TEST called FAPClientT.exe and FAPClientT.exe.config, like this:

Open the FAPClientQ.exe.config file in NOTEPAD++ and add the lines for your QAS system database server like:

<setting name=”Server” serializeAs=”String”>
<value>roger2</value>
</setting>
<setting name=”Database” serializeAs=”String”>
<value>FAP</value>
</setting>
<setting name=”User” serializeAs=”String”>
<value>Fastnet</value>

Save the file, and then edit the FAPClientT.exe.config file with the values to your TEST system.

Edit the FAPClient.exe.config with the values for your PRODUCTION system.

When a user start FAPClientQ.exe program, the values in the corresponding config file is used, and the user only have to enter the password to get access to the FAP program.

Create 3 different shortcuts to the .exe files, and present to the user in the Citrix portal.

More information:

https://www.ibm.com/support/pages/how-install-fap-client-end-users-desktop-pc

https://www.ibm.com/support/pages/how-installupgrade-controller-serverclient

The values is then saved in the users windows profile in a folder similar to this C:\Users\%user%\AppData\Local\IBM_Corp\FAPClient.exe_Url_kyxu0h5bacedq1foqhff0niw3305yy1o\10.4.2000.145\user.config

Product:
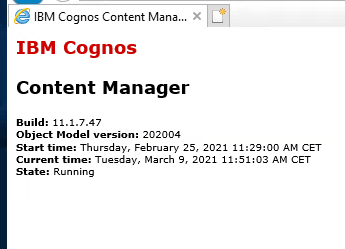
Planning Analytics 2.0.9.3
Microsoft Windows 2019 server

Problem:
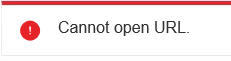
After SSL setup in TM1WEB, then TM1WEB does not list any TM1 servers to connect to.
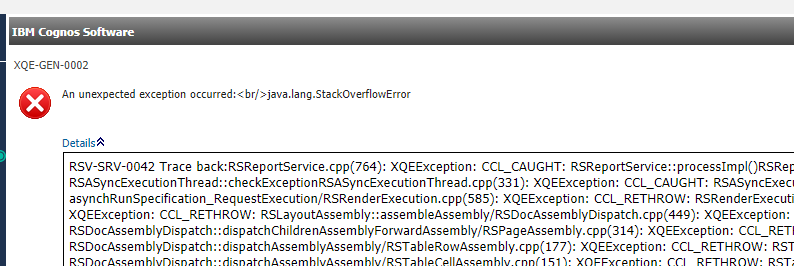
In TM1 APP WEB (pmpsvc) when you click on a contributor link you get a “an error has occurred”.

TM1 applications should use the internal Cognos certificate, ibmtm1.arm.

Please follow the official documentation, as it changes with every new version of PA.

Possible Solution:

As TM1Web is using a new keystore, you must include the TM1 Server certificates in the keystore file or you will be unable to see your TM1 Servers, point to that the SSL CERT import failed.

Redo the setup from; but first take a backup of all keystores files you use.

https://www.ibm.com/support/pages/how-configure-ssl-ibm-planning-analytics-spreadsheet-services-using-existing-keystore

If you got a PFX file with the certificate chain and key as you need you can use it to setup SSL.

For PMPSVC do this;
Start IKEYMAN.EXE as administrator from C:\Program Files\ibm\cognos\tm1_64\jre\bin folder
Open CAMkeystore file from C:\Program Files\ibm\cognos\tm1_64\configuration\certs folder
It is a PKCS12 file with password  NoPassWordSet

In Personal Certificates remove the encryption certificate
As you already have a correct PFX file, you click on IMPORT button.
Select you PFX file and enter the password you got with the PFX file from the Certified Authority who created the PFX for you.

You will be asked to rename the personal certificate, enter encryption and press OK.
Go then to Signer Certificates and check that you have also got the root and  intermediate certificates for your server. Double click on the certificates to check they have correct date and DNS alias.

You may need to import the \bin64\ssl\ibmtm1.arm file again as Signer Certificates.
Close IKEYMAN.

Go into Cognos Configuration for Planning Analytics (TM1).
Edit the TM1 Applications Properties.  Update all URI references to contain your fully qualified address, as well as change the http to https.
Edit the Local Configuration properties.  Add the property StandaloneCertificateAuthority and set it to True.

Edit the Cryptography > Cognos properties.  Change the Use third party CA? to True.
Save the Cognos configuration for Planning Analytics (TM1).
Start the TM1 service.
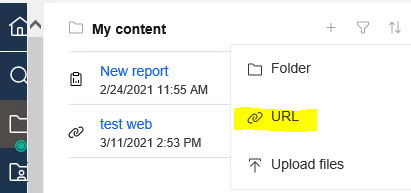
For new TM1WEB:

Export the Root and Intermediate certificates from your web browser, by go to the cognos site, and then select each certificate and save them as Base-64 encoded X.509 cer files.
Stop IBM Cognos TM1 service.
Copy the PFX file you got to C:\Program Files\ibm\cognos\tm1web\bin64\ssl folder

Open C:\Program Files\ibm\cognos\tm1web\wlp\usr\servers\tm1web\server.xml in notepad++
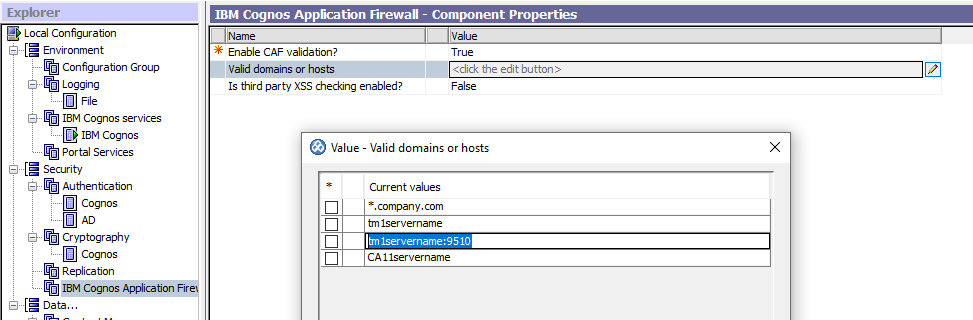
Update the ports you want to use, here 9510 for SSL and enter -1 to disabled HTTP.
<httpEndpoint id=”defaultHttpEndpoint” httpPort=”-1″ httpsPort=”9510″ host=”*” removeServerHeader=”true”>

Add as last line:
<keyStore id=”defaultKeyStore” location=”${wlp.user.dir}/../../bin64/ssl/customKeystore.pfx” password=”xxxxthepasswordxxxx” />

Replace with your PFX file name and the password for that file.
Go to C:\Program Files\ibm\cognos\tm1web\jre\bin\ in a DOS prompt.

Import the TM1 cert with command:
keytool -importcert -keystore ..\..\bin64\ssl\customKeystore.pfx -storepass xxxxthepasswordxxxx -storetype pkcs12 -noprompt -alias ibmtm1 -file ..\..\bin64\ssl\ibmtm1.arm

Copy your Root and Intermediate certificate files to your \tm1web\bin64\ssl\ directory

Import the Root and Intermediate certificates with this command:
keytool.exe -import -trustcacerts -file “..\..\bin64\ssl\ca.cer” -keystore “..\..\bin64\ssl\tm1store” -alias ca -storepass applix
keytool.exe -import -trustcacerts -file “..\..\bin64\ssl\intermediate.cer” -keystore “..\..\bin64\ssl\tm1store” -alias intca -storepass applix

CER or PEM files should work both. Now the new tm1store is updated with your root certs.

Start your IBM Planning Analytics Spreadsheet Service

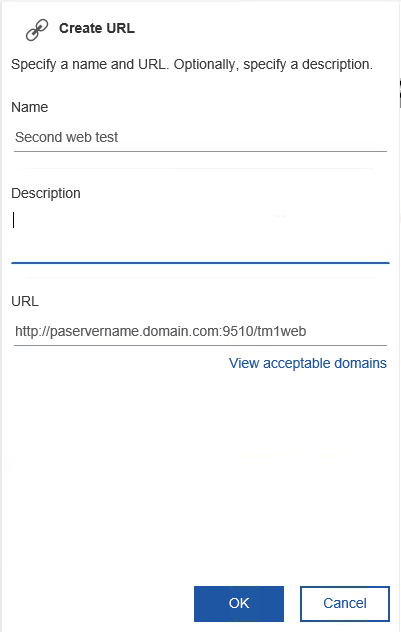
Test to browse to https://paservername.domain.com:9510/tm1web

Check for errors in file C:\Program Files\ibm\cognos\tm1web\wlp\usr\servers\tm1web\logs\console.log

More information:

https://www.ibm.com/support/pages/use-ikeyman-configure-custom-ssl-certificates-tm1web

https://www.ibm.com/support/pages/how-configure-ssl-ibm-planning-analytics-spreadsheet-services-using-existing-keystore

https://www.ibm.com/support/knowledgecenter/SSVJJU_6.3.0/com.ibm.IBMDS.doc/admin_gd175.htm

https://www.sslshopper.com/ssl-converter.html

To check a PFX file;

One your laptop install openssl from here https://github.com/git-for-windows/git/releases/tag/v2.23.0.windows.1 – get the file Git-2.23.0-64-bit.exe. Run the installation with all default values.

Start a command prompt as administrator. Go to folder C:\Program Files\Git\mingw64\bin

openssl  pkcs12  -in  c:\temp\customKeystore.pfx -out  c:\temp\good.pem  -nodes

Open good.pem  in notepad++ to check it contains 4 certificates.

The PEM format is the most common format that Certificate Authorities issue certificates in. PEM certificates usually have extensions such as .pem, .crt, .cer, and .key. They are Base64 encoded ASCII files and contain “—–BEGIN CERTIFICATE—–” and “—–END CERTIFICATE—–” statements. Server certificates, intermediate certificates, and private keys can all be put into the PEM format.

Product:
Cognos Analytics 11.1.7 fix pack 2
Microsoft Windows 2019 server

Problem:

When run some reports after a upgrade from previous version you get a error like this:

XQEGEN0002 An unexpected exception occurred: java.lang.StackOverflowError.

Report validation is OK but when you try to run it as HTML report you get a error.

Possible solution:

Check the report specification for any item or function that is common for the reports that does not work.

Can be that you have a filter in the Query parameters that you need to remove from the report to make it work.

You need to remove one part of the report at a time to find what part of the report specification that can give you the issue.

More information:

https://www.njit.edu/finance/sites/njit.edu.finance/files/finance-innovations/Cognos%20Analytics%20Reporting.pdf

https://www.ibm.com/support/knowledgecenter/en/SSEP7J_11.1.0/com.ibm.swg.ba.cognos.ug_ca_dshb.doc/ug_ca_dshb.pdf

https://reports.nycenet.edu/Cognos84sdk/documentation/en/ug_cr_rptstd.pdf

standard-deviation From the old Cognos 8
Returns the standard deviation of selected data items. The keyword “distinct” is available for
backward compatibility of expressions used in previous versions of the product.
Syntax
standard-deviation ( [ distinct ] expr [ auto ] )
standard-deviation ( [ distinct ] expr for [ all | any ] expr {
, expr } )
standard-deviation ( [ distinct ] expr for report )
Example
standard-deviation ( ProductCost )
Result: A value indicating the deviation between product costs and the average product cost.

Product:
Cognos Analytics 11.1.7
Microsoft Windows 2019 server

Problem:
Can not add url or use link to tm1web or other web site.

When you try to add a URL you get below error:

Your URL uses an invalid domain. Click ‘View acceptable domains’ to see a list of domains you can use.

Solution:
On all Cognos BI (CA11) servers, go into Cognos Configuration
Expand Security
Select IBM Cognos Application Firewall
Under “Enable CAF Validation?” = True, click on pen icon to add more servernames for Valid domains and hosts.

Enter the company domain name with a wildcard as *.company.com
Enter all the server names for your Cognos Analytics servers
Enter all the TM1 servers you have in your environment
Enter the TM1WEB servers with port number like tm1webservername:9510 (you must enter the port number for all servers Cognos will communicate with if it is not port 80)

Click OK
Click SAVE in Cognos Configuration.
You need then click on RESTART to make this changes take effect.
Restart the primary content manager service first, when that is up again, then restart the other CA11 servers in your environment.

How add a URL link in CA11:

Click on + in the folder where you want the link to be and select URL

Enter a name and enter the URL to your server including port number 9510 for tm1web. Recommended is to use full names includeing domain part.

Click OK.

Test the link.

“Cannot open URL” can also be becouse the website does not exist.

More information:

https://www.ibm.com/support/knowledgecenter/SSEP7J_10.2.2/com.ibm.swg.ba.cognos.inst_cr_winux.10.2.2.doc/t_inst_cnfg_caf_steps.html%23inst_cnfg_caf_steps

https://www.ibm.com/support/knowledgecenter/SSEP7J_11.1.0/com.ibm.swg.ba.cognos.inst_cr_winux.doc/t_inst_cnfg_caf_steps.html

Product:
Cognos Analytics 11.1.7
Microsoft Windows 2019

Problem:
How find out who is Active Content Manager without logging in to the CA11 server?

Solution:

From a web browser enter following URL to server on port 9300 to check CM:
http://cognosanalyticsservername:9300/p2pd/servlet

State is Running if it is the active CM in a multiserver environment of cognos bi.

To find java memory usage, enter this URL:

http://servername.domain.com:9300/bi/v1/disp?b_action=/diagnostics

Get Dispatcher version with this URL:
http://servername.domain.com:9300/p2pd/servlet/gc

Verify the configuration of an install with URL:

http://servername.domain.com:9300/bi/v1/disp/p2plbDiag

Find XML parser with URL:
http://servername.domain.com:9300/p2pd/servlet/dispatch/xts.diag

To check if POGO is alive enter URL:
http://servername.domain.com:9300/bi/v1/disp?b_action=/dbg

If you see this message pogo is alive

https://www.accelebrate.com/blog/call-pogo-name

In future use REST API to find out more:
https://www.ibm.com/support/knowledgecenter/SSEP7J_11.1.0/com.ibm.swg.ba.cognos.ca_api.doc/c_ca_api_rest.html

https://community.ibm.com/community/user/businessanalytics/blogs/jason-tavoularis1/2020/07/30/connecting-to-rest-api-data

https://www.ibm.com/support/knowledgecenter/SSD29G_2.0.0/com.ibm.swg.ba.cognos.tm1_rest_api.2.0.0.doc/tm1_rest_api.pdf

https://www.ibm.com/support/knowledgecenter/SSD29G_2.0.0/com.ibm.swg.ba.cognos.tm1_nfg.2.0.0.doc/c_nfg_tm1_rest_api_2_0_5.html

Product:
Planning Analytics 2.0.9
Microsoft Windows 2019 Server

Problem:
How many PVU is the CPU on my virtual TM1 server?

You can in Task Manager on the CPU tab, see number of sockets and number of cores.

Solution:
Check the number of sockets, if is less than or equal too 2 then each CPU CORE is 70 points.

In some cases the Windows 2019 task manager does not show correct number of sockets, so check the server hardware – what server are you running the virtual servers on? Then check that hardware, what number of sockets they have. For example, if you have a HPE ProLiant BL460c Gen9 server, check here

https://support.hpe.com/hpesc/public/docDisplay?docId=emr_na-c04434541

says it are Upgradeable to two (2) processors. Then we assume it have 2 sockets max.
This mean that each cpu core in task manager is 70 pvu points.
A windows server with 4 cpu cores will then be 280 pvu points.

Check your contract for lines like this;  IBM Planning Analytics Local TM1 Server for Non-Production Environment Processor Value Unit (PVU) Annual SW Subscription & Support Renewal to see how many PVU points you can spend on your server.

More Information:
https://www.ibm.com/software/passportadvantage/pvu_licensing_for_customers.html

https://infocube.com.au/ilmt

https://lodestarsolutions.com/what-the-heck-is-an-ibm-cognos-pvu

Product:
Cognos Controller 10.4.2 IF7

CONTRL_UPDATE_version=CCR-AW64-ML-RTM-10.4.2000.1063-0
CONTRL_UPDATE_name=IBM Cognos Controller Update

CCRPORTAL_version=CONTRL-AW64-ML-RTM-10.4.2000.185-0
CCRPORTAL_name=IBM Cognos Controller Portal

Microsoft Windows 2019 server

Problem:
One a fresh new Windows server, after installation of Cognos Controller program for the first time, there is missing COM+ applications for Cognos Controller in Component Services.

Solution:
Uninstall Cognos Controller from the server, leave a few files left, as below picture show.

Then run the installation again. Select everything.
This can help in many cases.

Other things to check;
Run below power shell command to check that NET framework 4.7.2 is installed:

(Get-ItemProperty “HKLM:\SOFTWARE\Microsoft\NET Framework Setup\NDP\v4\Full”).Release -ge 461808

More information:
https://www.ibm.com/support/pages/vfp-and-vfpcom-error-messages-when-installing-controller-server-causing-frangovfpdll-not-be-registered-component-services-com-caused-apar-ph24802

https://docs.microsoft.com/en-us/dotnet/framework/migration-guide/how-to-determine-which-versions-are-installed

https://www.ibm.com/support/pages/node/6348246

Product:
Cognos Analytics 11.0.12
kit_version=11.0.12.18062512
kit_name=IBM Cognos Analytics
Microsoft Windows 2016 server

Problem:
After restart of servers the Cognos BI system does not respond. The users see this message:

The IBM Cognos gateway is unable to connect to the IBM Cognos BI server. The server may be unavailable or the gateway may not be correctly configured.

Error in cognosserver.log file:

com.cognos.accman.jcam.crypto.CAMCryptoException: CAM-CRP-1093 Unable to read the contents of the keystore ‘D:/Program Files/ibm/cognos/analytics/configuration/certs\CAMKeystore’. Reason: java.io.IOException: stream does not represent a PKCS12 key store

Solution:

First, try to restart the IIS server on the Cognos Gateway with the dos command: IISRESET

If that does not help, create new cryptographic keys;
“C:\Program Files\ibm\cognos\analytics\bin64\cogconfigw.exe” open to start cognos configuration.

Stop the running of Cognos BI in Cognos Configuration.

From inside Cognos Configuration, click ‘File > Export As’.

Choose ‘Yes’ at the prompt and save the file.  Name it ‘cogstartup backup.xml’ which will be stored in the analytics\configuration folder.

Close Cognos Configuration.

Moving this files to a different, secure location e.g. c:\temp\backup (they should during the cryptographic keys regeneration process be re-created):

· analytics/configuration/cogstartup.xml

· analytics/configuration/caSerial

· analytics/configuration/certs/CAMCrypto.status

· analytics/configuration/certs/CAMKeystore

· analytics/configuration/certs/CAMKeystore.lock

· analytics/temp/cam/freshness

Moving this folder to a different, secure location e.g. c:\temp\backup

· analytics/configuration/csk

In the analytics\configuration folder, rename ‘cogstartup backup.xml’ to ‘cogstartup.xml’.

Go in to Cognos Configuration and click SAVE, and then start.

To test, you can browse to http://ca11servername:9300/p2pd/servlet

Repeat all the above steps on all the Cognos servers, starting with the Content Manager server and take the Cognos Gateway servers last.


If you see the message “CM-CFG-5069 A serious error occurred while committing a delete operation” when starting up the Cognos Analytics service, it can be a temporary error when CA11 try to clean up its own cache.  Restart the CA11 server again and see if the error goes away.

Misleading Error in cognosserver.log at first logon of any user after a Cognos restart:
“/v1/identity bi-service Can not retrieve the password from configuration.”
Solved in later versions of CA11.

More information:

https://www.ibm.com/support/pages/how-regenerate-cryptographic-keys-cognos-analytics-11

https://www.ibm.com/support/pages/cognos-gateway-unable-connect-cognos-bi-server-2

https://www.ibm.com/support/pages/cognos-gateway-unable-connect-cognos-bi-server-while-trying-logon-cam-namespace-solved-iisreset

By default, the cryptographic keys are valid for 365 days.

  • This value is configured inside Cognos Configuration
  • Specifically, browse to “Local Configuration -> Security -> Cryptography” and modify the value for: Common symmetric key lifetime in days

Each time you open Cognos configuration and click the save button, it resets the clock on your 365 days. Therefore, if you installed the software and didn’t save the configuration for 365 days, they would expire and you’d need to manually regenerate them.

You must restart the services every so often to ensure the new keys are actually being used.

  • If you think you won’t be opening and saving your configuration at any point in the next year or two, you can change the expiration date to 8 years and re-encrypt everything.

https://www.ibm.com/support/pages/apar/PI94141

Product:
Planning Analytics Workspace 2.0.
Linux Red Hat 7

Problem:
After change/crash of PAW, the system is starting but user can not login. They get the message “Planning Analytics Workspace is unavailable. Try again in a few minutes”
On the Linux server you run command to check that all containers are up, and they all show the same number of seconds to be up. This make it look like the PAW is working.
sudo docker ps

If you check the logs for a container, with below command, you can see if there are any errors giving more information.

sudo docker logs share-platform

cp: failed to extend ‘bootstrap.properties’: No space left on device

cp: error writing ‘bootstrap.properties’: No space left on device

Check the date before in log file, above can be a fill up disk of log files that have crashed the PAW before.

Check space with command: df -h

sudo docker logs pa-gateway

This may show AH01114: HTTP: failed to make connection to backend: share-platform, that tell us that it does not speak with the share-platform container, who had a problem before.

Solution:

Recreate the images, they can have been corrupted of the space outage you had earlier. This may remove the books you have inside PAW, so take a backup first by run script /ibm/paw/scripts/backup.sh to create a backup file under backup folder.

Go to the /ibm/paw/scripts folder on Linux server. Enter below command to stop PAW

./paw.sh stop

Backup the config folder and it sub-folders;   cp -ivR config  /tmp/cognos  (will copy all files in config folder to /tmp/cognos folder)

Kill all running containers
docker kill $(docker ps -q)
Delete all stopped containers
docker rm $(docker ps -a -q)
Delete all images
docker rmi $(docker images -q)

Then go to the PAW folder of your installation on the Linux server and run start.sh to create the images/containers from scratch.

./Start.sh

Answer YES on both questions.

You can in Linux test that the PAW is up by entering command (replace with your server DNS alias):

curl -k https://planningworkspaceserver.domain.com

this will return the html page as plain text – check for errors.

More Information:
https://www.ibm.com/support/pages/troubleshooting-planning-analytics-workspace-related-docker-issues

https://www.ibm.com/support/knowledgecenter/SSD29G_2.0.0/com.ibm.swg.ba.cognos.tm1_inst.2.0.0.doc/c_paw_trbl_cant_access_paw.html

https://www.ibm.com/support/pages/unable-access-ibm-planning-analytics-workspace

https://www.ibm.com/support/knowledgecenter/SSD29G_2.0.0/com.ibm.swg.ba.cognos.tm1_inst.2.0.0.doc/t_paw_uninstall.html

To limit docker log files you can edit the daemon.json file in folder /etc/docker

This sample configuration will limit the json log files to 10 megabytes, and will only keep the 5 most recent logs:

{

“log-opts”: {

“max-size”: “10m”,

“max-file”: “5”

}

https://ss64.com/bash/cp.html

Product:
Planning Analytics Workspace 2.0.39
Microsoft Windows 2016 server

Problem:
After restart/upgrade of PAW – when going to the administrator tab over databases, some show “Threads blocked: unavailable”

Solution:
Clear the cache in the web browser first, or try with a different web browser (chrome).

It can be that the account you logged in to PAW is not administration in the TM1 instance, then the threads info will not be shown.

More information:
https://www.ibm.com/support/pages/changes-planning-analytics-workspace-database-administration-2041

https://www.ibm.com/support/knowledgecenter/SSD29G_2.0.0/com.ibm.swg.ba.cognos.tm1_prism_gs.2.0.0.doc/c_paw_administer_servers.html