Product:
Planning Analytics Workspace 63
Red Hat Linux
Issue:
Need more space for the PAW installation. Docker will create is files in /var/ sub-folder.

Use df -h command to check space on your linux server.

Error:
Looks like something went wrong in step “installing/updating IBM planning analytics Docker images”… Check the log file /…..
in images.log : no space left on device

Solution:

Create folders, where you have space, sudo mkdir /data/docker

Stop docker service sudo systemctl stop docker

Update the file /etc/docker/daemon.json with sudo nano daemon.json

{
“graph” : “/data/docker”
}

Save with CTRL+O and exit with CTRL+X.

Start docker with sudo systemctl start docker

To restart the full Linux server enter: sudo reboot

Then run the installation of PAW ./Start.sh script again.

More information:

Storage requirements can vary, you need at least 100 GB for the /var/lib/docker directory and sufficient space for at least two Planning Analytics Workspace installation packages wherever you choose to install them.

https://www.ibm.com/docs/en/planning-analytics/2.0.0?topic=local-prerequisites

https://phase2.github.io/devtools/common-tasks/stopping-containers-and-cleanup/

How install docker:

If you have Red Hat Enterprise Linux Server release 7.9 (Maipo) then you may need to do this steps to be able to install docker before paw.
(to check Linux version enter cat /etc/redhat-release)

(this is if you get the error message: No package docker available.)

subscription-manager repos –enable=rhel-7-server-rpms

subscription-manager repos –enable=rhel-7-server-extras-rpms

subscription-manager repos –enable=rhel-7-server-optional-rpms

yum -y install docker

systemctl start docker

systemctl enable docker

How To Install Docker on CentOS 7 / RHEL 7

sudo docker version gives:

Client:
Version: 1.13.1
API version: 1.26
Package version: docker-1.13.1-205.git7d71120.el7_9.x86_64
Go version: go1.10.3
Git commit: 7d71120/1.13.1
Built: Wed Mar 31 06:52:27 2021
OS/Arch: linux/amd64

Server:
Version: 1.13.1
API version: 1.26 (minimum version 1.12)
Package version: docker-1.13.1-205.git7d71120.el7_9.x86_64
Go version: go1.10.3
Git commit: 7d71120/1.13.1
Built: Wed Mar 31 06:52:27 2021
OS/Arch: linux/amd64
Experimental: false

This is a supported docker version to be used with PAW.

Product:
Planning Analytics Workspace 63
Red Hat Linux 7
Issue:

After you login to PAW with Internet Explorer, you get a stuck screen.

Solution:

Use Chrome instead of IE.

The IE browser that comes with Windows server 2019 is not using Chrome engine as default.

More information:

https://docs.microsoft.com/en-us/troubleshoot/browsers/disable-internet-explorer-windows

To troubleshoot docker containers on Linux you can use this commands:

To change to root user:
sudo -i
To find all error files in the log folder (go to log folder first):
find . -print | grep -i error
To list all containers:
sudo docker ps -a
To list only the ID number for containers:
sudo docker ps -q
To show the last lines of a log file:
tail error.log
To move into a running container:
docker exec -it pa-gateway /bin/bash
To check space:

df -h

To exit out from a container:
exit

https://phase2.github.io/devtools/common-tasks/ssh-into-a-container/

https://www.cyberciti.biz/faq/unix-command-to-find-a-file-in-a-directory-and-subdirectory/

https://www.ibm.com/support/pages/http-404-error-not-found-during-validation-admin-tool-whereas-tm1-application-server-seems-work-properly 

https://ss64.com/bash/

Product:
Planning Analytics 2.0.9.7
Planning Analytics Workspace 63
Microsoft Windows 2019 server

Issue:
In PAW, when you create a new book, and insert a Websheet from a TM1 application, you only get a blank box after a long time. This is in a new installation, where you are using the new TM1WEB service (IBM Planning Analytics Spreadsheet Services).

Solution:

You need to in IBM Planning Analytics Workspace Administration Tool ensure that the TM1 Application Server Gateway URI point to the new TM1WEB server and it correct port.

Change and save. Then restart the PAW from inside the status tab.

If you click validate you will still get the 404 error on this line, this is OK, as they validate try to find pmhub parts that is not in PAL at this later versions.

This value is also in the paw.env file, on your PAW linux server. You can edit direct in the file, too.

Change value export TM1ApplicationsLocation=”https://yourservername.domain.com:9511″
The file is in your /ibm/paw/config folder.

Stop PAW with command (from your /paw/scripts/ folder):

sudo ./paw.sh stop

Check if PAW is stopped with command:

sudo docker ps

Start PAW with command:

sudo ./paw.sh

Wait 10 min before you test to browse, to your paw installation in chrome.

More information:

https://www.ibm.com/docs/en/planning-analytics/2.0.0?topic=web-install-configure-tm1-microsoft-windows

https://www.ibm.com/support/pages/http-404-error-not-found-during-validation-admin-tool-whereas-tm1-application-server-seems-work-properly

https://www.ibm.com/docs/en/planning-analytics/2.0.0?topic=tpal-how-do-i-fix-my-planning-analytics-workspace-local-installation

Product:
Cognos Analytics 11.1.7
Microsoft Windows 2019 Server

Issue:
After change to use HTTPS in Cognos Configuration, you get a error when you save.

[Populate authentication settings] [ WARNING ] Failed to populate the authentication settings to server

Solution:
When change values in Cognos Configuration that have with certificates, you need to first stop the “IBM Cognos” windows service.
Then you can save the configuration without warnings.


More Information:

To active Cognos internal certificate, you need to inside Cognos Configuration on your Content Manager server change HTTP to HTTPS under environment – group properties.
Check that server FQDN is at Cognos – Cryptography ;DNS names and Server common name.
Save will create the certificate files.

Start CMD, and move to folder C:\Program Files\ibm\cognos\analytics\bin
Run this to export the Cognos certificate
ThirdPartyCertificateTool.bat -E -T -p NoPassWordSet -r ca.cer

Start MMC on your Windows server where Cognos Gateway is installed, and certificates and go to “Trusted Root Certification Authority”. Right click to Import certs.
Select the ca.cer file and import it.

Inside IIS manager, go to \ibmcognos\bi folder and click on URL Rewrite icon.
Click on Reverse proxy Rules to edit.
At action properties – Rewrite URL: change the http to https

https://servername.domain.com:9300/bi/{R:0}
Click apply in the right corner.
Exit IIS manager.

On PA server open Command Prompt as an Administrator and navigate to the \bin64\ directory.

Execute the following command to import/trust the certificate for Tm1 admin:
gsk8capicmd_64 -cert -add -db “C:\Program Files\ibm\cognos\tm1_64\bin64\ssl\ibmtm1.kdb” -stashed -label caRoot -file “C:\Program Files\ibm\cognos\tm1_64\bin64\ssl\ca.cer” -format ascii -trust enable

Go to \bin64\jre\bin\ to import it to PMPSVC java keystore.
keytool.exe -import -trustcacerts -file “C:\Program
Files\ibm\cognos\tm1_64\bin64\ssl\ca.cer” -keystore “C:\Program
Files\ibm\cognos\tm1_64\bin64\ssl\tm1store” -alias caRoot -storepass applix

You need also to add the ca.cer file to the correct keystore for TM1WEB.


https://www.ibm.com/support/pages/node/879929

Configure Planning Analytics 2.0 TM1 Server with SSL Cognos BI Dispatcher (ibm.com)

How to Configure Planning Analytics to Connect to an SSL Secured Cognos Dispatcher (ibm.com)

Configuring TM1 Server to trust the SSL certificate on CA Side (ibm.com)

https://www.ibm.com/support/pages/configuring-ibm-cognos-analyticsbi-https-enabled-web-server

https://www.ibm.com/docs/en/cognos-analytics/11.0.0?topic=components-configuring-ssl-cognos

Product:
Microsoft Windows 2019 server

Issue:
Problem to connect to Remote Desktop from old laptop.

Solution:

Newer Microsoft Windows server has the possible to harden the communication, to not use old security protocols, then it will not allow connections from Windows 2012 or Windows 7 computers.

Try to connect from a Windows 10 computer with the latest service packs.


More information:

https://support.microsoft.com/en-us/topic/microsoft-security-advisory-update-for-disabling-rc4-479fd6f0-c7b5-0671-975b-c45c3f2c0540

https://support.microsoft.com/en-us/topic/rc4-cipher-is-no-longer-supported-in-internet-explorer-11-or-microsoft-edge-f8687bc1-1f88-9abe-5c81-b00c26290f36#bkmk_more

https://death-to-ie11.com/

https://www.syvik.com/multidesk/documentation.en.html

Product:
Planning Analytics 2.0.9
Cognos Analytics 11.1.7
Microsoft Windows 2019 server

Issue:
After import of the full content store to a new installed Cognos server, the icons for Tm1 App Web (PMPSVC) is not working.

Solution:
The old Cognos BI 10 solution may have used SKINS for the users.
Check the old server in folder d:\program files\ibm\cognos\c10_64\webcontent\skins for any unique folders that you do not have in your new cognos server. Copy that unique folder over to d:\program files\cognos\tm1_64\webapps\pmpsvc\skins folder.
Looks like the new TM1 needs the old custom skins files to work.

You can also click on icon for My Preferences and change Style to “modern” and click OK.

Below the default style skins that come with the product. If you have more folders in your Cognos BI installation, then they should be copied over to the new cognos server.

More information:
Inside Cognos Analytics – Administrator page – if you are only see text and miss the icons and color, it is possible the same issue, you need to copy the company unique skins folder to the new server.

https://www.cognoise.com/index.php?topic=32055.0

What you’re seeing is related to content (images and css files) not being found.
The person who has selected a custom skin as their default will get this.

If your custom skin is named MyCustomSkin, which doesn’t exist on the Cognos Analytics server.

On the Cognos Analytics server…
Copy <install_location>\webcontent\skins\corporate to <install_location>\webcontent\skins\MyCustomSkin.
Copy <install_location>\webcontent\bi\skins\corporate to <install_location>\webcontent\bi\skins\MyCustomSkin.

No restart is required. Once these are in place, the browser will find the styles and images and Cognos Analytics will be functional and more aesthetically pleasing.

https://www.ibm.com/support/pages/changing-skins-cognos-8-cognos-connection

https://www.ibm.com/support/pages/unable-see-icons-banner-tm1-contributortm1-applications

Product:
Planning Analytics 2.0.97  (file tm1_winx64h_2.0.97.6_ml.tar)
(TM1_version=TM1-AW64-ML-RTM-11.0.97.6-0)
Microsoft Windows 2019 server

Issue:
Error when installing PA on Windows server.

Solution:

Uninstall Planning Analytics.

Go to control panel – administrative tools – services.

Go to Printer Spooler service, right click and select properties and change it to Automatic.

Click to start the Printer Spooler.

Run the installation of Planning Analytics again.

https://www.ibm.com/docs/en/planning-analytics/2.0.0?topic=configuration-installing-planning-analytics-local-single-computer

More information:

https://www.ibm.com/support/pages/tm1-install-generates-error-message-enummonitorsfailed-error-1722

https://www.ibm.com/docs/en/planning-analytics/2.0.0?topic=features-whats-new-in-planning-analytics

https://www.ibm.com/support/pages/ibm-planning-analytics-local-2097-now-available-download-fix-central

Product:
Cognos Controller 10.4.2
Microsoft Windows 2012 R2 Server

Issue:
In Cognos Controller the IBM license is for users and servers. The user part is divided in Administrators and Standard Users.  The limit is that the Standard Users should not have access to all the menu points on the Maintain menu. How do we set this up?

Solution:
Create a security group called ST = standard user, and limit access to menu items as shown below.

Then use this menu group as template when you create other menu security groups in Cognos Controller- if you want the data entry people only to have access to less number of menus.

Log into Cognos Controller Client as a administrator (ADM) user.

Go to maintain – rights – security groups.

Create a new security group, by click on new icon.

Name it ST, Standard User and scroll down to select all menu points that should be set to Not Available.

Then for each menu a standard user, should not see, you need to select it and click “Not Available”.

Important, that Jobs menu above is set to red “Not Available”.

Submission – Tasks – Define, is a new function for Cognos Controller, so if you upgrade from a old version of Cognos Controller this menu will be active and set to allow – giving that all your old users become Administrators. You need to go into Security Groups and set “Not Available” on this new functions (after a upgrade).

“Manage Active Users” can in some cases be allowed for a “Standard User”.

When all fields need are set to “Not Available” click save icon.

Now click on save as icon to create a new security group with this as base;

Give it a good name, and then select the menu points your data entry users should not see, and also mark them as Not Available.

Here you need to decide what menu point your different users groups need. Save the new group.

Then you go to Maintain – Rights – Users.
On each user go to limitations and select your new security group.

Click on Save icon.
Now it may be needed, that you run a optimization of the database for the changes to take affect.

Go to maintain – rights – reports and click on Generate (to get a License Management Report as PDF)

Save the pdf to a folder you can find.
Open the UserReport.pdf file in your Adobe reader or web browser.

Now you should have more standard active users in the report.

The information is also stored in a SLMT tag file for each database, in a unique folder for each database, on the Cognos Controller main server.

C:\Program Files\ibm\cognos\ccr_64\SLMTagData\UK, is the folder for the UK database.

Where you can see historical values from your Controller installation.

In folder C:\Program Files\ibm\cognos\ccr_64\swidtag you find the file that the ILMT tool should check to find what version of Cognos Controller you have installed.


More Information:
https://www.ibm.com/support/pages/controller-licensing-what-difference-between-administrator-and-non-administrator-user

http://public.dhe.ibm.com/software/passportadvantage/PA_Agreements/PA_Agreement_International_English.pdf

https://www.middlecon.se/vad-ar-ilmt-och-vem-behover-bry-sig/

https://www.ibm.com/support/pages/faq-what-does-internal-database-optimise-do-and-how-often-should-i-run-database-optimize

https://www.ibm.com/docs/en/cognos-controller/10.4.1?topic=environment-monitoring-license-usage

https://www-03.ibm.com/software/sla/sladb.nsf/lilookup/B2CD5F784772CDB08525860A0058085C?OpenDocument

Product:

Cognos Controller web 10.4.2
Microsoft Windows 2012 R2 server

Issue:
Upgrade of controller web to later version with SSO (CAM login), you get a error after you select the database in the controller web page.

Error message:

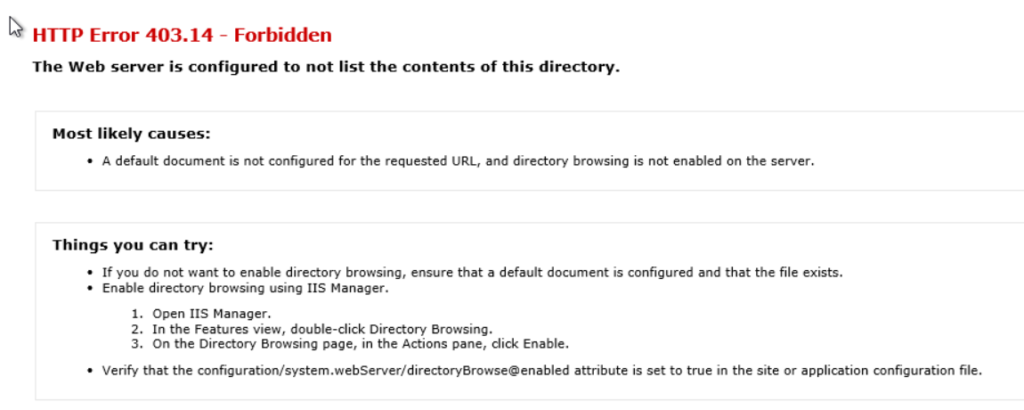
The website declined to show this webpage
Most Likely causes:
This website requires you to login.

This error (HTTP 403 Forbidden) means that Internet Explorer was able to connect to the website, but it does not have permission to view the webpage.

Solution:

The file D:\Program Files\ibm\cognos\analytics\templates\ps\portal\variables_CCRWeb.xml

may contain the wrong information.

Open variables_CCRWeb.xml in Notepad++

Change line <CRNenv c_cmd=”http://servername.domain.com:9080/fcm.web/#!/CamLogin”>

to

<CRNenv c_cmd=”http://servername.domain.com:9080/#!/CamLogin”>
<cookies>
<param name=”cam_passport”/>
</cookies>
</CRNenv>

The extra fcm.web is from the old version of Controller web.

Save the file again.

Restart the 3 Cognos Controller Web services.

Try to browse to http://servername.domain.com:9080/ to see if Controller Web works.

More Information:

https://www.ibm.com/support/pages/how-install-controller-web

https://www.ibm.com/support/pages/node/305259

https://www.ibm.com/support/pages/controller-web-does-not-fully-logout-authenticated-users-unless-web-browser-closed-using-cam-authentication

The log files for controller web is found in folders:

D:\Program Files\ibm\cognos\ccr_64\frontend\logs\fcmwebui-stdout.2021-04-23.log

D:\Program Files\ibm\cognos\ccr_64\fcmweb\wlp\usr\servers\fcm.web\logs\fcmweb-stdout.2021-04-23.log