Product:
Cognos Analytics 11.0.12 kit_version=11.0.12.18062512
Microsoft Windows Server 2012 R2 (Windows NT 6.2)

Issue:
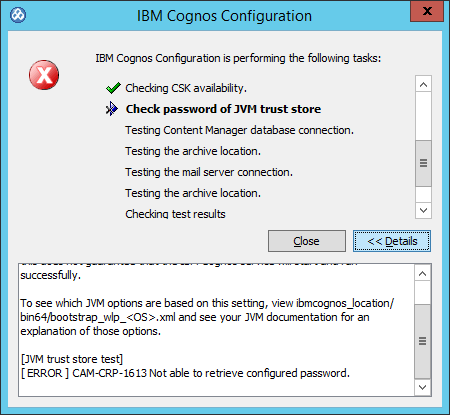
After upgrade of CA11, when you save the Cognos Configuration you get a error message.
This is in a multi server installation, and this can happen if the Cognos services are started in the wrong order.

Error message:

ca11 error1

Solution:
Reset the certificates on the server where you have the error.

1. Stop the running of your cognos service in Cognos Configuration.
2. On the Content Manager computer, click ‘File > Export As’. (and the other cognos servers)
3. Choose ‘Yes’ at the prompt and save the file. For example, name it ‘backup.xml’ which will be stored in the c11\configuration folder.
4. Close Cognos Configuration.
5. On the Content Manager computer, create a backup of the following files and directories before moving them to a different, secure location (as during the cryptographic keys regeneration process they will be re-created):

The files are:
c:/program files/ibm/cognos/analytics/configuration/cogstartup.xml
c:/program files/ibm/cognos/analytics/configuration/caSerial
c:/program files/ibm/cognos/analytics/configuration/certs/CAMCrypto.status
c:/program files/ibm/cognos/analytics/configuration/certs/CAMKeystore
c:/program files/ibm/cognos/analytics/configuration/certs/CAMKeystore.lock
c:/program files/ibm/cognos/analytics/temp/cam/freshness

The directory is
c:/program files/ibm/cognos/analytics/configuration/csk

6. In the c11\configuration folder, rename ‘backup.xml’ to ‘cogstartup.xml’.
7. Open Cognos Configuration, save the configuration and start the services.

8. Repeat steps 1-7 on all computers that have Cognos Analytics Server components installed.
If needed – if it is only one CA11 that have issues, start with only change on that server.

You can surf to http://ca11cm_servername:9300/p2pd/servlet to see if the CM is up.

Text is from this website:
http://www-01.ibm.com/support/docview.wss?uid=swg21995088

How to upgrade CA11

http://www-01.ibm.com/support/docview.wss?uid=swg21994915

Product:
Planning Analytics 2.0.3 (Tm1)
Cognos Analytics 11.0.9 (Cognos BI)
Microsoft Windows 2012 R2 Server

Issue:
When a user is added to a AD group, that then is added to Cognos group, and the Cognos Group is added in the TM1 application as a group. And that group is given access to cubes and dimensions inside TM1. When user login to TM1WEB, he can not see the cubes.
If you look inside TM1 Architect, there is no X for him under the Cognos\group. So Cognos have not understand that he belongs to a AD group.

Solution:
IBM Cognos service run as local system in Windows server.
The Active Directory is setup to allow user to login but not to see other users details, like groups.

ad1

You need to at Namespace – Resource Properties – Binding credentials enter the name and password of a user that have the rights to READ the Active Directory and see what groups a user belongs to.

ad2

When you right click on namespace in cognos configuration and select test, you will first validate the user and there after try to get a list of the groups the user belongs to.

ad3

You need the binding credentials if AD is not configured to allow anonymous bind.

ad4

In TM1 you can add the Cognos group or the AD group direct into TM1 Architect under security – client/groups. Click on Groups and Add New Group. Click on your namespace and search for the group you want to add. When it is added it will look similar, as in the picture above.
If a user is successful to login and belongs to a group, there will be a X under that group for that user. User AD/roger can we see belongs to the Cognos group “TM1 users”.

ad5

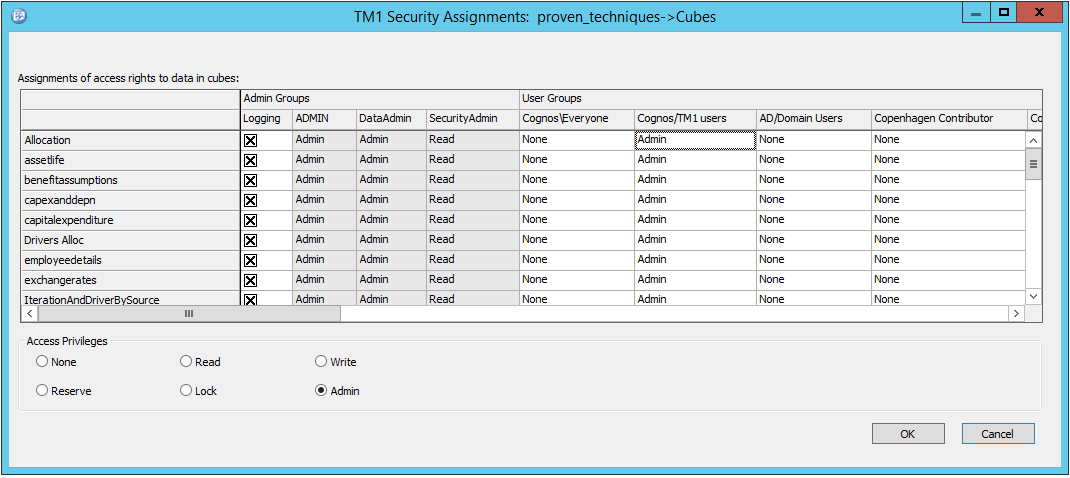
Then you have to, inside your TM1 application, give the groups the access they need to the different cubes and dimensions.

More Information:
https://www.ibm.com/support/knowledgecenter/SSEP7J_10.2.2/com.ibm.swg.ba.cognos.inst_cr_winux.10.2.2.doc/t_inst_activedirectoryserver_process.html

https://www.ibm.com/support/knowledgecenter/en/SS9RXT_10.2.2/com.ibm.swg.ba.cognos.tm1_dg_dvlpr.10.2.2.doc/c_controllingaccesstotm1objects_n60007.html

https://www.ibm.com/support/knowledgecenter/en/SS9RXT_10.3.0/com.ibm.swg.ba.cognos.prfmdl_ug.10.3.0.doc/c_prfmdl_setting_up_security.html

Product:
Cognos Analytics 11.0.9
Microsoft Windows 2012 R2 Server

Issue:
Does Cognos BI send a mail when you click on TEST of notifications i Cognos Configuration?

Solution:
Yes, cognos configuration test mail function, will send a mail to the default sender with the default sender as sender.
If you enter a valid mail address at the company as the default sender, and click test, that person will have a mail.

Under Data Access – Notifications set it up like this:
SMTP mail server: smtpserver.company.com:25
Account and password: (can be blank if the SMTP server allow resend of anonymous mail)
Default sender: roger@company.com (use the mail address to a person at the company)
SSL Encryption Enabled: False

More information:
http://www-01.ibm.com/support/docview.wss?uid=swg21445621
http://www-01.ibm.com/support/docview.wss?uid=swg21339824

Product
Planning Analytics 2.0.5
Microsoft Windows 2012 R2 Server

Problem
How to avoid the time out for users of TM1?

Solution

CA11 (Cognos BI) should have the lowest time out, e.g. 3600 seconds as default. This gives
CA Session timeout  < PAW Session Time-Out , should then have SessionTimeout= 60m and ProxyTimeoutSeconds=900 (15 min)
< TM1 Web in \tm1_64\webapps\tm1web\WEB-INF\web.xml at <session-timeout>70</session-timeout> & TM1 Web Applications timeout in Cognos Configuration > TM1 Applications set to 70 for Session timeout (default is 60 min).
< TM1 Database timeouts (tm1s.cfg settings IdleConnectionTimeOutSeconds= 4800, and a Rest-API connection HttpSessionTimeout= 80.)
< IIS timeout settings on the Windows server for CA gateway.

(below text copied from the web)

IIS server:
HTTP Response Headers at the ibmcognos/samples/images level – set common headers to Expire Web Content to After 5 days.
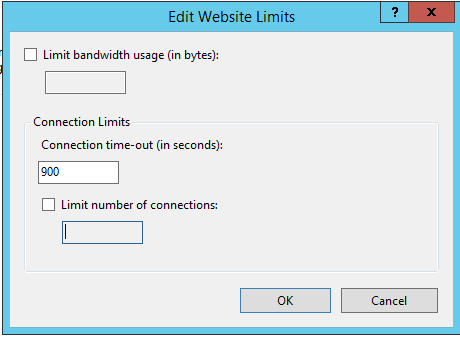
At the Default Web Site – Limits – set Connection time-out (in seconds): to 900.

to1

At Application Pools – ICAPool – Advanced Settings, change Idle Time-out (minutes) to 90.

TM1 SERVER IDLE:
Default: 900 seconds ( 15 minutes )
Location: tm1s.cfg
Setting: IdleConnectionTimeOutSeconds=900
https://www.ibm.com/support/knowledgecenter/en/SSD29G_2.0.0/com.ibm.swg.ba.cognos.tm1_inst.2.0.0.doc/c_idleconnectiontimeoutseconds_tm1.html

TM1 SERVER REST/HTTP:
Default: 20 minutes
Location: tm1s.cfg
Setting: HTTPSessionTimeoutMinutes=20
https://www.ibm.com/support/knowledgecenter/en/SSD29G_2.0.0/com.ibm.swg.ba.cognos.tm1_inst.2.0.0.doc/c_httpsessiontimeoutminutes.html

CAM SECURITY:
Default: 3600 seconds ( 60 minutes )
Location: Cognos Configuration > Security > Authentication
Setting: Inactivity timeout in seconds
https://www.ibm.com/support/knowledgecenter/en/SSEP7J_10.2.0/com.ibm.swg.ba.cognos.ig_mob.10.2.0.doc/t_mig_sec_st_cam.html

TM1 WEB (version 10.2.x):
Default: 20 minutes
Location: D:\Program Files\ibm\cognos\tm1_64\webapps\tm1web\WEB-INF\web.xml
Setting: <session-timeout>20</session-timeout>
https://www.ibm.com/support/knowledgecenter/en/SSD29G_2.0.0/com.ibm.swg.ba.cognos.tm1_prism_gs.2.0.0.doc/t_paw_troubleshooting_web_timeout.html

TM1 WEB (2.0.5 and earlier):Default: 20 minutes
Location: \tm1_64\webapps\tm1web\WEB-INF\web.xml
Setting <session-timeout>20</session-timeout>Setting the TM1 Web session timeout

TM1 WEB (2.0.6 and later):Default: 20 minutes
Location: \tm1_64\webapps\tm1web\WEB-INF\configuration\tm1web_config.xml
Setting <add key="HttpSessionTimeout" value="60" />Setting the TM1 Web session timeout

PMPSVC:
Default: 60 minutes
Location: Cognos Configuration > TM1 Applications
Setting: Session timeout (min)
( this setting updates the \tm1_64\webapps\pmpsvc\WEB-INF\configuration\fpmsvc_config.xml session-timeout )
https://www.ibm.com/support/knowledgecenter/en/SSD29G_2.0.0/com.ibm.swg.ba.cognos.tm1_inst.2.0.0.doc/t_tm1_inst_contrib_c8security_session_timeout_vals.html

PMHUB / PLANNING ANALYTICS FOR EXCEL:
Default: 3600 seconds ( 60 minutes )
Location: http://localhost:9510/pmhub/pm/admin , Configurations > PMHub Session
Setting: MaxInactivityTimeout

PAW (later versions only) on Windows:
Default: 120 seconds, how long paw waits for response on back end systems like tm1 instances.
Location: d:\ibm\paw\config\paw.ps1
Setting: $env:ProxyTimeoutSeconds=”900″

$env:SessionTimeout The amount of time a Planning Analytics Workspace login session can go unused before it is no longer valid. Specify a positive integer followed by a unit of time, which can be hours (h), minutes (m), or seconds (s). For example, specify 30 seconds as 30s. Default is 60 minutes.

Session timeout in TM1 portal
The TM1 Application Web session-timeout can be adjusted in the following file:
D:\Program Files\ibm\cognos\tm1_64\webapps\pmpsvc\WEB-INF\web.xml
Scroll to the bottom of this file and modify the session-timeout to the minutes you desire:
<session-config>
<|– Default to 5 minute session timeouts –>
<session-timeout>5</session-timeout>
</session-config>
Save the files and restart the IBM TM1 Application Server Service.
Session timeout in Cognos Analytics

1. Launch Cognos Configuration and navigate to “Local configuration -> Security -> Authentication”

2. Modify the “Inactivity timeout in seconds” from the default 3600 to your desired time (for example 7200 = 2 hours”).

3. Save the configuration and restart the Cognos service for the changes to take effect

Note:

  • Most web server timeout settings will come into effect long before the 1 hour time limit, but in the even that no such timeouts exist, this setting acts as a backup.
  • Furthermore, if the web server hosts other sites that do not have such a timeout, the Cognos portal can be secured by setting this to a shorted time frame so that only Cognos users are affected
  • The Cognos timeout is set to a value that is less than the timeout set on in-built portal. Make sure you set the value of “Inactivity timeout in seconds” in Cognos configuration to a value which is greater than the Inactivity timeout of your in-house portal.

Error
Unable to successfully log in to TM1Web: Session timed out. Please login again…
Problem(Abstract)
Whenever a user logs into TM1Web the session immediately (falsely) times out.
Cause
The web server has an underscore in the machine name.

More information:

https://www.ironsidegroup.com/2011/06/27/session-timeout-101/

http://www-01.ibm.com/support/docview.wss?uid=swg22002419

3 Ways to Optimize Cognos Timeout Settings


Product:
Planning Analytics 2.0.3
TM1SERVER_APP_version=TM1SERVER_APP-AW64-ML-RTM-11.0.3.119-0
Cognos Analytics 11.0.9 kit_version=11.0.9.17121514
kit_name=IBM Cognos Analytics
Planning Analytics Workspace version 29
Microsoft Windows 2012 R2 Server

Problem:
How make SSO with Planning Analytics for Excel work?

Contact IBM Cognos Support to get the latest instructions on how to setup PAX.

https://www.ibm.com/support/knowledgecenter/en/SSD29G_2.0.0/com.ibm.swg.ba.cognos.tm1_inst.2.0.0.doc/t_tm1_inst_pax_cam.html

Solution:
Setup of Content Store database in SQL server
See here how: https://www.ibm.com/support/knowledgecenter/en/SSEP7J_10.2.2/com.ibm.swg.ba.cognos.qrc_inst.10.2.2.doc/t_qrc_inst_sqlserver_createacontentstore.html

Setup of Cognos Analytics 11
See here how: http://cogknowhow.tm1.dk/archives/1056
Ensure that all servernames in Cognos Configuration uses FQDN, dvs servername.domain.com, this is a must for PAW setup.

The manual for CA11
http://www-01.ibm.com/support/docview.wss?uid=swg27047187

Setup of IIS and Cognos Analytics 11 Gateway
See here how: https://www.ibm.com/support/knowledgecenter/en/SSEP7J_11.0.0/com.ibm.swg.ba.cognos.inst_cr_winux.doc/t_gateway_iis.html

Check that SSO is working, to the Windows Active Directory, by surf to http://caservername.domain.com/ibmcognos/bi

Check the .\webcontent\default.htm and .\webcontent\index.html files. Update the last line starting with <meta http-equiv=”refresh” as shown below, (where <alias name> is the alias used in the CA_IIS_config.bat script file). Add /ibmcognos/ in most cases.

pax3

Important that Windows Authentication is on the /ibmcognos/sso folder in IIS manager and that you may need to add Advance properties singleSignOnOption: IdentityMapping in Cognos Configuration for CA11 at security – authentication – namespace – active directory.

If Cognos Application Firewall is used, then you need to add the TM1 servers here also with port 9510.
Open Cognos Configuration for CA11. Go to Local Configuration – IBM Cognos Application Firewall. Click on Valid domains or hosts to add the PAservername to the list of approved domains.
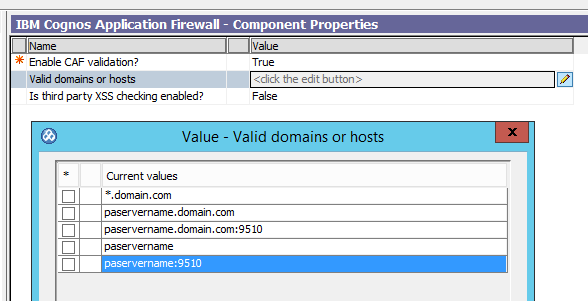
pax10
Click OK, save the new Configuration and restart the Cognos Analytics services. If above is not done, you get error DPR-ERR-2079 when you logout of TM1WEB.

Download of Planning Analytics 2.0.3
List of files
http://www-01.ibm.com/support/docview.wss?uid=swg24044001

Parts and Platforms Installation category Part number
IBM Planning Analytics 2.0.3 Microsoft Windows Multilingual Required CNN7AML
IBM Planning Analytics Client 32-bit 2.0.3 Microsoft Windows Multilingual Optional CNN7BML
IBM Planning Analytics Client 64-bit 2.0.3 Microsoft Windows Multilingual Optional CNN7CML
IBM Planning Analytics Workspace 2.0.3 Multiplatform Multilingual Optional CNN7DML
IBM Planning Analytics Workspace 2.0.3 Microsoft Windows Server 2016 Multilingual Optional CNN7EML
IBM Cognos TM1 Package Connector for Business Intelligence 10.2.2 Microsoft Windows Multilingual Optional CN1Z7ML
IBM Cognos Analytics Server 11.0.7 Microsoft Windows Multilingual Optional CNK1EML
IBM Cognos Analytics Samples 11.0.7 Microsoft Windows Multilingual Optional CNK1XML
IBM Cognos Framework Manager 11.0.7 Microsoft Windows Multilingual Optional CNK1MML

Download from here
http://www-01.ibm.com/support/docview.wss?uid=swg24044081

Setup of PA 2.0.3
https://www.ibm.com/support/knowledgecenter/SSD29G_2.0.0/com.ibm.swg.ba.cognos.tm1_inst.2.0.0.doc/tm1_inst.pdf

Check that Print Spooler Service is running in your Windows 2012 server.
Install NET Framework 4.6.1 (NDP461-KB3102436-x86-x64-AllOS-ENU.exe) in the Windows server, from here: https://support.microsoft.com/en-us/help/3102436/the–net-framework-4-6-1-offline-installer-for-windows
Install C++ 2010 x64 redistribution (vcredist_x64.exe).

Run the installation from the unziped file in D:\install\pa 2.0.3\tm1_winx64h_2.0.3.119_ml.tar\winx64h\issetup.exe

Go into Cognos Configuration for TM1 (PA2.0.3)
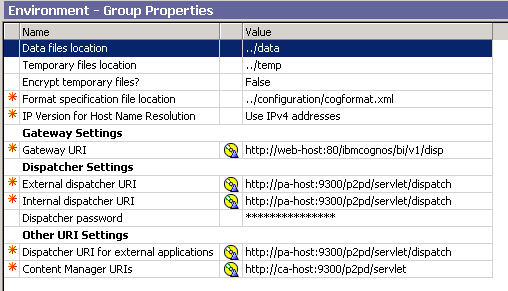
pax1
Under Environment point to the CA11 server.
Set gateway URI to be to the CA11 gateway like this http://caservername.domain.com:80/ibmcognos/bi/v1/disp
Set External Dispatcher URI to http://caservername.domain.com:9300/p2pd/servlet/dispatch
Set Content Manager URI to http://caservername.domain.com:9300/p2pd/servlet

At IBM Cognos TM1 you can tune your WebSphere Liberty Profile;
Set Ping timeout in seconds to a value like 480 seconds.
Set Maximum memory for Websphere Liberty Profile in MB to 4096, if TM1 Web or TM1 Application Web are getting unresponsive and Planning Analytics logs contain some errors java.lang.OutOfMemoryError.

At TM1 Applications leave the Maximum memory in MB at default 768.
Enter TM1 Application Server Gateway URI to http://paservername.domain.com:9510/pmpsvc and External server URI to http://paservername.domain.com:9510.
Consider to change Session timeout to a higher value.
Set TM1 Application Server Dispatcher URI to http://paservername.domain.com:9510/pmpsvc/dispatcher/servlet

At TM1 Clients change the Cognos Insight ping frequency (seconds) to a higher value like 90. See separate page about timeout values http://www-01.ibm.com/support/docview.wss?uid=swg22002419
Skip the Logging, Security, IBM Cognos Application Firewall – they have limited function in this version of PA2.

Start the SDATA and Proven_Techniques example TM1 instances.
We use Proven_Techniques to test SSO, because it have a short TM1S.CFG file, so it is easy to add fields.

Setup of SSO
http://www-01.ibm.com/support/docview.wss?uid=swg22000283

Open C:\Program Files\ibm\cognos\tm1_64\samples\tm1\Proven_Techniques\tm1s.cfg in notepad++.
Add the lines;
IntegratedSecurityMode=2
ServerCAMURI=http://caservername.domain.com:9300/p2pd/servlet/dispatch
ClientCAMURI=http://caservername.domain.com:80/ibmcognos/bi/v1/disp
Save the file and restart the TM1 instance Proven_Techniques.

Exit TM1 Architect.
Erase the tm1p.ini file from here C:\Users\%username%\AppData\Roaming\Applix\tm1 to allow it to get the new values.
Open C:\ProgramData\Applix\TM1\tm1p.ini in notepad and add the values AllowImportCAMClients = T
CognosGatewayURI = http://caservername.domain.com:80/ibmcognos/bi/v1/disp
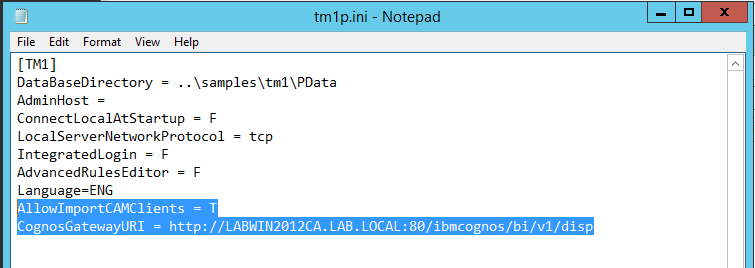
PAX2
Save the file.

Add users
Start Tm1 Architect, double click on Proven_Techniques to login.
Enter ADMIN as user to login. Right click and select Security – Client/Groups. From menu Clients select Add New Client.
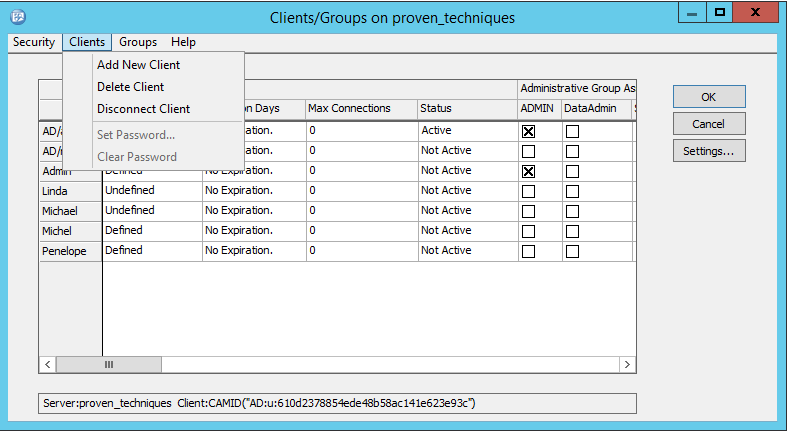
pax4
Click on your namespace name, in out example AD.
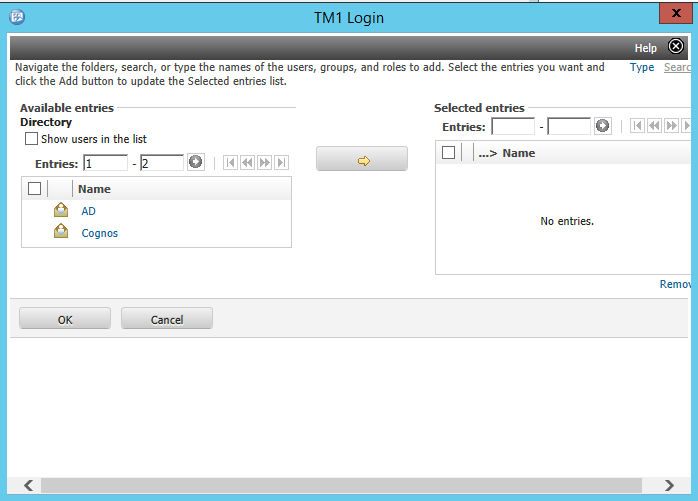
pax5
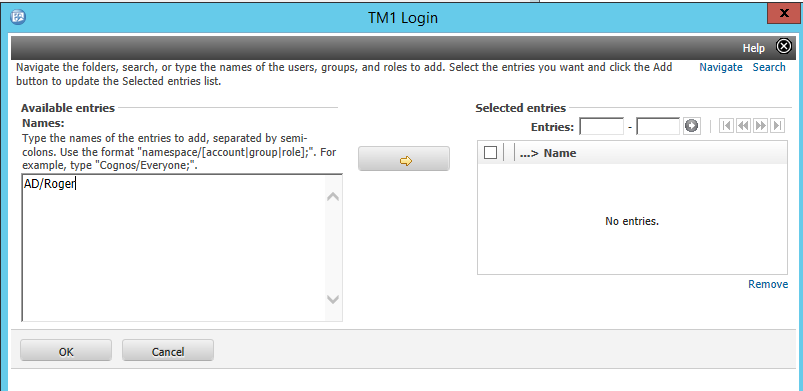
Click on TYPE in top right corner to enter the name of the user.
pax6
Enter the domainnamespace/username. Namespace name is the name you gave it in CA11 cognos configuration. Username most be the users name correct spelled as it is entered in Active Directory.
Click on yellow arrow to add the user, and click on OK.
pax7
Mark the user to be ADMIN, so he can then add other users later.
Click OK and exit TM1 Architect. Now you turn TM1 application to security mode 5,and then this user can login and add additional users in TM1 architect.

Open C:\Program Files\ibm\cognos\tm1_64\samples\tm1\Proven_Techniques\tm1s.cfg in notepad++.
Change the line to 5
IntegratedSecurityMode=5
Save the file and restart the TM1 instance.

Unzip the file C:\Program Files\ibm\cognos\tm1_64\bi_interop\bi_interop.zip to a separate folder like c:\install
There should be two folders
templates
webcontent
Go and update this files with the PA server name and PAW server name;
C:\install\webcontent\planning.html
Update the following to point to the location of the planning service(s)
var planningServices = [“http://paservername.domain.com:9510″,”http://pawservername.domain.com”];
C:\install\webcontent\pmhub.html
Update the following to point to the location of the pmhub service(s)
var pmhubURLs = [“http://paservername:9510″,”http://paservername.domain.com:9510″,”http://pawservername.domain.com”];
C:\install\webcontent\tm1\web\tm1web.html
// Update the following to point to the location of the TM1Web service(s)
var tm1webServices = [“http://paservername.domain.com:8080”, “http://paservername.domain.com:9510”];
Save the files.

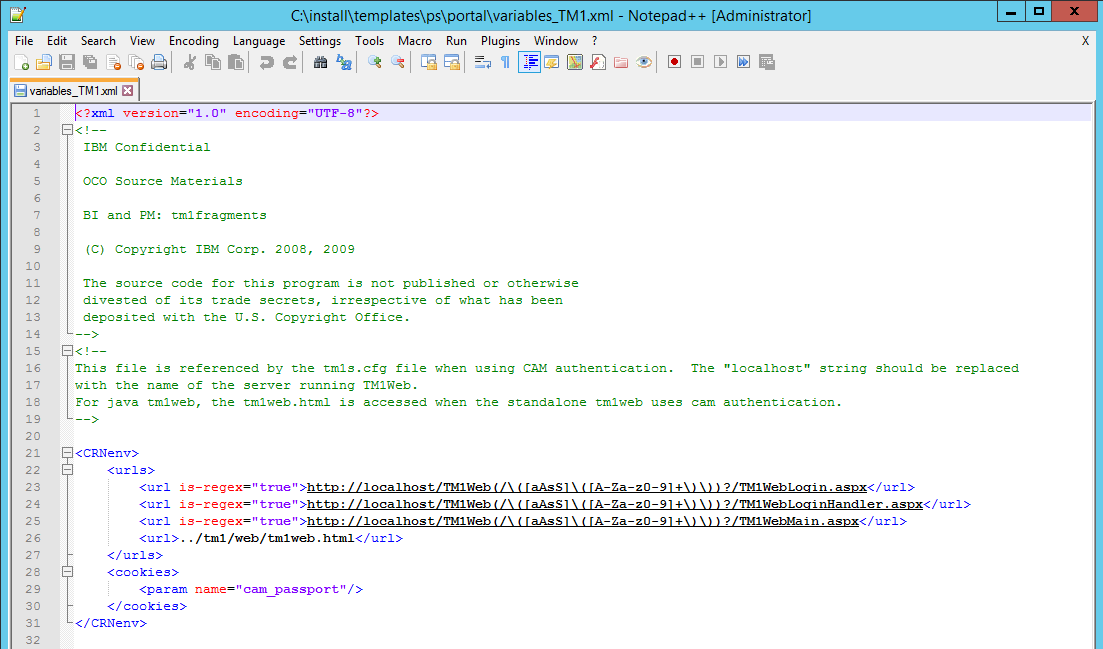
The files in C:\install\templates\ps\portal should not be changed.
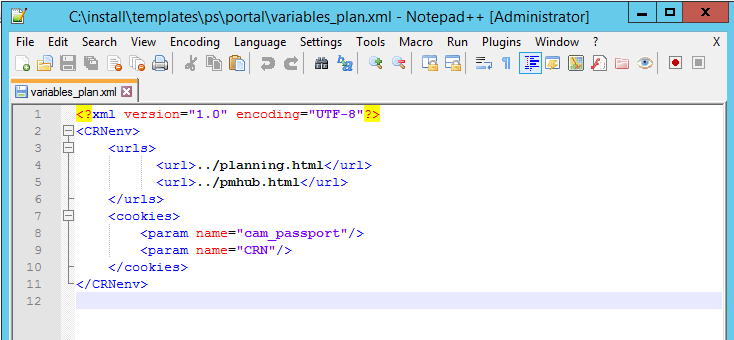
pax8
pax9
If variables_TM1.xml is not referenced in TM1S.CFG file, then it is most likely not used.

Copy the files and folders in C:\install\webcontent ontop the C:\Program Files\ibm\cognos\analytics\webcontent folder.
Go into C:\Program Files\ibm\cognos\analytics\webcontent\tm1\web\tm1web.html and see that it is the updated file.
Copy the files and folders in C:\install\templates to the C:\Program Files\ibm\cognos\analytics\templates folder.
Replace files as needed.

Copy the C:\Program Files\ibm\cognos\analytics\webcontent\tm1 folder to C:\Program Files\ibm\cognos\analytics\webcontent\bi folder. So you also got a TM1 folder under /webcontent/bi.

Copy the updated files planning.html, pmhub.html, default.htm and index.html from C:\Program Files\ibm\cognos\analytics\webcontent to folder C:\Program Files\ibm\cognos\analytics\webcontent\bi.

Restart IIS with iisreset from a CMD prompt.
Surf to http://paservername.domain.com:9510/tm1web to check that it works.

The first time you start TM1 Application portal, then it will connect to the PA and BI setup. You must surf to http://paservername.domain.com:9510/pmpsvc to set it up.
Enter the host name and the list of TM1 server names should be filled out. Select the proven_techniques from the list.
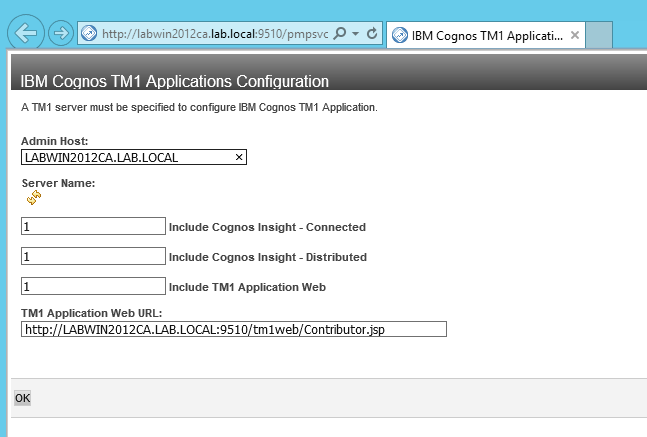
pax11error
If it looks like above – please try a different version of web browser.
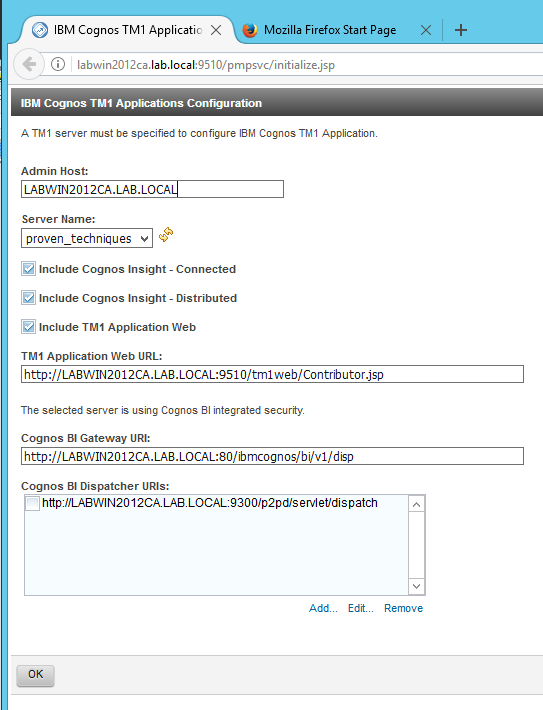
pax11firefox
Above is the correct look, you get in FireFox.
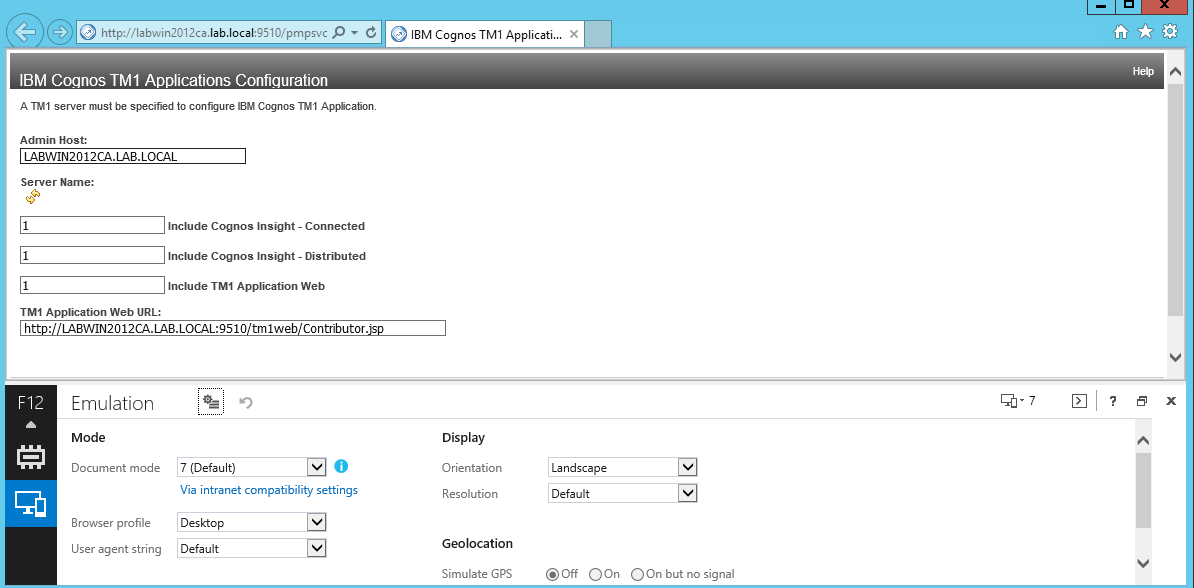
pax12
Press F12 inside Internet Explorer to find the Emulation in use.
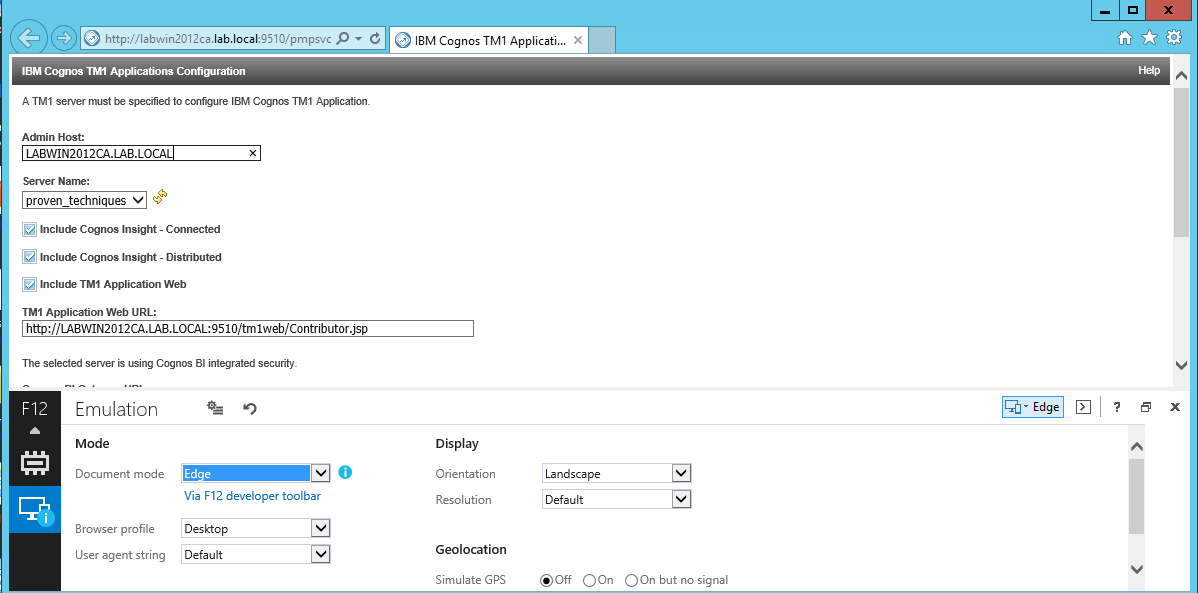
Above you see it is using Document Mode 7. The blue text “via intranet compatibility settings” tell us that it is the compatibility settings in internet options on your computer that give the issue. Open it and clear all values out. pax36Test again.
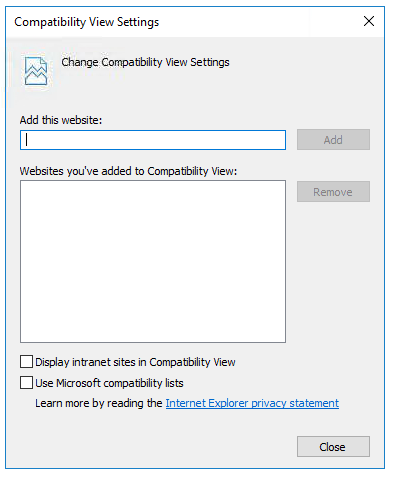
pax13
Change the mode to Edge and it may work for you.
Press OK to save the values to TM1 Application Portal.
pax14
When it is working it should look like above, if you are ADMIN in the Proven_Techniques application you should see all the icons to the right.
This configuration is stored in C:\Program Files\ibm\cognos\tm1_64\webapps\pmpsvc\WEB-INF\configuration\fpmsvc_config.xml.

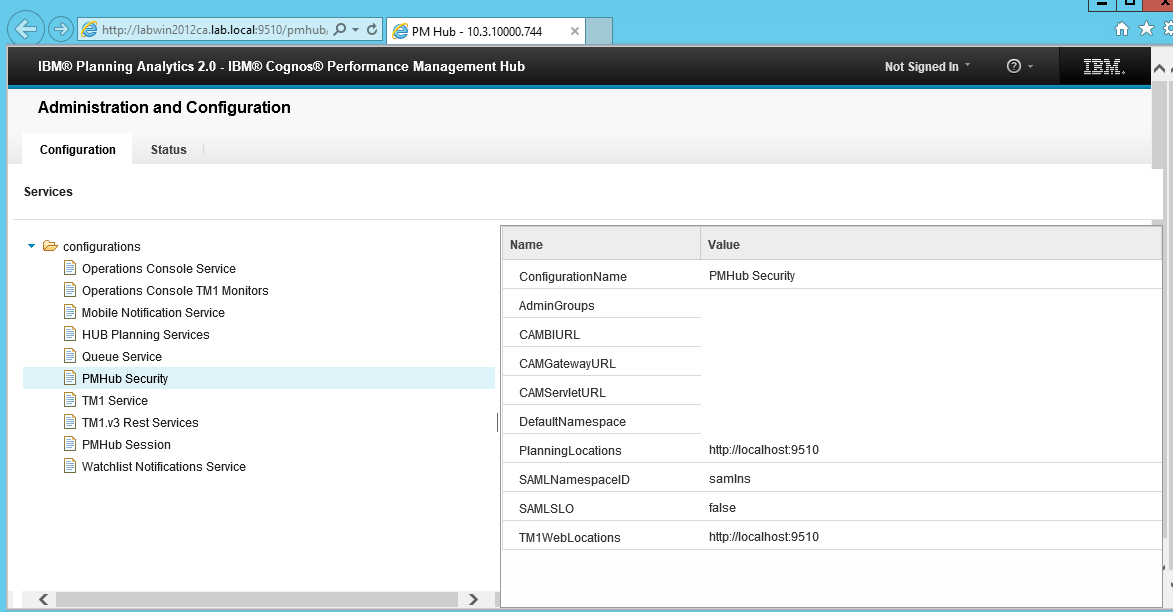
TM1 Operations Console is configured in a web interface. This UI presents multiple options of configuration, including the references to the Cognos Analytics environment.
Surf to http://paservername.domain.com:9510/pmhub/pm/admin
pax15
Expand configurations and select PMHub Security.
At CAMBIURL enter http://caservername.domain.com:9300/p2pd/servlet/dispatch
At CAMGatewayURL enter http://caservername.domain.com:/80/ibmcognos/bi/v1/disp
The values should save automatically in a few minutes.
pax16
Surf to http://paservername.domain.com:9510/pmhub/pm/opsconsole
to check that it works.

TM1 PMPSVC and PMHUB must be setup before you can get PAW to work.

You must setup PAW before PAX are setup.

Download of PAX from here
http://www-01.ibm.com/support/docview.wss?uid=swg27049597
(cor_win32_2.0.29.10_ml.tar.gz)
Installation of PAX
Install NET Framework 4.6.1 (NDP461-KB3102436-x86-x64-AllOS-ENU.exe) from here: https://support.microsoft.com/en-us/help/3102436/the–net-framework-4-6-1-offline-installer-for-windows

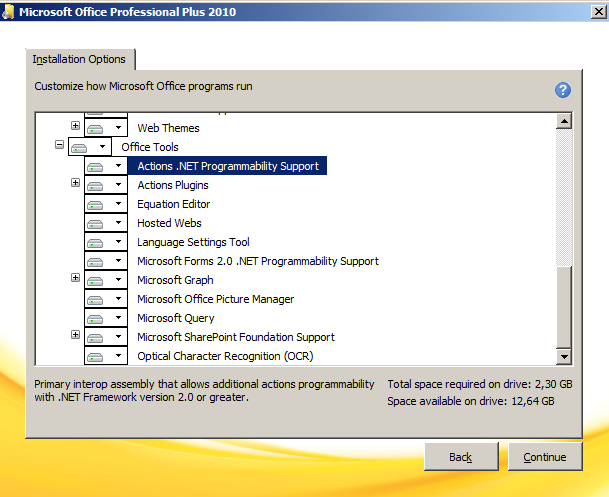
Check that Microsoft Office have the primary interop assemblies (PIAs) for Excel installed.
You can download the PIAredist.exe for Office 2010 from here https://www.microsoft.com/en-us/download/details.aspx?id=3508
In Office setup it is named NET Programmable support.
pax17
PIA – Primary Interop Assemblies (PIA) redistributable package for your version of Microsoft Outlook. The PIA is only needed if you have Outlook 2007 or 2010. PIA is not needed for Office 2013 or Office 365, it is part of the Office installation package as .NET Programmability Support for Office. In all version of Office you also need to make sure the .NET Programmability Support is installed (Control Panel – Program and Features – locate Microsoft Office installation, click on Change and Add/Remove features and expand Outlook, it is the first option you can check the box and install it)

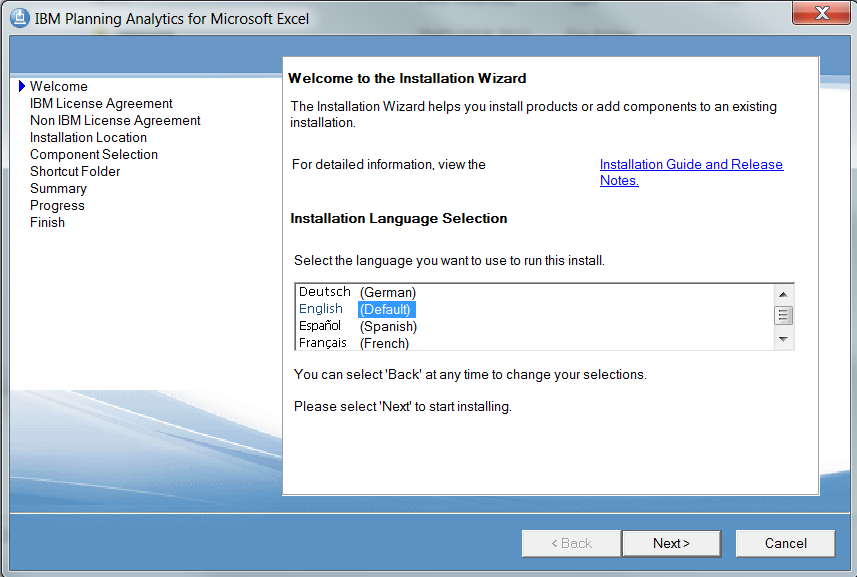
Run the file D:\install\pa 2.0.3\pax\cor_win32_2.0.29.10_ml.tar\win32\issetup.exe
pax18
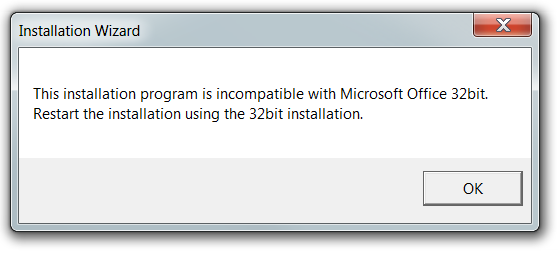
If your excel is 32 bit then you get this error if you select the wrong file. File cor_winx64h_2.0.29.10_ml.tar is for 64 bit excel.
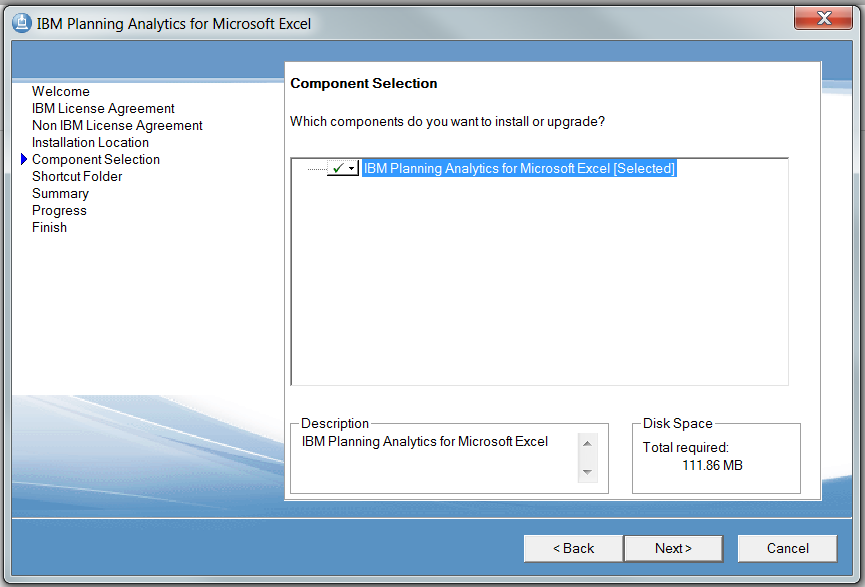
pax19
Click Next
pax20
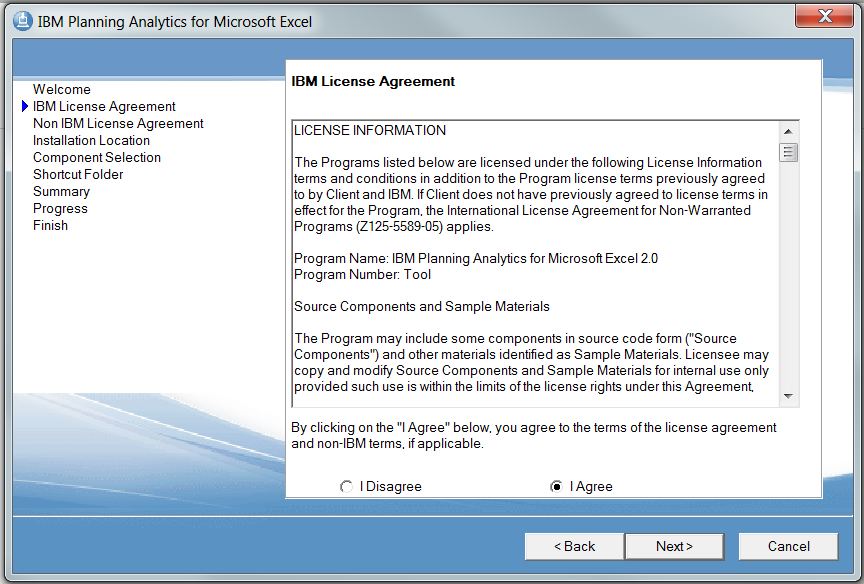
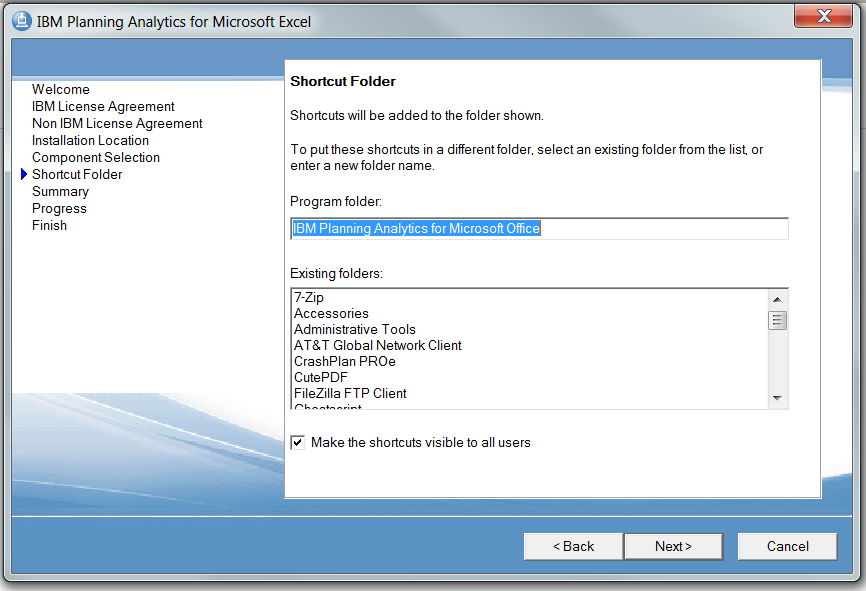
Select I Agree and click Next
pax21
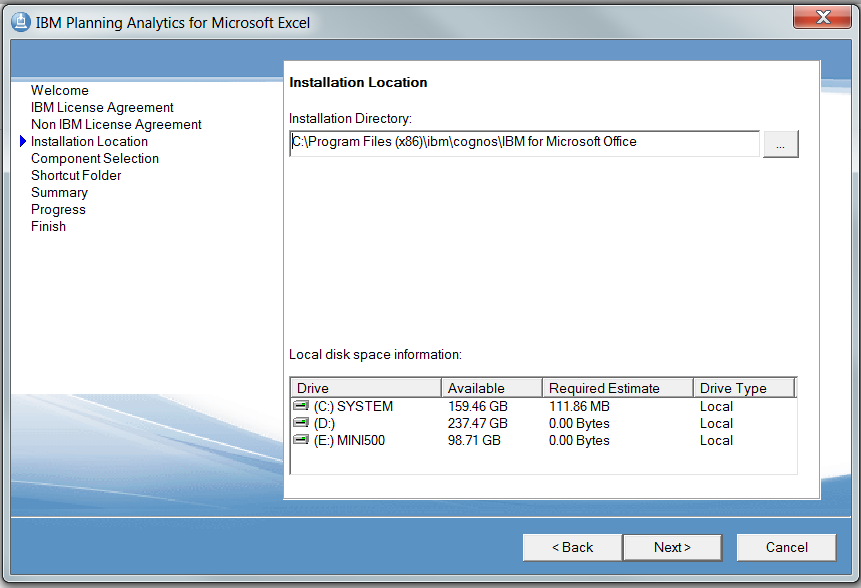
Click Next
pax22
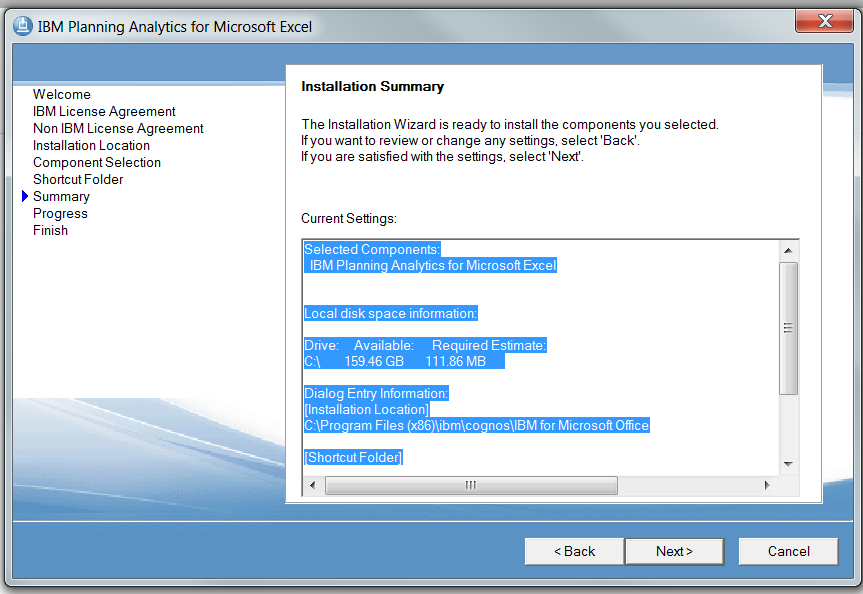
Click Next
pax23
Click Next
pax24
Click Next
pax25
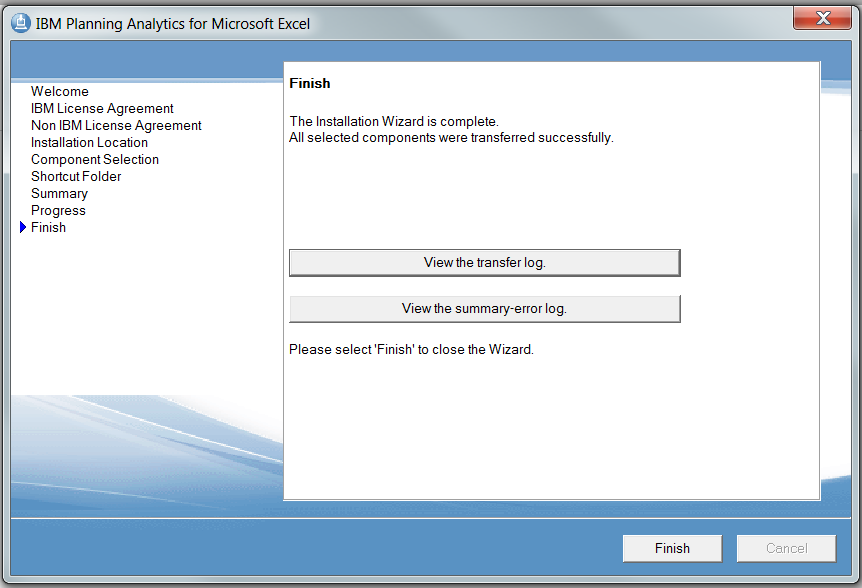
Click Finish.

Configure PAX
Start Microsoft Excel to configure IBM Planning Analytics
pax26
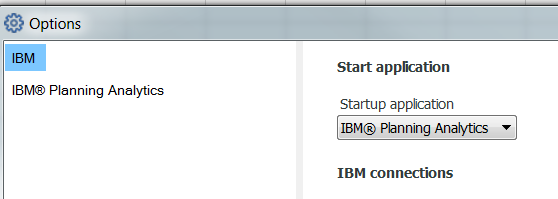
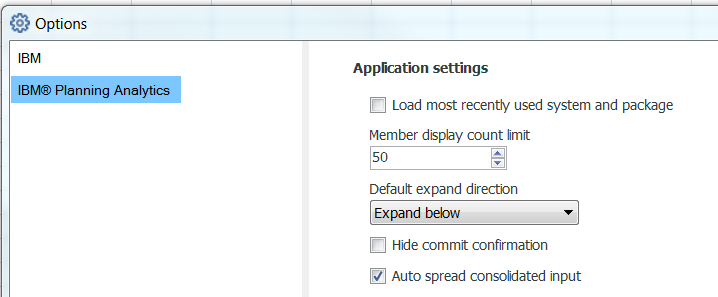
Select tab IBM Planning Analytics and click on Options
pax27
Click on IBM
pax28
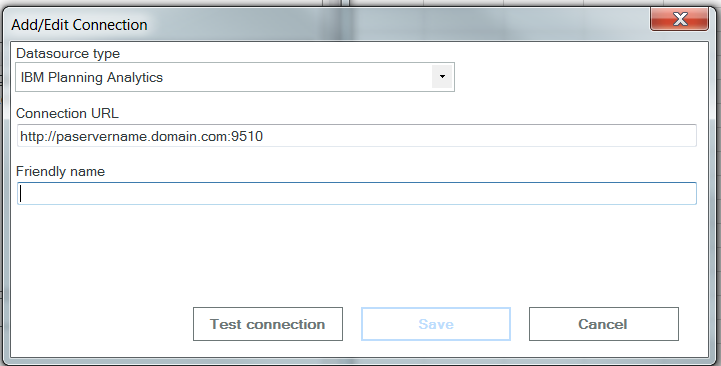
Select IBM Planning Analytics and click on ADD button
pax29
Enter your servername http://paservername.domain.com:9510   (this will make the SSO to work)

PAX should connect to the PAW (Planning Analytics Workspace) URL, like http://pawservername.domain.com:80/ to get the “set editor” to work.

Enter a friendly name, like PMPSVC Connect.
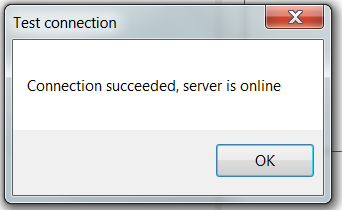
Click on Test Connection
pax30
Click Save
If the test fails, check that servername is correct spelled, and check that Windows Firewall on the server does not block port 9510.
Click OK
pax31
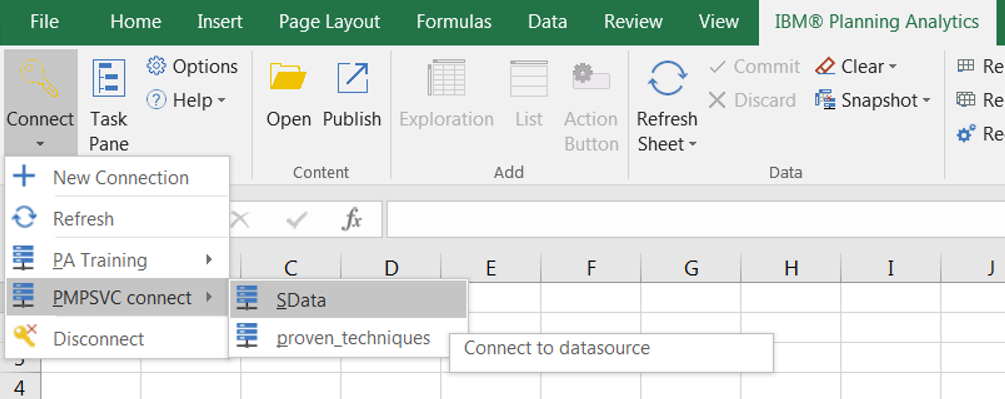
Now you can in Excel click on Connect – Your Friendly name – proven_techniques to start working with that.
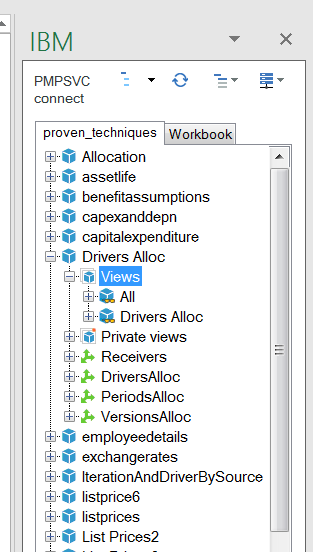
pax32
Now you can drag views from PA2 (TM1) into the spreadsheet.

How to use it http://www.element61.be/en/resource/ibm-planning-analytics-excel-pax
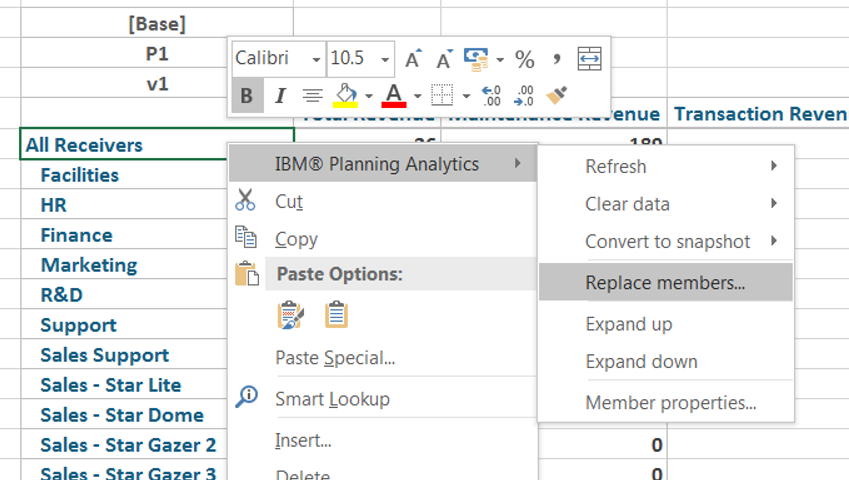
pax33
To get “Replace members” to work you need to install PAW.

If you use a TM1 instance that use securitymode=1 (like example SData) then “set editor” will work.
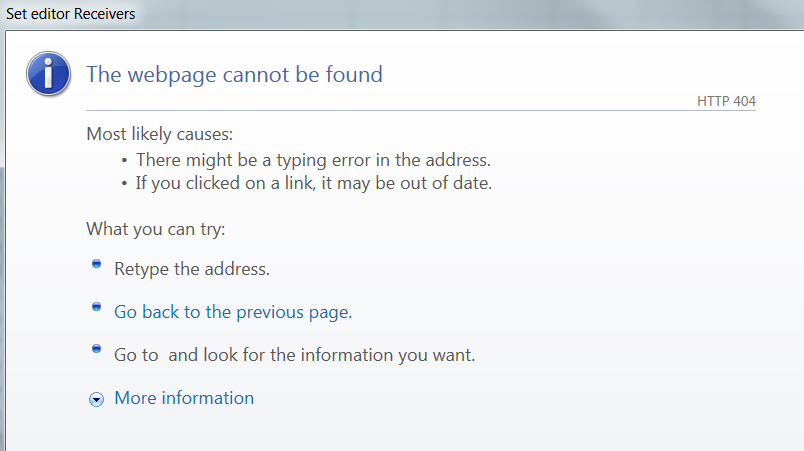
pax34
Above when you point PAX to the PA server and use a PA (TM1 instance) that uses SSO.

If you in PAX connect to PA (Tm1) server at address http://paservername.domain.com:9510/ or http://paservername.domain.com:9510/pmhub/pm then the settings inside pmhub security will tell pax where to go to authenticate.
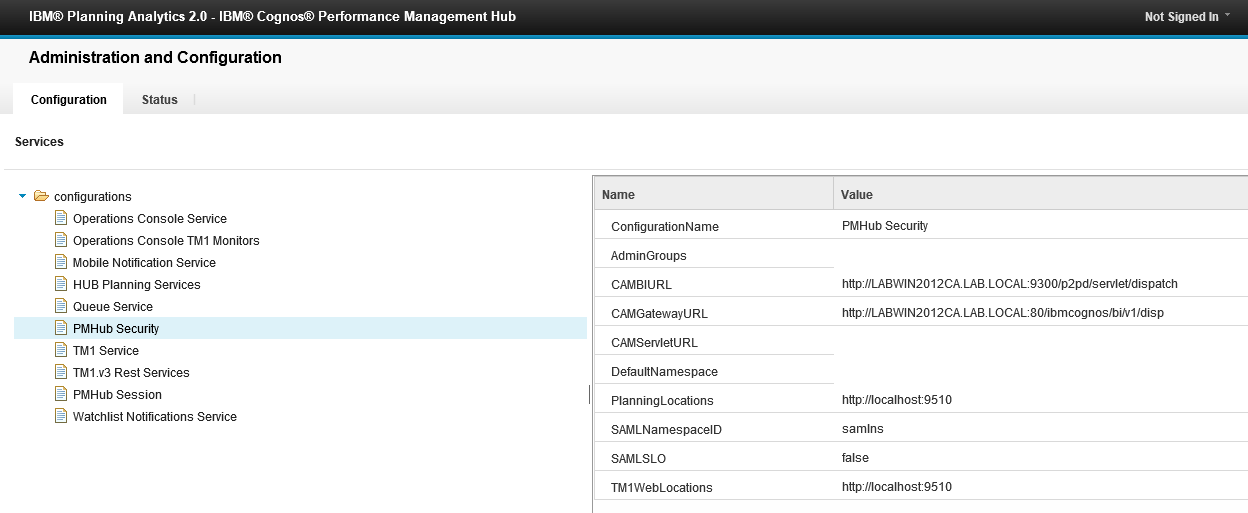
pax35

if you in PAX connect to PAW like http://pawservername.domain.com then the setting in paw administration (http://pawservername.domain.com:8888) will point to the authentic provider.

Then the value in C:\Program Files\ibm\cognos\analytics\webcontent\pmhub.html and C:\Program Files\ibm\cognos\analytics\webcontent\tm1\web\tm1web.html, can also be important to make it work.  Note that this files are also in folder C:\Program Files\ibm\cognos\analytics\webcontent\bi.


Setup of PAW
Ensure you use only FQDN to the servers.

First time you start PAW, you point it to a Native TM1 instance with security mode 2. Then you add your CAM users with TM1 Architect. Set this CAM users to be ADMIN in that instance, and they will be the first ADMIN in PAW. Switch that TM1 instance over to security mode 5. Change in IBM Planning Analytics Workspace Administration Tool from TM1 to CAM authentication mode. You must use security mode 1 first, before you can use PAW with security mode 5.

In IBM Planning Analytics Workspace Administration Tool, you should have this settings:

TM1 Admin Server URI: https://paservername.domain.com:5898

TM1 Application Server Gateway URI: http://paservername.domain.com:9510

Authentication Mode: CAM

IBM Cognos BI Gateway URI: http://caservername.domain.com:80/ibmcognos
if you use CA11 then you should set IBM Cognos BI Gateway URI: http://caservername.domain.com:80/ibmcognos/bi/v1/disp

IBM Cognos BI Dispatcher URI: http://caservername.domain.com:9300/p2pd/servlet/dispatch
if you use CA11 then you should set IBM Cognos BI Dispatcher URI: http://caservername.domain.com:9300/bi/v1/disp

IBM Cognos BI Authentication Namespace ID: AD (the same namespace id you have entered in Cognos Configuration for CA(BI)).

Click Validate and Update.

If above is correct set, then PAX should work pointing to http://pawservername.domain.com

Please note that above setup is for PAW version 29. Other versions of PAW may require other configuration.

See here how to set PAW up http://cogknowhow.tm1.dk/archives/1090

More Information:

https://www.ibm.com/communities/analytics/cognos-analytics-blog/cognosanalytics-and-planninganalytics-integration-walkthrough-part-3/
http://www-01.ibm.com/support/docview.wss?uid=swg22000283
http://www-01.ibm.com/support/docview.wss?uid=swg21958925
https://msdn.microsoft.com/en-us/library/kh3965hw.aspx
https://www.ibm.com/support/knowledgecenter/en/SSD29G_2.0.0/com.ibm.swg.ba.cognos.tm1_inst.2.0.0.doc/c_ig_cor_overview.html

#Cognos Analytics and #Planning Analytics Integration – Walkthrough – Part 2
Product:
Cognos Analytics 11.0.8
Microsoft Windows 2012 R2 Server
Issue:
New installation of Cognos Analytics 11, but when you surf to the http://servername/ibmcognos you get a error like “Error Message: 403.6 – Forbidden” or “This page can’t be displayed”.
You have tried to reinstall Cognos Analytics gateway server parts, that did not help.
If you surf direct to the dispatcher at http://IBM_Cognos_Analytics_server_host_name:9300/bi/v1/disp it works fine.

Please note that CA11 needs to use http://servername/ibmcognos/bi/ and not http://servername/IBMCOGNOS/bi with capital letters, that may not work.

If you get a blank page – click inside it and wait some more.

Solution:
The IIS setup have somehow become corrupt. Redo the IIS setup.
Inside IIS manager – mark cgi-bin and select delete.
Mark SSO under IBMCOGNOS and select delete.
Mark IBMCOGNOS (and COGNOS8 if it exist) and select delete.
Exit IIS manager and stop iis.
Erase web.config files from folders like c:\program files\ibm\cognos\analytics\webcontent\web.config file and c:\program files\ibm\cognos\analytics\webcontent\bi\.

If you run more than one IBM® Cognos® Analytics instances of the same product, on one computer, you must create a separate application pool for each instance and then associate the aliases for that gateway instance to each application pool.

Go into control panel – administrative tools – server manager. Select the local server.
In the Add Roles and Features Wizard, click Role-based or feature-based installation, and click Next.
Select Web Server (IIS), ensure that Common HTTP Features is selected including WebDAV Publishing, Performance Static Content Compression, Under Security select Request Filtering and Windows Authentication, and click Next until you get to the Role Services section of the wizard.
Expand Application Development.
Select CGI and ISAPI Extensions, ISAPI filters and click Next.
Select IIS Management Console, IIS Management Scripts and Tools, Management Service.
Features as NET framework 4.6 and ASP.NET 4.6 should be selected.
Click Install.

Download the IIS add ons needed for Cognos Reverse proxy. Install them in below order;
https://blogs.technet.microsoft.com/erezs_iis_blog/2013/11/27/installing-arr-manually-without-webpi/
1. Stop IIS first by typing net stop was /y and net stop wmsvc /y on an elevated command-line window

2. Download and install the Web Farm Framework module. It is currently available in version 1.1

3. Download and install the External cache module. It is currently available in version 1.0

4. Download and install the URL Rewrite module. It is currently available in version 2.0

5. Download and install ARR itself. It is currently available in version 3.0

6. Start the IIS services back by enter IISRESET (or, simply reboot your server).

Download the Cognos script to configure IIS. (CA_IIS_Config_v1.09(11.02.17).zip)
http://www-01.ibm.com/support/docview.wss?uid=swg22000097
1. Download the CA_IIS_config.zip file to your Cognos Analytics Gateway Server.
2. Extract the CA_IIS_config.bat file to a folder.
3. Open CA_IIS_config.bat in a text editor like Notepad++. https://notepad-plus-plus.org/download/v7.5.3.html
4. The variables, that are to be modified, are located at the top of the file. Edit the BAT file in Notepad++ before you run it.
Run the BAT file as a local administrator.

Then you need to Adjust request size limits.  Go into IIS Manager.

Select the bi directory under the ibmcognos application created earlier.
Double-click Request Filtering.
Click Edit Feature Settings… from the right-hand panel.
Set Maximum URL length (bytes) to 8192.
Set Maximum query string (bytes) to 8192.
Click OK.  (The Cognos Script have already change the values for /bi/ folder)

Configure IIS to allow to pass through the custom 441 errors that are used for recoverable exceptions from CAM. Otherwise, IIS can block these errors, and the customer sees the “Invalid Logon Response” error when trying to log on.

Click the ibmcognos virtual directory.
In the Home view, Management section, double-click Configuration Editor.
In the Section drop-down list, expand system.webServer, and select httpErrors.
Set the existingResponse property to PassThrough. It may already be set correct by the Cognos script.
Apply the configuration change.

If you configured the SSO application in previous steps, enable Windows Authentication.

Select the SSO application folder in IIS manager. For Microsoft Edge browser, select the ibmcognos application folder.
Double-click Authentication. Disable Anonymous Authentication, and enable Windows Authentication.

If you do not want to use Kerberos, at the namespace, add Advance properties singleSignOnOption: IdentityMapping

Cognos Analytics should now be available at: http://iis-host/ibmcognos.

WebDav setup

Note: webdav is not working in 11.0.8 – update to a later version of CA 11.
http://www-01.ibm.com/support/docview.wss?uid=swg1PI90123

Under Connections, expand your web server, Sites, and select your website. For example, select Default Web Site.
Double-click WebDAV Authoring.
Click Enable WebDAV.
Click WebDAV Settings.
If you have anonymous access enabled, select True for Allow Anonymous Property Queries, and click Apply.
Select the directory or virtual directory /ibmcognos/bi/samples/images/ to which you want to allow WebDAV access.
Double-click WebDAV Authoring.
Click Add Authoring Rule, and add the appropriate rules for your environment. Like Allow access to: All Content, User: All users, Access: Read.

For example, if you installed the samples and you want to use the default path, under the ibmcognos virtual directory, expand bi/samples, and select images, and add an authoring rule for the image files in that folder.
In Windows Explorer right-click the directory or virtual directory you added authoring rules to, in above it can be /cognos/analytics/webcontent/bi/samples/images, and click Properties.
Click Security tab, and add the appropriate permissions. For example,  add permissions for the anonymous user access.
You may need to setup webdav for other images folders on the IIS gateway server if they are used in the reports.

http://www-01.ibm.com/support/docview.wss?uid=swg22002398&aid=1

Best is to keep all pictures in the same folder /ibmcognos/bi/samples/images/ on all the Cognos BI servers.

Change the Gateway URI in IBM Cognos Configuration to match the new IIS configuration, i.e. http(s)://web-host:80/ibmcognos/bi/v1/disp
Access the Gateway through http(s)://web-host:80/ibmcognos/bi/

Create a redirect file and place in the C:\inetpub\wwwroot as default.htm
<html>
<head>
<title>Cognos Connection</title>
<meta http-equiv=”refresh” content=”0 ;url=http://cognosserver.domain.com/ibmcognos”>
</head>
</html>


More information:
https://www.ibm.com/support/knowledgecenter/en/SSEP7J_11.0.0/com.ibm.swg.ba.cognos.inst_cr_winux.doc/t_gateway_iis.html
https://www.ibm.com/support/knowledgecenter/SSEP7J_11.0.0/com.ibm.swg.ba.cognos.inst_cr_winux.doc/t_enablewebdavoniis.html
https://www.ibm.com/support/knowledgecenter/en/SSEP7J_11.0.0/com.ibm.swg.ba.cognos.inst_cr_winux.doc/c_inst_crit_config.html

Samples Landing Page

Product:
Cognos Analytics 11.0.7
Microsoft Windows 2012 R2

Problem:
When you inside Cognos Administration on Dynamic Cubes click on “properties” for a specific cube you get a error.
If you surf direct to the dispatcher on port 9300, and do the same thing inside Cognos Connection you do not get a error. Therefor the error is with IIS. Check the windows event log for more details:

Error message:
An unhandled exception has occurred.
/ibmcognos
C:\Program Files\ibm\cognos\analytics\webcontent\
w3wp.exe
IIS APPPOOL\ICAPool
HttpException
The length of the query string for this request exceeds the configured maxQueryStringLength value. at System.Web.HttpRequest.ValidateInputIfRequiredByConfig() at System.Web.HttpApplication.PipelineStepManager.ValidateHelper(HttpContext context)

Solution:
Withing IIS Default Web Site > ibmcognos > bi

Click on ‘Configuration Editor’

Select Section ‘system.web/httpRuntime’
set the following attribute setting –

maxQueryStringLength = 2048 -> 8192
maxRequestLength = 4096 -> 8192

Restart IIS

More information:
https://www.ibm.com/support/knowledgecenter/en/SSEP7J_11.0.0/com.ibm.swg.ba.cognos.inst_cr_winux.doc/t_gateway_iis.html

Adjust request size limits. (Sometimes this settings does not work and you need to edit as above).
Select the bi directory under the ibmcognos application created earlier.
Double-click Request Filtering.
Click Edit Feature Settings… from the right-hand panel.
Set Maximum URL length (bytes) to 8192.
Set Maximum query string (bytes) to 8192.
Click OK.

Product:
Cognos Analytics 11.0.7
Microsoft Windows 2012 R2 Server

Issue:
On new Windows 7 computer you get a blank screen when you surf to Cognos Connection.

Error message in left corner of browser:
Webpage error details
User Agent: Mozilla/4.0 (compatible; MSIE 8.0; Windows NT 6.1; WOW64; Trident/4.0; SLCC2; .NET CLR 2.0.50727; .NET CLR 3.5.30729; .NET CLR 3.0.30729; Media Center PC 6.0; InfoPath.3)

Message: ‘performance’ is undefined
Line: 42
Char: 3
Code: 0
URI: https://caservername/ibmcognos/bi/

Solution:
Install a different browser like Internet Explorer 11.

For any issues in CA11, please first check with a different browser like Chrome. Many issues is only in a specific version of Web Browser.

Cognos Analytics only supports IE11 and some other browsers.
https://www.ibm.com/software/reports/compatibility/clarity-reports/report/html/softwareReqsForProduct?deliverableId=A6C8D9F0FF5611E6A4D1A0107E2821F7&osPlatform=Windows#sw-13

To install IE11 you need SP1 for Windows 7 https://www.microsoft.com/en-us/download/details.aspx?id=5842 and this updates
https://support.microsoft.com/en-us/help/2847882/prerequisite-updates-for-internet-explorer-11

Press F12 and select network, to troubleshoot more inside IE.

Product:
Cognos Analytics 11.0.7
Microsoft Windows 2008/2012/2016 server
Problem:
How setup SSL with the IIS for the cognos users?
Solution:
For testing in your demo environment, you can create own certificate, but for setup in production you need to buy a certificate from trusted CA store.

More information on OPENSSL can be found  here https://www.feistyduck.com/books/openssl-cookbook/

Demo setup:
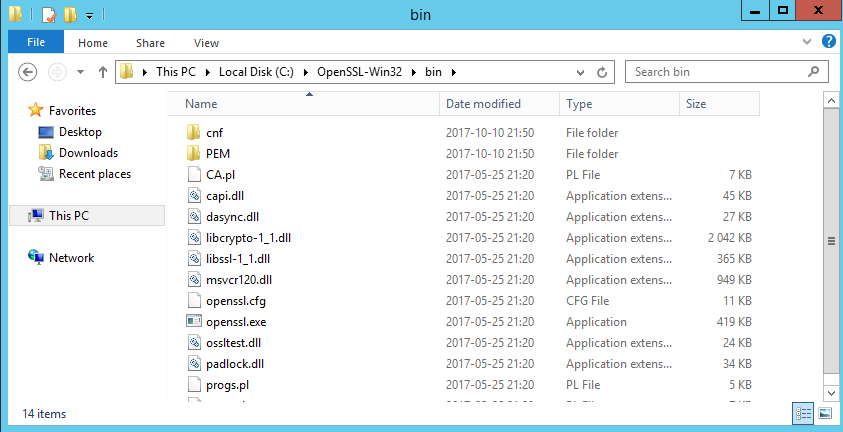
Download open ssl from here in a good installation package http://slproweb.com/products/Win32OpenSSL.html
ssl1
Check the file for virus before you install it.
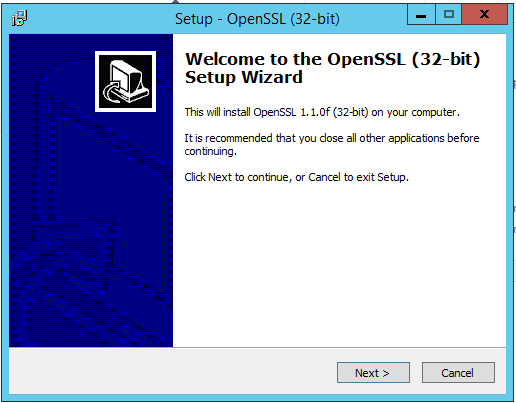
Install openssl on your server
ssl2
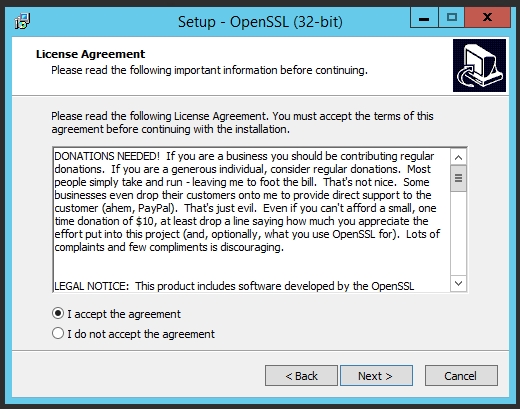
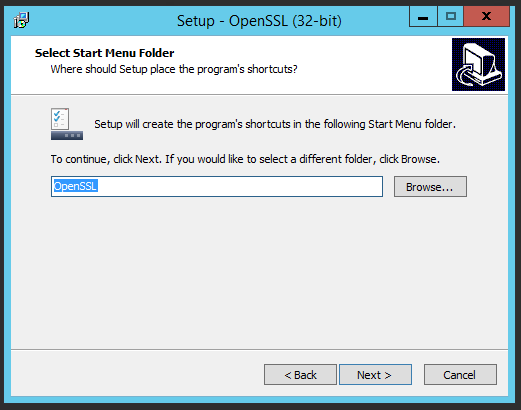
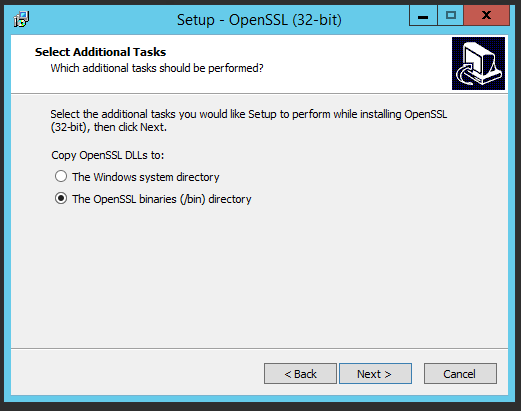
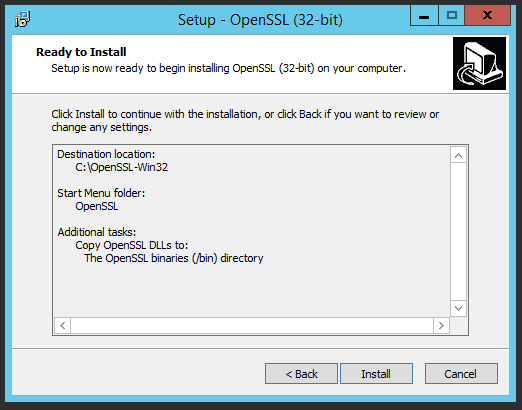
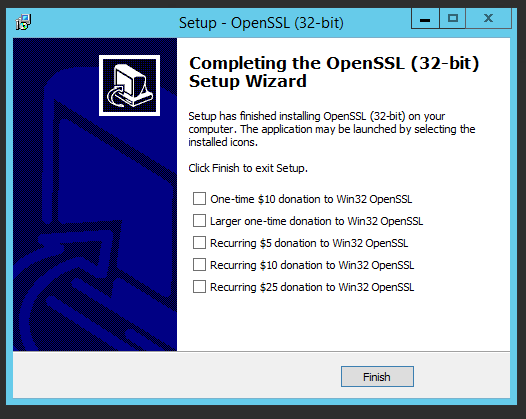
Click next on all dialogs to install it
ssl3

ssl4

ssl5

ssl6

ssl7

ssl8

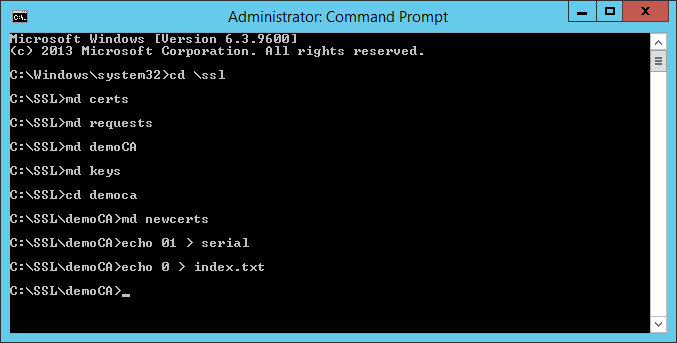
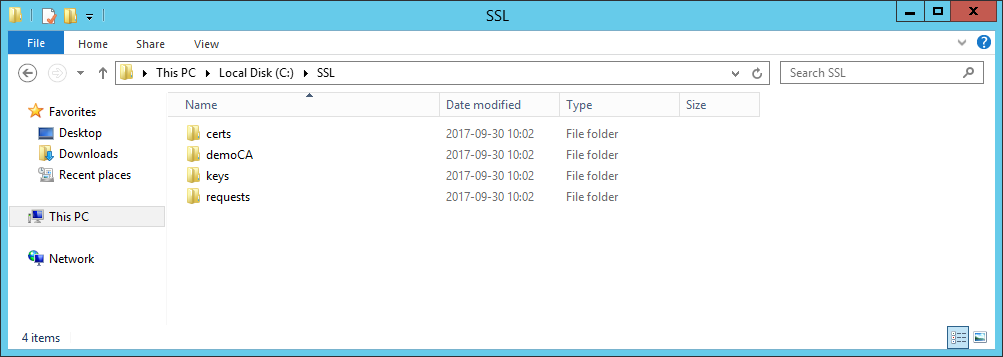
Create a folder c:\ssl
Start a command prompt as administrator
Change into c:\ssl directory.
Make a directory called keys.
Make a directory called certs.
Make a directory called requests.
Make a directory called demoCA.
Move to the demoCA folder
Make a directory called demoCA/newcerts.
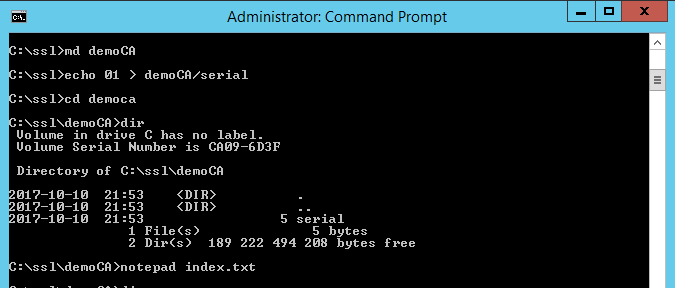
Do Echo 01 >demoCA/serial.
Create an empty txt file called demoCA/index.txt.
ssl10
You can also try to Open notepad to create the index.txt file
SSL11
Save the file and close notepad.
ssl12
ssl13
Note the name of the server and domain to create the certs.
The name that is in the cert must exist in the DNS to make it work.
Generate the private key and CA certificate needed to sign requests
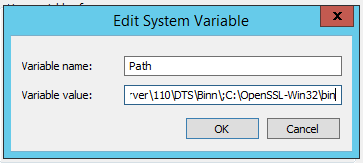
you need to add openssl\bin to path, otherwise you get below error
ssl14
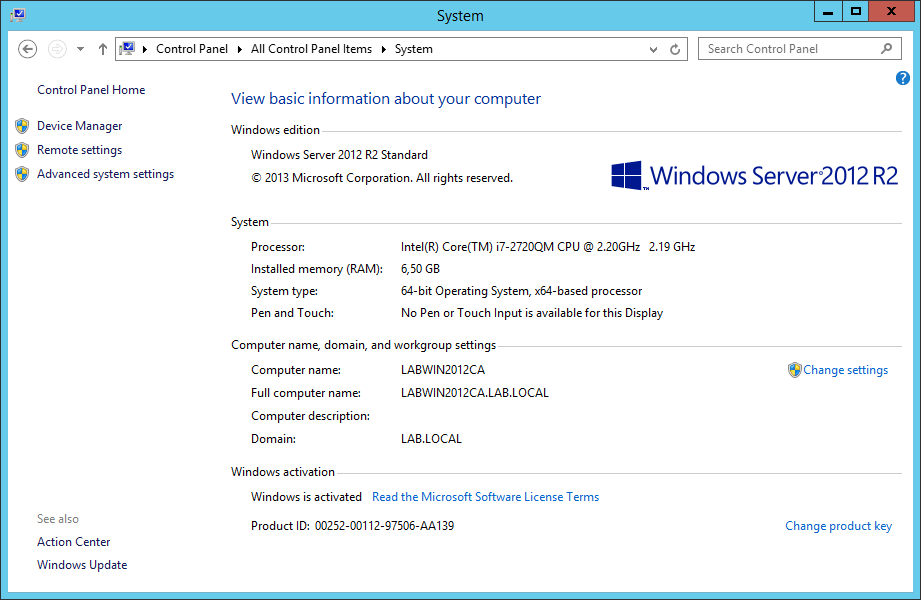
Open control panel – system – advance settings
ssl15
ssl16
add the BIN folder to path and click OK

We will create a simple SSL cert, recommendation is that you create a newer and stronger cert in your testing.

Start a new administrative command prompt and move to SSL folder
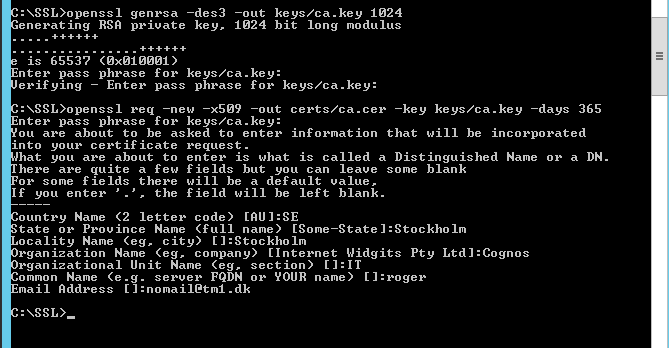
Enter this command to create the ca key
openssl genrsa -des3 -out keys/ca.key 1024
ssl17
Ensure to enter the same password in all the steps.
e.g cognos101
generate a self-signed CA certificate that will be used later to sign all certificate requests
Enter this command to create the root ca
openssl req -new -x509 -out certs/ca.cer -key keys/ca.key -days 365
ssl18
Enter values that make sense for you.
Above is to setup the ca – this can also be done in Windows IIS to or use a public vendor like;
https://www.expertssl.se/
https://uk.godaddy.com/help/ssl-certificates-1000006#nav-1
https://really-simple-ssl.com/
ssl19
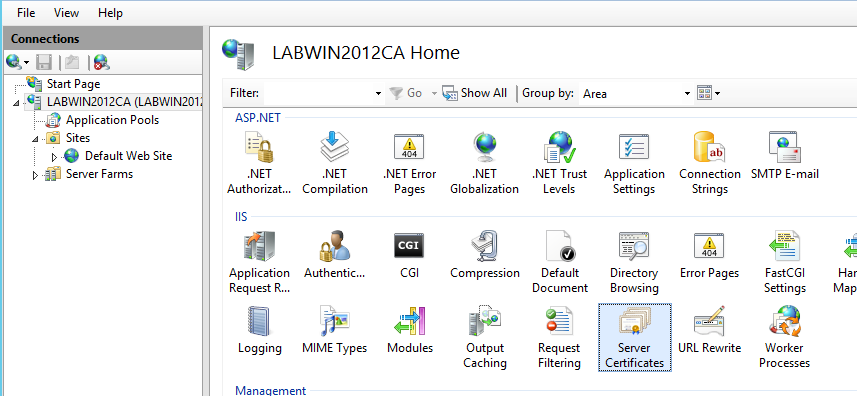
Start IIS on the Microsoft Windows Server 2016 where the Cognos gateway are installed.
Click on Server Certificates
ssl20
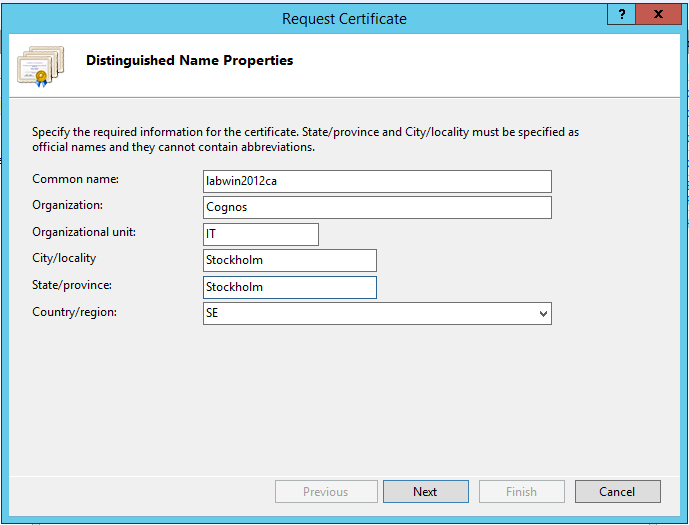
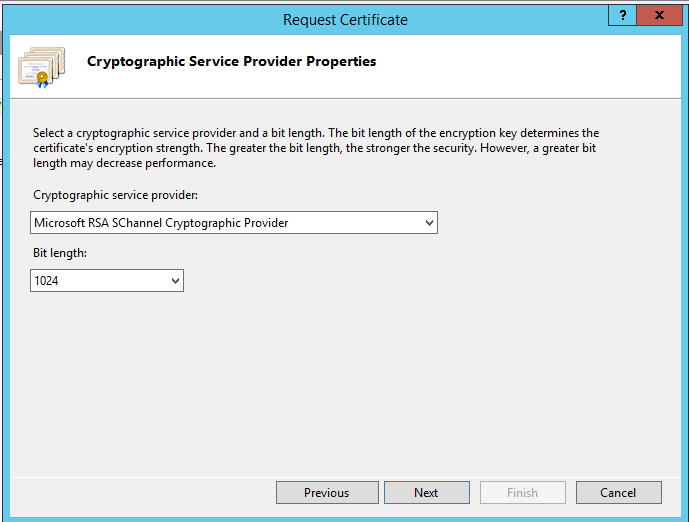
Click on Create certificate request
ssl21

ssl22
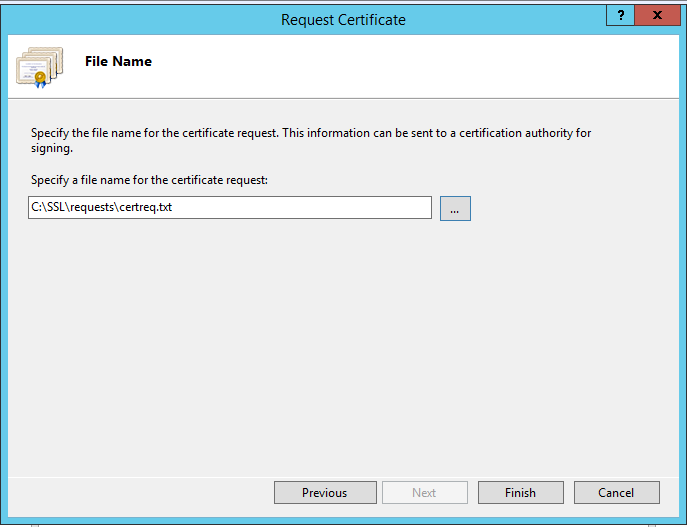
ssl23
Save file in request folder
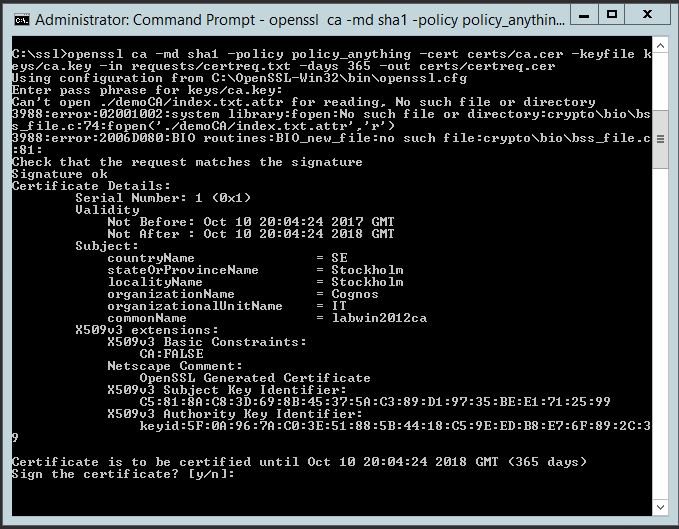
Now create the cert with this command
openssl ca -md sha1 -policy policy_anything -cert certs/ca.cer -keyfile keys/ca.key -in requests/certreq.txt -days 365 -out certs/certreq.cer
ssl24
If you get errors, it can be that the index.txt file was not created in correct way.
ssl25
Check that a cert was created with this command
openssl x509 -text -in certs/certreq.cer
ssl26
Now you have a cert file.
Complete the process on the IIS server to import the cert now.
ssl27
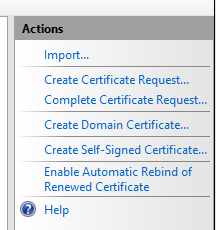
Inside IIS manager mark the servername and click on SSL certificates
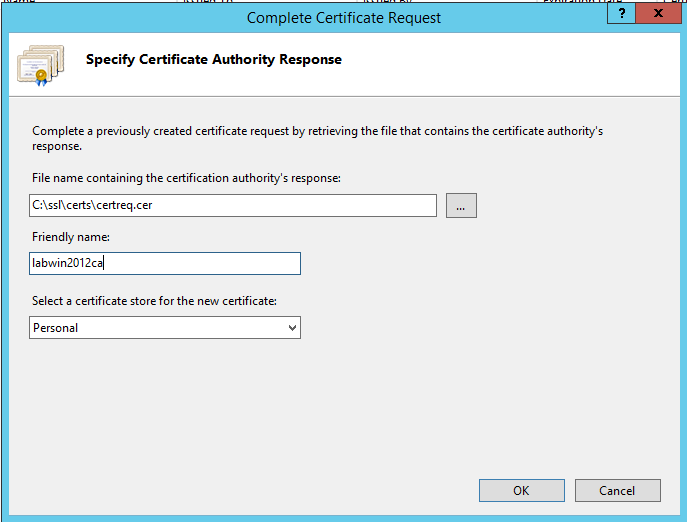
Click on complete certificate request
ssl28
Browse to the new cer file
Enter a name
And click OK
ssl29
After some time the cert will show up in the list.
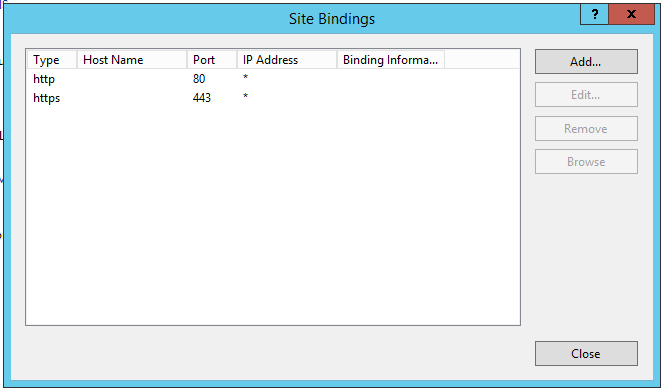
Mark default web site and click on bindings
ssl30
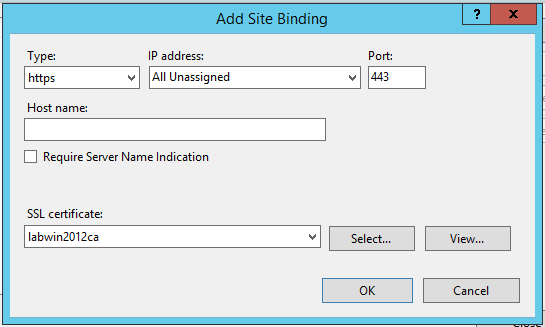
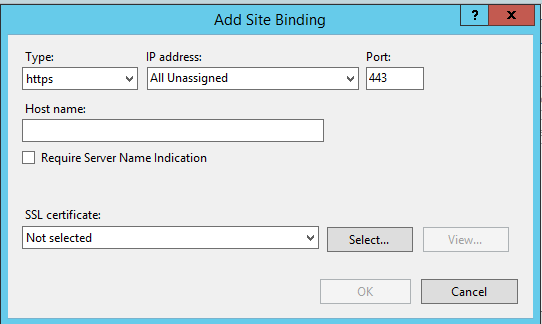
Click on Add in site Bindings dialog.
ssl31
Select https
Select the SSL certificate from the drop-down list
ssl32
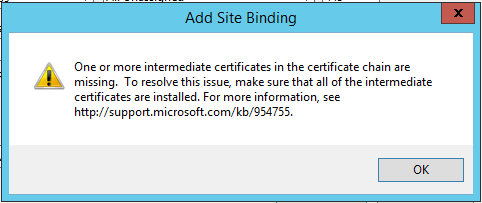
This is only the simplest demo setup, and therefor in production you should also follow things like this if above error comes up
https://support.microsoft.com/en-gb/help/954755/how-to-configure-intermediate-certificates-on-a-computer-that-is-runni
ssl33
If you can not save with a blank host name, enter a name and remove it later.
Click close.
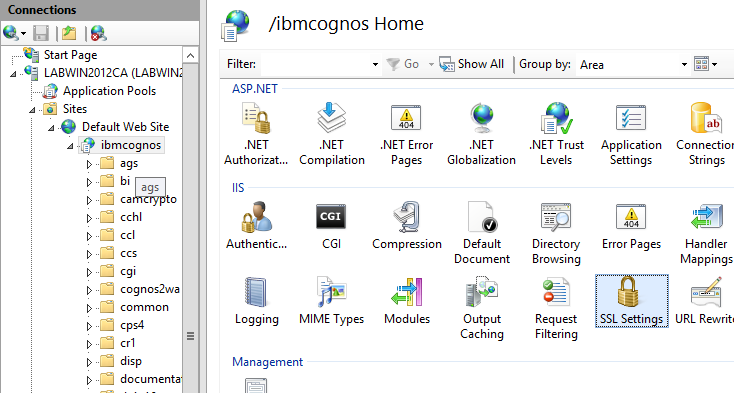
Mark ibmcognos virtual folder in IIS manager and click on SSL settings
ssl34
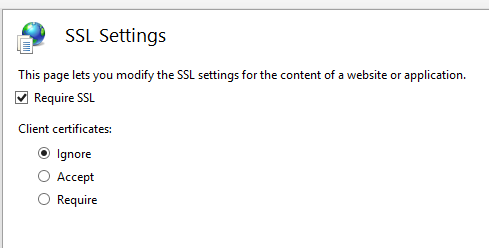
ssl35
Mark Require SSL and click on Apply in top right corner.
Restart the iis webserver.
Now if you surf to http://labwin2012ca:9300/bi/ you go direct to cognos server and do not use a encrypoted session.
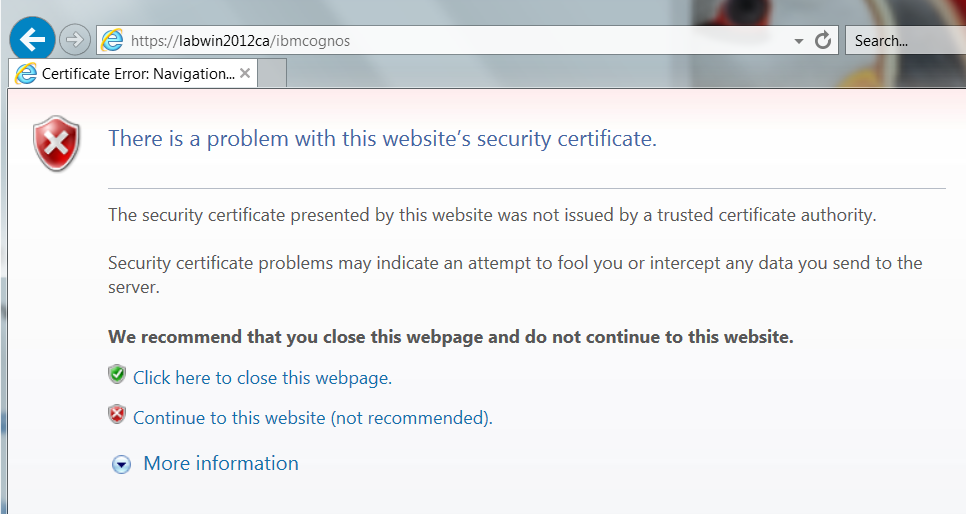
If you surf to https://labwin2012ca/ibmcognos you will get this message
ssl36
If you click on continue to this website – you will come through to the website.
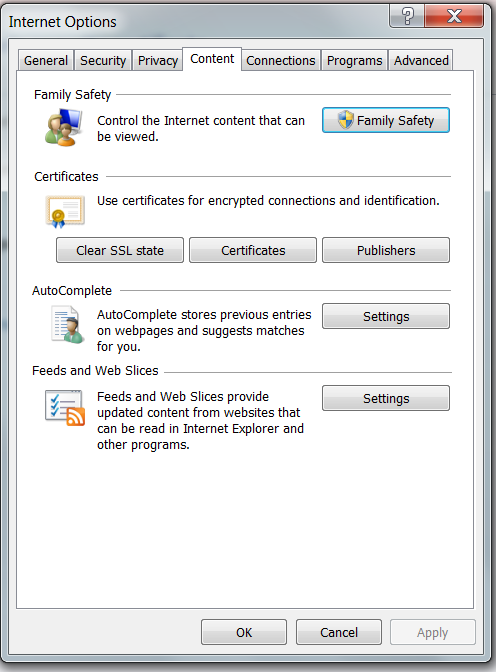
To get away of this error message, we will import the trust cert (CA) into Internet Explorer.
ssl37
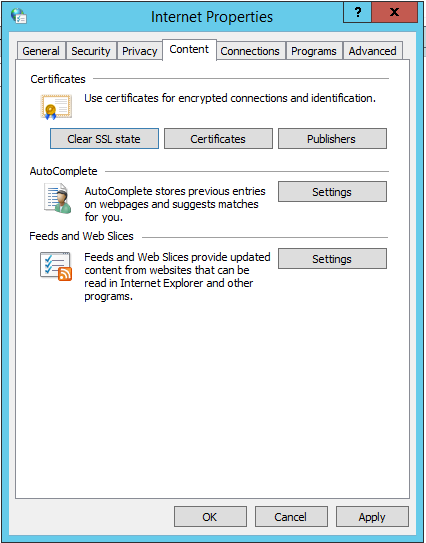
Go to internet options and click on content
ssl38
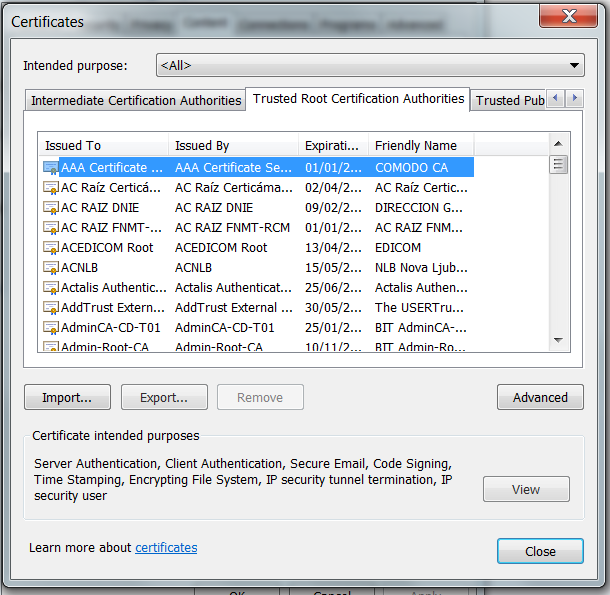
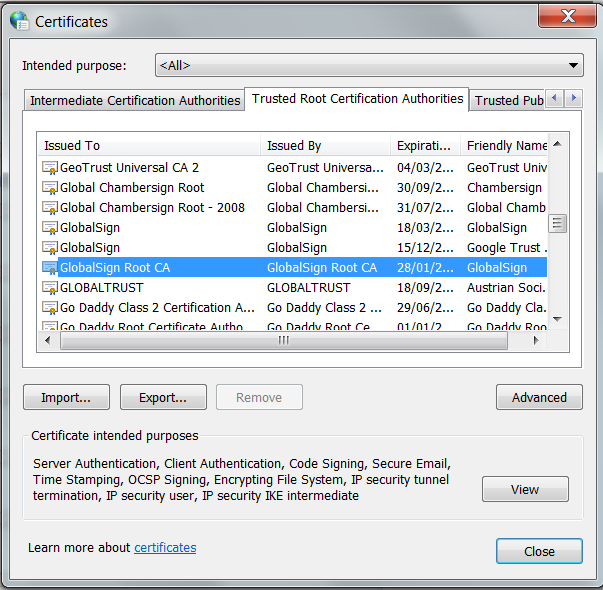
Click on Trusted Root Certification Authorities and click import
ssl39
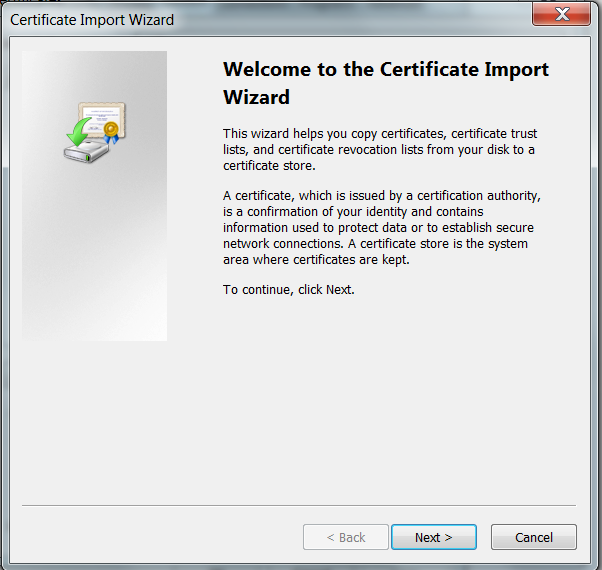
Click next
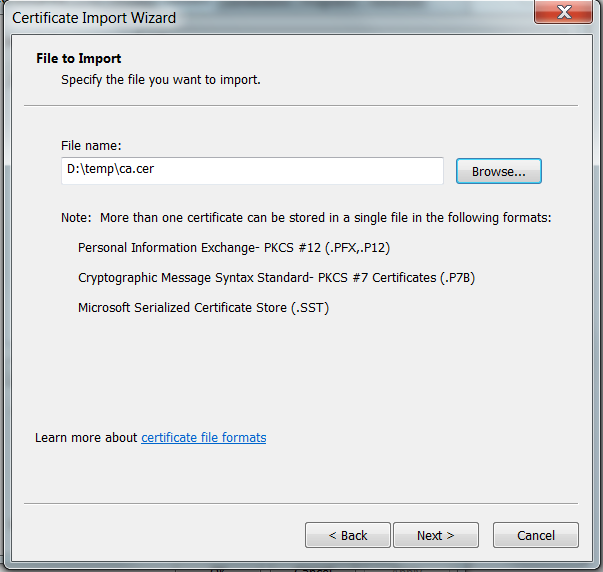
ssl40
Mark the ca.cer file that was created by openssl
And click next
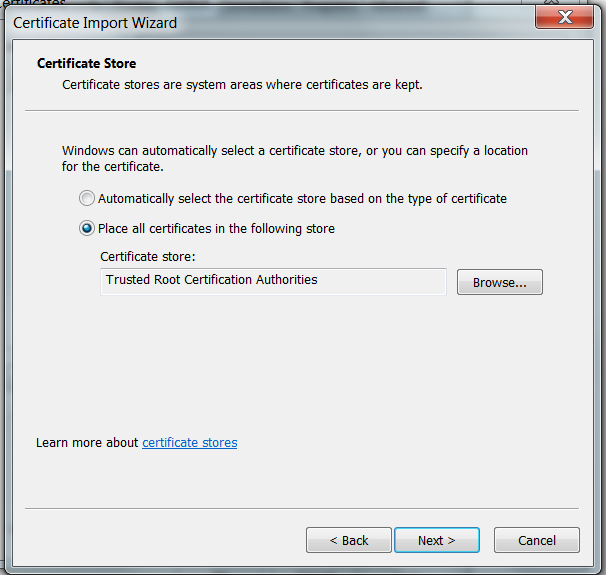
ssl41
There is a suggestion on how to do the SSL setup, there are other ways that are more correct.
Click Next
ssl42
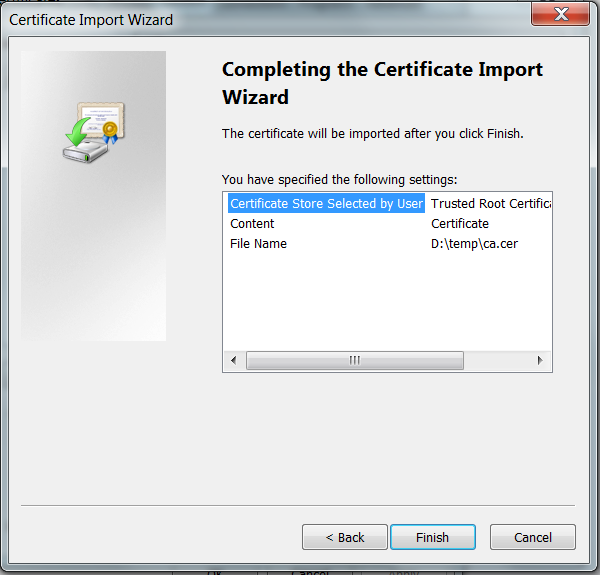
Click finish
ssl43
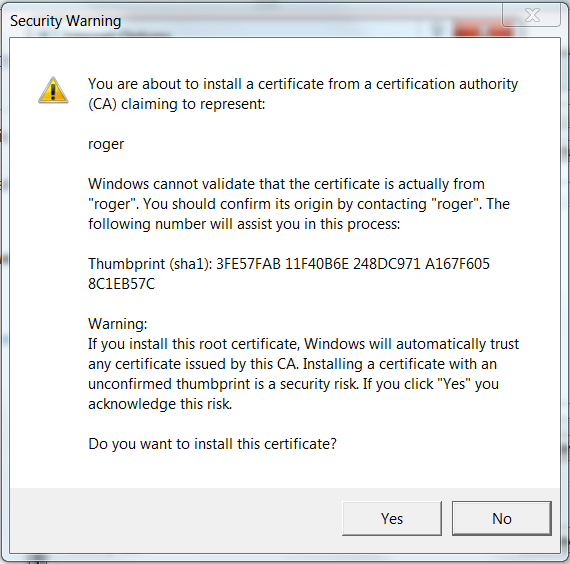
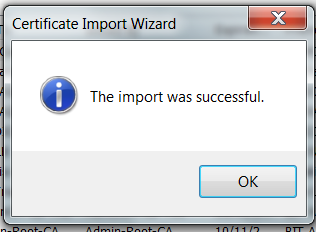
Because this is a cert we created we get this warning, click yes, to import it to your laptops IE.
ssl44
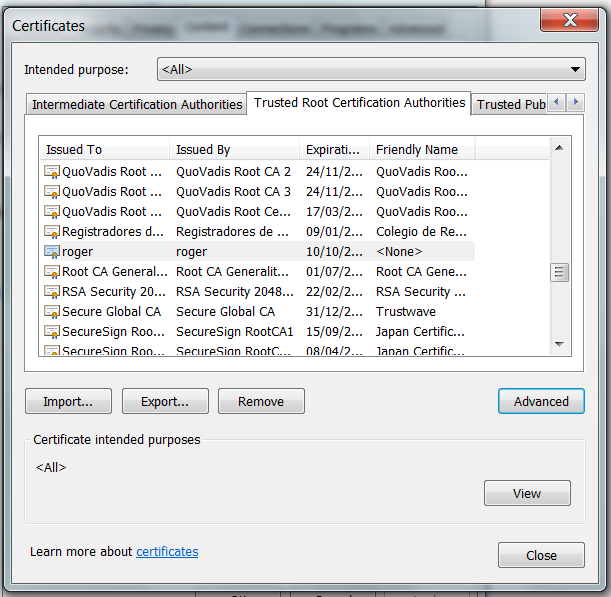
If you check the cert should be in your IE now.
ssl45
Close IE and try to surf again.
ssl46
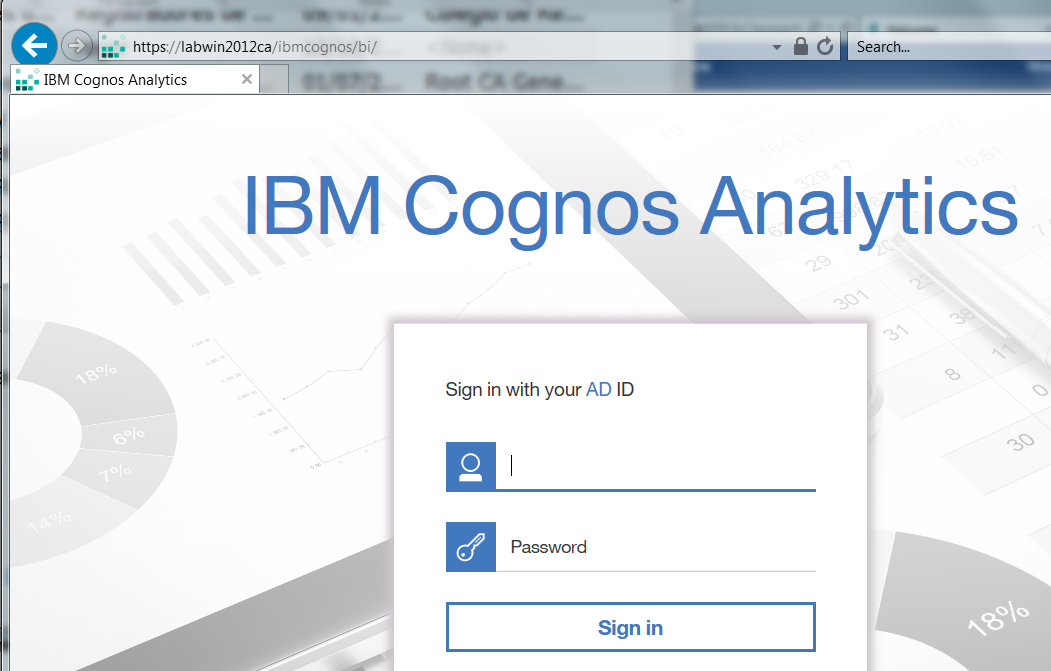
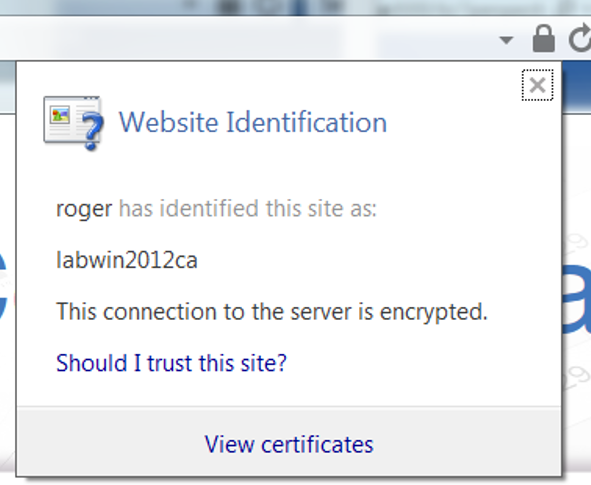
Now you get direct to CA 11 without errors. You see on the lock in the toolbar that it is a secure connection, you can click on the lock to get more information.
ssl47
if you use your own OPENSSL cert, you need to import the ca cert in every client computer to get a secure connection without error messages. Therefor it is simpler to buy a cert from a known CA.
You will also need to install the CA.CER in the Cognos BI server to be able to create PDF reports with pictures.
Copy your ca.cer to the cognos\bin folder
ssl48
Open an administrative dos prompt
Enter this command
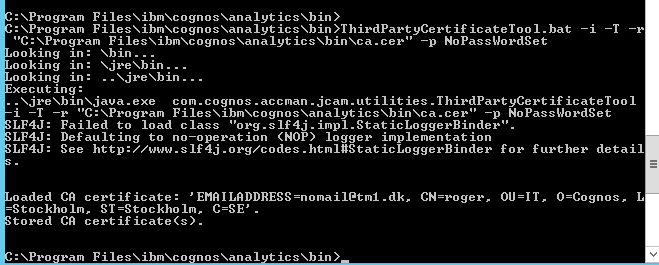
ThirdPartyCertificateTool.bat -i -T -r “C:\Program Files\ibm\cognos\analytics\bin\ca.cer” -p NoPassWordSet
ssl49
Above error comes when the “ is of the wrong format.
ssl50
Enter the command in NOTEPAD to ensure you have the correct signs. Copy from notepad to the cmd prompt.
ssl51
Now restart Cognos services and try the report to PDF again.
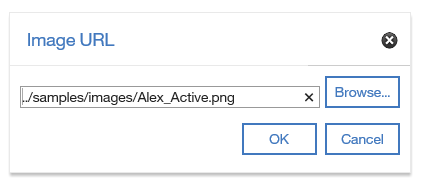
Important that the reference to a picture in a Cognos report is relative like this
../samples/images/Alex_Active.png
ssl52
If you use the sample images that are stored in folder C:\Program Files\ibm\cognos\analytics\webcontent\bi\samples\images\
then it will work with both http://labwin2012ca:9300/bi/ (direct to BI services) and https://labwin2012ca/ibmcognos/bi (secure link to the IIS gateway).

Use F12 in IE to troubleshoot, if you get errors, you will see text like this
SEC7132: The certificate protecting this web site uses weak cryptography, SHA1. The web site should replace this certificate with a SHA2 certificate before SHA1 is no longer allowed https://labwin2012ca/ibmcognos/bi/pat/images/select_container.png

You need to create a stronger SSL cert, to not get above warning in the Web Browser.

SSL Setup in Production IIS server:
How setup SSL with a bought certificate.
Create a DNS alias for the server, so you have a good FQDN that will work in your domain.
Test that the users can surf to you IIS/IBMCOGNOS server with use of the dns alias like this
http://dnsalias.domain.com/ibmcognos/bi
Get a cert from your supplier for the DNS alias.
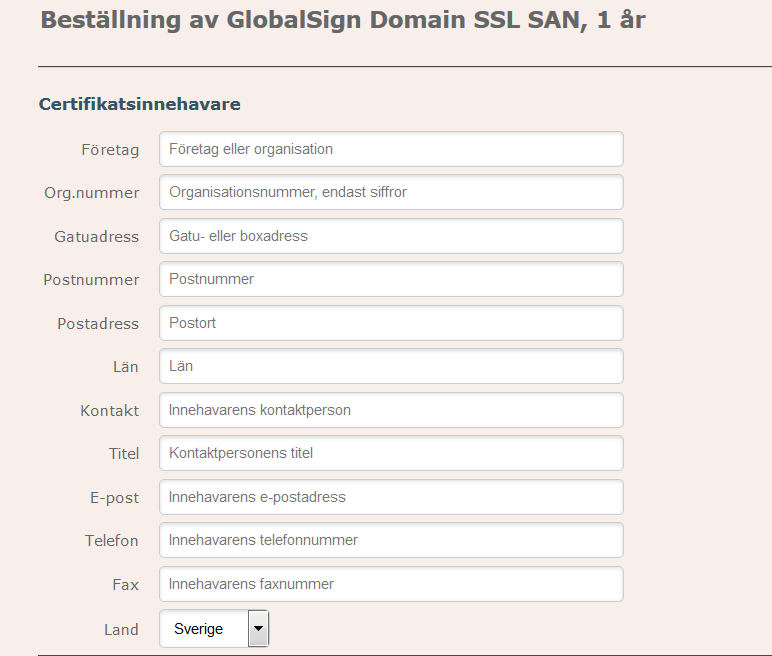
SSL53
You need to fill in information like this – please talk to your Internet provider, they can help.
You will get a PFX file that you will have a password to, normally you get the password by sms.
Place the cert file in a folder on the IIS server.
Import Cert to IIS
ssl54
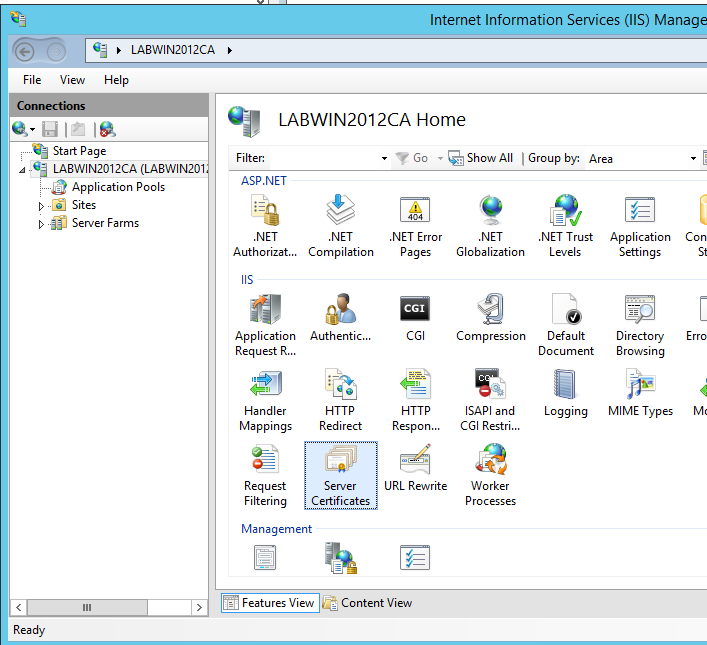
Start IIS manager
Mark the computer (server)
Click on server certificates
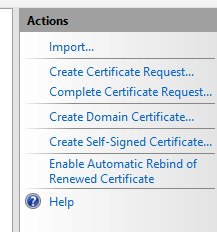
ssl55
Click on Import to read in the certificate you have got from your ISP.
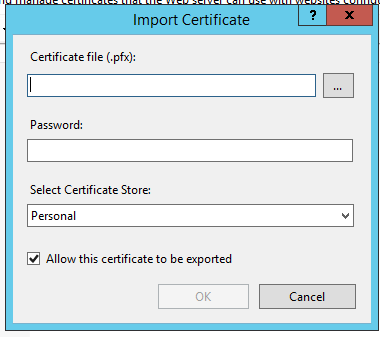
SSL56
Enter the path and filename of pfx file
Enter the password you have got for the certificate.
Leave it to store in Personal folder.
Click OK.
ssl57
Mark the default web site and click on Bindings to the right.
ssl58
Click on add to add the new cert
ssl59
Fill in the hostname
Click on select to select the cert you have read in.
Click OK
SSL60
Click Edit on the same line you saved.
Remove the host name so it is blank.
Click OK to save it again.
ssl61
Mark your IBMCOGNOS folder in IIS Manager and click on SSL settings
ssl35
Mark Require SSL and click Apply in the top right corner.
This will make that a user that surf to /IBMCOGNOS/ must have a cert.
We have left port 80 open to default website, so users do not get a message that the site does not exist.
To make it easier for users, we create a default.htm page with below content and place it in the iisroot folder (C:\inetpub\wwwroot). This should make users that surf only to the server name, are redirected to the correct address.
<html>
<head>
<title>Cognos Connection</title>
<meta http-equiv=”refresh” content=”0 ;url=https://labwin2012ca/ibmcognos”>
</head>
<body>
<a href=”https://labwin2012ca/ibmcognos” >click here</a>.
</body>
</html>
More information on how you could do it in old Cognos;
https://docs.microsoft.com/en-us/iis/configuration/system.webserver/httpredirect/

To get report with pictures to be created as PDF, you need to import the root cert to Cognos BI server.
Export CA cert from IE for your trust issuer
Go to Windows control panel
Open internet options
ssl62
Click on certificates
Click on Trusted Root Certificate Authorities
If you do not find your supplier in the list, check on your local Windows 7 computer, it can have more certificates than a Windows server.
ssl63
Select you certificate and click on Export
ssl64
Click next
ssl65
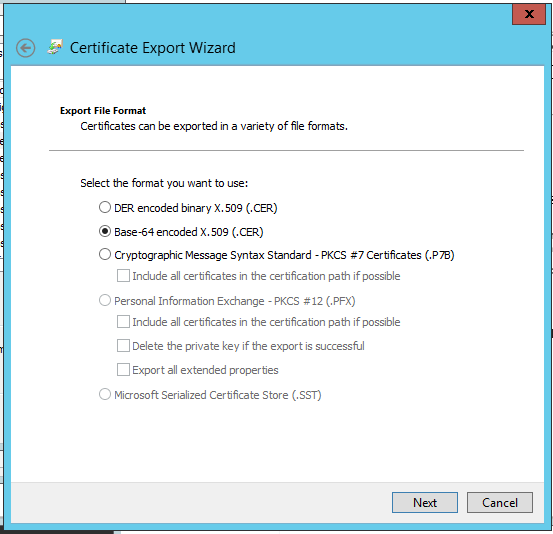
Select BASE-64 CER file and click Next
ssl66
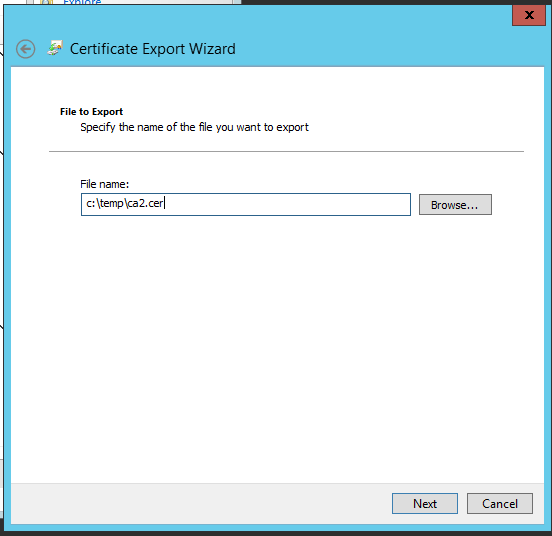
Enter a filename and click next.
ssl67
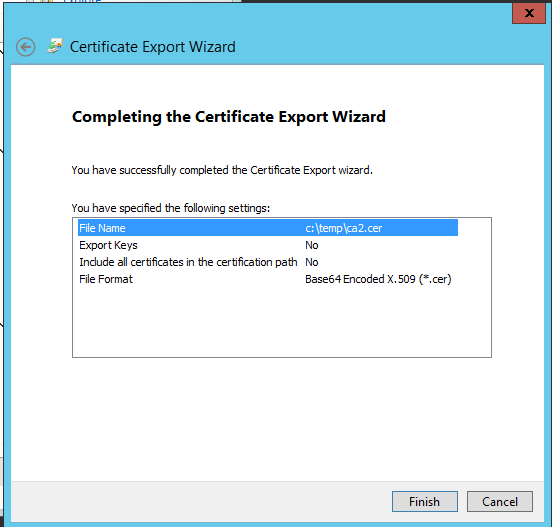
CLick finish
ssl68
You will need to copy the cer file to your Cognos BIN folder.

Import CA cert to CA 11.0.7 content store
Place the ca2.cer file in your cognos BIN and BIN64 folder.
Start an administrative command prompt
Move to the bin folder
ssl69
Enter the command ThirdPartyCertificateTool.bat -i -T -r ca2.cer -p NoPassWordSet
The password is the password for the Cognos storage, most cases NoPassWordSet
This will get the cert into the Cognos store.
If you get an error like “short read” then the cer file is in the wrong format. Please export it again from IE.
In most cases you need to put the full path to the file like this
ThirdPartyCertificateTool.bat -i -T -r “C:\Program Files\ibm\cognos\analytics\bin\ca2.cer” -p NoPassWordSet
Then it should be possible to read in the cert without errors.
You must restart the Cognos Analytics service, to make it notice the new cert.
Test by create a cognos report with a picture and run it as a PDF.
You should use the ../samples/images/Alex_Active.png to the picture if you have the picture in folder C:\Program Files\ibm\cognos\analytics\webcontent\bi\samples\images

Cognos Framework manager will work, as long it points to the CA server and not the gateway.
So, FM and other clients like Cube Designer should point to http://servername:9300/bi/v1/disp
If FM use a Gateway URI that use HTTPS and point to the IBMCOGNOS, then you need to do the same import in their local store.
This is for all Cognos tools that uses Java.

When testing, ensure that the Cognos Service have started correct, and also ensure that the web browser you use, have the trusted root cert for you cert. You must clear the web browser cache between every test.

More information
https://www.digicert.com/csr-ssl-installation/iis-8-and-8.5.htm
https://www.ibm.com/support/knowledgecenter/en/SSEP7J_11.0.0/com.ibm.swg.ba.cognos.inst_cr_winux.doc/c_thirdpartycertificatetoolcommands.html
http://www-01.ibm.com/support/docview.wss?uid=swg21339916
https://www.ibm.com/support/knowledgecenter/en/SSEP7J_10.2.1/com.ibm.swg.ba.cognos.inst_cr_winux.10.2.1.doc/t_importcacertificates.html
http://www-01.ibm.com/support/docview.wss?uid=swg21992784

Product:
Cognos Analytics 11.0.7
Microsoft Windows 2012 R2 server

Problem:
The custom control is not found.

Suggested solution:
For this example you can download this files
https://ibm.ent.box.com/v/AlternatingBackground

Place the file AlternatingBackground.js in folder C:\Program Files\ibm\cognos\analytics\webcontent\bi\samples\js on your Cognos server.
If you use SSO, you may need to start IIS Manager and go to the
ibmcognos virtual folder, then step down to bi-samples.
Mark samples folder and click on Authentication icon.
Mark Anonymous Authentication and click Enable.
Exit IIS manager.

Create a list report on some sample data in Cognos Analytics.
Test that the report works.
In edit mode click on TOOLBOX icon.
Expand ADVANCE section and drag in a Custom Control to your report.
Set the description to a name like: AlternatingBackground
Click on module path and set it to be
../samples/js/AlternatingBackground

include the js file in the path name.

Click on configuration and enter this
{
“isCrosstab”: false,
“controlName”: “List1”,
“firstColor”: “yellow”,
“secondColor”: “#EAE6E3”
}
Click Apply
Click OK
Save the report.

The controlname refer to the report object that will be affected.
Important that the JSON configuration is inside “curly brackets” { }.

Test the report again in HTTP. Go to the last page of the report to ensure it is working.

Here a video on how to set it up
https://www.youtube.com/watch?v=ZYheTq5VpUc
https://community.watsonanalytics.com/wp-content/uploads/2017/10/JavaScript_setup_instructions.pdf?cm_mc_uid=23471188803615059157867&cm_mc_sid_50200000=1508323924