Product:

Planning Analytics 2.0.9.13

Microsoft Windows 2019 server

Problem:

If i remove a user from the TM1 Security dialog, will he come back if he have access in Cognos Analytics, when we use CAM security in TM1?

Solution:

Yes, If a user can login to CA11, that is used as the validator for TM1 access ( with the IntegratedSecurityMode=5 parameter in tm1s.cfg file), then the user will pop up inside the Tm1 architect security clients/groups dialog.

The AD group he is part of will not be listed, but if you have before added a AD group into TM1, then he will be marked with a X that he belongs to that AD group.

This give that you can remove a user from security clients/groups dialog in Tm1 architect, and he will next time he logins to TM1 come up again. He will also get back the security he had, as he belongs to the same AD groups as before.

You can not remove the AD groups from security clients/groups dialog, as then the security you have set on that group in TM1 is gone.

If you set security direct on the user, that security is also gone when you remove the user from Tm1.


To remove several users at once from a tm1 application with CAM security, create a text file, with each AD account name on a row (that you want to be removed). Save the file as D:\user_handling\removeuser.txt on the TM1 server.

Login to Tm1 Architect on the Tm1 server direct, and create a new TM1 process.

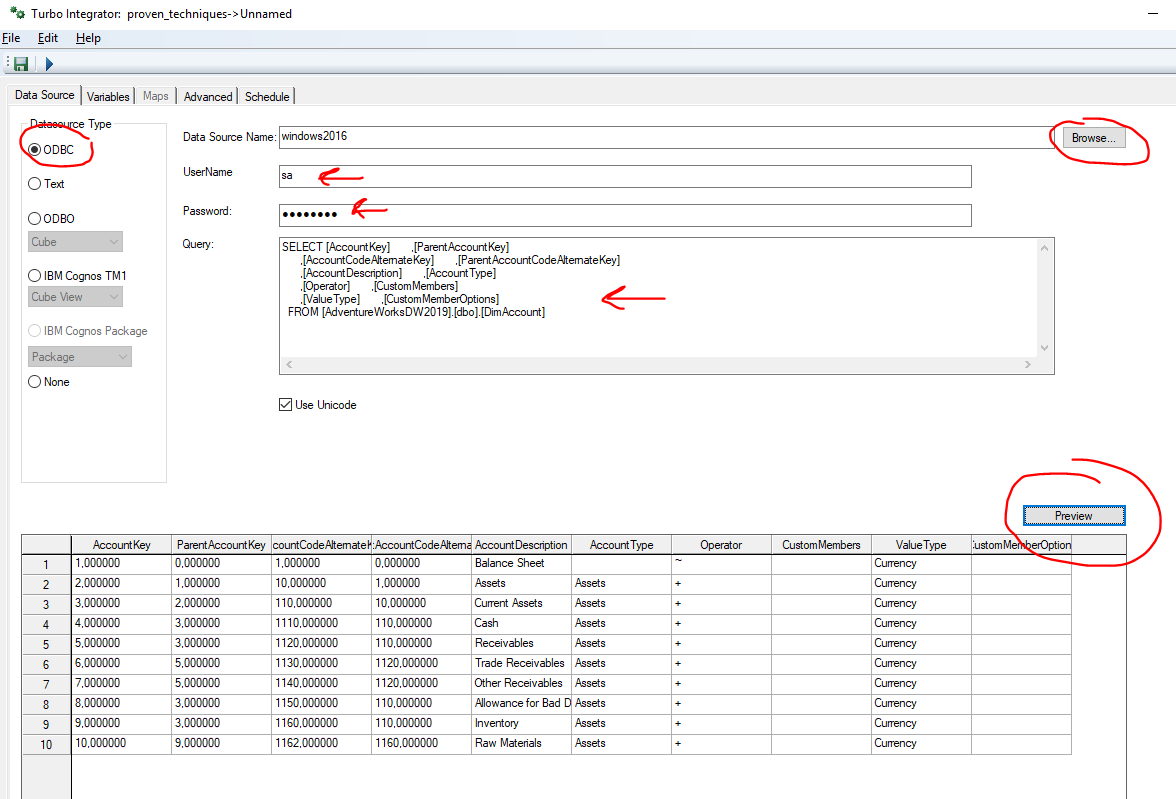
Select Text as datasource, and select the D:\user_handling\removeuser.txt file.

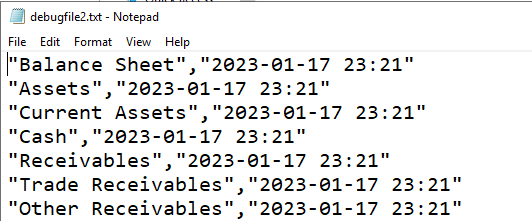
Click Preview, and you should see a list of the names.

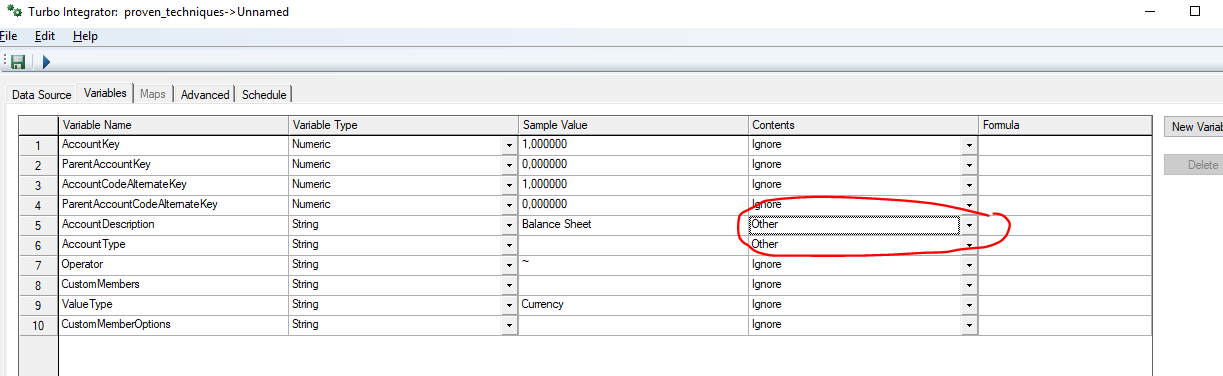
Go to the Variables tab, and change the name of the first (and only) variable to vUser.

Change the contents to be Other.

Go to the Advanced – prolog tab, and enter below code:

sCube = '}ClientGroups';
sDimName = '}Clients';

#-- enter the name of the company domain as it looks in CA11 below --
sDomainName = 'CompanyAD/' ;

#-- file name setup for debug text file --
sFileName= 'debugfile1.txt';
sFilePath = 'd:\temp\';
sDEBUGFILE = sFilePath | sFileName ;

In the metadata tab, enter below code:


#--- add domain name to username name
sFullUser = sDomainName | vUser;

#--- find users alias in client dimenstion and get the tm1 internal name
sPrincipalName = DimensionElementPrincipalName( sDimName, sFullUser );
#--- check that user is not admin
vGroupAdmin = CellGetS( sCube , sPrincipalName , 'ADMIN' );
#--- remove remark to debug write out data to file
# ASCIIOUTPUT ( sDEBUGFILE, sPrincipalName, vGroupAdmin );

If (vGroupAdmin @<> 'ADMIN' );
#--- remove user from security cube in tm1
#--- only if user is not part of ADMIN group
DeleteClient ( sPrincipalName );
endif;

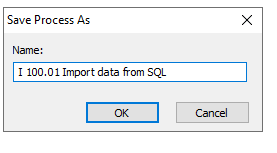
Save the TM1 TI process, and test run it in a sample database first.

More information:

https://www.ibm.com/docs/en/cognos-tm1/10.2.2?topic=groups-deleting-user#DeletingaUser_N1704BD 

https://succeedium.com/teamone/doc/users.html#deleting-users 


Product:

Microsoft SQL Azure

Issue:

How create a user in SQL Azure, as you do not have a GUI to use in SSMS.

Solution:

Connect to Azure SQL with SSMS as administrator.

Connect to your user database, and enter below SQL statement to create user Roger and give it datareader rights:

CREATE User Roger
WITH PASSWORD = 'Password!'

ALTER ROLE db_datareader ADD member Roger

This user only exist in the database selected.

To create a user that will need access to more than one database, select the master database and enter below SQL:

CREATE Login Roger
WITH PASSWORD = 'Password!' 

CREATE USER Roger FOR LOGIN Roger

(You need to create the user in master database to, so he can login when master is default database)

Then switch to your user database and enter this SQL statement:

CREATE USER Roger FOR LOGIN Roger

ALTER ROLE db_datareader ADD member Roger


Best is to use a AD group instead, and set that SQL login to have the needed rights in the database.


More Information:

https://stackoverflow.com/questions/55230724/set-default-database-to-user-sql-server-azure 

https://learn.microsoft.com/en-us/sql/relational-databases/security/contained-database-users-making-your-database-portable?view=sql-server-ver16 

— =======================================================================================
— Create User as DBO template for Azure SQL Database and Azure Synapse Analytics Database
— =======================================================================================
— For login login_name, create a user in the database
CREATE USER <user_name, sysname, user_name>
FOR LOGIN <login_name, sysname, login_name>
WITH DEFAULT_SCHEMA = <default_schema, sysname, dbo>
GO

— =======================================================================================
— Create Azure Active Directory User for Azure SQL Database and Azure Synapse Analytics Database
— =======================================================================================
— For login <login_name, sysname, login_name>, create a user in the database
— CREATE USER <Azure_Active_Directory_Principal_User, sysname, user_name>
— [ { FOR | FROM } LOGIN <Azure_Active_Directory_Principal_Login, sysname, login_name> ]
— | FROM EXTERNAL PROVIDER
— [ WITH DEFAULT_SCHEMA = <default_schema, sysname, dbo> ]
— GO

— Add user to the database owner role
EXEC sp_addrolemember N’db_owner’, N'<user_name, sysname, user_name>’
GO

Product:
Planning Analytics 2.0.9.13  ( IBM_PAfE_x64_2.0.82.5.xll )
Microsoft Windows 2019 server

Issue:
How publish a excel sheet with a dynamic report to TM1WEB?

Solution:

You publish the excel sheet to PAW, and it will be availble in both TM1WEB and PAW.

To be able to create Action Button inside excel for Planning Analytics, you need to enable trust for VBA.

Inside Excel – go to file – options – trust center – trust center settings button – macro settings.

Mark “trust access to the VBA project object model”.  Click OK.

You need also in many cases have “Optimize for compatibility” marked.

Go to Excel Options – General – User Interface options, mark “Optimize for compatibility“.

Click OK.

To be able to publish a excel dynamic report, you must save the report first, before you publish it. Recommended to save it with the same name, as you would like to have it shown in TM1WEB.

Click on Publish icon in Excel ribbon.

Select the application folder, where you want your websheet and enter a name. Above we have expanded Planning Sample applications.

Mark “make public” if you want other users to see the websheet in TM1WEB. Press publish button.


If you get a blank page in PAW when you insert a Excel sheet to a workbook, that works fine in TM1WEB, you need to ensure that the firewall ports between the TM1 web server and the planning analytics workspace server is open on ports 9510 and 9511. The websheet that show inside PAW; is rendered from TM1WEB.

Access to TM1WEB for both end user and the PAW server is essentiell to make it (PAfE) work.

More information:

https://www.ibm.com/support/pages/blank-white-page-rendered-while-opening-websheets-within-planning-analytics-workspace

https://www.ibm.com/support/pages/planning-analytics-excel-task-pane-empty-and-grayed-out-when-connecting-cam-secured-tm1-server

https://qmetrix.com.sg/ibm-planning-analytics-for-excel-pax-vs-tm1-perspectives/

Product:

Planning Analytics 2.0.9.13
Microsoft Windows 2019 server

Issue:

How install the new pafe (planning analytics for excel) for the end user?  Previous known as PAX.

Solution:

Check what version of Excel you have. Go to File – Account. Click on About excel. Check the bold line;

Microsoft® Excel® for Microsoft 365 MSO (Version 2212 Build 16.0.15928.20196) 64-bit

If it say 64-bit then you need to download the 64 bit xll file, otherwise you need to download the 32 bit xll file and use.

Go to IBM Fix Central and search for release level: BA-PAXL-2.0.82 IBM Planning Analytics for Microsoft Excel 2.0.82

Download the version that matches the version of PAW you have installed. Check here what works well: https://www.ibm.com/support/pages/node/6519826

Copy the file IBM_PAfE_x64_2.0.82.5.xll to a folder on your laptop – like c:\program files.

Right click on the file IBM_PAfE_x64_2.0.82.5.xll and select create “short-cut”

Click Yes on above question, and place the shortcut on your desktop.

You should now get a icon like above – click on this icon to start PAFE (new pax) on your laptop.

If you inside excel get a sheet with garbage characters – then you have downloaded wrong bit version, like if you use 64 bit version in 32 bit excel version.

Inside Excel click on Planning Analytics and options.

Click on IBM and then ADD button.

Enter the full URL to your PAW server. Check your company server-name for your PAW server. This is what you need to get the pafe to work.

Click TEST connection and then save.

You may need to inside Excel, allow the xll file to be run by “Enable all code published by this publisher” inside file – options – trust center.

Before you can publish a excel workbook with buttons, to TM1WEB, you need to save it as a .xlsm file. then you can click publish it to TM1 application folder.

After you publish it, you go back into publish dialog, and right click your tm1websheet and select “public” to make it accessible for all users.

https://www.ibm.com/docs/en/planning-analytics/2.0.0?topic=analysis-publish-workbook-tm1-server-application-folder

More information:

https://www.ibm.com/docs/en/planning-analytics/2.0.0?topic=icpame-downloading-upgrading-planning-analytics-microsoft-excel-single-xll-add-in-versions-2065-later

https://www.ibm.com/support/pages/download-fixes-fix-central

https://quebit.com/askquebit/IBM/demystifying-the-pa-pafe-paw-passl-install-files-from-ibm-fix-central/

https://exploringtm1.com/install-planning-analytics-workspace-to-windows-2016/

https://exploringtm1.com/how-to-install-planning-analytics-workspace-to-windows-server-2019/

https://exploringtm1.com/how-to-upgrade-install-planning-analytics-for-excel-pax/

Product:
Planning Analytics 2.0.9.13

TM1_version=TM1-AW64-ML-RTM-11.0.913.10-0
Microsoft Windows 2019 server

Issue:

Can not read data from ODBC connection in TI process.

Solution:

Check that the ODBC connection still exist, and that the TM1 service have access to the ODBC connection.


How setup a ODBC connection for TM1:

On the server go to control panel – administrative tools – ODBC data source (32 bit).
Click on system DSN tab.
Click on Add button.
Select SQL server native client 11.0 and press Finish button.

Fill in a name and a server-name, that you can connect to the database on.

Enter a SQL native login, that you can use to test the connection with.

Click next – next – finish.

Click Test data source button, you should get this if you did correct:

Microsoft SQL Server Native Client Version 11.00.5058

Running connectivity tests…

Attempting connection
Connection established
Verifying option settings
Disconnecting from server

TESTS COMPLETED SUCCESSFULLY!

Now go into you TM1 application, and create a new TI process.

Select ODBC as data source, and pick your ODBC from the list.

Enter a working SQL native username and password.
Enter a SELECT SQL statement, that you have tested in SSMS, that it works to bring some data back.
Press Preview to check that the SQL connection work – you should see your data.

Go to variables tab.

The variables name suggestion is created from first data line, you can change them to vNames that you think is more describing. Do not use spaces in variable names.
For the lines of data that you want to use, change the Contents column to ‘Other’ as shown above. Click on Advanced tab.

Go to prolog tab, and enter some code to test this process:

# variables setup - set them all here as empty at least

sAccount = '';

# file name setup for debug text file
sFileName= 'debugfile2.txt';
sFilePath = 'c:\temp\';
sDEBUGFILE = sFilePath | sFileName ;

# get the date and time to set a stamp in the log file
# https://edu.cubewise.com/tm1-function-for-rules-timst/

sNowTime = NOW();
sDATETIME = TIMST( sNowTime , '\Y-\m-\d \h:\i' );

Then go to the Data tab, to enter code to write out the data to a file for debugging.

# set the variable from the data source to a variable in the code and print it out
sAccount = AccountDescription;

ASCIIOUTPUT ( sDEBUGFILE, sAccount, sDATETIME );

Save the process with a name that describe the function.

Run the process.

Then to check that it works, go to c:\temp and open the text file.

The value in the database for column [AccountDescription] is first, and then a date-time stamp from the code.

As we use the TM1 data source tab, we do not need to use the ODBCopen command to get the data in the data tab.

Planning analytics should work with both 32 bit and 64 bit ODBC connections on the Windows server, as below parameter is on by default.

EnableODBCProxy makes 32-bit data source names to be available to TurboIntegrator processes on 64-bit machines.

Parameter type: optional, dynamic

EnableODBCProxy is useful, if a 64-bit driver is not available. Each proxied connection creates a 32-bit tm1odbcproxy.exe process during the connection. EnableODBCProxy is true by default, but you can disable the feature by including EnableODBCProxy=false in the tm1s.cfg.

This give that your TM1 64 bit server can use 32 bit ODBC connections. But for best result you should use a 64 Bit connection in Windows server.

More information:

https://www.ibm.com/docs/en/planning-analytics/2.0.0?topic=tf-odbc-turbointegrator-functions

https://code.cubewise.com/odbc-connect

https://quebit.com/askquebit/IBM/how-to-speed-up-tm1-odbcoutput/

https://www.mssqltips.com/sqlservertip/5030/import-and-export-data-between-sql-server-and-cognos-tm1-cube/

Sending Cube Data into a Database

Product:

Planning Analytics 2.0.9.3
Microsoft Windows 2019 server

Issue:
In a TM1 solution where CAM security with Cognos Analytics is used, user can login to the TM1WEB, as long they are validated by CA11 – but then not see anything in TM1 as they have no access in the TM1 product.

But the user leave a mark (name) in the }ClientSecurity cube.  That may be registered in the ILMT software scan of TM1 license usage.
Can we prevent them from login?

Solution:

A Cognos Analytics user that run reports on TM1 data, should in most cases be good with the license of CA11 they have, and not need a license for TM1 access. TM1 access are in many license forms included in the Cognos BI license.
If you active the tm1s.cfg parameter CreateNewCAMClients=F on a TM1 Instance, then no one can login if they not are already part of the security setup.

This mean you have to manually add new users to TM1 Security in TM1 architect.

Please note: to be able to run a Cognos report with TM1 data, the user that run the report must have read rights in the TM1 cube, and therefor in most cases be registered inside TM1 security. Only when the access to TM1 is done with a special TM1 account in Cognos Data Source connection, this may not be needed.

When CreateNewCAMClients=F and a logon is attempted with a valid set of CAM credentials, but a corresponding Planning Analytics client does not exist in the security cube, the Planning Analytics client is not created and the logon is rejected.

User who have left the company or do not need access to TM1, need to be manually removed from the }Clients dimension.

Users are not automatically removed from a TM1 database – even if the TM1 database is configured for Cognos authentication.  IBM Planning Analytics customers must manually remove users that are no longer licensed to use Planning Analytics and no longer should have access to the TM1 database.

Failing to remove inactive users from the TM1 database may result in over-counting the number of Authorized Users, which can lead to auditing issues.

You can also inside Cognos Analytics Configuration set that users must be part of a Cognos group to be allowed to login:

  1. Open Cognos Configuration and under the ‘Security’ tab, click on ‘Authentication’.
  2. Against ‘Restrict access to members of the built-in namespace?’ set the value to ‘True’. This excludes all others from third party authentication sources who are not explicitly part of a Cognos namespace group or role as defined in Cognos Analytics 11.
  3. Save the configuration and restart the Cognos service.

Then the user can not login to CA11, and therefor also not login to Tm1 that are using CAM security (IntegratedSecurityMode=5).


More information:

https://www.ibm.com/docs/en/planning-analytics/2.0.0?topic=pitfaecp-createnewcamclients

https://www.ibm.com/docs/en/planning-analytics/2.0.0?topic=cmpal-parameters-in-tm1scfg-fileplanning-analytics-engine-configuration-parameters

https://www.ibm.com/support/pages/how-do-you-restrict-users-based-their-license-roles-cognos-analytics-version-1107

https://www.softwareone.com/en/blog/all-articles/2020/10/21/how-does-the-licensing-of-ibm-cognos-analytics-work

https://pmsquare.com/analytics-blog/2021/6/4/setting-up-security-in-cognos

https://www.ibm.com/support/pages/node/6513214

https://www.ibm.com/docs/en/cognos-analytics/11.1.0?topic=roles-default-permissions-based-licenses

https://www-40.ibm.com/software/sla/sladb.nsf/lilookup/D82A3B8F5404959F00258760000B8233?OpenDocument

IBM® TM1® Server generates IBM Software License Metric Tag (SLMT) files. Versions of IBM License Metric Tool that support SLMT files can generate License Consumption Reports that provide information about license usage for your TM1 Server.

For complete details on installing and using IBM License Metric Tool, see IBM License Metric Tool on IBM Knowledge Center.

The initial generation of SLMT files is determined by the LicenseMetricTime Tm1s.cfg parameter. When the generation of SMLT files is enabled with LicenseMetricTime, a new SLMT file is created every 24 hours.

The AUTHORIZED_USER metric

The AUTHORIZED_USER metric can have the following subtypes:

  • IBM Cognos Enterprise Planning TM1 Modeler – Any user that is a member of the Admin, DataAdmin, or SecurityAdmin user groups on the TM1 Server.
  • IBM Cognos Enterprise Planning TM1 Contributor – Any user that is not a Modeler, but is assigned to a group with write access to at least one cube on a TM1 Server. A group is defined to have write access for a cube if the group is assigned one of the following security permissions for the cube: Write, Lock, Reserve, or Admin.
  • IBM Cognos Enterprise Planning TM1 Explorer – Any user that is not a Modeler or a Contributor.

For each of these subtypes, the AUTHORIZED_USER metric records the number of users who have logged on to the TM1 Server during the period identified in the SLMT file.

Location of Software License Metric Tag files

On all operating systems, the SLMT files are created in the slmtag directory at the same level as the bin64 directory in the TM1 install location. For example, C:\Program Files\IBM\cognos\tm1_64\slmtag. All SLMT files use the .slmtag file extension.

I think the modern ILMT tool only reads the }ClientSecurity.cub file to find out number of users in the TM1 installation.

https://www.ibm.com/docs/en/planning-analytics/2.0.0?topic=installation-monitoring-tm1-server-license-usage

https://community.ibm.com/community/user/businessanalytics/discussion/emailing-reports-to-recipients-and-cognos-license

https://www.linkedin.com/pulse/fact-myth-i-have-correct-ibm-cognos-licenses-bi-tm1-cole-j-d-/

  1. I want to use TM1 Data in a BI report but use TM1 security to pass through from BI. Do I need a TM1 license for the Cognos BI user? TM1 is just another data source to BI. If you want to use TM1 as a base for Cognos BI, you need to have the appropriate Cognos BI license. However, real issue is that to assign security on the TM1 data which is being passed to BI, you need to put the user in a TM1 group. For example, if you need to have cell level security, you need to set them up in TM1. If the user will not access TM1, and are only set up in TM1 to assign security, they will NOT need a TM1 user license. This is specified in the TM1 License which states that BI Analytics Users or Explorers don’t need additional authorized user entitlements to TM1. They do however, need the appropriate IBM Cognos Analytic Server license.


Cognos TM1 Licensing 13 Most Common Questions

Product:

Microsoft Windows 2019 Server

Issue:

I can not ping the server to check if the IP address or server DNS name is correct. How open ping in Windows Firewall?

Solution:

Windows Firewall
  • Search for Windows Firewall , and click to open it.
  • Click Advanced Settings on the left.
  • From the left pane of the resulting window, click Inbound Rules.
  • In the right pane, find the rules titled File and Printer Sharing (Echo Request – ICMPv4-In).
  • Right-click each rule and choose Enable Rule.

To allow TM1 architect access the TM1 server, the windows firewall need to open this ports:

5495,5498,5895,5898,12300-12400

Then you need to update the tm1s.cfg file for each TM1 instance to use above port range:

PortNumber=12345

HTTPPortNumber=12354

ClientMessagePortNumber=

By default, ClientMessagePortNumber port number is automatically and dynamically assigned when the TM1 server starts. You do not have to set ClientMessagePortNumber to a specific number unless firewalls or other network issues require the listener port to be a well-known number.

Note: Be sure to assign unique port numbers for the server and client message ports. If you have two servers running on the same machine with the same port number, the message activity may cause a system failure.

EnableTIDebugging=T

Setting the parameter to T (true) allows you to use any of the TurboIntegrator process debugging capabilities of the TM1 REST API.
More Information:

https://www.howtogeek.com/howto/windows-vista/allow-pings-icmp-echo-request-through-your-windows-vista-firewall/

https://activedirectorypro.com/allow-ping-windows-firewall/

https://optics.ansys.com/hc/en-us/articles/7144748040467-Adding-inbound-rules-to-Windows-Defender-firewall

https://www.veritas.com/support/en_US/article.100027250 

Product:

TM1

Microsoft Windows 2019 server

Issue:

How do i skip elements in a list/view in the data tab from a subset?

Solution:

If you have a subset named “DonaldsCoffe” that contain the stores-name that you want not to be transferred used in your data tab, in the TM1 TI process.
Use below statement to check if the element exist in the subset, and if it does skip that data.

IF ( DIMIX ('DonaldsCoffe',  vElementName) <> 0); 

Itemskip;

ENDIF;

In case you use =0 in above IF statement, that is that you will skip all elements that are not in the list.

DIMIX returns the position of the element in the subset list. 0 (zero) means the element is not in the list.

The comparison operators compare values in the formula portion of a rule calculation statement.

Operator

Meaning

>

Greater than

<

Less than

>=

Greater than or equal to

<=

Less than or equal to

=

Equal to

<>

Not equal to

To compare two string values, insert the @ symbol before the comparison operator, as in the following example:

IF (‘A’ @= ‘B’,0,1) yields the number 1.


More information:

http://tm1sir.blogspot.com/

https://www.tm1forum.com/viewtopic.php?t=15927

https://www.tm1forum.com/viewtopic.php?t=11902

https://quebit.com/askquebit/IBM/ibm-planning-analytics-dimix-function-when-and-how-to-use-it/

https://www.ibm.com/docs/en/planning-analytics/2.0.0?topic=functions-dimix

https://exploringtm1.com/operators-tm1-ti-if-statements/

https://exploringtm1.com/if-tm1-ti-function-use-syntax/

Product:
Notepad++
Microsoft Windows 2019

Issue:

How do i add compare function to Notepad++?

Solution:

Start Notepad++

Go to plugin menu and select Plugin Admin.

Enter Compare to search for the plug in. Mark Compare in the list and click on install icon.

Click Yes, and Notepad++ will restart after it have downloaded from internet the compare files and put them in folder C:\Program Files\Notepad++\plugins\ComparePlugin

If the server does not have access to internet, copy above 3 files from a working installation, and add them to the plugins folder of your Notepad++ installation.

ComparePlugin.dll
\ComparePlugin\sqlite3.dll
\ComparePlugin\git2.dll

Then you can in Notepad++ use Plugins – Compare – Compare, to get a quick listing of the different rows between the two latest (on the right) open files.

If you use TM1, you can add support for TM1 syntax with download of a tm1.zip file , and unzip it and place the tm1.xml in folder C:\temp. Then from inside Notepad++ go to Languages – User Defined Language -Define your language.
https://npp-user-manual.org/docs/user-defined-language-system/

In the dialog, click import, and select the above tm1.xml file. Then restart Notepad++.

You should now have a new selection TM1 at the bottom of the languages menu.

You can create yourself what words should highlight or be suggested in the User Defined Language dialog.


More information:

https://www.wimgielis.com/tm1_tm1andnotepad++_EN.htm

https://www.tm1forum.com/viewtopic.php?t=15927

https://www.tm1forum.com/viewtopic.php?f=3&t=7540

https://www.tm1forum.com/viewtopic.php?t=4248

https://exploringtm1.com/notepad-for-tm1-rules-ti-updated/

Product:
Microsoft Windows 2019

Issue:

How copy only a folder structure and not the files therein?

Solution:

Use robocopy:

robocopy "source"  "destination" /e /xf *

Above will copy folder structure from source to destination folder, without the security.

/E copy subdirectories, including Empty ones.
/XF file [file]… eXclude Files matching given names/paths/wildcards.

Add /SEC and the security for the file is also copied.

/SEC Copy files with SECurity (equivalent to /COPY:DATS). Useful if you just want to copy over security changes.

More Information:

https://learn.microsoft.com/en-us/windows-server/administration/windows-commands/robocopy

https://social.technet.microsoft.com/wiki/contents/articles/1073.robocopy-and-a-few-examples.aspx

https://www.pdq.com/blog/hitchhikers-guide-to-robocopy/

https://plataformaremota.wordpress.com/support/use-robocopy-to-migrate-windows-shares/